Channels
WebSDK Integration Guide
Key features
WebSDK is a light weight messaging sdk which can be embedded easily in web sites and hybrid mobile apps with minimal integration effort. Once integrated it allows end users to converse with the Conversational AI/bot on the Active AI platform on both text and voice. WebSDK has out the box support for multiple UX templates such as List and Carousel and supports extensive customization for both UX and functionality.
Supported Components
- A chatbot interface, where bubble chain ( bot and user bubble ) is the fundamental medium of communication is called as WebSDK.
- To enable rich browsing experience in WebSDK as per the flow demands, custom views gets invoked by the user events within WebSDK as an overlay, these extended views incorporate larger images, additional scrolling and specifically structured data, they are commonly called as Webviews. These webviews are bundled as clientweb , that needs to be hosted along with the WebSDK. Webviews are not part of the scope of WebSDK integrations.
Note: Components details given above is just for information based only due to security reason and maintaining a secure financial transaction sessions , it is a mandate to host the WebSDK and clientweb in the absolute same domain.
Supported Browsers
- Chrome
- Firefox
- Edge (Windows only)
- Safari (including iOS)
- Android webkit
Highlights
- Custom Theme
- Integrated Voice Support
- Analytics
- Templates
- FAQs
- Language - You can craft the bot response in your favourite language, See Properties on how it's done.
- Voice
- Cache - We use Service Worker caching for the bot with the
cache firststrategy, this will make the bot frame to load faster. When a new update is released, the changes will be cached first and then on the next load, the new changes will be loaded. - Post Login - Postlogin is a scenario where the user is already logged in the your app. So the user feels the bot is integrated with your app.
- Customer Segment - Segment you message for your priority customers, For ex: A
Hellomessage to customer whose segment is in free tier andHello ${username}for the priority customers. - Webview
- Deployments and Updates
- Security
Setup using CLI
Using the create-websdk-bot a bot can be build with less configuration
- Creating a Bot – How to create a new bot.
Quick Overview
npx create-websdk-bot <bot-name>


For ex:

npx create-websdk-bot stella
(npx comes with npm 5.2+ and higher, see instructions for older npm versions)
Prerequisites
You need to install a build tool Grunt.
bash
npm i grunt-cli -g
Creating a Bot
You’ll need to have Node v8.16.0 or Node 10.16.0 or later version on your machine. You can use nvm (macOS/Linux) or nvm-windows to easily switch Node versions between different projects.
To create a new bot:
npx create-websdk-bot <bot-name>

For ex:

npx create-websdk-bot stella
(npx comes with npm 5.2+ and higher, see instructions for older npm versions)
npm i create-websdk-bot -g --registry=http://activenpm.active.ai
and then
create-websdk-bot <bot-name>

For ex:

create-websdk-bot stella
Once the above command is execute, a few series of questions are asked regarding the properties you want in the bot, based on your selection a bot will be created.
You'll be prompted two version for building the bot, deployments-<bot-name> & Maven and also you can build a development & production version of the bot.
If you've chose deployments-<bot-name>, you can serve the static folder deployments-<bot-name>/morfeuswebsdk folder into a server, then bot is served from the folder. If you've chosen Maven as an option, then a WAR file would be generated.
Integration to Website
Get started immediately
- The SDK
- As part of standard deployment, a web application by name
morfeuswebsdkis generally installed in the Active.ai infrastructure. This web application is a bundled to consist and distribute the WebSDK from the server directly.
- As part of standard deployment, a web application by name
Include the JS SDK to your project
- Import the reference to the sdk.js from morfeuswebsdk public site in your hosted main html page where you intend the chat bot to render.
- Add an id as ‘webSdk’ to the script tag which enables the sdk to verify the url. For example - if your domain where morfeuswebsdk is hosted is https://ai.yourcompany.com/morfeuswebsdk, then
<script type="text/javascript" src="https://ai.yourcompany.com/morfeuswebsdk/libs/websdk/sdk.js" id="webSdk"></script>Invoke the WebSDK by adding the code snippet in a file
index.js(function() { let customerId = ""; let initAndShow = "1"; let showInWebview="0"; let endpointUrl = “https://ai.yourcompany.com/morfeus/v1/channels"; let desktop = { "chatWindowHeight": "90%", "chatWindowWidth": "25%", "chatWindowRight": "20px", "chatWindowBottom": "20px", "webviewSize": "full" }; let properties = { "customerId": customerId, "desktop": desktop, // screen Size of the chatbot for desktop version "initAndShow": initAndShow, // maximized or closed state . "showInWebview": showInWebview, "endpointUrl": endpointUrl, "botId": "XXXXXXXXXXXXX", // unique botId Instance specific "domain": "https://ai.yourcompany.com", // hosted domain address for websdk "botName": "default", "apiKey": "1234567", "dualMode": "0", "debugMode": "0", "timeout": 1000 * 60 * 15, "idleTimeout": 1000 * 60 * 15, "quickTags" : { "enable" : true, "overrideDefaultTags" : true, "tags" : ["Recharge", "Balance", "Transfer", "Pay bills"] } } websdk.initialize(properties); })();This will load the bot with the above said
properties, Click here to know the available properties that can be used when integrating the bot.
NOTE: To change the icon of the WebSDK bot, please change the
background-imageof the #ai-container .ai-launcher-open-icon class in thevendor-theme-chatbutton.cssfile.
Post Login
Postlogin is a scenario where the user is already logged in the your app. We login the user by default, so the user feels that the bot is integrated in your app.
In your app, paste the following JavaScript snippet
    var host = window.location.host;
    var hostname = "https://" + host + "/morfeuswebsdk/libs/websdk/js/chatSDK.js";
    if (host === 'router.triniti.ai') {
        hostname = "https://" + host + "/apikey/<your-api-key>/morfeuswebsdk/libs/websdk/js/chatSDK.js";
    }
    var chatSDK = document.createElement('script');
    chatSDK.type="text/javascript";
    chatSDK.id="chatSDK";
    chatSDK.src = hostname;
    document.head.appendChild(chatSDK);
Also the below snippet ```js var url = document.getElementById("chatSDK").src.split("/").slice(0, 3).join("/");
function getParameterByName(name, url) {
if (!url) {
url = window.location.href;
}
name = name.replace(/[[]]/g, "\$&");
var regex = new RegExp("[?&]" + name + "(=([^&#]*)|&|#|$)"),
results = regex.exec(url);
if (!results) return null;
if (!results[2]) return '';
return decodeURIComponent(results[2].replace(/+/g, " "));
}
var properties = {
"url" : url + "/apikey/
Note: Please contact us for the API Key.
Custom Theme
The WebSDK bot can be customized as per your App/Website, The existing CSS of the bot can be override by your theme file.
Create a bot-theme.css file and upload to any static serving site and pass the url of the css file in properties as a config as shown below
"chatbotTheme": {
    "themeFilePath": ["https://s3-ap-southeast-1.amazonaws.com/your-company/css/bot-theme.css"]
}
Classes to override the theme
To override the
font-familyof the bothtml, body { font-family: 'Roboto' !important; }To override the background the bot messages container
.messages {
    /* Your css here */
}
To override the user chat bubble
.user-message-text {
    /* Your css here */
}
To override the bot chat bubble
.bot-message-text {
    /* Your css here */
}
To override the button
.button-div .btn-sm {
    /* Your css here */
}
NOTE: If the override doesn't happen, then use
!important.
Properties
The properties which can be customized in the bot and enabled and disabled in the WebSDK bot, these properties have to be enabled while initializing the bot as shown in the web integration
There are two ways you can configure the properties, one is passing through the index.js as mentioned in web and one more is INIT_DATA which can be configured through the admin portal.
Theme - To change the theme to match your App/Website
"chatbotTheme": {
    "themeFilePath": ["https://s3-ap-southeast-1.amazonaws.com/your-company/css/bot-theme.css"]
}
Postlogin - Postlogin case is a scenario where the user is already logged in the parent app(bank's application). So morfeus-controller have to pass X-CSRF-TOKEN in init request to ensure it's a postlogin case.
Analytics - This feature is about adding analytics management to the websdk container.
// To enable analytics for your bot
{
    "analyticsProvider": "ga",
    "crossDomains": ["yourbank.com", "ai.yourbank.com"],
    "enabled": Boolean,
    "ids": {
        'ga': "UA-1XY169AA3-1"
    }
}
DestroyOnClose - This feature is about destroying the instance of the bot completely from the parent page containing the chatbot
destroyOnClose : BooleanIdle timeout - This feature logs out the user after a certain period of time if the user is logged in and is inactive for a certain period of time.
ideltimeout : Number (in milliseconds)Bot Dimension - This feature is used to specify the dimensions of the chatbot in parent container.
"desktop" : {
    "chatWidth": "value in %",
    "chatHeight": "value in %",
    "chatRight": "value in px",
    "chatBottom": "value in px"
}
Quick Tags - This feature is used to add quick replies list in the chatbot. This usually appears in the bottom section of the chatbot.
// To add quick tags for you bot
"quickTags" : {
    "enable" : Boolean,
    "overrideDefaultTags" : Boolean,
    "tags" : Array, //[tag1, tag2, ..... tagn]
}
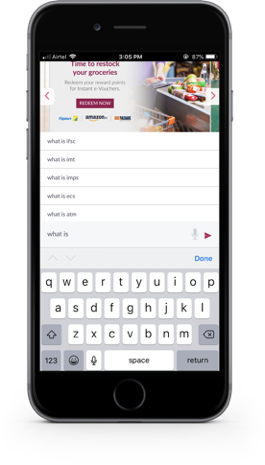
Auto suggest - This feature is used to present suggestions to user whenever user is typing a query in the chatbox. The auto suggest consists of the FAQ
"autoSuggestConfig" : {
    "enableSearchRequest" : Boolean,
    "enabled" : Boolean,
    "noOfLetters" : Number // to trigger the autosuggest after the number of letters
}
Show Postback Value - This feature is used to show the user selected value, ie; Button or List Item.
"showPostbackValue" : BooleanSlim Scroll - This feature is used to enable slim scroll bar for Internet Explorer browser
"enableSlimScroll" : BooleanPage Context - This feature is to pass the page details on where the bot resides, This is used for analytics on where the bot is residing.
"pageContext": StringLanguage
"i18nSupport" : {
    "enabled": Boolean,
    "langCode": "en"
}
NOTE: Supported languages - English[en], Hindi[hi], Spanish[es], Thai[th], Japanese[ja] & Chinese[zh]
Hide the text input box in the footer of the bot
"buttonFlow": BooleanDate Format - This feature is about keeping a particular date format when chatbot is showing last login date to the user
lastLoginDateFormat : "Date format in string"VoiceSdk - This feature is used for mic support in hybrid sdk for mobile based platforms This feature can be enabled/disabled in websdk by adding/removing a flag called voiceSdkConfig object in INIT_DATA object through admin panel of morfeuswebsdk.
"voiceSdkConfig" : {
    "enableVoiceSdkHint" : Boolean,
    "maxVoiceSdkHint" : Number,
    "speechConfidenceThreshold" : Number,
    "customWords" :  Array of String, //array of banking terminology/abbreviation i.e not easily recognised by native support
    "speechRate":{
        "androidVoiceRate" : Number [0 - 1],
        "iosVoiceRate" : Number [0 - 1]
    }
}
MicrosoftSpeechSdk - It uses Microsoft Speech API developed by Microsoft to allow the use of speech recognition and speech synthesis. Users can use its Text-To-Speech(TTS) And Speech-To-Text(STT) feature by enabling their respective flags.
"microsoftSpeechSdkConfig": {
    "enable": false, //set this flag to false to disable STT.
        "apiKey": "",
            "apiRegion": "",
                "continousMode": true,
                    "speak": false, // set this flag to false to disable TTS
                        "lang-config": {
        "en" : {
            "lang" : "en-US",
                "voiceName" : "en-US-ZiraRUS"
        },
        "ar": {
            "lang" : "ar-EG",
                "voiceName" : "ar-EG-Hoda"
        }
    }
},
Show Postback Utterance - This feature is used trigger external message in websdk from parent container.
"showPostbackUtterance": BooleanShow Close Button On Postlogin - This feature is used to remove close button in post login scenario.
"showCrossOnPostLogin": BooleanLocation Blocked Message - This is used to display custom location blocked message if user has denied allow location pop up in browser
"locationBlockedMsg": StringLive Chat Notification - If the current tab is inactive and if a manual chat is received, a Notification is shown with a sound, If the sound file is not defined, it will play the default sound.
"tabSwitchNotification": Boolean,
"tabSwitchNotificationSound": "path/to/mp3/file"
Webview
The WebSDK bot allows to open a webview, Webview is a separate project and is a secured frame and it's renders as a part of WebSDK. The Webview displays web pages as part of the WebSDK layout.
A common scenario in which using WebView is helpful is Secured Login Page, User Profile Update Page or Entering an OTP screen.
Customizing Templates
WebSDK allows you to create custom templates, Custom templates consist of three separate technologies: 1. HTML Elements 2. JavaScript 3. CSS
For ex. Say you're creating a custom User Profile Update Form templates
- Create a file
userProfileUpdate.jsinmorfeuswebsdk/src/main/webapp/js/. - Create a file
userProfileUpdate.htmlinmorfeuswebsdk/src/main/webapp/templates/custom/. - The HTML file should consist of Handlebars template, also the CSS is included in this HTML inside the
<style/>tag. - Mention the
userProfileUpdatefunction in the adaptor.js file which is located in the pathmorfeuswebsdk/src/main/webapp/js/. - Mention the
userProfileUpdate.jsin theGruntfile.jsof the morfeuswebsdk inside the tags task under the src section. - The WebSDK will render the custom template.
Sample Snippet
userProfileUpdate.js
(function(window){
    function userProfileUpdateAdaptor(templateName, response){
        var container = "messages";

        // Your code goes here

        loadDynamicCustomTemplate(templateName, container);
        appendTemplate(templateName, container, {});
    }

    window.userProfileUpdateAdaptor = userProfileUpdateAdaptor;
})(window);
userProfileUpdate.html
<div class="user-profile-container">
    <!-- Your HTML code goes here -->
    <!-- You can include any jQuery plugin here -->
    <!-- Also supports Handlebars template -->
</div>

<style>
    /* Your CSS goes here */
</style>
adaptor.js
(function(window){
    var adaptor = {
        // Existing Custom Templates

        "userProfileUpdateHTML" : function(templateName, data){
            userProfileUpdateAdaptor(templateName, data);
        }

    };

    window.adaptor = adaptor;

})(window);
Deployments and Updates
The latest WebSDK version will be published to the npm repository, For you to get the new version of the WebSDK, grab the crurrent version from npm and modify the version number in the Gruntfile.js of the bot generated, then re-build the bot using mvn clean install. This will generate a new version of the bot.
Security
The WebSDK follows guidelines for security which includes industry best practices. It has also multiple layer of authentication and provides complete protection for user sensitive data.
For additional security, where every request is sent with a security hash, as additional property has to be enabled in the index.js file
sAPIKey: String
sAPIKey - When the sAPIKey is set in the index.js, A unique timeStamp is passed in the request param and hash is set to the header which is combination of the request parameters, where the hash is generated using HMACSHA1 algorithm.
RTL Support
The WebSDK supports multi-language and it also extends it's support for the Arabic, Hebrew, Farsi and Urdu languages with simple config
    "i18nSupport": {
        "enabled": true,
        "langCode": "ar", // Arabic
        "rtl": Boolean
    },
Customizing Web
List Of Customisable Features:
- Common Templates
- Customer Specific Templates
- Icons
- Minimize button
- Close button
- Maximize button
- Minimizedstate(3rd state)
- Splash screen
- Popularquery
- PostLogin and Prelogin
- Analytics
- Destroying the bot
- start over chat
- Idle timeout
- Bot dimensions
- Uploading a photo
- Feedback icon
- Teach icon
- Last login date Format
- Emoji
- Slim scroll
- Ssl Pinning
- SSE
- Push Notification
- Autosuggest
- Custom Webview Header
- Show Postback Utterance
- Custom Error
- Hide on Response
- Show Close Button On Post Login
- Focus On Query
- Location Blocked Message
- UnLinkify Email
- Custom Negative Feedback
- Postback on Related Faq
| Feature | Customisable | How |
|---|---|---|
| Common Templates | Yes | Common Templates can be customised by writing css in vendor-theme-chatbox.css and vendor-theme-chatbox.css. |
| Customer Specific Templates | Yes | Common Templates can be customised by writing css in vendor-theme-chatbox.css and vendor-theme-chatbox.css. |
| Feature | Customisable | How |
|---|---|---|
| Icons | Yes | Icons can be customised by replacing icons references in index.css and common templates. |
| Feature | Customisable | How |
|---|---|---|
| Minimize Button | Yes | The minimise button can be customised by changing it's image reference in desktopHeaderTemplate.html and mobileHeaderTemplate.html in common templates and it's style values in vendor-theme-chatbox.css. |
| Close Button | Yes | The close button can be customised by changing it's image reference in desktopHeaderTemplate.html and mobileHeaderTemplate.html in common templates and it's style values in vendor-theme-chatbox.css. |
| Maximize Button | Yes | This feature can be introduced in the websdk by providing a flag in index.js of the project.And can be customised by making changes in minimizedStateTemplate.html in common templates and style values in vendor-theme-chatbox.css. |
The flag that needs to be introduced in initParams of index.js of project is
json "minimizedState : false".
| Feature | Customisable | How |
|---|---|---|
| Splash Screen | Yes | Modify the splashScreenTemplate.html available in the common templates. Customize this template according to the requirement by adding style(css) in vendor-theme-chatbox.css. |
| Feature | Customisable | How |
|---|---|---|
| Popular Query - This feature displays a menu at the footer of the chatbot showing popular querieswhich could made by the user to the bot. | Yes | Can be customised by changing the display type of submenu in the payload coming in the init call. |
| Feature | Customisable | How |
|---|---|---|
| Prelogin | No | Default feature. No customisation needed. |
| Postlogin | Yes | Postlogin case is a scenario where the user is already logged in the parent app(bank's application). So morfeus-controller have to pass X-CSRF-TOKEN in init request to ensure it's a postlogin case. |
| Feature | Customisable | How |
|---|---|---|
| Analytics - This Feature about adding analytics management to the websdk container. | Yes | This feature can be enabled/disabled in websdk by adding/removing analytics flag object in initParams config object of index.js of the project. Below is the config structure to be added Type of the values to be added in the above object |
"analytics" : {
    "enabled" : true/false,
    "crossDomains" : [domain 1, domain 2, ...domain n],
    "ids" : {
        "analyticsServiceProviderName" : "apiKey"
    }
}
| Feature | Customisable | How |
|---|---|---|
| DestroyOnClose - This Feature about destroying the instance of the bot completely from the parent page containing the chatbot | Yes | This feature can be enabled/disabled in websdk by adding/removing destroyOnClose flag in initParams config object of index.js of the project. Below is the flag to be added. |
destroyOnClose : true/false
| Feature | Customisable | How |
|---|---|---|
| Quick Tags - This Feature used to add quick replies list in the chatbot. This usually comes in the bottom section of the chatbot. | Yes | This feature can be enabled/disabled in websdk by adding/removing quickTags flag object in initParams config object of index.js of the project. This feature can further be customised by changing the payload coming in the init network call after the bot is rendered inorder to load quick tag options dynamically from the server. Also if the overrideDefaultTags is set to false, The quickTags can be modified from server response quick_replies, and if the response from the server is empty, the quickTags will loaded from index.js Below is the flag object to be added. |
"quickTags" : {
    "enabled" : true/false,
    "overrideDefaultTags" : true/false,
    "tags" : ["tag1", "tag2"...."tagn"]
}
| Feature | Customisable | How |
|---|---|---|
| Start Over Chat - This Feature used reinitiate the chatbot by clearing all the current session chat messages if required and current user login session as well | Yes | This feature can be enabled/disabled in websdk by adding/removing startOverChat flag object in initParams config object of index.js of the project. Below is the flag object to be added. |
"startOverConfig" : {
    "clearMessage" : true/false
}
| Feature | Customisable | How |
|---|---|---|
| Idle timeout - This feature logs out the user after a certain period of time if the user is logged in and is inactive for a certain period of time | Yes | The idle timeout in websdk can be changed by changing the value of idletimeout flag in initParams config object of index.js of the project. Below is the flag to be added. |
"idletimeout" : 'idleTimeoutValue'
| Feature | Customisable | How |
|---|---|---|
| Bot Dimension - This Feature used to specify the dimensions of the chatbot in parent container. | Yes | The dimension and position of chatBox window inside the parent container window can be managed by providing desktop flag object in the initParam config object. Below is the flag to be added. |
"desktop" : {
    "chatWidth" : "value in %",
    "chatHeight" : "value in %",
    "chatRight" : "value in px",
    "chatBottom" : "value in px"
}
| Feature | Customisable | How |
|---|---|---|
| Upload Image - This Feature used to upload user's image in the chatbox. | Yes (only style) | The is only customisable in look and feel wise by making changes in chatBoxTemplate.html's editImage modal in common templates. |
| Feature | Customisable | How |
|---|---|---|
| Teach Icon | Yes | The icon can be changed by replacing with the desired image in images folder of the project and replacing with appropriate image and making changes in the feedbackTemplate.html of common templates |
| Feedback Icons | Yes | The icon can be changed by replacing with the desired images in images folder of the project and replacing with appropriate images and making changes in the feedbackTemplate.html of common templates |
| Feature | Customisable | How |
|---|---|---|
| Date Format - This Feature about keeping a particular date format when chatbot is showing last login date to the user | Yes | It can be changed by keeping a flag lastLoginDateFormat in initParams object of the index.js file of projects. Below is the flag to be added. |
lastLoginDateFormat : "date format in string"
| Feature | Customisable | How |
|---|---|---|
| Emoji - Supporting emojis in websdk as a feature | Yes | 1. This feature can be enabled/disabled in websdk by adding/removing a flag called emojiEnabled in initParams config object of index.js of project. 2. And the different emojis supported in websdk can be mentioned in the emoji array flag where each element contains an array of emoji's. This also has to be added in initConfig params object of index.js of project. The mark up and style values and of the emoji box can be changed by customising emojiTemplate.html in common templates and vendor-theme.chatbox.css respectively. |
For Point 1
Below is the flag to be added:
enableEmoji : true/false
For Point 2
Below is the flag to be added:
emoji : [
    ["emoji code1","emoji code2","emoji code3" ....."emoji code n"],

    ["emoji code1","emoji code2","emoji code3" ....."emoji code n"],

    .

    .

    ["emoji code1","emoji code2","emoji code3" ....."emoji code n"]
]
| Feature | Customisable | How |
|---|---|---|
| SSL Pinning - This Feature implemented on the mobile implementation of websdk. It is a security check for certificates on network calls | Yes | This feature can be enabled/disabled in websdk by adding/removing a flag called sslE nabled in initParams config object of index.js of project. Below is the flag to be added - |
sslEnabled : true/false
| Feature | Customisable | How |
|---|---|---|
| Server Sent Event Feature - This Feature implemented when the chatbot is unable to continue chat with user further and chat is transferred to a human being | No |
| Feature | Customisable | How |
|---|---|---|
| Push Notification - This Feature used to send push notification updates to the user | Yes | This feature can be enabled/disabled in websdk by adding/removing a flag called pushConfig object in INIT_DATA object through admin panel of morfeuswebsdk. |
| Feature | Customisable | How |
|---|---|---|
| AutoSuggest - This Feature used to present suggestions to user whenever user is typing a query in the chatbox. | Yes | This feature can be enabled/disabled in websdk by adding/removing a flag called autoSuggestConfig object in INIT_DATA object through admin panel of morfeuswebsdk. Below is the sample config to be added. |
"autoSuggestConfig" : {
    "enableSearchRequest" : true/false,
    "enabled" : true/false,
    " noOfLetters" : number
}
| Feature | Customisable | How |
|---|---|---|
| VoiceSdk - This Feature used for mic support in hybrid sdk for mobile based platforms | Yes | This feature can be enabled/disabled in websdk by adding/removing a flag called voiceSdkConfig object in INIT_DATA object through admin panel of morfeuswebsdk. Below is the sample payload config to be added |
"voiceSdkConfig" : {
    "enableVoiceSdkHint" : true/false,
    "maxVoiceSdkHint" : number of hints,
    "speechConfidenceThreshold" : threshold value

}
| Feature | Customisable | How |
|---|---|---|
| Custom Webview Header - Used to insert customised Webview Header Template. | Yes | This feature has template dependency which can be customised by changed webviewHeaderTemplate.html from common templates and css style from vendor-theme-chatbox.css. This feature can be enabled/disabled in websdk by adding/removing a flag called customWebviewHeader in initParams config object of index.js of project. Below is the flag object to be added in initParams Config Object- |
"customWebviewHeader" : {
    "enable" : true/false
}
| Feature | Customisable | How |
|---|---|---|
| Show Postback Utterance - This Feature used trigger external message in websdk from parent container. | Yes | This feature can be enabled/disabled in websdk by adding/removing a flag called showPostbackUtterance in initParams config object of index.js of project. |
Below is the flag to be added in initParams Config Object-
"showPostbackUtterance" : true/false
Type of value to be added in the above flag
showPostbackUtterance : Boolean
| Feature | Customisable | How |
|---|---|---|
| Custom Errors - This Feature used to handle various network response error scenarios in websdk. | Yes | This feature can be enabled/disabled in websdk by adding/removing a flag called customErrors in initParams config object of index.js of project. For various HTTP error statuses, project can define different messages in a function called handleErrorResponse of preflight.js file. Below is the flag to be added in initParams Config Object. |
"customErrors" : true/false
| Feature | Customisable | How |
|---|---|---|
| Hide On Response - This is Feature used to minimise chatbot when user is having conversation with the bot depending upon the template type coming from the network response | Yes | This feature can be enabled/disabled in websdk by adding removing a flag called hideOnResponseTemplate in initParams config object of index.js of project. Below is the flag to be added in initParams Config Object. |
"hideOnResponseTemplates" : ["templateName1",
"templateName2",...."templateName n"]
| Feature | Customisable | How |
|---|---|---|
| Show Close Button On Postlogin - This Feature used to remove close button in post login scenario. | Yes | This feature can be enabled/disabled in websdk by adding/removing a flag called showCrossOnPostLogin in initParams config object of index.js of project. Below is the flag to be added in initParams Config Object. |
"showCrossOnPostLogin" : true/false
| Feature | Customisable | How |
|---|---|---|
| Location Blocked Message - This is used to display custom location blocked message if user has denied allow location pop up in browser. | Yes | This feature can be enabled/disabled in websdk by adding/removing a flag called locationBlockedMsg in initParams config object of index.js of project. Below is the flag object to be added in initParams Config Object. |
"locationBlockedMsg" : true/false
| Feature | Customisable | How |
|---|---|---|
| Slim Scroll - This Feature used to enable slim scroll bar for Internet Explorer browser | Yes | This feature can be enabled/disabled in websdk by adding/removing a flag called enableSlimScroll in initParams config object of index.js of project. Below is the flag object to be added in initParams Config Object. |
"enableSlimScroll" : true/false
| Feature | Customisable | How |
|---|---|---|
| Unlinkify Email - This Feature used to remove url nature of any emails text coming in websdk cards | Yes | This feature can be enabled/disabled in websdk by adding/removing a flag called unLinkifyEmail in initParams config object of index.js of project. Below is the flag object to be added in initParams Config Object. |
"unLinkifyEmail" : true/false
| Feature | Customisable | How |
|---|---|---|
| Focus On Query - Focus on input box if the last message in websdk is a text | Yes | This feature can be enabled/disabled in websdk by adding/removing a flag |
called focusOnQuery in initParams config object of index.js of project. Below is the flag object to be added in initParams Config Object.
json
"focusOnQuery" : true/false
| Feature | Customisable | How |
|---|---|---|
| Custom Negative Feedback - Load an dynamic feedback template from network call rather than default feedback modal | Yes | m This feature can be enabled/disabled in websdk by adding/removing a flag called customNegativeFeedback in initParams config object of index.js of project. Below is the flag object to be added in initParams Config Object. |
"customNegativeFeedback" : true/false
| Feature | Customisable | How |
|---|---|---|
| If payload type is RELATED_FAQ and messageType in network request body needed is postback | Yes | This feature can be enabled/disabled in websdk by adding/removing a flag called postbackOnRelatedFaq in initParams config object of index.js of project. Below is the flag object to be added in initParams Config Object. |
"postbackOnRelatedFaq" : true/false
Morfeus Android Hybrid SDK
Key features
Morfeus Hybrid SDK is a lightweight messaging SDK that can be embedded easily in web sites and hybrid mobile apps with minimal integration effort. Once integrated it allows end-users to converse with the Conversational AI /bot on the Active AI platform on both text and voice. WebSDK has out the box support for multiple UX templates such as List and Carousel and supports extensive customization for both UX and functionality.
Supported Components
Please refer this link in WebSDK section
Device Support
All android phones with OS support 4.4.0 and above.
Setup and how to build
Please refer above WebSDK section of Setup and how to build before starting below steps.
1. Pre Requisites
- Android Studio 2.3+
2. Install and configure dependencies
Add the following lines to your project level build.gradle file.
allprojects {
   repositories {
       google()
       jcenter()
       maven {
           url "http://repo.active.ai/artifactory/resources/android-sdk-release"
           credentials {
               username = "artifactory_username"
               password = "artifactory_password"
           }
       }
   }
}
To install SDK add the following configuration to your module(app) level build.gradle file.
dependencies {
    ...
    // Voice SDK
    implementation 'com.morfeus.android.voice:MFSDKVoice:2.4.10'

    // gRPC
    implementation 'io.grpc:grpc-okhttp:1.18.0'
    implementation 'io.grpc:grpc-protobuf-lite:1.18.0'
    implementation 'io.grpc:grpc-stub:1.18.0'
    implementation 'io.grpc:grpc-android:1.18.0'
    implementation 'javax.annotation:javax.annotation-api:1.2'

    // OAuth2 for Google API
    implementation('com.google.auth:google-auth-library-oauth2-http:0.7.0') {
        exclude module: 'httpclient'
    }
    // Morfeus SDK
    implementation 'com.morfeus.android:MFSDKHybridKit:2.4.20'
    implementation 'com.morfeus.android:MFOkHttp:3.12.0'
    implementation 'com.google.guava:guava:22.0-android'
    implementation 'com.android.support:appcompat-v7:28.0.0'
    implementation 'com.android.support:design:28.0.0'
    ...
}
Note: If you get 64k method limit exception during compile time then add following code into your app-level build.gradle file.
android {

    defaultConfig {
        multiDexEnabled true
    }
}

dependencies {
    implementation 'com.android.support:multidex:1.0.1'
}
Integration to Application
User can integrate chatbot at on any screen in application.Broadly it is divided into 2 sections * Public * Post Login
1. Public
Initialize the SDK
To initialize Morfeus SDK pass given BOT_ID, BOT_NAME and END_POINT_URL to MFSDKMessagingManagerKit. You must initialize Morfeus SDK once across the entire application.
Add the following lines to your Activity/Application where you want to initialize the Morfeus SDK.onCreate()of Application class is best place to initialize. If you have already initialized MFSDK, reinitializing MFSDK will throw MFSDKInitializationException.
try {
    // Properties to pass before initializing sdk
    MFSDKProperties properties = new MFSDKProperties
                    .Builder(END_POINT_URL)
                    .addBot(BOT_ID, BOT_NAME)
                    .setSpeechAPIKey(SPEECH_API_KEY)
                    .build();

    // sMFSDK is public static field variable
    sMFSDK = new MFSDKMessagingManagerKit
                    .Builder(activityContext)
                    .setSdkProperties(properties)
                    .build();

    // Initialize sdk
    sMFSDK.initWithProperties();

} catch (MFSDKInitializationException e) {
    Log.e(TAG, "Failed to initializing MFSDK", e);
}
Properties:
| Property | Description |
|---|---|
| BOT_ID | The unique ID for the bot. |
| BOT_NAME | The bot name to display on top of chat screen. |
| END_POINT_URL | The bot API URL. |
Invoke Chat Screen
To invoke chat screen call showScreen() method of MFSDKMessagingManagerKit. Here, sMSDK is an instance variable of MFSDKMessagingManagerKit.
// Open chat screen
sMFSDK.showScreen(activityContext, BOT_ID);
You can get instance of MFSDKMessagingManagerKit by calling getInstance()of MFSDKMessagingManagerKit. Please make sure before calling getInstance() you have initialized the MFSDK. Please check the following code snippet.
try {
    // Get SDK instance
    MFSDKMessagingManager mfsdk = MFSDKMessagingManagerKit.getInstance();

    // Open chat screen
    mfsdk.showScreen(activityContext, BOT_ID);

} catch (Exception e) {
    // Throws exception if MFSDK not initialised.
}
Compile and Run
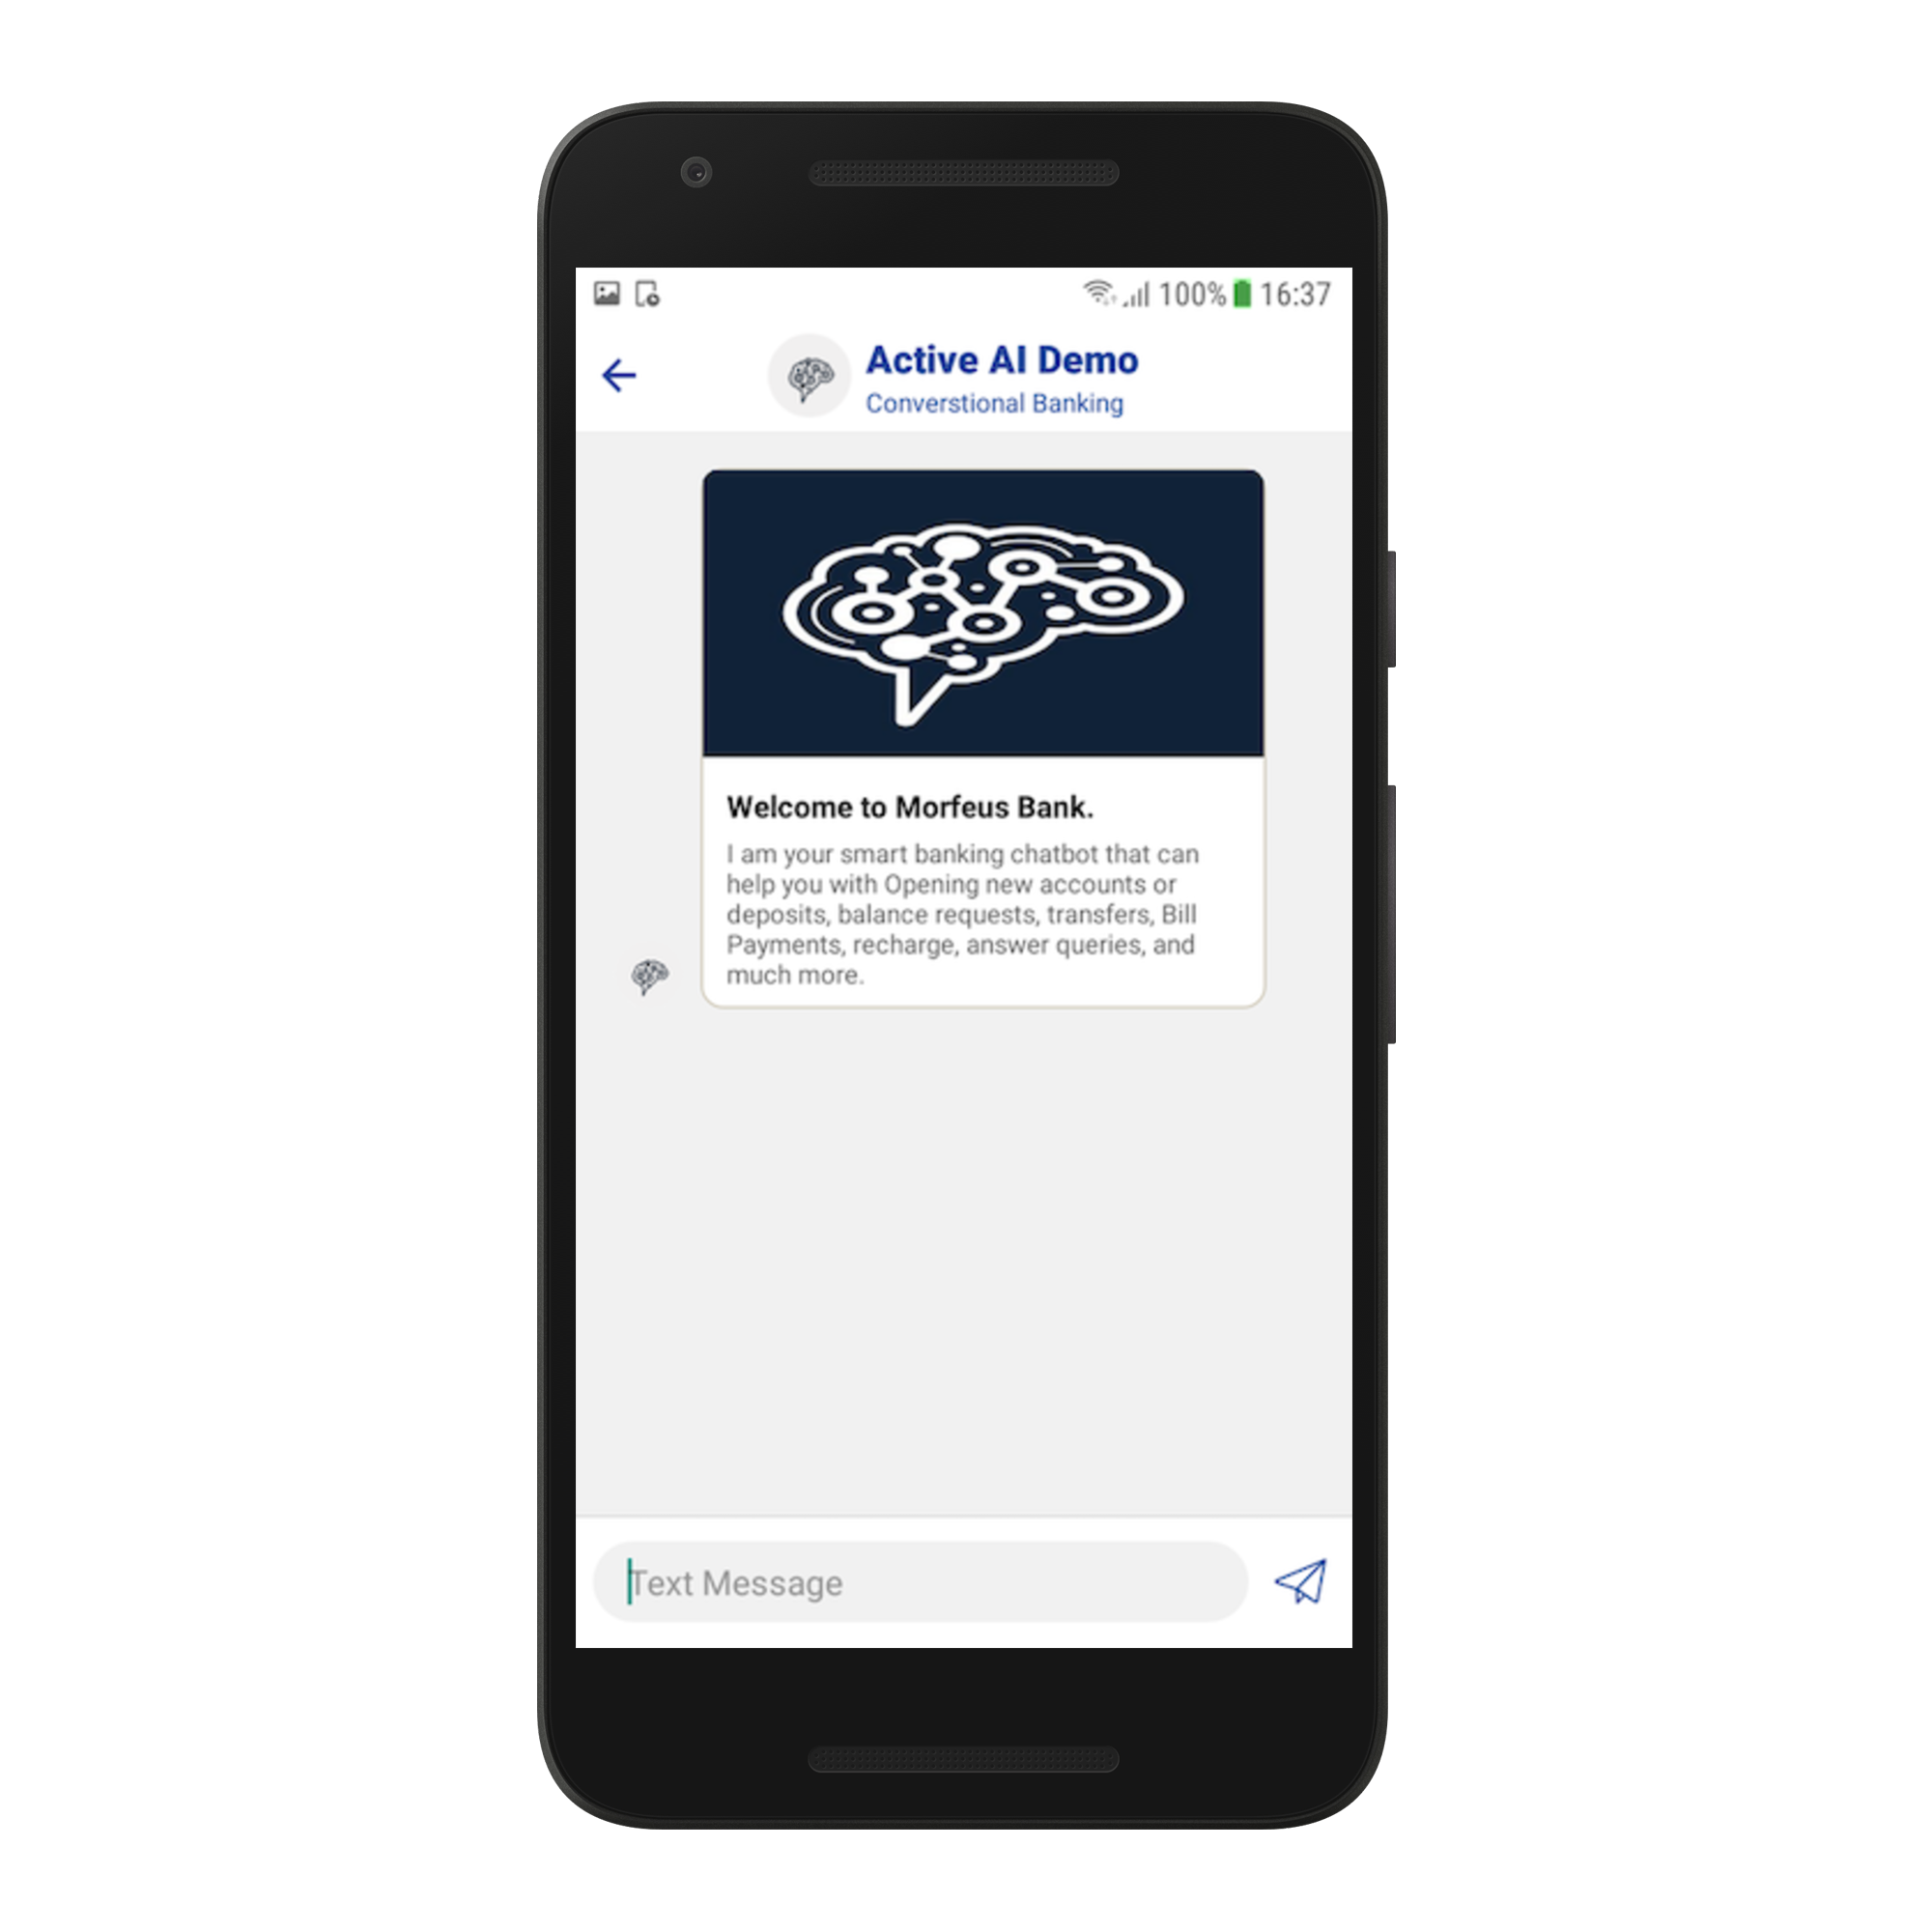
Once the above code is added you can build and run your application. On launch of chat screen, welcome message will be displayed.
2. Post Login
You can pass set of user/session information to the MFSDK using MFSDKSessionProperties builder. In following example we are passing Customer ID to MFSDK.
HashMap<String, String> userInfoMap      = new HashMap();
userInfo.put("CUSTOMER_ID", customerID);
userInfo.put("SESSION_ID", sessionID); // Pass your app sessionID

MFSDKSessionProperties sessionProperties = new MFSDKSessionProperties
                                              .Builder()
                                              .setUserInfo(userInfoMap)
                                              .build();

// Open chat screen
mMFSdk.showScreen(LoginActivity.this, BOT_ID,  sessionProperties);
Note: Please make sure length of customerID and sessionID should not be greater than 256 bytes if encyption of keys are required
Properties
Setting Chat Screen Header
Morfeus Android SDK provides feature to set header as native header. To enable native header setMFSDKProperties.Builder.showNativeHeader(boolean) to true. Please check below code snippet.
// Enable Native Header
MFSDKProperties.Builder sdkPropertiesBuilder = new MFSDKProperties
       .Builder(BOT_URL)
       …
       .showNativeHeader(true)
       …
       .build();
You can configure native header properties by using “setHeader” method of MFSDKSessionProperties. You need to create MFSDKHeader object and set below properties according to requirement. In following example we are setting header background as color with title and left, right button.
If you want to set custom font to header title, please copy your custom font.ttf file to assets/fonts folder and provide font name withsetTitleFontName(fontName) method as shown in below code snippet.
MFSDKHeader header = new MFSDKHeader();
header.setHeaderHeight(MFSDKHeader.WRAP_CONTENT);

// Hex color code
header.setBackgroundColor("#CD1C5F");

header.setTitle("ActiveAI Bot!");

// Keep font file under assets/fonts folder
header.setTitleFontName("Lato-Medium.ttf");
header.setTitleColor("#FFFFFF");
header.setTitleFontSize(20); // unit is sp
header.setTitleAlignment(MFSDKHeader.Alignment.CENTER_ALIGN);

header.setLeftButtonImage("ic_action_nav");
header.setLeftButtonAction(MFSDKHeader.ButtonAction.NAVIGATION_BUTTON);

header.setRightButtonImage("ic_action_home");
header.setRightButtonAction(MFSDKHeader.ButtonAction.HOME_BUTTON);

MFSDKSessionProperties sessionProperties = new MFSDKSessionProperties.Builder()
       ...
       .setHeader(header)
       ...
       .build();
Handling Logout Event
To retrieve logout event, register MFLogoutListener with MFSDK. MFSDK will call onLogout(int logoutType) method when user logout from the current chat session. There are four type of logout method supported by MFSDK as listed below.
| Logout Type | Logout Code |
|---|---|
| Auto logout / Inactivity Timeout | 1001 |
| Forced logout | 1002 |
Please check following code sample.
//Note: mMFSdk is an instance variable of MFSDKMessagingManagerKit
mMFSdk.setLogoutListener(new MFLogoutListener() {
   @Override
   public void onLogout(int logoutType) {

   }
}
Deeplink Callback
Using MFSDKMessagingHandler interface you can deep link your application with MFSDK. MFSDKMessagingHandler contains a callback method which will be called by MFSDK depending on the requirement. MFSearchResponseModel represents set of information required by Application to enable the deep linking.
MFSDKProperties properties = new MFSDKProperties.Builder(BASE_URL)
           .setMFSDKMessagingHandler(new MFSDKMessagingHandler() {
               @Override
               public void onSearchResponse(MFSearchResponseModel model) {

               }
               @Override
               public void onSSLCheck(String url, String requestCode) {
                   // No-op
               }
               @Override
               public void onChatClose() {
                   // Retrieve callback when chat screen is closed
               }
               @Override
               public void onEvent(String eventType, String payloadMap) {
                   // No-op
               }
               @Override
               public void onHomemenubtnclick() {
                   // Retrieve home button click event
               }
           })
           .build();
Adding Voice Feature
If you haven’t added required dependencies for voice than please add following dependencies in your project’s build.gradle file. Voice recognition has two medium of speech recognition and either of them can be used :
Google Speech recognition
Android Native Speech Recognition
a. Google Speech Recognition
Update following configuration to your module(app) level build.gradle file.
dependencies {
    ...
    // Voice SDK dependencies
    implementation 'com.morfeus.android.voice:MFSDKVoice:2.4.10'

    implementation 'io.grpc:grpc-okhttp:1.18.0'
    implementation 'io.grpc:grpc-protobuf-lite:1.18.0'
    implementation 'io.grpc:grpc-stub:1.18.0'
    implementation 'io.grpc:grpc-android:1.18.0'
    implementation 'javax.annotation:javax.annotation-api:1.2'

    implementation('com.google.auth:google-auth-library-oauth2-http:0.7.0') {
        exclude module: 'httpclient'
    }
    ...
}
To use google cloud speech feature we need to set google speech API key through setSpeechAPIKey(String apiKey) method ofMFSDKProperties builder.
try {
    // Set speech API key
    MFSDKProperties properties = new MFSDKProperties
                    .Builder(END_POINT_URL)
                    ...
                    .setSpeechAPIKey("YourSpeechAPIKey")
                    ...
                    .build();

   } catch (MFSDKInitializationException e) {
    Log.e("MFSDK", e.getMessage());
}
// Set speech provider type
MFSDKSessionProperties properties = new MFSDKSessionProperties
 .Builder()
  ...
.setSpeechProviderForVoice(
    MFSDKSessionProperties.SpeechProviderForVoice.GOOGLE_SPEECH_PROVIDER)
.setSpeechToTextLanguage("en-IN")
  ...
 .build();
b. Android Speech Recognition
Update following configuration to your module(app) level build.gradle file.
dependencies {
    ...
    // Voice SDK
    implementation 'com.morfeus.android.voice:MFSDKVoice:2.4.10'

    // OAuth2 for Google API
    implementation('com.google.auth:google-auth-library-oauth2-http:0.7.0') {
        exclude module: 'httpclient'
    }

    // Morfeus SDK
    implementation 'com.morfeus.android:MFSDKHybridKit:2.4.10'
    implementation 'com.morfeus.android:MFOkHttp:3.12.0'
    implementation 'com.android.support:appcompat-v7:28.0.0'
    implementation 'com.android.support:design:28.0.0'
    implementation 'com.google.code.gson:gson:2.8.6'
    implementation 'io.grpc:grpc-okhttp:1.18.0'
    implementation 'com.google.guava:guava:22.0-android'
    ...
}
To use native android speech recognition feature we need to set ANDROID_SPEECH_PROVIDER as a property in setSpeechProviderForVoice method of MFSDKSessionProperties.
// Set speech provider type
MFSDKSessionProperties properties = new MFSDKSessionProperties
 .Builder()
  ...
.setSpeechProviderForVoice(
    MFSDKSessionProperties.SpeechProviderForVoice.ANDROID_SPEECH_PROVIDER)

.setSpeechToTextLanguage("en-IN")
  ...
 .build();
Using Offline Mode (Optional)
Android provides feature to do speech recognition offline i.e. when device is not having internet connection.
To use above feature please set enableNativeVoiceOffline as true. If we set enableNativeVoiceOffline as true, framework will use default voice recognition package of device and hence will reduce voice recognition accuracy. So we recommend not to use this becasue user experience will not be good.By default offline mode is false.
// Set speech provider type
MFSDKSessionProperties properties = new MFSDKSessionProperties
 .Builder()
  ...
.setSpeechProviderForVoice(
    MFSDKSessionProperties.SpeechProviderForVoice.ANDROID_SPEECH_PROVIDER)
.enableNativeVoiceOffline(false)

.setSpeechToTextLanguage("en-IN")
  ...
 .build();
c. Set Speech-To-Text language
In MFSDKHybridKit, English(India) is the default language set for Speech-To-Text. You can change STT language by passing valid language code using setSpeechToTextLanguage("lang-Country")method ofMFSDKSessionProperties.Builder. You can find a list of supported language code here.
    // Set speech to text language
    MFSDKSessionProperties properties = new MFSDKSessionProperties
                    .Builder()
                    ...
                    .setSpeechToTextLanguage("en-IN")
                    ...
                    .build();
d. Set Text-To-Speech language
English(India) is the default language set for Text-To-Speech. You can change TTS language by passing valid language code using setTextToSpeechLanguage("lang-Country") method of MFSDKSessionProperties.Builder.You can find a list of supported language code here.
    // Set text to speech language
    MFSDKSessionProperties properties = new MFSDKSessionProperties
                    .Builder()
                    ...
                    .setTextToSpeechLanguage("en_IN")
                    ...
                    .build();
Enable Analytics
By default, analytics is disabled in SDK. To enable analytics set enableAnalytics(true) and pass analytics provider and id detail with MFSDKProperpties. Please check the following code snippet to enable analytics.
try {
    // Pass analytics properties
    MFSDKProperties properties = new MFSDKProperties
                    .Builder(END_POINT_URL)
                    ...
                    .enableAnalytics(true)
                    .setAnalyticsProvider("Your Analytics provider code")
                    .setAnalyticsId("Your Analytics ID")
                    ...
                    .build();

} catch (MFSDKInitializationException e) {
    Log.e("MFSDK", e.getMessage());
}
Close Chatbot
Call newcloseScreen(String botId, boolean withAnimation)method of MFSDKMessagingManager to close chat screen with/without exit animation. Set second parameter to false to close screen without animation.
// Close chat screen without exit animation
sMFSdk.closeScreen(BOT_ID, false);
Customising WebSDK
Please refer this link in WebSDK section ~Coming Soon~
Customizing WebViews
Please refer this link in WebSDK section ~Coming Soon~
Deployments & Updates
Please refer this link in WebSDK section ~Coming Soon~
Security
SSL Pinning
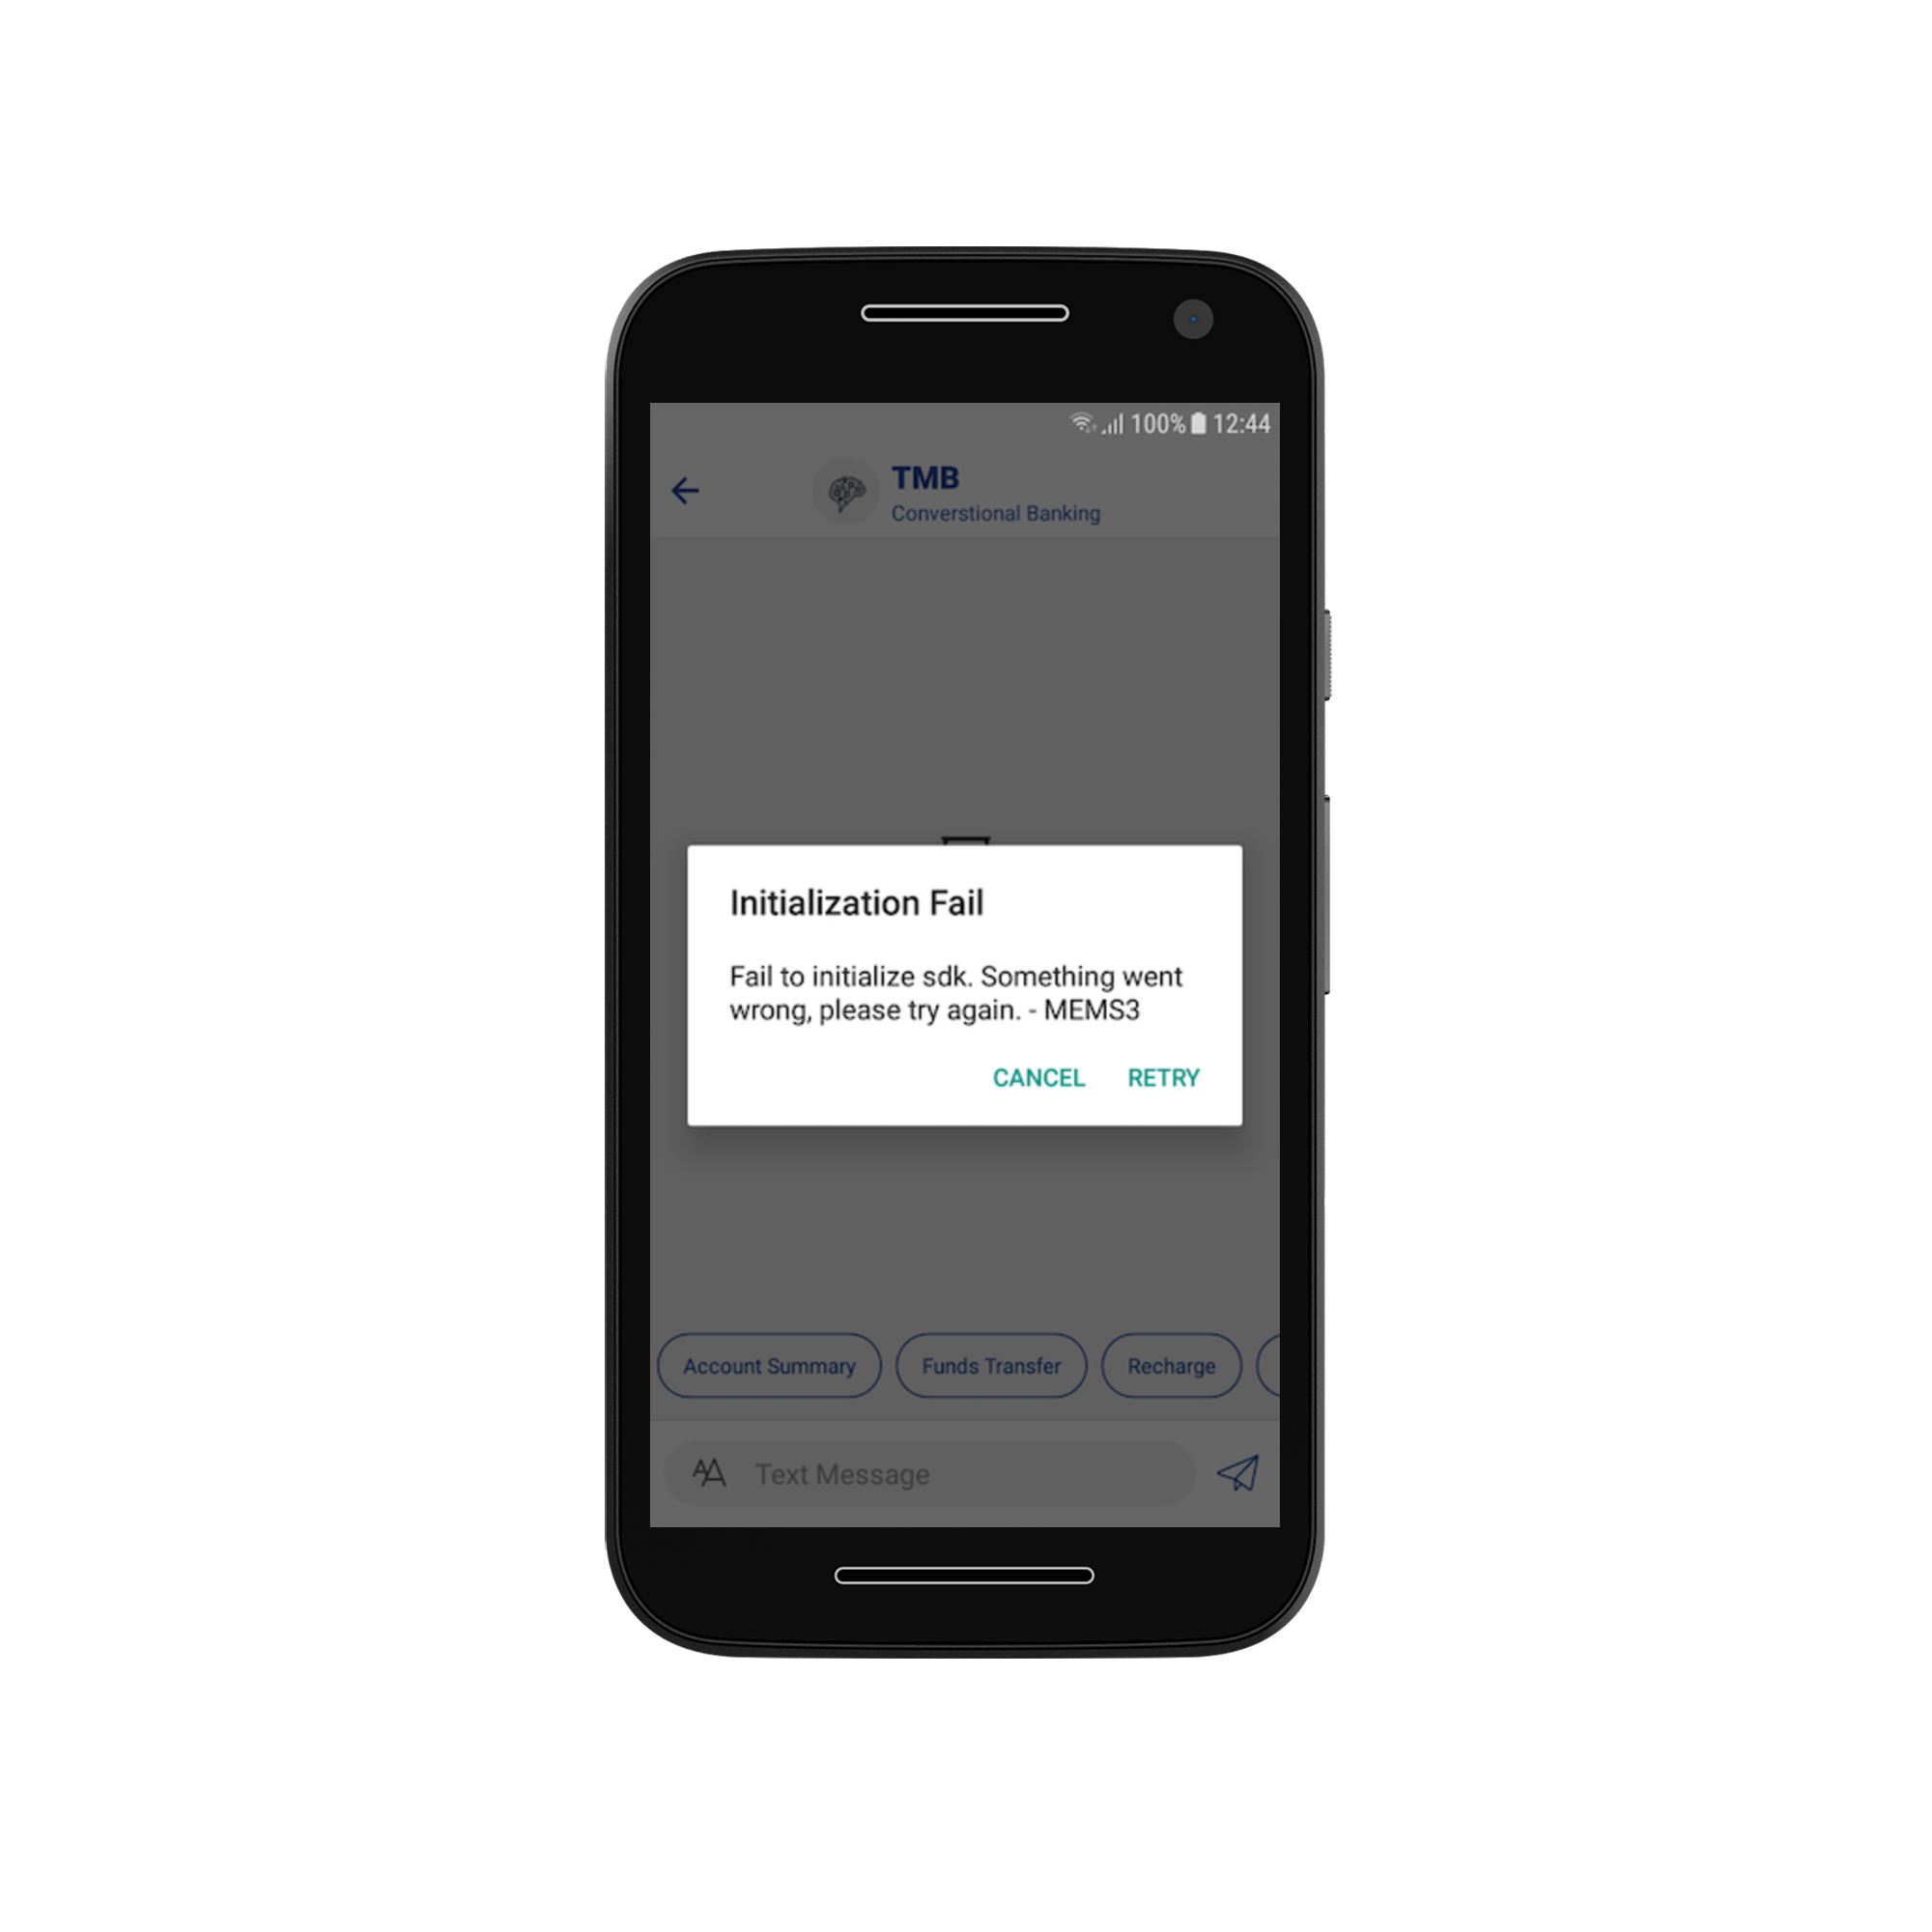
MFSDK has support for SSL (Secure Sockets Layer), to enable encrypted communication between client and server. MFSDK doesn't trust SSL certificates stored in the device's trust store. Instead, it only trusts the certificates which are pass to the MFSDKProperties
Please check the following code snippet to enable SSL pinning.
MFSDKProperties sdkProperties = new MFSDKProperties
                .Builder(BOT_END_POINT_URL)
                .enableSSL(true, new String[] {PUBKEY_CA})  // Enable SSL check
                ...
                .build();
When SSL is enabled, MFSDK verify the certificates which are passed to the MFSDKProperties
Rooted Device Check
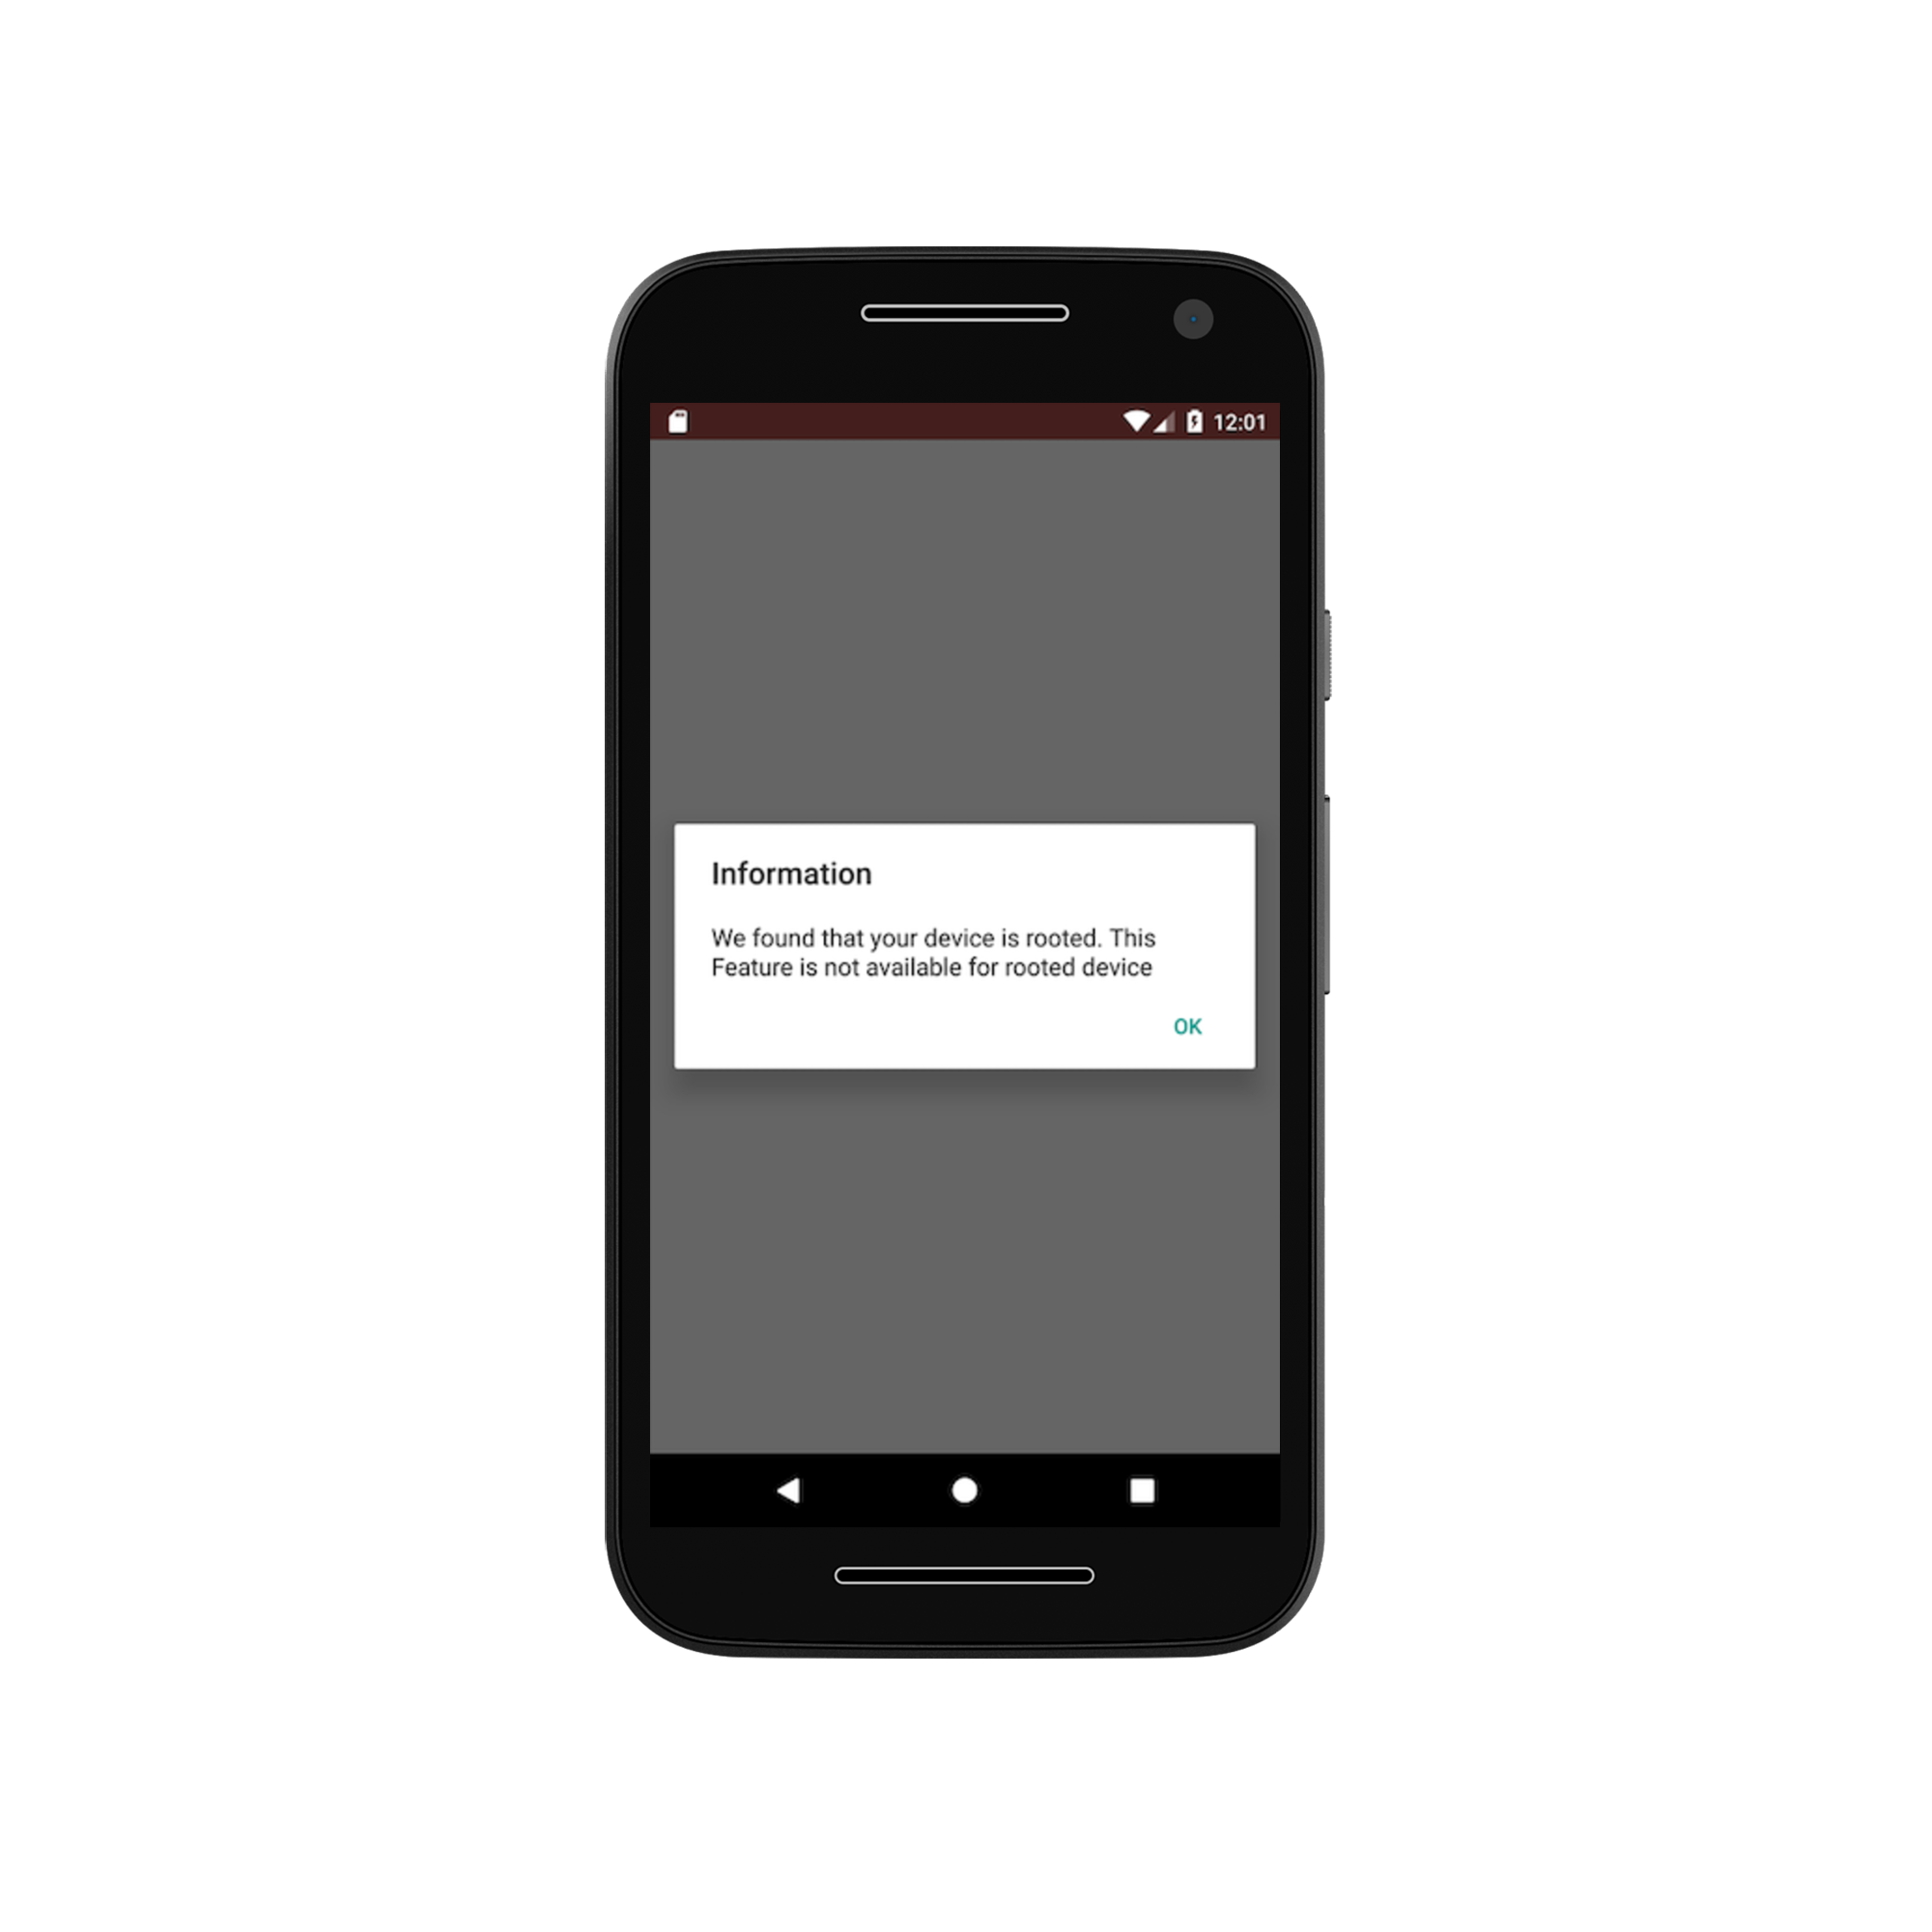
You can prevent MFSDK from running on a rooted device. If enabled, MFSDK will not work on a rooted device.
You can use "enableRootedDeviceCheck" method of MFSDKProperties.Builder to enable this feature.
Please check the following code snippet to enable the rooted device check.
MFSDKProperties sdkProperties = new MFSDKProperties
                .Builder(BOT_END_POINT_URL)
                .enableRootedDeviceCheck(true) // Enable rooted device check
                ...
                .build();
Content Security(Screen capture)
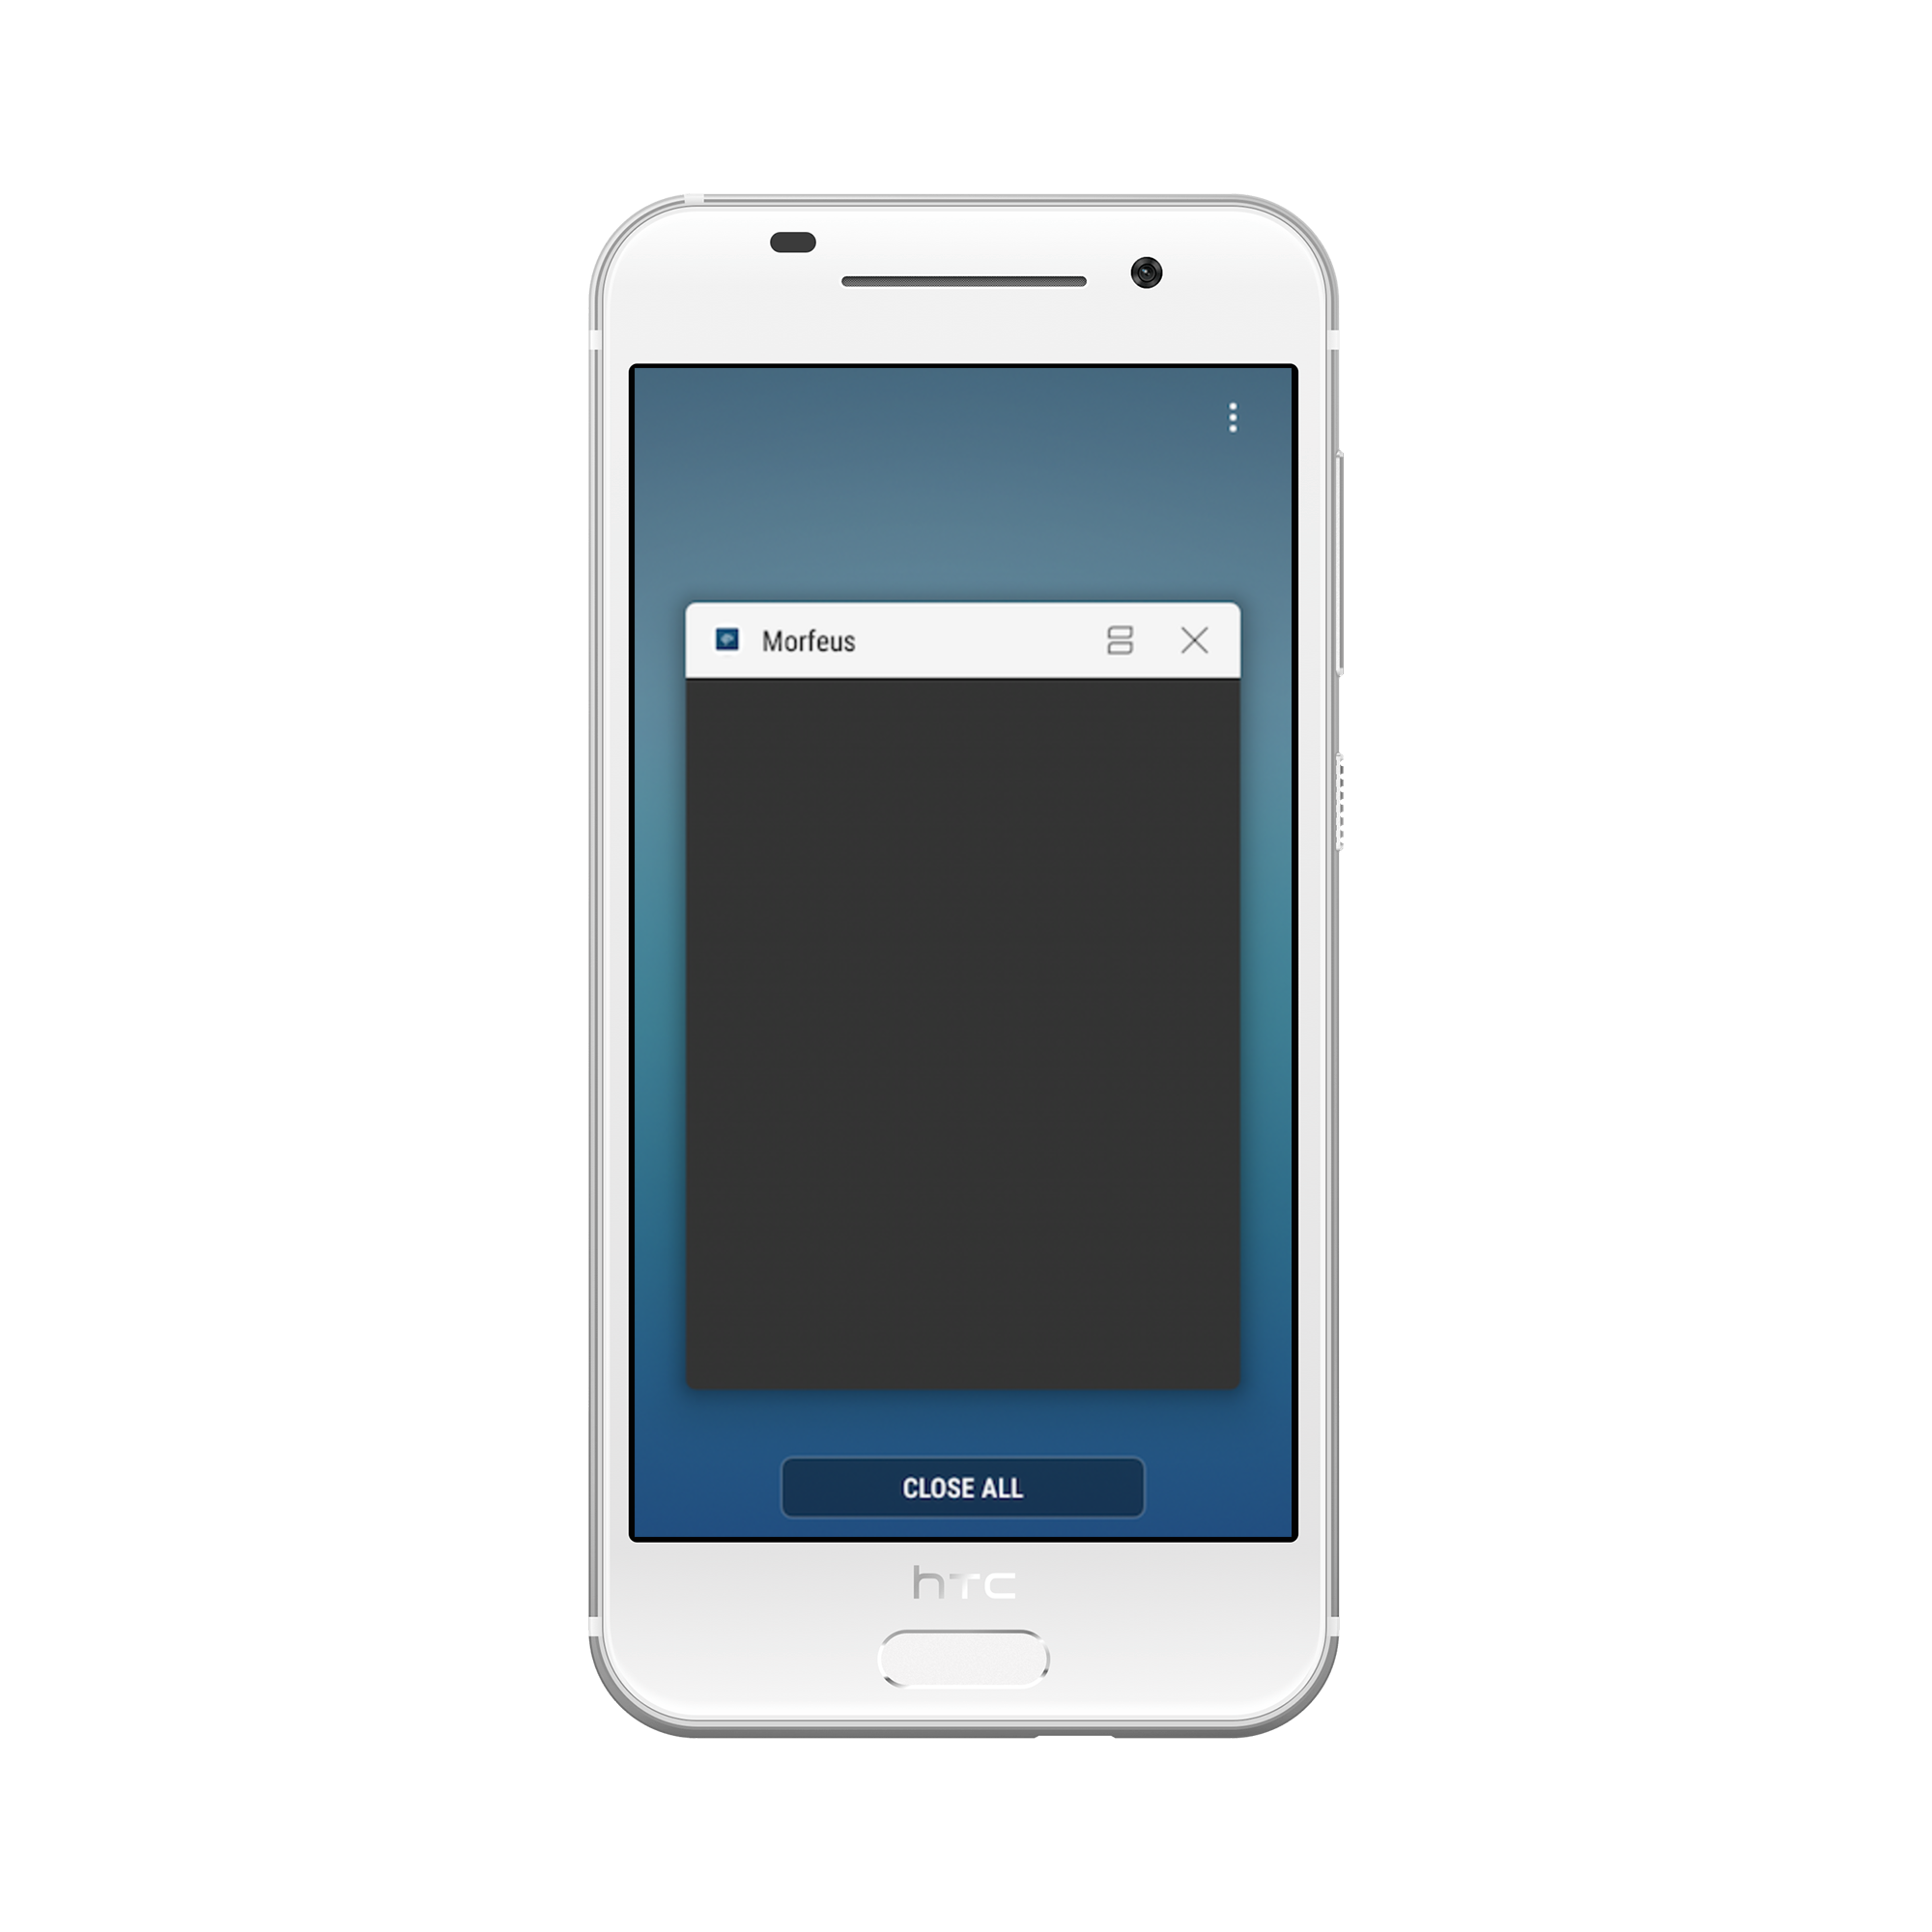
You can prevent user/application from taking the screenshot of the chat. You can use "disableScreenShot" method of
MFSDKProperties.Builder to enable this feature. By default, MFSDK doesn't prevent the user from taking the screenshot.
Please check following code snippet.
MFSDKProperties sdkProperties = new MFSDKProperties
                .Builder(BOT_END_POINT_URL)
                .disableScreenShot(true) // Prevent screen capture
                ...
                .build();
Morfeus iOS Hybrid SDK
Morfeus Hybrid SDK is a light weight messaging sdk which can be embedded easily in web sites and hybrid mobile apps with minimal integration effort. Once integrated it allows end users to converse with the Conversational AI /bot on the Active AI platform on both text and voice. WebSDK has out the box support for multiple UX templates such as List and Carousel and supports extensive customization for both UX and functionality.
Supported Components
Please refer this link in WebSDK section
Device Support
All iOS phones with OS support 8.0 and above.
Setup and how to build
Please refer above WebSDK section of Setup and how to build before starting below steps.
1. Prerequisites
- OS X (10.11.x)
- Xcode 8.3 or higher
- Deployment target - iOS 8.0 or higher
2. Install and configure dependencies
a.Install Cocoapods
CocoaPods is a dependency manager for Objective-C, which automates and simplifies the process of using 3rd-party libraries in your projects. CocoaPods is distributed as a ruby gem, and is installed by running the following commands in Terminal App:
$ sudo gem install cocoapods
$ pod setup
b. Update .netrc file
The Morfeus iOS SDK are stored in a secured artifactory. Cocoapods handles the process of linking these frameworks with the target application. When artifactory requests for authentication information when installing MFSDKHybridKit, cocoapods reads credential information from the file.netrc, located in ~/ directory.
The .netrc file format is as explained: we specify machine(artifactory) name, followed by login, followed by password, each in separate lines. There is exactly one space after the keywords machine, login, password.
machine <NETRC_MACHINE_NAME>
login <NETRC_LOGIN>
password <NETRC_PASSWORD>
One example of .netrc file structure with sample credentials is as below. Please check with the development team for the actual credentials to use.

Steps to create or update .netrc file
1. Start up Terminal in mac
2. Type "cd ~/" to go to your home folder
3. Type "touch .netrc", this creates a new file, If a file with name .netrc not found.
4. Type "open -a TextEdit .netrc", this opens .netrc file in TextEdit
5. Append the machine name and credentials shared by development team in above format, if it does not exist already.
6. Save and exit TextEdit
c. Install the pod
To integrate 'MFSDKHybridKit' into your Xcode project, specify the below code in your Podfile
source 'https://github.com/CocoaPods/Specs.git'
#Voice support is available from iOS 8.0 and above
platform :ios, '7.1'

target 'TargetAppName' do
    pod '<COCOAPOD_NAME>'
end
Once added above code, run install command in your project directory, where your "podfile" is located.
$ pod install
If you get an error like "Unable to find a specification for
$ pod repo update
When you want to update your pods to latest version then run below command.
$ pod update
Note: If we get "401 Unauthorized" error, then please verify your .netrc file and the associated credentials.
d. Disable bitcode
Select target open "Build Settings" tab and set "Enable Bitcode" to "No".

e. Give permission
Search for “.plist” file in the supporting files folder in your Xcode project. Update NSAppTransportSecurity to describe your app’s intended HTTP connection behavior. Please refer apple documentation and choose the best configuration for your app. Below is one sample configuration.
<key>NSAppTransportSecurity</key>
<dict>
      <key>NSAllowsArbitraryLoads</key>
      <true/>
</dict>
Integration to Application
User can integrate chatbot at on any screen in application.Broadly it is divided into 2 sections * Public * Post Login
1. Public
Invoke the SDK
To invoke chat screen, create MFSDKProperties, MFSDKSessionProperties and then call the method showScreenWithWorkSpaceId:fromViewController:withSessionProperties to present the chat screen. Please find below code sample.
// Add this to the .h of your file
#import "ViewController.h"
#import <MFSDKMessagingKit/MFSDKMessagingKit.h>
@interface ViewController ()<MFSDKMessagingDelegate>
@end

// Add this to the .m of your file
@implementation ViewController
// Once the button is clicked, show the message screen -(IBAction)startChat:(id)sender
{
    MFSDKProperties *params = [[MFSDKProperties alloc] initWithDomain:@"<END_POINT_URL>"];
    params.workSpaceId = <WORK_SPACE_ID>;
    params.messagingDelegate = self;
    params.enableScheduledBackgroundRefresh = YES;
    //optional for ios13 Support
    params.sdkStatusBarColor = <UIColor>;//color to be set for status-bar
    params.botModalPresentationStyle = PresentationFullScreen;

    [[MFSDKMessagingManager sharedInstance] initWithProperties:params];
    MFSDKSessionProperties *sessionProperties = [[MFSDKSessionProperties alloc]init];
    sessionProperties.userInfo = [[NSDictionary alloc] initWithObjectsAndKeys:@"KEY",@"VALUE", nil];


[[MFSDKMessagingManager sharedInstance] showScreenWithWorkSpaceId:@"<WORK_SPACE_ID>" fromViewController:self withSessionProperties:sessionProperties];

}

@end
Properties:
| Property | Description |
|---|---|
| BOT_ID | The unique ID for the bot. |
| BOT_NAME | The bot name to display on top of chat screen. |
| END_POINT_URL | The bot API URL. |
Compile and Run
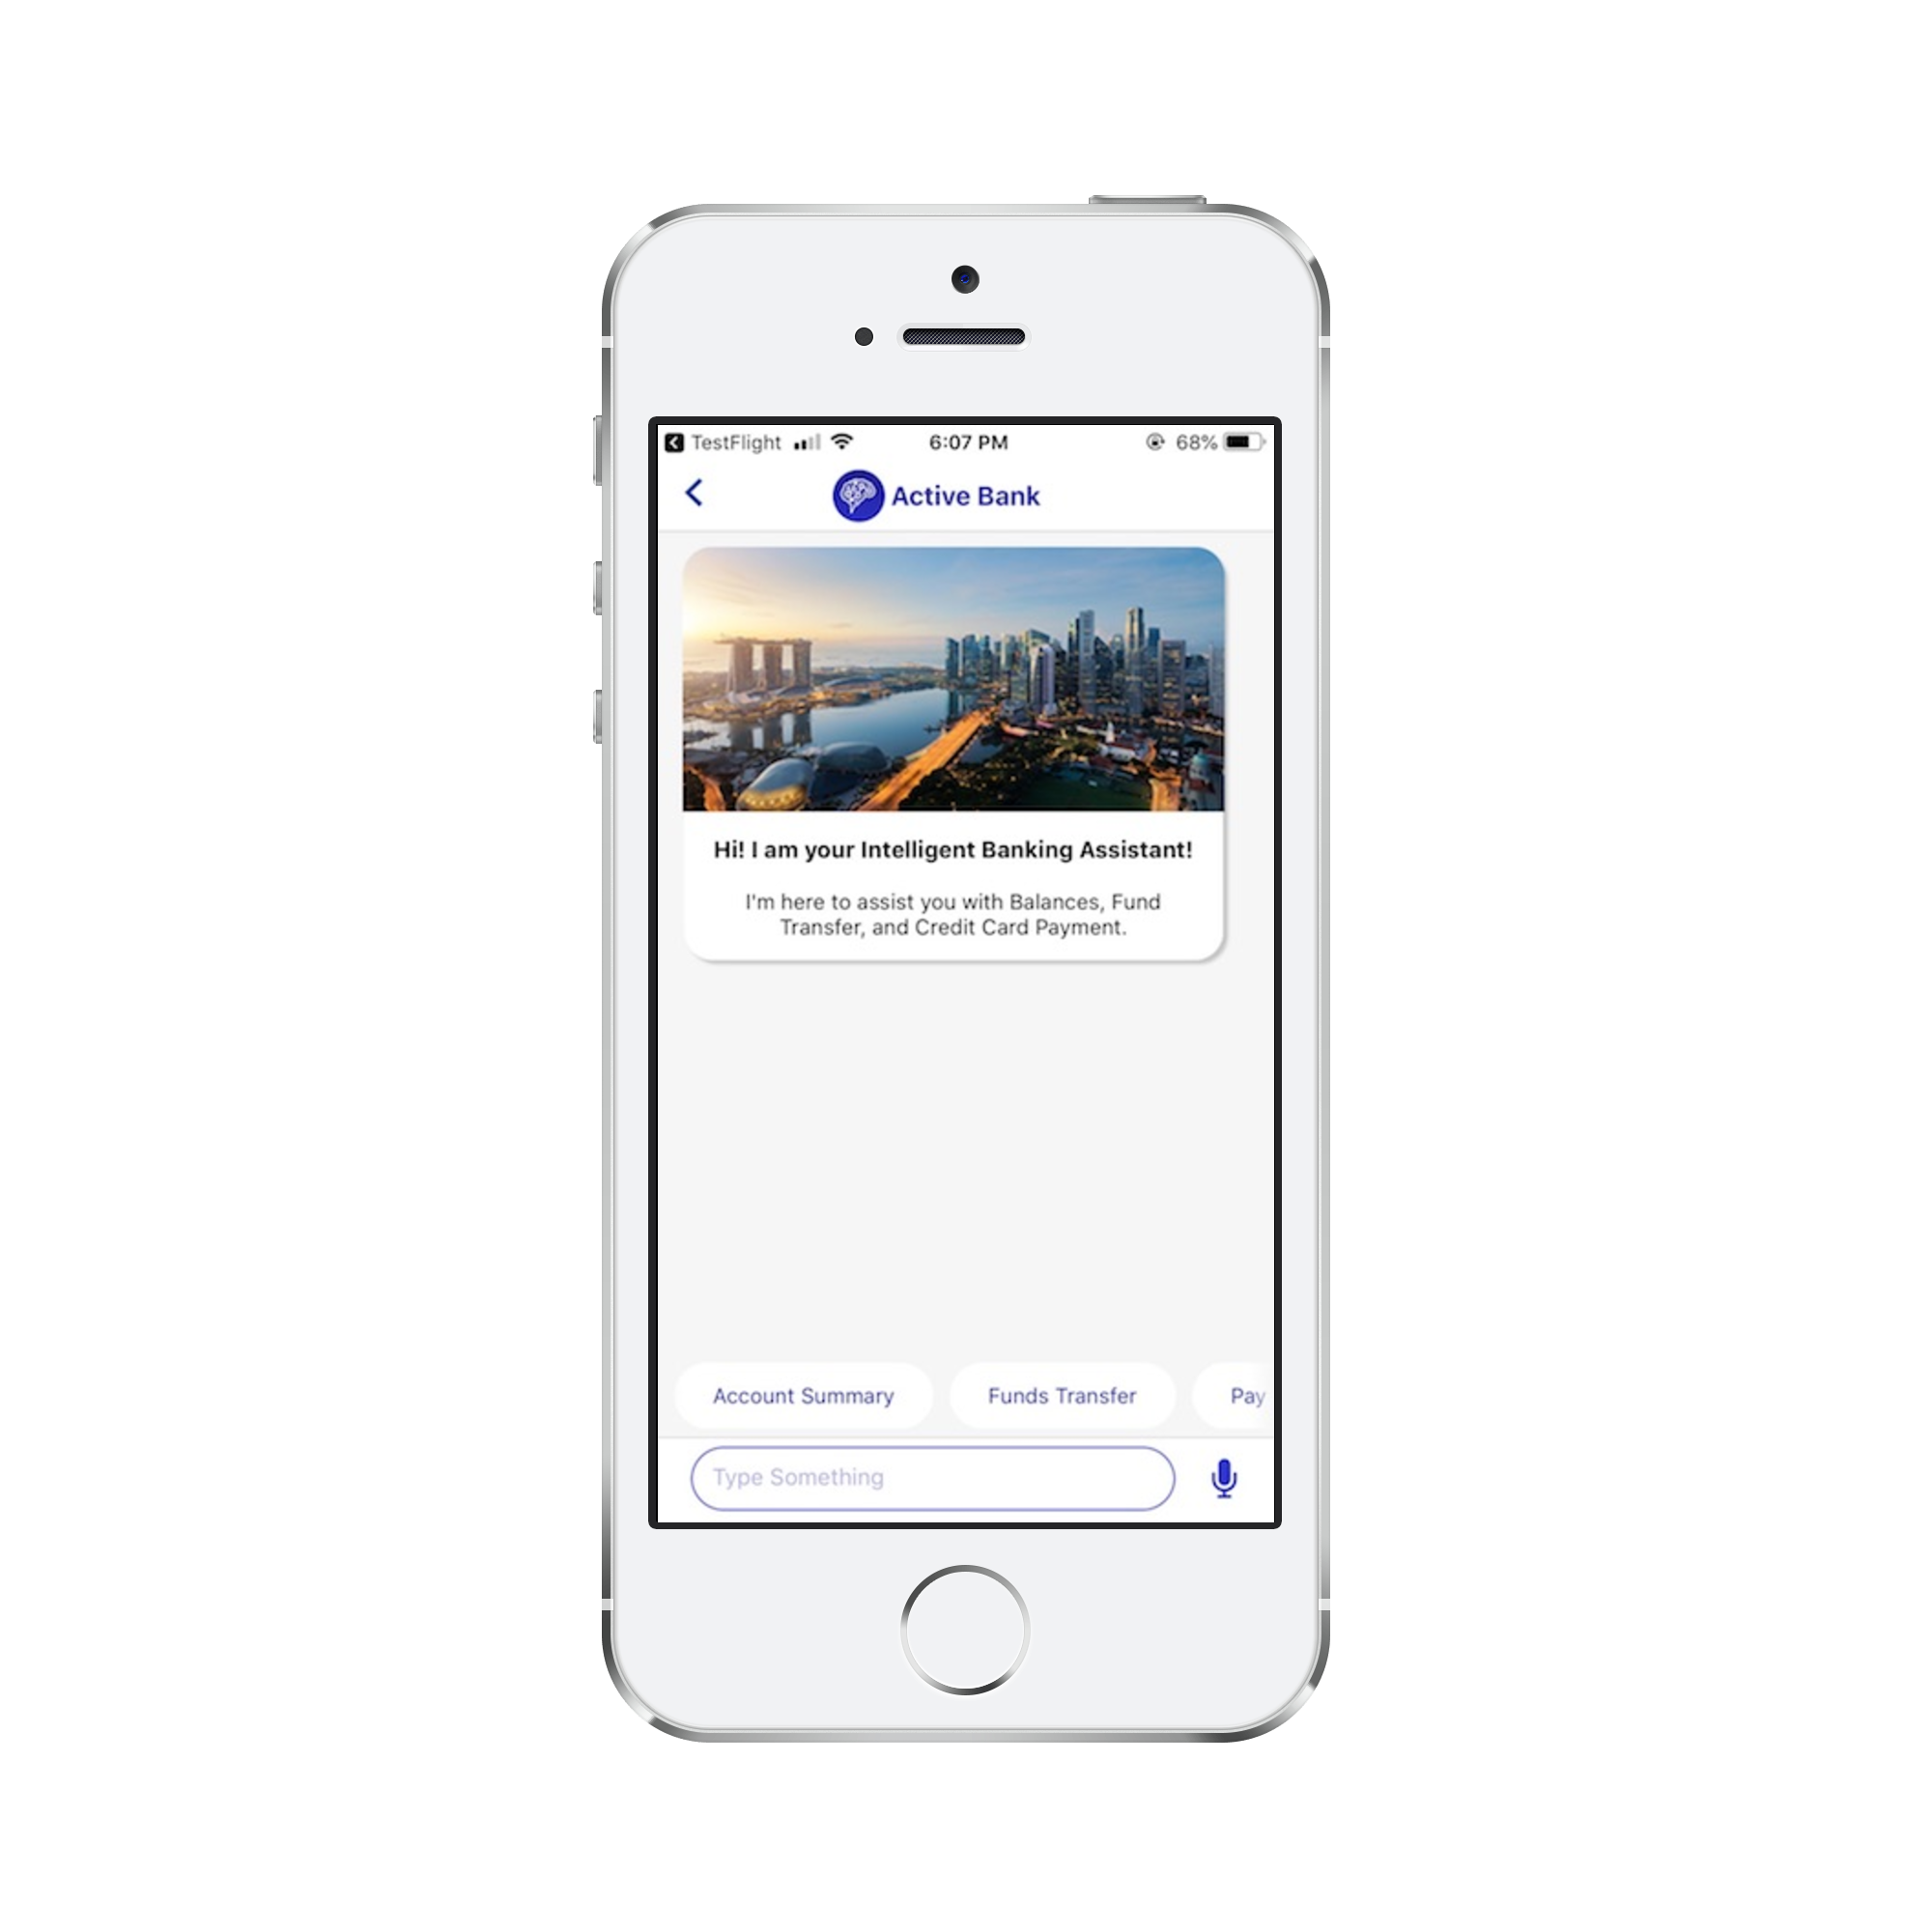
Once above code is added we can build and run. On launch of chat screen, welcome message will be displayed.
2. Post Login
You can pass set of key value pairs to the MFSDK using userInfo(NSDictionary) in MFSDKSessionProperties. In following example we are passing Customer ID, Session ID to MFSDK.
 MFSDKSessionProperties *sessionProperties = [[MFSDKSessionProperties alloc]init];
 sessionProperties.userInfo = @{@"CUSTOMER_ID": @"<CUSTOMER_ID_VALUE>", @"SESSION_ID": @"<SESSION_ID_VALUE>", nil];
 [[MFSDKMessagingManager sharedInstance] showScreenWithWorkSpaceId:@"<WORK_SPACE_ID>" fromViewController:self withSessionProperties:sessionProperties];
Note: Please make sure length of customerID and sessionID should not be greater than 256 bytes if encyption of keys are required
Properties
Setting Chat Screen Header
Morfeus iOS SDK provides feature to set header as native header.You can set native header by using “setHeader” method of MFSDKSessionProperties.You need to create MFSDKHeader object and set below properties according to requirement. In following example we are setting header background as color with left and right button.
MFSDKProperties *params = [[MFSDKProperties alloc] initWithDomain:@"<END_POINT_URL>"];
    [params addBot:@"<BOT_ID>" botName:@"<BOT_NAME>"];
    params.messagingDelegate = self;
    params.showNativeNavigationBar = YES;
    [[MFSDKMessagingManager sharedInstance] initWithProperties:params];
MFSDKSessionProperties *sessionProperties = [[MFSDKSessionProperties alloc]init];
    MFSDKHeader *headerObject = [[MFSDKHeader alloc]init];
    headerObject.isCustomNavigationBar = YES;

    headerObject.titleText = @"ActiveAI Bot !";
    headerObject.titleColor = @"#FFFFFF";
    headerObject.titleFontName = @"Lato_Medium";
    headerObject.titleFontSize = 16.00f;

    headerObject.rightButtonAction = HOME_BUTTON;
    headerObject.rightButtonImage = @"hdr_home";

    headerObject.leftButtonAction = BACK_BUTTON;
    headerObject.leftButtonImage = @"hdr_menu_icon";

    headerObject.backgroundColor = @"#CD1C5F";

    [sessionProperties setHeader:headerObject];
Handling Logout Event
To retrieve logout event, implement the MFSDKMessagingDelegate. MFSDK will call onLogout: method when user logout from the current chat session. There are three type of logout methods supported by MFSDK as listed below.
| Logout Type | Logout Code |
|---|---|
| Auto logout / Inactivity Timeout | 1001 |
| Forced logout | 1002 |
Please check following code sample.
// Add this to the header of your file
#import "ViewController.h"
#import <MFSDKMessagingKit/MFSDKMessagingKit.h>
@interface ViewController ()<MFSDKMessagingDelegate>
@end
@implementation ViewController
-(IBAction)startChat:(id)sender
{
    ...
    //Show chat screen
}

-(void)onLogout:(NSInteger)logoutType
{
    NSLog(@"logoutType: %@",logoutType);
}
@end
Handling Close Event
To retrieve close event, implement the MFSDKMessagingDelegate. MFSDK will call onChatClose method when user touches back button, which results in closure of chat screen.
Please check following code sample.
// Add this to the header of your file
#import "ViewController.h"
#import <MFSDKMessagingKit/MFSDKMessagingKit.h>
@interface ViewController ()<MFSDKMessagingDelegate>
@end
@implementation ViewController
-(IBAction)startChat:(id)sender
{
    ...
    //Show chat screen
}

-(void)onChatClose
{
    NSLog(@"Chat screen closed, perform necessary action");
}
@end
Deeplink Callback
You can deep link your application with MFSDK by implementing the MFSDKMessagingDelegate. If Active AI chat bot is not able to answer, framework will call onSearchResponse method of MFSDKMessagingDelegate and “MFSearchResponseModel” model will be passed. User can invoke respective screen from this method depending on properties set in the model.
| Property | Description |
|---|---|
| MFSearchResponseModel | This model contains 3 properties keyValue, menuCode & payload which will be used to navigate to respective screen in application. |
// Add this to the header of your file
#import "ViewController.h"
#import <MFSDKMessagingKit/MFSDKMessagingKit.h>
@interface ViewController ()<MFSDKMessagingDelegate>
@end
@implementation ViewController
-(IBAction)startChat:(id)sender
{
    MFSDKProperties *params = [[MFSDKProperties alloc] initWithDomain:@"<END_POINT_URL>"];
    params.messagingDelegate = self;
    [[MFSDKMessagingManager sharedInstance] initWithProperties:params];
    ...
    //Show chat screen
}

-(void)onSearchResponse:(MFSearchResponseModel *)model
{
    //handle code to display native screens
    NSLog(@"onSearchResponse: %@",model.menuCode);
}
@end
Adding Voice Feature
MFSDKHybridKit supports text to speech and speech to text feature. It has two medium of speech recognition and either of them can be used :
Google Speech recognition
iOS Native Speech Recognition
a. Google Speech recognition
The minimum iOS deployment target for voice feature is iOS 8.0. The pod file also needs to be updated with the minimum deployment target for voice feature. Speech API key can be passed using speechAPIKey in MFSDKSessionProperties as below.
MFSDKHybridKit supports text to speech and speech to text feature. The minimum iOS deployment target for voice feature is iOS 8.0. The pod file also needs to be updated with the minimum deployment target for voice feature. Speech API key can be passed using speechAPIKey in MFSDKSessionProperties as below.
MFSDKSessionProperties *sessionProperties = [[MFSDKSessionProperties alloc]init];
sessionProperties.speechAPIKey = @"<YOUR_SPEECH_API_KEY>";

[[MFSDKMessagingManager sharedInstance] showScreenWithBotID:@"<BOT_ID>" fromViewController:self withSessionProperties:sessionProperties];
Search for “.plist” file in the supporting files folder in your Xcode project. Add needed capabilities like below and appropriate description.
<key>NSSpeechRecognitionUsageDescription</key>
<string>SPECIFY_REASON_FOR_USING_SPEECH_RECOGNITION</string>

<key>NSMicrophoneUsageDescription</key>
<string>SPECIFY_REASON_FOR_USING_MICROPHONE</string>
b. Native Speech recognition
MFSDKHybridKit supports text to speech and speech to text feature. The minimum iOS required to target native speech recognition feature is iOS 10.0. Speech provider needs to be set as SpeechProviderNative for the property called speechProviderForVoice in MFSDKSessionProperties.
MFSDKSessionProperties *sessionProperties = [[MFSDKSessionProperties alloc]init];
   sessionProperties.speechProviderForVoice = SpeechProviderNative;

[[MFSDKMessagingManager sharedInstance] showScreenWithWorkSpaceId:@"<WORK_SPACE_ID>" fromViewController:self withSessionProperties:sessionProperties];
Search for “.plist” file in the supporting files folder in your Xcode project. Add needed capabilities like below and appropriate description.
<key>NSSpeechRecognitionUsageDescription</key>
<string>SPECIFY_REASON_FOR_USING_SPEECH_RECOGNITION</string>

<key>NSMicrophoneUsageDescription</key>
<string>SPECIFY_REASON_FOR_USING_MICROPHONE</string>
Both the permission should be provided by the user in order to make apple’s native speech recognition work.
c. Set Speech-To-Text language
English(India) is the default language set for Speech-To-Text. You can change STT language by passing valid language code using speechToTextLanguage property of MFSDKSessionProperties. You can find list of supported language code here.
MFSDKSessionProperties *sessionProperties = [[MFSDKSessionProperties alloc]init];
   sessionProperties.shouldSupportMultiLanguage = YES;
   sessionProperties.speechToTextLanguage = @"en-IN";
d. Set Text-To-Speech language
English(India) is the default language set for Text-To-Speech. You can change STT language by passing valid language code using textToSpeechLanguage property of MFSDKSessionProperties.Please set language code as per apple guidelines.
MFSDKSessionProperties *sessionProperties = [[MFSDKSessionProperties alloc]init];
   sessionProperties.shouldSupportMultiLanguage = YES;
   sessionProperties.textToSpeechLanguage = @"en-IN";
Enable Analytics
By default, analytics is disabled in SDK. To enable analytics set enableAnalytics to YESand pass analytics provider and id detail with MFSDKProperpties. Please check the following code snippet to enable analytics
// Add this to the header of your file
#import "ViewController.h"
#import <MFSDKMessagingKit/MFSDKMessagingKit.h>
@interface ViewController ()<MFSDKMessagingDelegate>
@end
@implementation ViewController
-(IBAction)startChat:(id)sender
{
    MFSDKProperties *params = [[MFSDKProperties alloc] initWithDomain:@"<END_POINT_URL>"];
    params.enableAnalytics = YES;
    params.analyticsProvider = @"YOUR_ANALYTICS_PROVIDER_CODE";
    params.analyticsId = @"YOUR_ANALYTICS_ID";
    ...
    [[MFSDKMessagingManager sharedInstance] initWithProperties:params];
    ...
    //Show chat screen
}
@end
Close Chatbot
To close the chat screen with smooth animation call the closeScreenWithBotID: with the
[[MFSDKMessagingManager sharedInstance] closeScreenWithBotID:@"<WORK_SPACE_ID>"];
To close the chat screen without animation call closeScreenWithBotID:withAnimation: with the
[[MFSDKMessagingManager sharedInstance] closeScreenWithBotID:@"<WORK_SPACE_ID>" withAnimation:NO];
Customising WebSDK
Please refer this link in WebSDK section
Customizing WebViews
Please refer this link in WebSDK section
Deployments & Updates
Please refer this link in WebSDK section
Security
SSL Pinning
MFSDK has a built-in support for SSL (Secure Sockets Layer), to enable encrypted communication between client and server. MFSDK doesn't trust SSL certificates stored in device's trust store. Instead, it only trusts the certificates by checking its SSL Hash keys using TrustKit SSL pinning validation technique.
Please check following code snippet to enable SSL pinning.
MFSDKProperties *params = [[MFSDKProperties alloc]initWithDomain:self.defaultBaseURL];

[params enableSSL:YES sslPins:@[SSL_HASH_KEY_1,SSL_HASH_KEY_2]];
Here we can pass SSL Hash key of certificate for ssl pinning validation
Note: Please make sure SSL Hash key which you are providing is associated with Bot end-point URL.
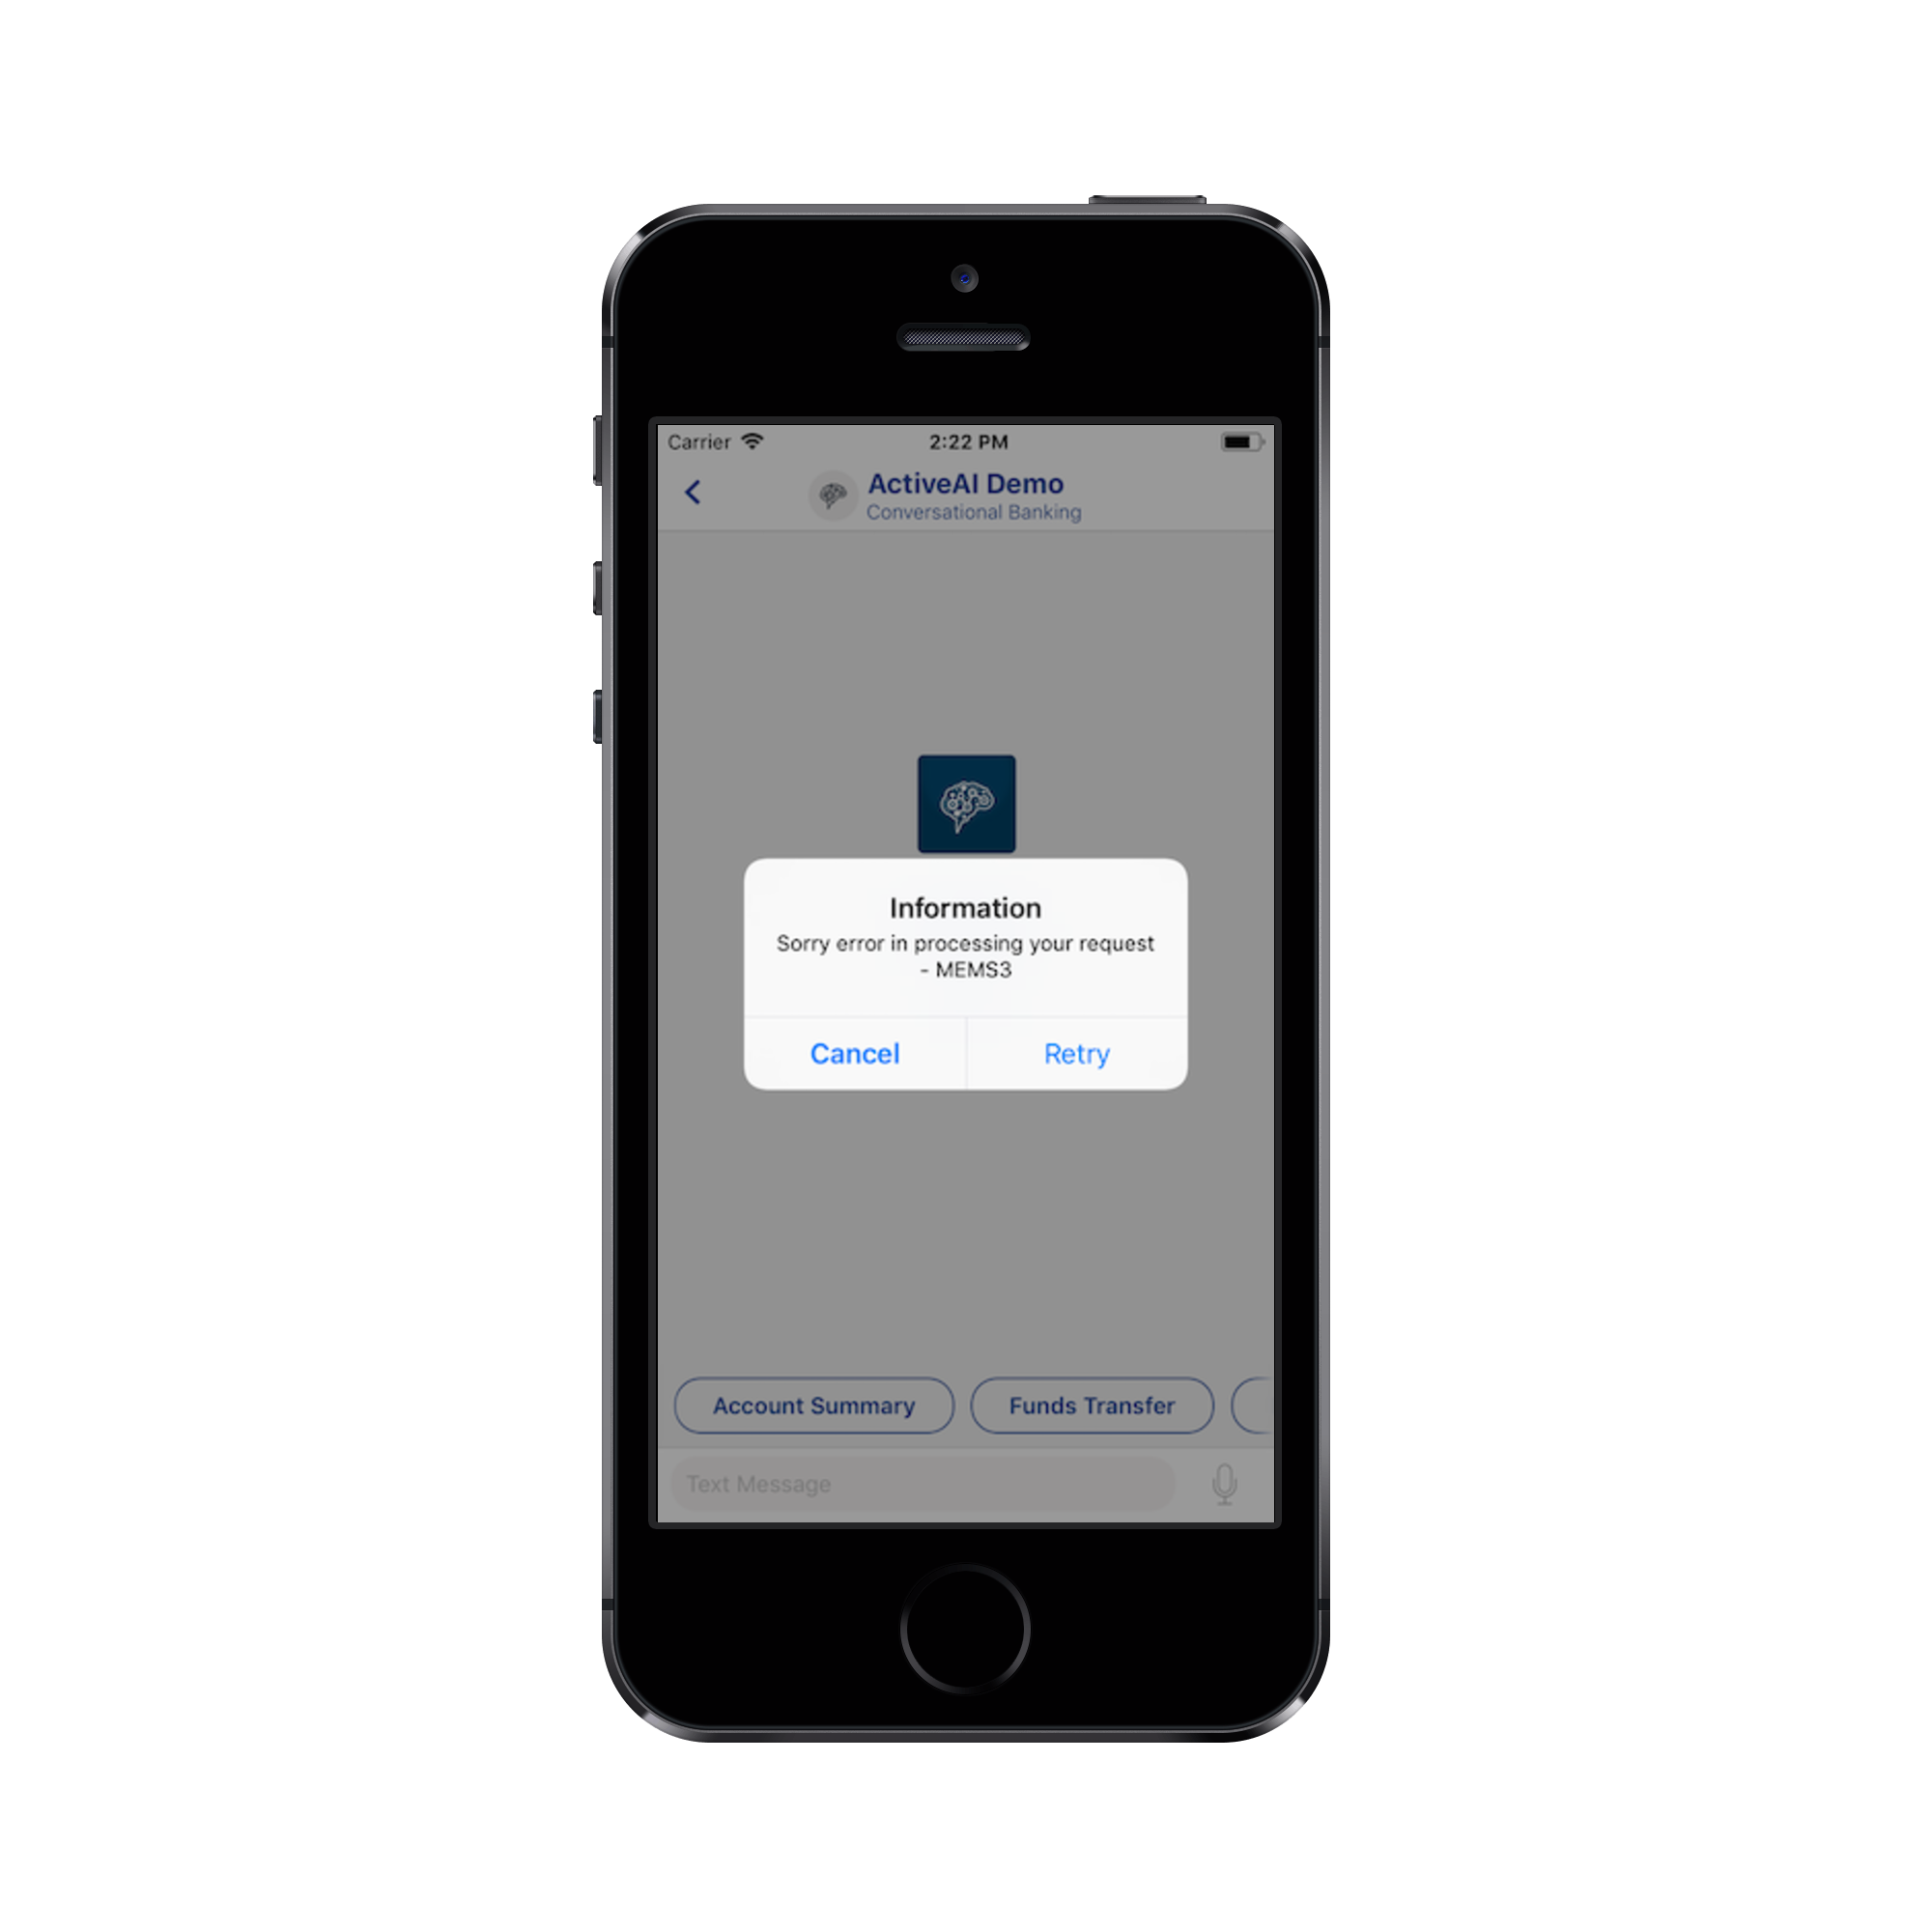
Below is the snapshot when SSL is enabled, but there is a failure in validating secure connection.
Rooted Device Check
MFSDK has a built-in support for rooted device check.If enabled,application will not work on rooted device.
Please check following code snippet to enable rooted device check.
MFSDKProperties *params = [[MFSDKProperties alloc]initWithDomain:self.defaultBaseURL];

[params enableCheck:YES/NO];
Content Security in Minimise State
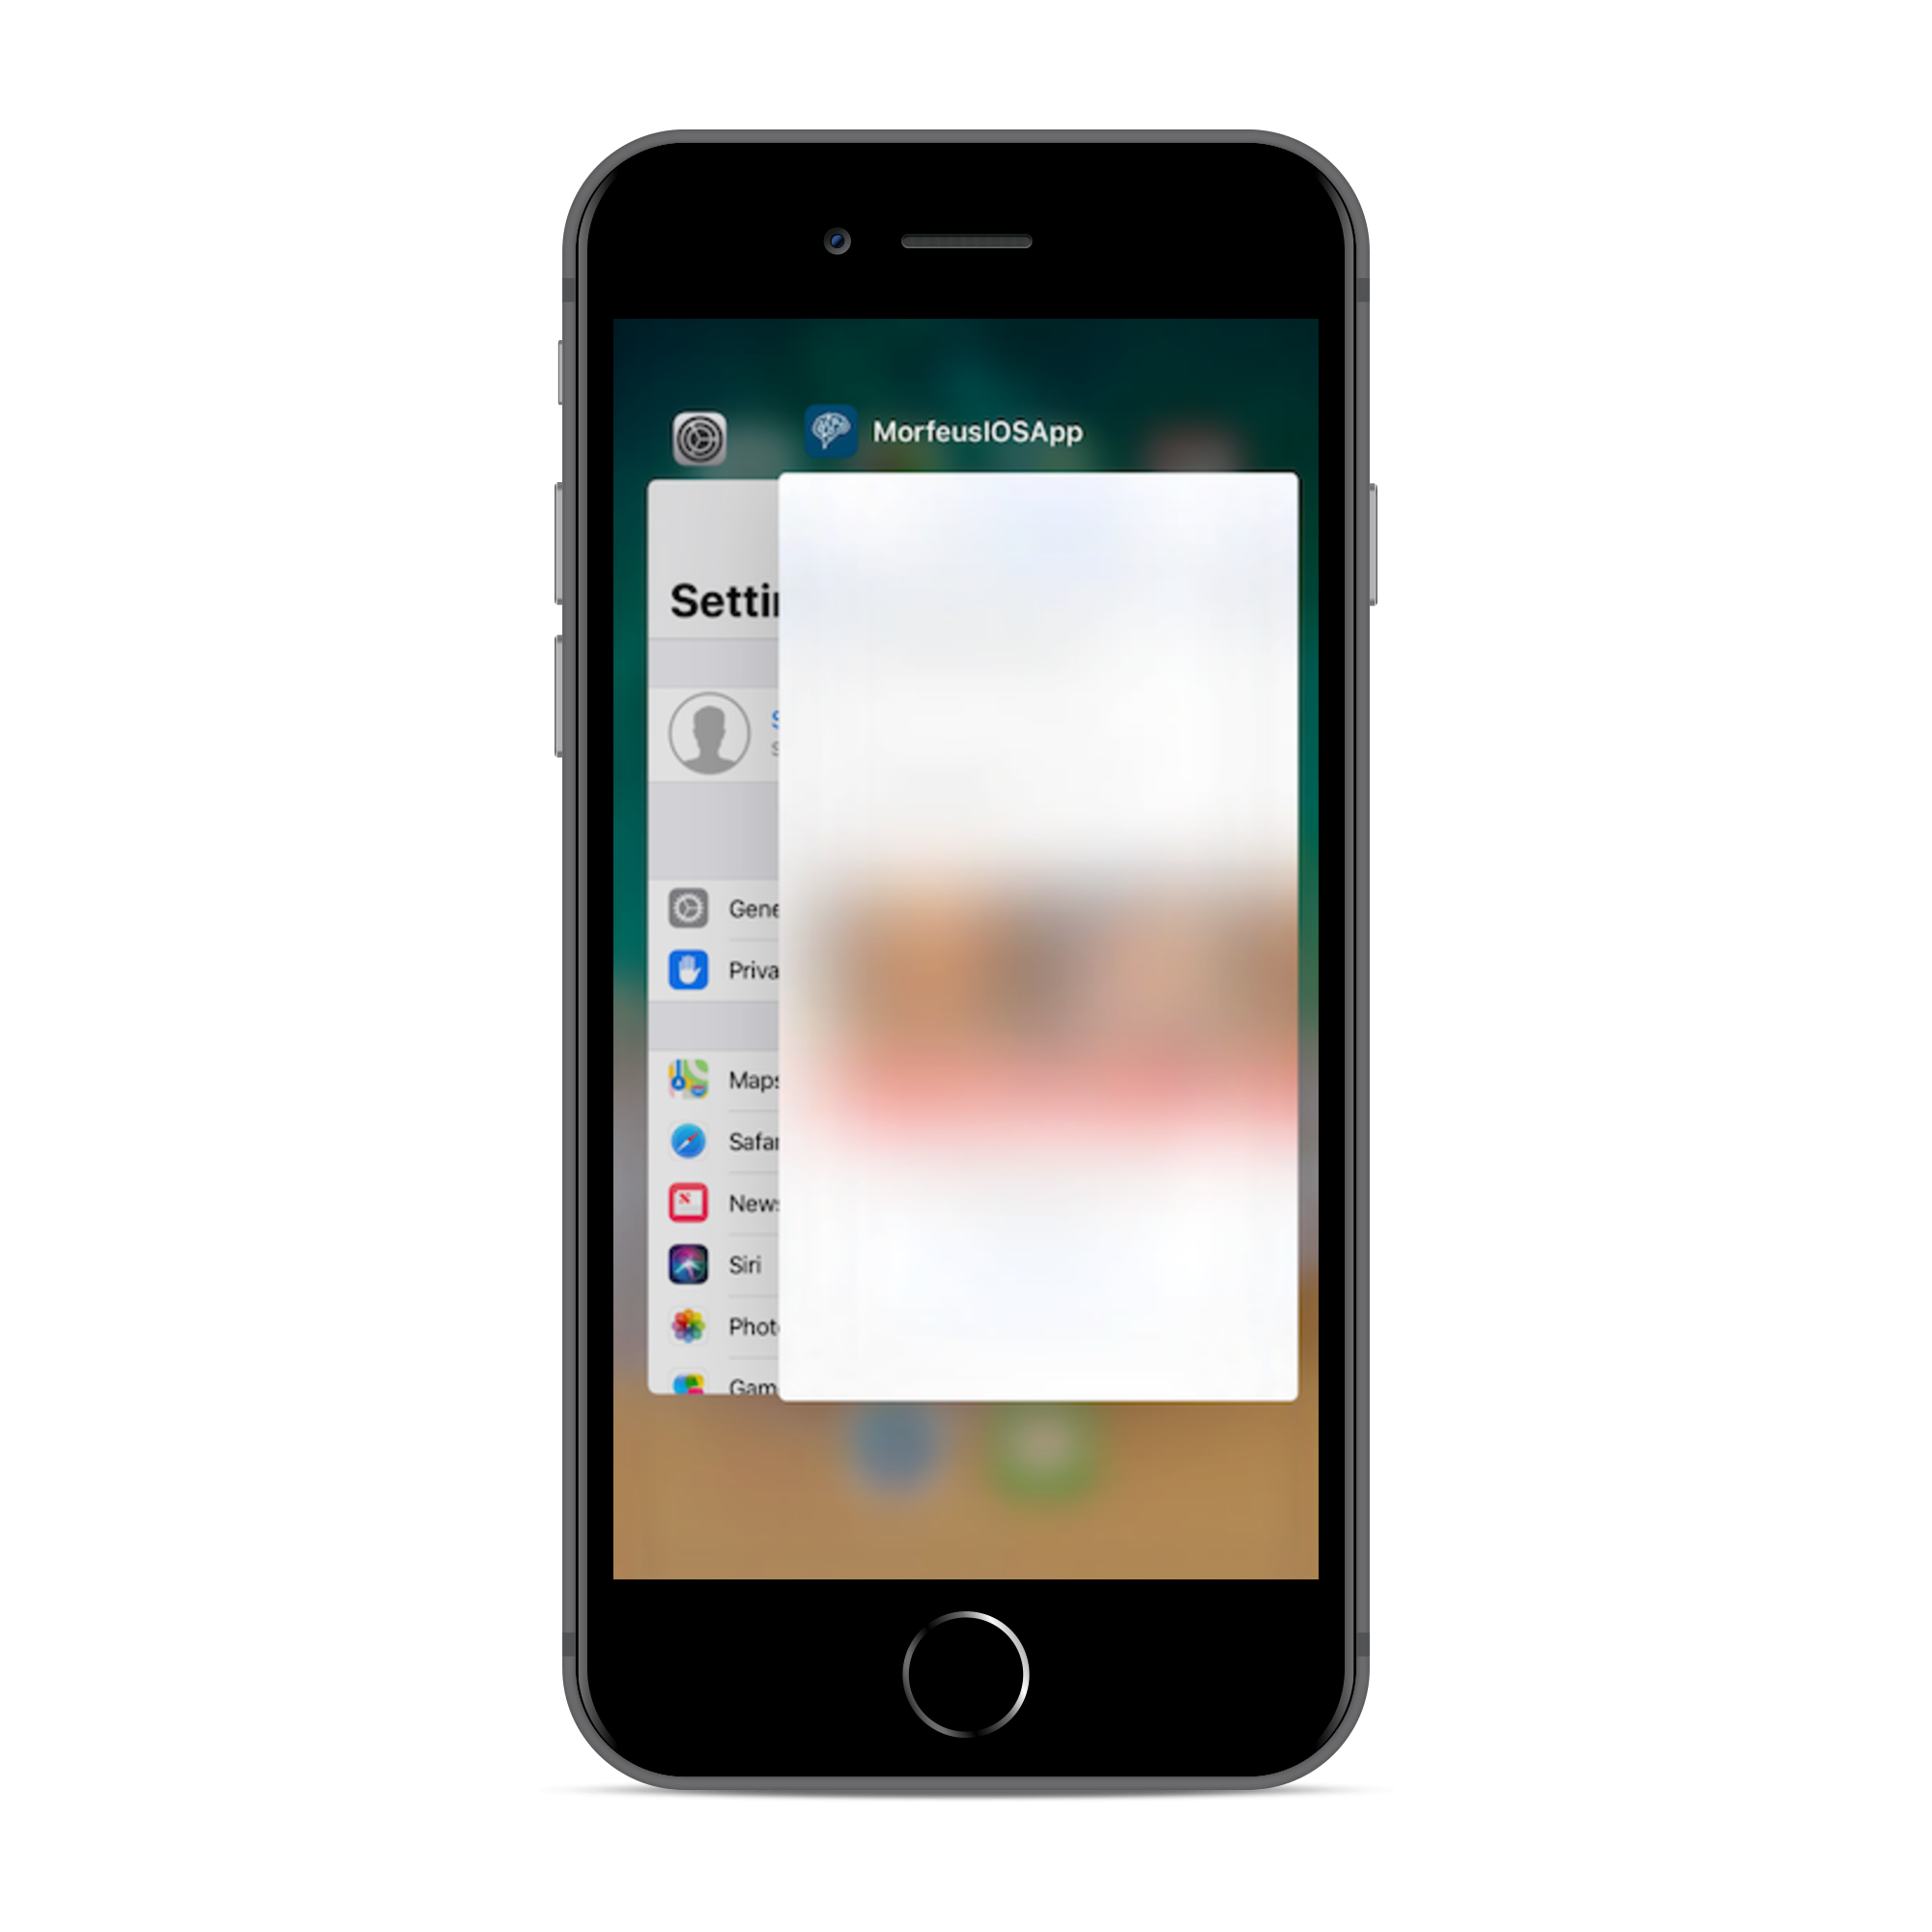
MFSDK has a built-in support for hiding content in minimise state. If enabled, user will not able to see content in minimise case. The contents will be blurred as shown in snapshot below.
Please check following code snippet to enable content security in minimise state.
MFSDKProperties *params = [[MFSDKProperties alloc]initWithDomain:self.defaultBaseURL];
..
params.hideContentInBackground = YES;
..
[[MFSDKMessagingManager sharedInstance] initWithProperties:sdkProperties];
Morfeus iOS Native SDK
Key features
Morfeus Native SDK is a light weight messaging sdk which can be embedded easily in native mobile apps with minimal integration effort. Once integrated it allows end users to converse with the Conversational AI /bot on the Active AI platform on both text and voice. The SDK has out the box support for multiple UX templates such as List and Carousel and supports extensive customization for both UX and functionality. The SDK has inbuilt support for banking grade security features.
Supported Components
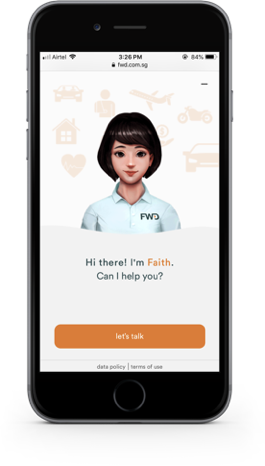
Current SDK support below inbuilt message templates
| Splash | Welcome | Cards | Carousal |
|---|---|---|---|
 |
 |
 |
 |
| Suggestion | Quick Replies | List | Webview |
|---|---|---|---|
 |
 |
 |
 |
Device Support
All iOS phones with OS support 8.0 and above.
Setup and how to build
1. Prerequisites
- OS X (10.11.x)
- Xcode 8.3 or higher
- Deployment target - iOS 8.0 or higher
2. Install and configure dependencies
a. Install Cocoapods
CocoaPods is a dependency manager for Objective-C, which automates and simplifies the process of using 3rd-party libraries in your projects.CocoaPods is distributed as a ruby gem, and is installed by running the following commands in Terminal App:
$ sudo gem install cocoapods
$ pod setup
b. Update .netrc file
The Morfeus iOS SDK are stored in a secured artifactory. Cocoapods handles the process of linking these frameworks with the target application. When artifactory requests for authentication information when installing MFSDKWebKit, cocoapods reads credential information from the file .netrc, located in ~/ directory.
The .netrc file format is as explained: we specify machine(artifactory) name, followed by login, followed by password, each in separate lines. There is exactly one space after the keywords machine, login, password.
machine <NETRC_MACHINE_NAME>
login <NETRC_LOGIN>
password <NETRC_PASSWORD>
Steps to create or update .netrc file
1.Start up Terminal in mac 2.Type "cd ~/" to go to your home folder 3.Type "touch .netrc", this creates a new file, If a file with name .netrc not found. 4.Type "open -a TextEdit .netrc", this opens .netrc file in TextEdit 5.Append the machine name and credentials shared by development team in above format, if it does not exist already. 6.Save and exit TextEdit
c. Install the pod
To integrate 'MorfeusMessagingKit' into your Xcode project, specify the below code in your Podfile
source 'https://github.com/CocoaPods/Specs.git'
platform :ios, '8.0'

target 'TargetAppName' do
    pod '<COCOAPOD_NAME>'
end
Once added above code, run install command in your project directory, where your "podfile" is located.
$ pod install
If you get an error like "Unable to find a specification for
$ pod repo update
When you want to update your pods to latest version then run below command.
$ pod update
Note: If we get "401 Unauthorized" error, then please verify your .netrc file and the associated credentials.
d. Disable bitcode
Select target open "Build Settings" tab and set "Enable Bitcode" to "No".

e. Give Permission:
Search for “.plist” file in the supporting files folder in your Xcode project. Add various privacy permissions as needed. Please refer apple documentation and choose the best configuration for your app. Below is one sample configuration.
<key>NSCameraUsageDescription</key>
<string>Specify the reason for your app to access the device’s camera</string>
<key>NSContactsUsageDescription</key>
<string>Specify the reason for your app to access the user’s contacts</string>
<key>NSLocationWhenInUseUsageDescription</key>
<string>Specify the reason for your app to access the user’s location information</string>
<key>NSFaceIDUsageDescription</key>
<string>Specify the reason for your app to use Face ID</string>
<key>NSMicrophoneUsageDescription</key>
<string>Specify the reason for your app to access any of the device’s microphones</string>
<key>NSSpeechRecognitionUsageDescription</key>
<string>Specify the reason for your app to send user data to Apple’s speech recognition servers</string>
<key>NSPhotoLibraryUsageDescription</key>
<string>Specify the reason for your app to access the user’s photo library</string>
Integration to Application
User can integrate chatbot at on any screen in application.Broadly it is divided into 2 sections * Public * Post Login
1. Public
Initialize the SDK
To invoke chat screen, create MFSDKProperties, MFSDKSessionProperties and then call the method showScreenWithBotID:fromViewController:withSessionProperties to present the chat screen. Please find below code sample.
AppDelegate.m
// Add this to the .h of your file
#import "ViewController.h"
#import <MFSDKMessagingKit/MFSDKMessagingKit.h>
@interface ViewController ()<MFSDKMessagingDelegate>
@end

// Add this to the .m of your file
@implementation ViewController
// Once the button is clicked, show the message screen -(IBAction)startChat:(id)sender
{
    MFSDKProperties *params = [[MFSDKProperties alloc] initWithDomain:@"<END_POINT_URL>"];
    [params addBot:@"<BOT_ID>" botName:@"<BOT_NAME>"];
    params.messagingDelegate = self;
    [[MFSDKMessagingManager sharedInstance] initWithProperties:params];

    MFSDKSessionProperties *sessionProperties = [[MFSDKSessionProperties alloc]init];
    sessionProperties.language = @"en";
    [[MFSDKMessagingManager sharedInstance] showScreenWithBotID:@"<BOT_ID>" fromViewController:self withSessionProperties:sessionProperties];
}

@end
Properties:
| Property | Description |
|---|---|
| BOT_ID | The unique ID for the bot. |
| BOT_NAME | The bot name to display on top of chat screen. |
| END_POINT_URL | The bot API URL. |
3. Compile and Run
Once above code is added we can build and run. On launch of chat screen, welcome message will be displayed.

4. Debugging
While running application you can check logs in the Console with identifier<MFSDKLog>.
2. Post Login
To process any query specific to user account, authentication is required. If such authentication details already available, it can be passed to Morfeus SDK as key-value pairs. While making request with server, Morfeus SDK sends the key-value pair in JSON request. If server can validate the details, then authentication will be maintained in Morfeus SDK.
Providing User/Session Information
You can pass set of key value pairs to the MFSDK using userInfo(NSDictionary) in MFSDKSessionProperties. In following example we are passing Customer ID, Session ID to MFSDK.
// Add this to the header of your file
#import "ViewController.h"
#import <MFSDKMessagingKit/MFSDKMessagingKit.h>

// Add this to the body
@implementation ViewController

// Once the button is clicked, show the message screen
-(void)startChat
{
     MFSDKSessionProperties *sessionProperties = [[MFSDKSessionProperties alloc]init];
 sessionProperties.userInfo = @{@"CUSTOMER_ID": @"<CUSTOMER_ID_VALUE>", @"SESSION_ID": @"<SESSION_ID_VALUE>", nil];
 [[MFSDKMessagingManager sharedInstance] showScreenWithBotID:@"<BOT_ID>" fromViewController:self withSessionProperties:sessionProperties];
}
@end
Properties:
| Property | Description |
|---|---|
| sessionProperties.userInfo | userInfo is a dictionary which will have user information for post login |
| SESSION_ID | session id to be passed by the project |
| CUSTOMER_ID | customer id to be passed by the project |
Error Codes
These are the basic error codes and their description. Error code message can be customised in MFLanguages.json file.
| Error Code | Description |
|---|---|
| MEMS1 | HTTP client error i.e. from 400 to 449 |
| MEMS2 | HTTP internal server error i.e. http 500 |
| MEMS3 | SSL handshake exception |
| MEMS4 | No internet connection |
| MEMS50 | Invalid server response, i.e. fail to parse response |
| MEMS51 | Invalid server response, i.e. empty message |
| MEMD1 | Fail to upload file |
| MEMD2 | Fail to download file |
| MEMV1 | Google speech API error |
Properties
Adding Voice Feature
MorfeusMessagingKit has an UI that accepts voice input and displays responses from server. This UI is designed to make the interaction voice friendly. To display the voice page set the screenToDisplay to display voice screen as shown below.
MFSDKSessionProperties *sessionProperties = [[MFSDKSessionProperties alloc]init];
sessionProperties.screenToDisplay = MFScreenVoice;//displays voice screen
params.googleVoiceKey = @"<SPEECH_API_KEY>";
[[MFSDKMessagingManager sharedInstance] showScreenWithBotID:@"<BOT_ID>" fromViewController:<VIEW_CONTROLLER> withSessionProperties:sessionProperties];
Below are the options available for screenToDisplay
| Property | Description |
|---|---|
| MFScreenMessageVoice | Displays both chat and voice screen, user can swipe left/right to navigate between them. |
| MFScreenVoice | Display only voice screen. |
| MFScreenMessage | Display only chat screen. |
Handling Push Notification
Morfeus SDK supports push notification and displays it to user.
- When Morfeus screen is on top, Morfeus SDK moves to appropriate morfeus screen. eg., if its a new message, it refreshes the chat screen
- When Morfeus screen is not on top, Morfeus SDK displays a tappable HUD in the top. If the HUD tapped, the appropriate morfeus screen is moved
To handle morfeus push notification, the app delegate should call the methods defined in MFSDKApplicationDelegate. These callbacks gives control to Morfeus SDK to handle the APNS when it is related to Morfeus and silently ignores when it’s not related to Morfeus.
A sample implementation for APNS is as described below.
1. Handling Apple Push Call Back
AppDelegate.m
- (void)application:(UIApplication *)app didRegisterForRemoteNotificationsWithDeviceToken:(NSData *)deviceToken
{
    [[MFSDKApplicationDelegate sharedAppDelegate] application:app didRegisterForRemoteNotificationsWithDeviceToken:deviceToken];
}
-(void)application:(UIApplication *)application didFailToRegisterForRemoteNotificationsWithError:(NSError *)error
{
    [[MFSDKApplicationDelegate sharedAppDelegate] application:application didFailToRegisterForRemoteNotificationsWithError:error];
}
- (void)userNotificationCenter:(UNUserNotificationCenter *)center willPresentNotification:(UNNotification *)notification withCompletionHandler:(void (^)(UNNotificationPresentationOptions options))completionHandler API_AVAILABLE(ios(10.0));
{
    [[MFSDKApplicationDelegate sharedAppDelegate] userNotificationCenter:center willPresentNotification:notification withCompletionHandler:completionHandler];
}

-(void)userNotificationCenter:(UNUserNotificationCenter *)center didReceiveNotificationResponse:(UNNotificationResponse *)response withCompletionHandler:(void (^)(void))completionHandler
API_AVAILABLE(ios(10.0)){

    [[MFSDKApplicationDelegate sharedAppDelegate] userNotificationCenter:center didReceiveNotificationResponse:response withCompletionHandler:completionHandler];
}
- (void)application:(UIApplication *)application didReceiveRemoteNotification:(NSDictionary *)userInfo
{
    [[MFSDKApplicationDelegate sharedAppDelegate]application:application didReceiveRemoteNotification:userInfo];
}

- (void)application:(UIApplication *)application didReceiveRemoteNotification:(NSDictionary *)userInfo fetchCompletionHandler:(void (^)(UIBackgroundFetchResult))completionHandler
{
    [[MFSDKApplicationDelegate sharedAppDelegate]application:application didReceiveRemoteNotification:userInfo fetchCompletionHandler:completionHandler];
}
2. Passing push data to Chat SDK
a) App in Kill State
When notification is received and app is opened by tapping on push notification then project must get the push data and pass that data to the bot when it invokes the bot screen.
A sample implementation is as described below.
-(IBAction)startChat:(id)sender
{
 MFSDKSessionProperties *sessionProperties = [[MFSDKSessionProperties alloc]init];
...
    if([(AppDelegate *)[[UIApplication sharedApplication] delegate] handleNotificationOnLaunch]){
        if([(AppDelegate *)[[UIApplication sharedApplication] delegate] userInfoDic]!=nil){
            if ([sender isKindOfClass:[NSDictionary class]]){
                NSDictionary *userInfo = (NSDictionary *)sender;
                sessionProperties.pushData = userInfo;
            }
        }
    }else{
        if ([sender isKindOfClass:[NSDictionary class]]){
            NSDictionary *userInfo = (NSDictionary *)sender;
            sessionProperties.pushData = userInfo;
        }
    }
...
...
}
b) App in Background State
When notification is received in background state and app is opened by tapping on push notification -
Case 1: Bot screen was already in view before going to background
In this case handling of push data will be automatically handled by delegate methods that project has called in AppDelegate.m.
Case 2: When bot screen is not in view before going to background
In this case similarly as "killed state" project side has to get the push data and invoke bot screen with the push data.
Note : Refer app in killed state for clarity on passing data.
c) App in Active State
Case 1: Bot screen was already in view
In this case handling of push data will be automatically handled by delegate methods that project has called in AppDelegate.m.
Case 2: When bot screen is not in view
In this case a heads-up will be shown on screen and when heads-up is tapped a callback is given to project team which has to be implemented to open bot by passing push data.
-(void)askTohandleOnScreenPushTapWithUserInfo:(NSDictionary*)userInfo
{    //invoke bot screen and pass push data that will be there in userInfo params of the method
    [self startChat:userInfo];
}
Note : Wherever project is handling/invoking bot screen there it has to set notification delegate to get the heads-up tap callback. Refer handling callback of headsup notification View (HUD) section.
[MFSDKNotificationKitManager sharedInstance].notificationDelegate = self;
3. Handling callback of Headsup Notification View (HUD)
Project needs to handle protocol methods to get the call back related to HUD. These are optional protocols but has to be handled to receive proper callback. Extend MFNotificationKitManagerDelegate in your class to implement the protocol methods.
@interface ViewController ()<MFNotificationKitManagerDelegate>
@end

@implementation ViewController
//somewhere set the delegate object for the protocol methods
[MFSDKNotificationKitManager sharedInstance].notificationDelegate = self;
// this method will be called when HUD is tapped
-(void)askTohandleOnScreenPushTapWithUserInfo:(NSDictionary*)userInfo;
Customising Message UI
Adding Custom Cards
Morfeus iOS SDK have set of default cards, which gets displayed in the chat screen based on server response. You can also add custom cards at project level and register them with Morfeus iOS SDK.
Custom cards are displayed, depending on server response. SDK checks "type" property in server response to display custom card. If "type" is "customTemplate" , SDK looks for registered custom card and display it. Each custom card can be uniquely identified through "templateName" property in response.
Creating custom card is very simple process, it require below 3 steps.
- Create Model
- Create View
- Register Custom Card
Once registered, on receiving the server response with "type" as "customTemplate" and "templateName" property, SDK calls the model to parse the response and the view files to display the custom cards.
1. Create model
Developer need to create model (.h & .m) that handles the parsing of server response.
Create a model that inherits from MFCardModel and implement the
CustomCardModel.h
#import <Foundation/Foundation.h>
#import <MFSDKMessagingKit/MFSDKMessagingKit.h>

@interface CustomCardModel : MFCardModel <MFCardModelDelegate>
@property(nonatomic,strong) NSDictionary *titleDict;
@end
CustomCardModel.m
@implementation CustomCardModel
-(void)updateCardModelFromMessageDictionary:(NSDictionary*)messageDictionary
{
    self.titleOneDict = [messageDictionary valueForKeyPath:@"content.title"];;
}
@end
2. Create View
Creating view is like standard iOS development. Developer need to create .xib, .h and .m.
Create a view that inherits from MFCardCell and implement the
CustomCardCell.h
#import <UIKit/UIKit.h>
#import <MFSDKMessagingKit/MFSDKMessagingKit.h>

@interface CustomCardCell : MFCardCell <MFCardCellDelegate>
@property(nonatomic,weak)IBOutlet UILabel *lblOne;
@end
CustomCardCell.m
#import "CustomCardCell.h"
#import "CustomCardModel.h"

@implementation CustomCardCell

-(void)updateUIWithCardModel:(id)cardModel
{
    CustomCardModel *model = cardModel;
    self.lblOne.text = model.titleOneDict[@"text"];
}

-(CGFloat)calculateRowHeightForCardModel:(id)cardModel
{
    CustomCardModel *model = cardModel;
    NSInteger cellHeight = <calculate_height_based_on_the_model>
    return cellHeight;
}
@end
Note: calculateRowHeightForCardModel method should return height considering the autolayout padding in the top, bottom and the cells width.
Add an xib to main project and name it e.g. CustomCardCell_IN.xib.
Provide action for UI component like the following in the card : (example)
-(void)performSomeAction:(id)sender
{
    MFThemeButton*customBtn = sender;
    MFButtonCardModel *cardModel = (MFButtonCardModel*)[self getCardModelForIndexpath:customBtn.componentIndexpath];
    MFComponent *cardComponent = cardModel.button[[customBtn.componentTag integerValue]];
    MFActionModel *model = [[MFActionModel alloc]initWithPayloadDict:[cardComponent getProperties] withParameters:[cardComponent getText]];
    [model performAction];
}
3. Register card
Call the registerTemplateMapping:forCardTemplate with the view and model details, wrapped in MFCardTemplateMapping object.
MFCardTemplateMapping *templateCustom = [MFCardTemplateMapping new];
templateCustom.incomingCellNibName = @"CustomCardCell_IN";
templateCustom.tvCellNibName = @"CustomCardCell";
templateCustom.tvCellModelName = @"CustomCardModel";
[[MFSDKMessagingManager sharedInstance] registerTemplateMapping:templateCustom forCardTemplate: @"externalCardTemplate"]
Now whenever "templateName" property as “externalCardTemplate” is recieved in server response, SDK will call the delegate methods implemented in CustomCardModel and CustomCardCell and the custom card will get displayed.
4. SDK Delegates
The model should implement the delegate
MFCardModelDelegate
@protocol MFCardModelDelegate <NSObject>
/**
 SDK will call this delegate with the server response as a dictionary parameter, so that the model can initialize its properties.
*/
-(void)updateCardModelFromMessageDictionary:(NSDictionary*)messageDictionary;
@end
The view should implement the delegate
MFCardCellDelegate
@protocol MFCardCellDelegate <NSObject>
/**
 SDK will call this delegate, only once when the cell is first time created. We can update fonts, color etc in this method, as they dont change when the cell is reused.
 */
-(void)updateStaticUIWithCardModel:(id)cardModel;

/**
 SDK will call this delegate, every time when the cell is about to be displayed in screen. We can update the label text, textView content, button text etc in this method, basically things that change when the cell is reused.
  */
-(void)updateUIWithCardModel:(id)cardModel;
/**
 SDK will call this delegate, every time when there is an image download in progress. We can update the image download progress in this method. If this method is not implemented, then updateUIWithCardModel: will  be called.
  */
-(void)updateImageWithCardModel:(id)cardModel;

/**
 SDK will call this delegate, to obtain the height needed to display the view.
  */
-(CGFloat)calculateRowHeightForCardModel:(id)cardModel;
@end
Customising Screen UI
Chat Screen UI Config
Developer can change style of chat screen by just changing few properties.These properties are available in MFUIConfig.json, please update properties as below.
1. Config File
MFUIConfig.json file -
MFUIConfig.json
{
    "screen": {
        "id": "chat",
        "body": {
            "style": {
                "backgroundImage": "",
                "backgroundColor": "#F6F6F6"
            }
        },
        "header": {
            "style": {
                "backgroundImage": "",
                "backgroundColor": "#FFFFFF",
                "statusBarTheme": "Dark"
            },
            "leftButtons": [{
                            "image": "back-navbar",
                            "action": "action_back",
                            }],
            "rightButtons": [{
                             "text": "",
                             "image": "logoutIcon",
                             "action": "action_logout",
                             "style": {
                                "textColor": "#1E4596"
                             }
                             }],
            "headerText": {
                "style": {
                    "textColor": "#2426A4",
                    "horizontalAlignment": "center"
                }
            },
            "subHeaderText": {
                "text": "",
                "style": {
                    "textColor": "#1E4596"
                }
            },
            "profileImage": {
                "image": "bot-default",
            },
            "statusView": {
                "icon": {
                    "image": ""
                },
                "title": {
                    "text": "SECURE LOGIN",
                    "style": {
                        "textColor": "#FFFFFF",
                    }
                },
                "subTitle": {
                    "style": {
                        "textColor": "#FFFFFF"
                    }
                },
                "style": {
                    "backgroundColor": "#44CFFF"
                }
            }
        },
        "footer": {
            "chatOverlay":"false",
            "inputView": {
                "style": {
                    "backgroundColor": "#FFFFFF"
                },
                "textInput": {
                    "placeholderText":"Type Something",
                    "style": {
                        "borderColor": "#2E33CD",
                        "borderWidth": "1",
                        "hintColor": "#B1B2E0",
                        "borderShape": "rounded",
                        "textColor": "#2E33CD",
                        "backgroundColor": "#ffffff"
                    }
                },
                "sendButton": {
                    "sendImage": "text-chat-normal",
                    "micImage": "voice-chat-normal"
                }
            },
            "toolBarView": {},
            "shortCutView": {
                "style": {
                    "backgroundColor": "#F6F6F6",
                    "button": {
                        "borderColor": "#ffffff",
                        "borderWidth": "0",
                        "borderShape": "rounded",
                        "textColor": "#2426A4",
                        "backgroundColor": "#ffffff",
                        "selectedBackgroundColor": "#44CFFF",
                        "selectedTextColor": "#ffffff"
                    }
                },
                "content": [{
                            "text": "Account Balance",
                            "imageName": "Account_sg",
                            "action": "action_send",
                            "payload": "What's my balance"
                            "isInternationalisation":true
                            },
                            {
                            "text": "Funds Transfer",
                            "imageName": "FundTransfer_sg",
                            "action": "action_send",
                            "payload": "Funds Transfer"
                            "isInternationalisation":true
                            },
                            {
                            "text": "Pay Bills",
                            "imageName": "Cardblock_sg",
                            "action": "action_send",
                            "payload": "Pay Bills"
                            "isInternationalisation":true
                            },]
            }
        },
        "subView": {},
        "initView": {
            "icon": {
                "image": "loading-empty-logo"
            },
            "loadingText": {
                "text": "Loading...",
                "style": {
                    "textColor": "#2426A4"
                }
            },
            "progressView": {
                "color": "#2426A4"
            }
        }
    }
}
2. Adding Config File
Add this file in your project structure like the following :
3. List of UI component
List of UI component displayed in chat screen. You can add, remove or change style of following available UI components.
| Component | Description |
|---|---|
| title | Set status bar title |
| textInput | textInput json-object represents the EditText view displayed in chat screen. |
| subtitle | Set status bar sub-title |
| subHeaderText | Display subtitle below title. |
| style | Change style of initialisation progress view. |
| statusView | statusView json-object represents the status-bar view shown below the Navigation bar. It’s can be used to show some status information to user such as last login time detail. |
statusView
| Property | Description |
|---|---|
| shortCutView.content | Set text and text color of suggestion text. |
| shortCutView | shortCutView json-object represents the list of suggestions to display above EditText. |
| sendButton | Set send button image. |
| rightButtons | Display button on right side of the Navigation Bar. For example logout button in right side of Navigation Bar. |
| progressView | Set progress bar color. |
| profileImage | Display profile picture with the title in Navigation Bar. |
| loadingText | Set loading text displayed in initialisation progress view |
| leftButtons | Display button on left side of the Navigation Bar. For example, displaying back navigation button in Navigation Bar. |
| inputView | inputView json-object represents the bottom text input area of chat screen. |
| initview | initView json-object represents the progress view displayed at the time initialisation of MFSDK. |
initView
| Property | Description |
|---|---|
| icon | Set status view icon image |
| icon | Set icon displayed in initialisation progress view |
| headerText | Display screen title in Navigation Bar. |
| header | header json-object represents the Navigation bar of chat screen |
Header
| Property | Description |
|---|---|
| footer | footer json-object represents the bottom input area of chat screen. It contains shortCutView and inputView. |
footer
| Property | Description |
|---|---|
| body | body json-object represents the chat content area of chat screen. |
List of UI properties
| Property | Description |
|---|---|
| image | Display image from drawable resource. Set drawable image name. |
| text | Set text. |
| textColor | Set text color(Hex color code). |
| backgroundColor | Set background color(Hex). |
| backgroundImage | Display background image from drawable resource. Set drawable image name. |
| placeholderText | Set hint text for EditText. |
| borderShape | Set view shape. Ex. rounded or rectangle. |
| micImage | Set drawable image name to display it as mic button. |
| sendImage | Set drawable image name to display it as send button. |
| borderColor | Set suggestion button border color. |
| borderWidth | Set suggestion button border width. |
| selectedBackgroundColor | Set suggestion button background color for selected state. |
| selectedTextColor | Set suggestion button text color for selected state. |
| color | Set color(Hex). |
| payload | Payload to send on click of the button. |
| statusBarColor | Change Android status bar color. |
| horizontalAlignment | Set view alignment to left, right or center. |
List of UI properties supported by UI components
| Property | Description |
|---|---|
| header.style | Prorperties are backgroundImage,backgroundColor,statusBarColor |
| leftButtons | Currently, you can display only single left button in Actionbar. You can change image of left button. Prorperties are image |
| rightButtons | Currently, you can display only single right button in Actionbar. You can set following properties for right button. Prorperties are image,text,textColor |
| headerText | Prorperties are text,textcolor,horizontalAlignment |
| subHeaderText | Prorperties are text,textColor |
| profileImage | Prorperties is image |
| StatusView | |
| title | text |
| title.style | textColor |
| subTitle.style | textColor |
| Body | |
| body.style | backgroundImage,backgroundColor |
| Footer | |
| inputView.style | backgroundColor |
| inputView.textInput | placeholderText |
| inputView.textInput.style | borderShape,backgroundColor,textColor |
| inputView.sendButton | sendImage,micImage |
| shortcutView.style | backgroundColor |
| shortcutView.style.button | borderColor, borderWidth, borderShape, textColor, backgroundColor,selectedBackgroundColor,selectedTextColor |
| shortcutView.content | text,image,payload |
| InitView | |
| icon | image |
| loadingText | text |
| style | textColor |
| progressView | color |
Voice Screen UI Config
Developer can change style of voice screen by just changing few properties.These properties are available in MFVoiceUIConfig.json, please update properties as below.
1. Config File
MFVoiceUIConfig.json file -
MFVoiceUIConfig.json
{
    "screen": {
        "id": "voice",
        "body": {
            "style": {
                "backgroundImage": "Home_Imge",
                "backgroundColor": "#F1F1F1"
            },
            "micImage":
            {
                "inprogress": "voiceMicbutton-InProgress",
                "idle": "voiceMicbutton-Idle",
                "active": "voiceMicbutton-Active",
            },
            "wave": {
                "style": {
                    "color": "#303BCA"
                }
            },
            "hintText": {
                "text": "What can I help you with?",
                "style": {
                    "textColor": "#1E4596"
                }
            },
            "suggestionText": {
                "text": "Sorry, I didn't quite catch that. Did you mean...",
                "rightImage": "siri-tick",
                "style": {
                    "textColor": "#000000"
                }
            },
            "voiceText": {
                "inprogress": "In progress",
                "idle": "Tap to Speak",
                "active": "Listening",
                "style": {
                    "textColor": "#1E4596"
                }
            },
            "backButton": {
                "image": "voiceClose"
            },
            "muteButton": {
                "unmuteImage": "UnMute",
                "muteImage": "Mute"
            }
        }
    }
}
2. Adding Config File:
Add this file in your project structure like the following :

3. List of UI component
List of UI component displayed in voice screen. You can add, remove or change style of following available UI components.
| Object | Description |
|---|---|
| style | Set basic style properties for voice screen such as background image or background color. |
| micImage | Set mic image displayed at bottom of voice screen. |
| wave | Set wave color displayed on top of mic image. |
| hintText | Set hint text and its style displayed at top of the screen. |
| suggestionText | When recognised speech to text is less accurate, voice screen displays list of text as possible recognised text. You can change the style of those suggestion texts. |
| voiceText | Set text and style for voice status text. Ex. Listening..., In-progress and Processing. |
| backButton | Set style for top left back button. |
| muteButton | Set style for top right mute button. |
List of UI properties
| Property | Description |
|---|---|
| backgroundImage | Display background image from drawable resource. Set drawable image name. |
| backgroundColor | Set background color(Hex). |
| image | Set drawable image name to display image from drawable resource. |
| color | Set color(Hex). |
| text | Set text. |
| rightImage | Set drawable image for suggestion view right image. |
| textColor | Set text color(Hex color code). |
| idle | Set text for idle state of voice service. |
| inprogress | Set text for in-progress state of voice service. |
| active | Set text for active state of voice service. |
| unmuteImage | Set unmute image displayed at top right corner of the voice screen. |
| muteImage | Set mute image displayed at top right corner of the voice screen. |
List of UI properties supported by UI components
| Property | Description |
|---|---|
| body.style | backgroundImage,backgroundColor. |
| micImage | image |
| wave.style | color |
| hintText.text | text |
| hintText.style.textColor | textColor |
| suggestionText | text,rightImage |
| suggestionText.style | textColor |
| voiceText | inprogress, idle, active |
| voiceText.style | textColor |
| backButton | image |
| muteButton | unmuteImage,muteImage |
Internationalisation Config
MFSDK's default language is 'en-US' (US English). To change default language pass supported language code to sessionProperties.language = @"
Note: While adding new language we need to make sure all string for new language in MFLanguages.json and language should be enabled on middleware.
1. Adding Config File:
Add this file in your project structure like the following :

2. Code snippet for adding internationalisation:
Code snippet
 MFSDKProperties *params = [[MFSDKProperties alloc] initWithDomain:@"<BOT_URL>"];
 [params addBot:@"<BOT_ID>" botName:@"<BOT_NAME"];

 params.messagingDelegate = self;
 params.isSupportMultiLanguage = YES;

 MFSDKSessionProperties *sessionProperties = [[MFSDKSessionProperties alloc]init];
    //set screen type both message and voice
 sessionProperties.screenToDisplay = MFScreenMessageVoice;
 sessionProperties.language = @"th-TH";

 [[MFSDKMessagingManager sharedInstance] showScreenWithBotID:@"<BOT_ID>" fromViewController:self withSessionProperties:sessionProperties];
Language codes are same as used in for iOS developer guides given by apple.
3. Config File:
MFLanguages.json file -
MFLanguages.json
[
    {
        "error_code": {
            "MEMD1": "Error in uploading file - MEMD1",
            "MEMD2": "Error in downloading file - MEMD2",
            "MEMS1": "Sorry error in processing your request - MEMS1",
            "MEMS2": "Sorry error in processing your request - MEMS2",
            "MEMS3": "Sorry error in processing your request - MEMS3",
            "MEMS4": "No internet connection. Make sure wifi or cellular data is turned on, then try again - MEMS4",
            "MEMV1": "Sorry error in processing your request - MEMV1",
            "MEMS50": "Sorry error in processing your request - MEMS50",
            "MEMS51": "Sorry error in processing your request - MEMS51"
        },
        "lang": "en-IN",
        "resource": {
            "Account Balance": "Account Balance",
            "Alert": "Alert",
            "Are you sure you want to logout?": "Are you sure you want to logout?",
            "BALANCE": "BALANCE",
            "BILL PAYMENT": "BILL PAYMENT",
            "Block Cards": "Block Cards",
            "Camera": "Camera",
            "Cancel": "Cancel",
            "Choose": "Choose",
            "Choose image from": "Choose image from",
            "Close": "Close",
            "Did you mean?": "Did you mean?",
            "Enter Username": "Enter Username",
            "Fail to initialize sdk. Something went wrong, please try again.": "Fail to initialize sdk. Something went wrong, please try again.",
            "Fail to login, please try again later.": "Fail to login, please try again later.",
            "FUNDS TRANSFER": "FUNDS TRANSFER",
            "Funds Transfer": "Funds Transfer",
            "Home": "Home",
            "Initialization Fail": "Initialization Fail",
            "Loading": "Loading",
            "Loading...": "Loading...",
            "Login": "Login",
            "Login Successful.": "Login Successful.",
            "Login...": "Login...",
            "Logout": "Logout",
            "Morfeus": "Morfeus",
            "move and scale": "move and scale",
            "No internet connection. Make sure wifi or cellular data is turned on, then try again.": "No internet connection. Make sure wifi or cellular data is turned on, then try again.",
            "Online": "Online",
            "Password": "Password",
            "Photo library": "Photo library",
            "Please enter password": "Please enter password",
            "Please fill all the digits": "Please fill all the digits",
            "RECHARGE": "RECHARGE",
            "Recharge": "Recharge",
            "Retake": "Retake",
            "Retry": "Retry",
            "Secured Login": "Secured Login",
            "Send": "Send",
            "Type here...": "Type here...",
            "Use Photo": "Use Photo",
            "Username": "Username",
            "UserName": "UserName",
            "Waiting for network": "Waiting for network",
            "What can I help you with?": "What can I help you with?",
            "You have been logged out successfully. Thanks for using virtual bank assistant.": "You have been logged out successfully. Thanks for using virtual bank assistant.",
            "You have selected Google speech, do you want to proceed?": "You have selected Google speech, do you want to proceed?",
            "You have selected Nuance, do you want to proceed?": "You have selected Nuance, do you want to proceed?",
            "You're Logged Out": "You're Logged Out"
        }
    },
    {
        "error_code": {
            "MEMD1": "Error in uploading file - MEMD1",
            "MEMD2": "Error in downloading file - MEMD2",
            "MEMS1": "Sorry error in processing your request - MEMS1",
            "MEMS2": "Sorry error in processing your request - MEMS2",
            "MEMS3": "Sorry error in processing your request - MEMS2",
            "MEMS4": "Sorry error in processing your request - MEMS4",
            "MEMV1": "Sorry error in processing your request - MEMV1",
            "MEMS50": "Sorry error in processing your request - MEMS50",
            "MEMS51": "Sorry error in processing your request - MEMS51"
        },
        "lang": "th-TH",
        "resource": {
            "Account Balance": "udisfgudsfiuods",
            "Account Summary": "vbnvvnn",
            "Alert": "\u0e40\u0e15\u0e37\u0e2d\u0e19\u0e20\u0e31\u0e22",
            "Are you sure you want to logout?": "\u0e04\u0e38\u0e13\u0e41\u0e19\u0e48\u0e43\u0e08\u0e27\u0e48\u0e32\u0e04\u0e38\u0e13\u0e15\u0e49\u0e2d\u0e07\u0e01\u0e32\u0e23\u0e17\u0e35\u0e48\u0e08\u0e30\u0e2d\u0e2d\u0e01\u0e08\u0e32\u0e01\u0e23\u0e30\u0e1a\u0e1a?",
            "BALANCE": "\u0e2a\u0e21\u0e14\u0e38\u0e25",
            "BILL PAYMENT": "\u0e08\u0e48\u0e32\u0e22\u0e1a\u0e34\u0e25",
            "Block Cards": "\u0e1a\u0e25\u0e47\u0e2d\u0e01\u0e01\u0e32\u0e23\u0e4c\u0e14",
            "Camera": "\u0e01\u0e25\u0e49\u0e2d\u0e07",
            "Cancel": "\u0e22\u0e01\u0e40\u0e25\u0e34\u0e01",
            "Choose": "\u0e40\u0e25\u0e37\u0e2d\u0e01",
            "Choose image from": "\u0e40\u0e25\u0e37\u0e2d\u0e01\u0e20\u0e32\u0e1e\u0e08\u0e32\u0e01",
            "Close": "\u0e1b\u0e34\u0e14",
            "Did you mean?": "\u0e04\u0e38\u0e13\u0e2b\u0e21\u0e32\u0e22\u0e16\u0e36\u0e07\u0e2d\u0e30\u0e44\u0e23?",
            "Enter Username": "\u0e1b\u0e49\u0e2d\u0e19\u0e0a\u0e37\u0e48\u0e2d\u0e1c\u0e39\u0e49\u0e43\u0e0a\u0e49",
            "Fail to initialize sdk. Something went wrong, please try again.": "\u0e44\u0e21\u0e48\u0e2a\u0e32\u0e21\u0e32\u0e23\u0e16\u0e40\u0e23\u0e34\u0e48\u0e21\u0e15\u0e49\u0e19 SDK \u0e44\u0e14\u0e49 \u0e40\u0e01\u0e34\u0e14\u0e02\u0e49\u0e2d\u0e1c\u0e34\u0e14\u0e1e\u0e25\u0e32\u0e14\u0e42\u0e1b\u0e23\u0e14\u0e25\u0e2d\u0e07\u0e2d\u0e35\u0e01\u0e04\u0e23\u0e31\u0e49\u0e07",
            "Fail to login, please try again later.": "\u0e44\u0e21\u0e48\u0e2a\u0e32\u0e21\u0e32\u0e23\u0e16\u0e40\u0e02\u0e49\u0e32\u0e2a\u0e39\u0e48\u0e23\u0e30\u0e1a\u0e1a\u0e42\u0e1b\u0e23\u0e14\u0e25\u0e2d\u0e07\u0e2d\u0e35\u0e01\u0e04\u0e23\u0e31\u0e49\u0e07\u0e43\u0e19\u0e20\u0e32\u0e22\u0e2b\u0e25\u0e31\u0e07",
            "FUNDS TRANSFER": "\u0e01\u0e32\u0e23\u0e42\u0e2d\u0e19\u0e40\u0e07\u0e34\u0e19",
            "Funds Transfer": "\u0e01\u0e32\u0e23\u0e42\u0e2d\u0e19\u0e40\u0e07\u0e34\u0e19",
            "Home": "\u0e1a\u0e49\u0e32\u0e19",
            "Initialization Fail": "\u0e01\u0e32\u0e23\u0e40\u0e23\u0e34\u0e48\u0e21\u0e15\u0e49\u0e19\u0e25\u0e49\u0e21\u0e40\u0e2b\u0e25\u0e27",
            "Loading": "\u0e01\u0e33\u0e25\u0e31\u0e07\u0e42\u0e2b\u0e25\u0e14",
            "Loading...": "\u0e01\u0e33\u0e25\u0e31\u0e07\u0e42\u0e2b\u0e25\u0e14...",
            "Login": "\u0e40\u0e02\u0e49\u0e32\u0e2a\u0e39\u0e48\u0e23\u0e30\u0e1a\u0e1a",
            "Login Successful.": "\u0e40\u0e02\u0e49\u0e32\u0e2a\u0e39\u0e48\u0e23\u0e30\u0e1a\u0e1a\u0e2a\u0e33\u0e40\u0e23\u0e47\u0e08\u0e41\u0e25\u0e49\u0e27",
            "Login...": "\u0e40\u0e02\u0e49\u0e32\u0e2a\u0e39\u0e48\u0e23\u0e30\u0e1a\u0e1a...",
            "Logout": "\u0e2d\u0e2d\u0e01\u0e08\u0e32\u0e01\u0e23\u0e30\u0e1a\u0e1a",
            "Morfeus": "Morfeus",
            "move and scale": "\u0e22\u0e49\u0e32\u0e22\u0e41\u0e25\u0e30\u0e2a\u0e40\u0e01\u0e25",
            "No internet connection. Make sure wifi or cellular data is turned on, then try again.": "\u0e44\u0e21\u0e48\u0e21\u0e35\u0e01\u0e32\u0e23\u0e40\u0e0a\u0e37\u0e48\u0e2d\u0e21\u0e15\u0e48\u0e2d\u0e2d\u0e34\u0e19\u0e40\u0e17\u0e2d\u0e23\u0e4c\u0e40\u0e19\u0e47\u0e15. \u0e15\u0e23\u0e27\u0e08\u0e2a\u0e2d\u0e1a\u0e27\u0e48\u0e32\u0e44\u0e14\u0e49\u0e40\u0e1b\u0e34\u0e14\u0e43\u0e0a\u0e49\u0e07\u0e32\u0e19 WiFi \u0e2b\u0e23\u0e37\u0e2d\u0e02\u0e49\u0e2d\u0e21\u0e39\u0e25\u0e21\u0e37\u0e2d\u0e16\u0e37\u0e2d\u0e41\u0e25\u0e49\u0e27\u0e25\u0e2d\u0e07\u0e2d\u0e35\u0e01\u0e04\u0e23\u0e31\u0e49\u0e07",
            "Online": "\u0e2a\u0e27\u0e31\u0e2a\u0e14\u0e35",
            "Password": "\u0e23\u0e2b\u0e31\u0e2a\u0e1c\u0e48\u0e32\u0e19",
            "Photo library": "\u0e44\u0e25\u0e1a\u0e23\u0e32\u0e23\u0e35\u0e23\u0e39\u0e1b\u0e20\u0e32\u0e1e",
            "Please enter password": "\u0e42\u0e1b\u0e23\u0e14\u0e1b\u0e49\u0e2d\u0e19\u0e23\u0e2b\u0e31\u0e2a\u0e1c\u0e48\u0e32\u0e19",
            "Please fill all the digits": "\u0e42\u0e1b\u0e23\u0e14\u0e01\u0e23\u0e2d\u0e01\u0e15\u0e31\u0e27\u0e40\u0e25\u0e02\u0e17\u0e31\u0e49\u0e07\u0e2b\u0e21\u0e14",
            "RECHARGE": "\u0e40\u0e15\u0e34\u0e21\u0e40\u0e07\u0e34\u0e19",
            "Recharge": "\u0e40\u0e15\u0e34\u0e21\u0e40\u0e07\u0e34\u0e19",
            "Retake": "\u0e40\u0e2d\u0e32\u0e04\u0e37\u0e19",
            "Retry": "\u0e25\u0e2d\u0e07\u0e2d\u0e35\u0e01\u0e04\u0e23\u0e31\u0e49\u0e07",
            "Secured Login": "\u0e40\u0e02\u0e49\u0e32\u0e2a\u0e39\u0e48\u0e23\u0e30\u0e1a\u0e1a",
            "Send": "\u0e2a\u0e48\u0e07",
            "Type here...": "\u0e1e\u0e34\u0e21\u0e1e\u0e4c\u0e17\u0e35\u0e48\u0e19\u0e35\u0e48...",
            "Use Photo": "\u0e43\u0e0a\u0e49\u0e23\u0e39\u0e1b\u0e20\u0e32\u0e1e",
            "Username": "\u0e0a\u0e37\u0e48\u0e2d\u0e1c\u0e39\u0e49\u0e43\u0e0a\u0e49",
            "UserName": "\u0e0a\u0e37\u0e48\u0e2d\u0e1c\u0e39\u0e49\u0e43\u0e0a\u0e49",
            "Waiting for network": "\u0e01\u0e33\u0e25\u0e31\u0e07\u0e23\u0e2d\u0e40\u0e04\u0e23\u0e37\u0e2d\u0e02\u0e48\u0e32\u0e22",
            "What can i help you with?": "\u0e2d\u0e30\u0e44\u0e23\u0e17\u0e35\u0e48\u0e09\u0e31\u0e19\u0e2a\u0e32\u0e21\u0e32\u0e23\u0e16\u0e0a\u0e48\u0e27\u0e22\u0e04\u0e38\u0e13\u0e44\u0e14\u0e49?",
            "You have been logged out successfully. Thanks for using virtual bank assistant.": "\u0e04\u0e38\u0e13\u0e2d\u0e2d\u0e01\u0e08\u0e32\u0e01\u0e23\u0e30\u0e1a\u0e1a\u0e40\u0e23\u0e35\u0e22\u0e1a\u0e23\u0e49\u0e2d\u0e22\u0e41\u0e25\u0e49\u0e27 \u0e02\u0e2d\u0e02\u0e2d\u0e1a\u0e04\u0e38\u0e13\u0e17\u0e35\u0e48\u0e43\u0e0a\u0e49\u0e1c\u0e39\u0e49\u0e0a\u0e48\u0e27\u0e22\u0e18\u0e19\u0e32\u0e04\u0e32\u0e23\u0e40\u0e2a\u0e21\u0e37\u0e2d\u0e19\u0e08\u0e23\u0e34\u0e07",
            "You have selected Google speech, do you want to proceed?": "\u0e04\u0e38\u0e13\u0e40\u0e25\u0e37\u0e2d\u0e01\u0e04\u0e33\u0e1e\u0e39\u0e14\u0e02\u0e2d\u0e07 Google \u0e41\u0e25\u0e49\u0e27\u0e04\u0e38\u0e13\u0e15\u0e49\u0e2d\u0e07\u0e01\u0e32\u0e23\u0e14\u0e33\u0e40\u0e19\u0e34\u0e19\u0e01\u0e32\u0e23\u0e15\u0e48\u0e2d\u0e2b\u0e23\u0e37\u0e2d\u0e44\u0e21\u0e48?",
            "You have selected Nuance, do you want to proceed?": "\u0e04\u0e38\u0e13\u0e40\u0e25\u0e37\u0e2d\u0e01 Nuance \u0e41\u0e25\u0e49\u0e27\u0e04\u0e38\u0e13\u0e15\u0e49\u0e2d\u0e07\u0e01\u0e32\u0e23\u0e14\u0e33\u0e40\u0e19\u0e34\u0e19\u0e01\u0e32\u0e23\u0e15\u0e48\u0e2d\u0e2b\u0e23\u0e37\u0e2d\u0e44\u0e21\u0e48?",
            "You're Logged Out": "\u0e04\u0e38\u0e13\u0e2d\u0e2d\u0e01\u0e08\u0e32\u0e01\u0e23\u0e30\u0e1a\u0e1a\u0e41\u0e25\u0e49\u0e27"
        }
    }
]
Security Features
1. SSL Pinning
MFSDK has a built-in support for SSL (Secure Sockets Layer), to enable encrypted communication between client and server. MFSDK doesn't trust SSL certificates stored in device's trust store. Instead, it only trusts the certificates by checking its SSL Hash keys using TrustKit SSL pinning validation technique.
Please check following code snippet to enable SSL pinning.
MFSDKProperties *params = [[MFSDKProperties alloc]initWithDomain:self.defaultBaseURL];

[params enableSSL:YES sslPins:@[SSL_HASH_KEY_1,SSL_HASH_KEY_2]];
Here we can pass SSL Hash key of certificate for ssl pinning validation
Note: Please make sure SSL Hash key which you are providing is associated with Bot end-point URL.
Below is the snapshot when SSL is enabled, but there is a failure in validating secure connection.

2. Rooted Device Check
MFSDK has a built-in support for rooted device check.If enabled,application will not work on rooted device.
Please check following code snippet to enable rooted device check.
MFSDKProperties *params = [[MFSDKProperties alloc]initWithDomain:self.defaultBaseURL];

[params enableCheck:YES/NO];
3. Content Security in Minimise State
MFSDK has a built-in support for hiding content in minimise state. If enabled, user will not able to see content in minimise case. The contents will be blurred as shown in snapshot below.
Please check following code snippet to enable content security in minimise state.
MFSDKProperties *params = [[MFSDKProperties alloc]initWithDomain:self.defaultBaseURL];
..
params.hideContentInBackground = YES;
..
[[MFSDKMessagingManager sharedInstance] initWithProperties:sdkProperties];

4. Inactivity Timeout
In a case when MFSDK is running and the user is not using it actively, MFSDK automatically log out the user from current chat session after 5 min.
You can change this inactivity timeout limit using the property inactivityTimeout in MFSDKProperties. The unit of measurement passed is seconds
Please check following code snippet to set inactivity timeout limit.
MFSDKProperties *params = [[MFSDKProperties alloc]initWithDomain:self.defaultBaseURL];
..
params.inactivityTimeout = 15*60;//15 minutes
..
[[MFSDKMessagingManager sharedInstance] initWithProperties:sdkProperties];
Morfeus Android Native SDK
Key features
Morfeus Native SDK is a lightweight messaging sdk which can be embedded easily in native mobile apps with minimal integration effort. Once integrated it allows end-users to converse with the Conversational AI /bot on the Active AI platform on both text and voice. The SDK has out the box support for multiple UX templates such as List and Carousel and supports extensive customization for both UX and functionality. The SDK has inbuilt support for banking grade security features.
Supported Components
Current SDK support below inbuilt message templates
|Splash|Welcome|Cards|Carousal|
|-|-|-|
| |
| |
|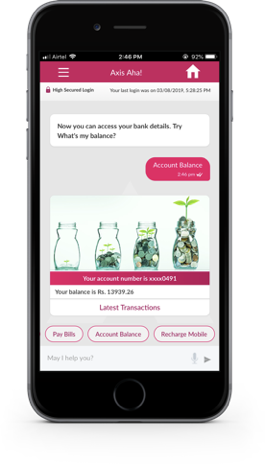 |
|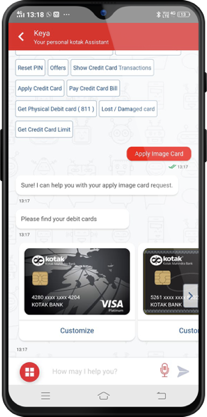 |
|
|Suggestion|Quick Replies|List|Webview|
|-|-|-|
|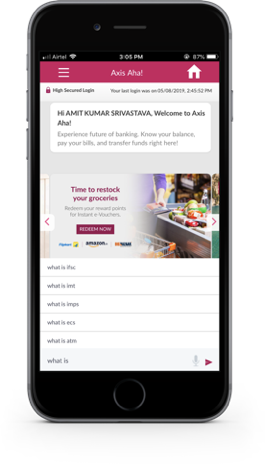 |
|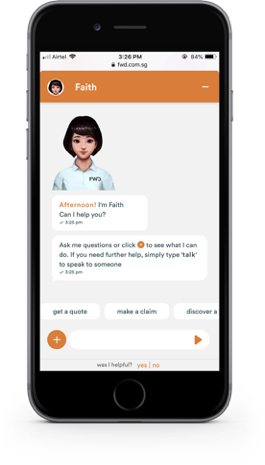 |
|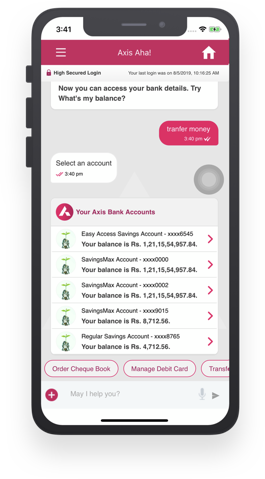 |
|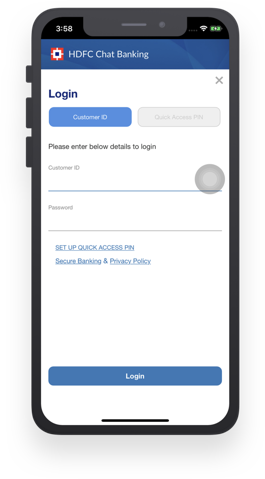 |
|
Device Support
All android phones with OS support 4.4.0 and above.
Setup and how to build
1. Pre Requisites
- Android Studio 2.3+
2. Install and configure dependencies
Installing SDK is a straightforward process if you're familiar with using external libraries in your project.
To install Android SDK using Gradle add following lines to your project-level build.gradle file. Morfeus Android SDK is published to a private maven repository. To install SDK you have to provide an actual username and password. Replace your_username and your_password with credentials provided to you.
project/build.gradle
buildscript {
    dependencies {
        classpath 'com.google.gms:google-services:4.3.3'
    }
}

allprojects {
   repositories {
     maven {
        url "http://repo.active.ai/artifactory/resources/android-sdk-release"
        credentials {
            username = "your_username"
            password = "your_password"
        }
     }
   }
}
Add following lines to your app-level build.gradle file.
app/build.gradle
dependencies {
    implementation 'com.morfeus.android:MFSDKMessaging:1.0.4'
    implementation 'com.google.android.gms:play-services:12.0.1'
    implementation 'com.android.support:cardview-v7:25.0.0'
    implementation 'com.android.support:recyclerview-v7:25.0.0'
    implementation 'com.android.support:design:25.0.0'
    implementation 'com.android.support:appcompat-v7:25.0.0'
    implementation 'com.google.guava:guava:24.1-jre'
    implementation 'com.google.code.gson:gson:2.8.6'
    implementation 'org.greenrobot:eventbus:3.0.0'
}
Note: If you get 64k method limit exception during compile time then add following code into your app-level build.gradle file.
app/build.gradle
android {

    defaultConfig {
        multiDexEnabled true
    }
}

dependencies {
    implementation 'com.android.support:multidex:1.0.3'
}
Integration to Application
User can integrate chatbot at on any screen in application.Broadly it is divided into 2 sections * Public * Post Login
1. Public
Initialize the SDK
To initialize Morfeus SDK pass in BOT_ID, BOT_NAME and END_POINT_URL to MFSDKMessagingManagerKit. You must initialize Morfeus SDK once across the entire application.
Add the following lines to your Activity/Application where you want to initialize the Morfeus SDK. onCreate() of Application class is the best place to initialize. Morfeus SDK will throw MFSDKInitializationException if it's already initialized.
2. Post Login
~Coming Soon
3. Intialize
try {
    // Properties to pass before initializing sdk
    MFSDKProperties properties = new MFSDKProperties
                    .Builder(END_POINT_URL)
                    .addBot(BOT_ID, BOT_NAME)
                    .setSpeechAPIKey(SPEECH_API_KEY)
                    .build();

    // sMFSDK is public static field variable
    sMFSDK = new MFSDKMessagingManagerKit
                    .Builder(activityContext)
                    .setSdkProperties(properties)
                    .build();

    // Initialize sdk
    sMFSDK.initWithProperties();

} catch (MFSDKInitializationException e) {
    Log.e(TAG, "Failed to initializing MFSDK", e);
}
Properties
| Property | Description |
|---|---|
| BOT_ID | The unique ID for the bot. |
| BOT_NAME | The bot name to display on top of chat screen. |
| END_POINT_URL | The bot API URL. |
4. Invoke Chat Screen
To invoke chat screen call showScreen() method of MFSDKMessagingManagerKit. Here, sMSDK is instance variable of MFSDKMessagingManagerKit.
showScreen
// Open chat screen
sMFSDK.showScreen(activityContext, BOT_ID);
If MFSDK is already initialized and you don't have a reference for MFSDKMessagingManagerKit instance. You can get `MFSDKMessagingManagerKit `instance by calling `MFSDKMessagingManagerKit.getInstance(). Please check following code snippet. `
try {
    // Get SDK instance
    MFSDKMessagingManager mfsdk = MFSDKMessagingManagerKit.getInstance();

    // Open chat screen
    mfsdk.showScreen(activityContext, BOT_ID);

} catch (Exception e) {
    // Throws exception if MFSDK not initialised.
}
5. Compile and Run
Once the above code is added you can build and run your application. On the launch of the chat screen, a welcome message will be displayed.

6. Debugging
While running the application you can check logs in the Console with identifier <MFSDKLog>.
2. Post Login
To process any query specific to a user account, user authentication is required. If you have already authenticated the user and having SESSION_ID and CUSTOMER_ID, you can set those details in UserInfo of MFSDKSessionProperties.
Check the following code snippet as an example.
HashMap<String, String> userInfo = new HashMap<>();
userInfo.put("CUSTOMER_ID", customerId);
userInfo.put("SESSION_ID", sessionId);

MFSDKSessionProperties sessionProperties = new MFSDKSessionProperties
                        .Builder()
                        .setUserInfo(userInfo)
                        .build();

sMFSdk.showScreen(activityContext, BOT_ID, sessionProperties);
Properties:
| Class | Description |
|---|---|
| MFSDKSessionProperties | Builder used to pass session properties from Application to Morfeus SDK. |
| Property | Description |
|---|---|
| sessionProperties.userInfo | userInfo is a dictionary which will have user information for post login |
| SESSION_ID | session id to be passed by the project |
| CUSTOMER_ID | customer id to be passed by the project |
Error Codes
| Error Code | Description |
|---|---|
| MEMS1 | HTTP client error i.e. from 400 to 449 |
| MEMS2 | HTTP internal server error i.e. http 500 |
| MEMS3 | SSL handshake exception |
| MEMS4 | No internet connection |
| MEMS50 | Invalid server response, i.e. fail to parse response |
| MEMS51 | Invalid server response, i.e. empty message |
| MEMD1 | Fail to upload file |
| MEMD2 | Fail to download file |
| MEMV1 | Google speech API error |
Properties
Adding Voice Feature
Morfeus SDK has a UI that accepts voice input and displays responses from server. This UI is designed to make the interaction voice friendly.
If you haven’t added required dependencies for voice than please add following dependencies in your project’s build.gradle file.
app/build.gradle
dependencies {
   …

   implementation 'io.grpc:grpc-okhttp:1.13.1'
   implementation 'io.grpc:grpc-protobuf-lite:1.13.1'
   implementation 'io.grpc:grpc-stub:1.13.1'
   implementation 'io.grpc:grpc-android:1.13.1'
   implementation 'javax.annotation:javax.annotation-api:1.2'

   implementation('com.google.auth:google-auth-library-oauth2-http:0.7.0') {
       exclude module: 'httpclient'
   }
   ...
}

repositories {
   flatDir {
       dirs 'libs'
   }
}
Call setSpeechAPIKey(String apiKey) method of MFSDKProperties builder to pass the speech API key.
try {
    // Set speech API key
    MFSDKProperties properties = new MFSDKProperties
                    .Builder(END_POINT_URL)
                    …
                    .setSpeechAPIKey("YourSpeechAPIKey")
                    …
                    .build();

   } catch (MFSDKInitializationException e) {
    Log.e("MFSDK", e.getMessage());
}
To display the voice page set the screenToDisplay to display voice screen as shown below.
MFSDKSessionProperties sessionProperties = new MFSDKSessionProperties
      .Builder()
      // Set `MFScreenMessageVoice` to `screenToDispaly()` to display both chat and voice screen,
      .setScreenToDisplay(MFSDKSessionProperties.MFScreen.MFScreenMessageVoice)
      .build();


 sMFSDK.showScreen(context, "BOT_ID", sessionProperties);
Below are the options available for screenToDisplay
| Property | Description |
|---|---|
| MFScreenMessageVoice | Displays both chat and voice screen, user can swipe left/right to navigate between them. |
| MFScreenVoice | Display only voice screen. |
| MFScreenMessage | Display only chat screen. |
Adding Push Notification
Morfeus SDK supports push notification and displays it to the user. Morfeus SDK handles push notification click events in two different ways.
- When Morfeus SDK screen is on top of the activity stack, it will handle push notification click events and display a message to the user.
- When Morfeus SDK screen isn't on top of the activity stack, it will give you a callback to handle that click event.
1. Configure dependencies
Add following lines to your app-level build.gradle file.
app/build.gradle
...
apply plugin: 'com.google.gms.google-services'
dependencies {
    ...
    // MFNotification
    implementation "com.morfeus.android:MFNotification:0.1.0"

    // Firebase Dependencies
    implementation 'com.google.firebase:firebase-core:16.0.5'
    implementation 'com.google.firebase:firebase-messaging:17.3.4'
    ...
}
2. Binding MFNotification to MFSDK
To bind Notification SDK with MessagingKit, you need to add a notification interceptor to MessagingKit. For adding interceptor to MessagingKit, use below code snippets.
private static MFSDKMessagingManagerKit sMFSDK;
MFSDKProperties sdkProperties = new MFSDKProperties
       .Builder(BOT_URL)
       .addBot(BOT_ID, BOT_NAME)
       . . .
       .build();

// MFNotificationInterceptor
MFNotificationInterceptor interceptor = new MFNotificationInterceptor();
interceptor.registerNotificationListener(applicationContext);


    sMFSDK = new MFSDKMessagingManagerKit
                   .Builder(applicationContext)
                   .setSdkProperties(sdkProperties)
                   .build();

// Adding properties to MFSDKMessagingManagerKit
   sMFSDK.addMFNotificationInterceptor(interceptor);
   sMFSDK.initWithProperties();
3. Initialize MFNotification
For initializing MFNotification, Add the following lines to your Activity/Application where you want to initialize the MFNotification. onCreate() of Application class is the best place to initialize.
Note: MFNotification should be initialized before MessagingKit
MFNotification.create(context).init();
4. Enable to display Notification
To display a notification, when notification trigger. To do that you just need to add setDisplayOnScreenNotification properties to MFNotification. In setDisplayOnScreenNotification you need to pass Notification as a parameter. For reference check the below code snippets
/**
* @param option    The name of the notification option.
* enum OnScreenNotificationOption { Notification, None }
*/
MFNotification.create(context).setDisplayOnScreenNotification(
           MFNotification.OnScreenNotificationOption.Notification)
       .init();
If you don’t want to show a notification when the app is in the foreground. In this case, you can pass MFNotification.OnScreenNotification.None to ignore notification pop - up.
5. Set Notification Handler/Callback
To receive notification callback, you just need to add one more property setNotificationHandler() to the MFNotification.
onNotificationReceived() method will call when notification received but notification is ignored to display.
_onNotificationTapped() method will call when notification tapped._
MFNotification.create(context)
   .setNotificationHandler(new MFNotification.NotificationHandler() {
         @Override
         public void onNotificationReceived(NotificationData nd) {

         }
         @Override
         public void onNotificationTapped(NotificationData nd) {

         }})
    . . .
    .init();
6. App in Background/Kill State
For receiving Notification Data when the app is in the background or in kill state. You need to add intent-filter in your activity of your AndroidManifest.xml
For reference, please have a look at below code snippet.
AndroidManifest.xml
<application>

   ....

   <activity android:name=".MainActivity">
      <intent-filter>
         <action android:name="android.intent.action.MAIN" />
         <category android:name="android.intent.category.LAUNCHER" />
      </intent-filter>
      <intent-filter>
         <action android:name="com.morfeus.android.push.MFNOTIFICATION" />
         <category android:name="android.intent.category.DEFAULT" />
      </intent-filter>
   </activity>
</application>
In case of background or killed state, notification is delivered to the device’s system tray, and the data payload is delivered in the extras of the intent of your launcher Activity.
private NotificationData notificationData;
if (getIntent().getExtras() != null){
     notificationData = getIntent().getParcelableExtra(
                                   MFNotification.EXTRA_NOTIFICATION_DATA);
}
After getting NotificationData, There are two case of passing notification data are mentioned below:
Case-1: Bot is not opened yet
In this case notification data will pass through the customer info.
HashMap<String, String> userInfo = new HashMap<>();

if(notificationData != null) {
  HashMap<String, String> notificationDataHM = new HashMap<>();
  notificationDataHM.put("title", notificationData.getTitle());
  notificationDataHM.put("body", notificationData.getBody());
  notificationDataHM.put(
          "notificationId",notificationData.getNotificationId());
  notificationDataHM.put(
          "notificationType",   notificationData.getNotificationType());

  userInfo.putAll(notificationDataHM);
}

MFSDKSessionProperties sessionProperties = new MFSDKSessionProperties
                        .Builder()
                        .setUserInfo(userInfo)
                        .build();

sMFSdk.showScreen(activityContext, BOT_ID, sessionProperties);
This scenario can happen in 2 use cases
- Application is not opened and user clicked on received notification in notification center
- Application is opened but not on chatbot screen and user clicked on received notification
Case-2: Bot is active screen, and user minimised the application
In this case notification data will pass through the MessagingKit properties
Please have a look at passing notification data. In this, you just need to add one property of MFSDKMessagingManager.
private static MFSDKMessagingManagerKit sMFSDK;

public static void setNotifiationData(NotificationData notificationData) {
   if(notificationData != null){
       if(sMFSdk != null){
           sMFSdk.setNotificationData(notificationData);
       }
   }
}
Customising Message UI
Adding Custom Cards.
Morfeus SDK comes with the set of default cards.Which are used to display a message to the user. Morfeus SDK also allows you to display your own custom card. For any card, Morfeus SDK looks for four things TemplateView, TemplateViewHolder TemplateModel and Template ID.
Here is a high level overview of what you need to know to get started.
In oder to create your own custom card follow these basic five step process
- Create xml layout for custom template
- Create custom template view class extending TemplateView.
- Create view holder for your custom template
- Create model for your custom template
- Register your custom template with MFSDK
Step 1: Create custom template layout.xml
custom_templatview_layout.xml
<RelativeLayout xmlns:android="http://schemas.android.com/apk/res/android"
   android:layout_width="match_parent"
   android:layout_height="match_parent" >

   <TextView
      android:id="@+id/tv_text"
      android:layout_width="wrap_content"
      android:layout_height="wrap_content"/>

</RelativeLayout>
Step 2: Create custom template view and its view-holder
TemplateView class is responsible for inflating template layout and providing instance its view-holder.
Before displaying your template MFSDK calls a setData(TemplateModel model) of TemplateViewHolder.
Here, you can bind received model data with your template view.
- Implement CustomTemplateView class extending TemplateView
- Implement CustomTemplateViewHolder class extending TemplateViewHolder
CustomTemplateView.java
public class CustomTemplateView extends TemplateView {

    public CustomTemplateView(Context context) {
        super(context);
    }

    // Inflate template layout
    @Override
    public TemplateView inflate(Context context) {
        return (CustomTemplateView) LayoutInflater.from(context)
                .inflate(R.layout.custom_templatview_layout, this);
    }

    @Override
    public BaseView create(Context context) {
        return new CustomTemplateView(context);
    }

    @Override
    public TemplateViewHolder createViewHolder(BaseView view) {
        return new CustomTemplateViewHolder((View) view);

    }

    @NonNull
    @Override
    protected String getTemplateId() {
        return "CUSTOME_TEMPLATE_ID";

    }

    // Implement CustomTemplateViewHolder
    public static class CustomTemplateViewHolder extends TemplateViewHolder {

        private TextView mTvText;

        CustomTemplateViewHolder(View itemView) {
            super(itemView);

            // Inflate view component
            mTvText = (TextView) itemView.findViewById(R.id.tv_text);

        }

        // Bind receive template data with its view
        @Override
        public void setData(@NonNull final TemplateModel model) {
            // Bind card data to its view
            if (!(checkNotNull(model) instanceof CustomTemplateModel)) {
                throw new IllegalTemplateModelException(
                        "Error: Invalid template model!"
                );
            }

            CustomTemplateModel customModel = (CustomTemplateModel) model;

            if (!TextUtils.isEmpty(customModel.getText())) {
                mTvText.setText(customModel.getText());
            }

        }
    }
}
Step 3: Create model for your custom template
TemplateModel is used for two purpose holding template data and parsing json response. MFSDK passes json to deserialize(JsonArray jsonArray) method of TemplateModel. Here, you have to
parse received json and prepare your model.
- Implement CustomeTemplateModel extending TemplateModel
- Override mfClone() method. MFSDK calls this method before calling the deserialize method to create new instance of registered template model.
- Parse receive json and prepare model
CustomTemplateModel.java
public class CustomTemplateModel extends TemplateModel {
    private String text;
    public CustomTemplateModel(@NonNull String templateId) {
        // Set templateID
        this.templateID = templateId;

    }

    public TemplateModel mfClone(){
        return new CustomTemplateModel(this);
    }

    public CustomTemplateModel(CustomTemplateModel copyObject){

        super(copyObject);
        this.templateID = copyObject.templateID;
        this.text = copyObject.text
    }

    @Override
    public void deserialize(JsonArray jsonArray) {
        // Parse raw json to prepare your model
        // setTime after parsing.
    }

    public void setText(String text){
         this.text = text;
    }
    public void getTime(){
         return text;
    }

}
Step 4: Register your custom template with MFSDK
Finally register your custom card with MFSDK. Once you register your custom template, MFSDK will display your custom template to user whenever it receive the message with custom template ID.
try{
    TemplateView customTemplateView = new CustomTemplateView(applicationContext);
    TemplateModel customTemplateModel = new CustomTemplateModel("CUSTOM_TEMPLATE_ID");
    Template customTemplate = new Template( "CUSTOM_TEMPLATE_ID", customTemplateView, customTemplateModel);

    sMFSdk.registerTemplate(textTemplateIn);

} catch(MfMsgModelException e){
    Log.e(TAG,e.toString());
}
Customising Screen UI
Chat Screen UI Config
Developer can change style of chat screen by just changing few properties.These properties are available in MFUIConfig.json, please update properties as below.
1. Config File
MFUIConfig.json file -
{
    "screen": {
        "id": "chat",
        "body": {
            "style": {
                "backgroundImage": "",
                "backgroundColor": "#F6F6F6"
            }
        },
        "header": {
            "style": {
                "backgroundImage": "",
                "backgroundColor": "#FFFFFF",
                "statusBarTheme": "Dark"
            },
            "leftButtons": [{
                            "image": "back-navbar",
                            "action": "action_back",
                            }],
            "rightButtons": [{
                             "text": "",
                             "image": "logoutIcon",
                             "action": "action_logout",
                             "style": {
                                "textColor": "#1E4596"
                             }
                             }],
            "headerText": {
                "style": {
                    "textColor": "#2426A4",
                    "horizontalAlignment": "center"
                }
            },
            "subHeaderText": {
                "text": "",
                "style": {
                    "textColor": "#1E4596"
                }
            },
            "profileImage": {
                "image": "bot-default",
            },
            "statusView": {
                "icon": {
                    "image": ""
                },
                "title": {
                    "text": "SECURE LOGIN",
                    "style": {
                        "textColor": "#FFFFFF",
                    }
                },
                "subTitle": {
                    "style": {
                        "textColor": "#FFFFFF"
                    }
                },
                "style": {
                    "backgroundColor": "#44CFFF"
                }
            }
        },
        "footer": {
            "chatOverlay":"false",
            "inputView": {
                "style": {
                    "backgroundColor": "#FFFFFF"
                },
                "textInput": {
                    "placeholderText":"Type Something",
                    "style": {
                        "borderColor": "#2E33CD",
                        "borderWidth": "1",
                        "hintColor": "#B1B2E0",
                        "borderShape": "rounded",
                        "textColor": "#2E33CD",
                        "backgroundColor": "#ffffff"
                    }
                },
                "sendButton": {
                    "sendImage": "text-chat-normal",
                    "micImage": "voice-chat-normal"
                }
            },
            "toolBarView": {},
            "shortCutView": {
                "style": {
                    "backgroundColor": "#F6F6F6",
                    "button": {
                        "borderColor": "#ffffff",
                        "borderWidth": "0",
                        "borderShape": "rounded",
                        "textColor": "#2426A4",
                        "backgroundColor": "#ffffff",
                        "selectedBackgroundColor": "#44CFFF",
                        "selectedTextColor": "#ffffff"
                    }
                },
                "content": [{
                            "text": "Account Balance",
                            "imageName": "Account_sg",
                            "action": "action_send",
                            "payload": "What's my balance"
                            "isInternationalisation":true
                            },
                            {
                            "text": "Funds Transfer",
                            "imageName": "FundTransfer_sg",
                            "action": "action_send",
                            "payload": "Funds Transfer"
                            "isInternationalisation":true
                            },
                            {
                            "text": "Pay Bills",
                            "imageName": "Cardblock_sg",
                            "action": "action_send",
                            "payload": "Pay Bills"
                            "isInternationalisation":true
                            },]
            }
        },
        "subView": {},
        "initView": {
            "icon": {
                "image": "loading-empty-logo"
            },
            "loadingText": {
                "text": "Loading...",
                "style": {
                    "textColor": "#2426A4"
                }
            },
            "progressView": {
                "color": "#2426A4"
            }
        }
    }
}
2. Adding Config File
Add this file in assets folder of your project like below :
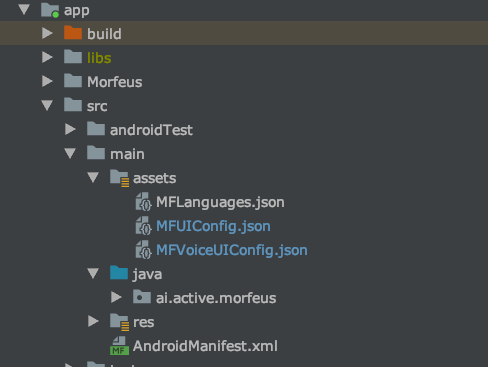
3. List of UI component
List of UI component displayed in chat screen. You can add, remove or change style of following available UI components.
| Component | Description |
|---|---|
| title | Set status bar title |
| textInput | textInput json-object represents the EditText view displayed in chat screen. |
| subtitle | Set status bar sub-title |
| subHeaderText | Display subtitle below title. |
| style | Change style of initialisation progress view. |
| statusView | statusView json-object represents the status-bar view shown below the Navigation bar. It’s can be used to show some status information to user such as last login time detail. |
statusView
| Property | Description |
|---|---|
| shortCutView.content | Set text and text color of suggestion text. |
| shortCutView | shortCutView json-object represents the list of suggestions to display above EditText. |
| sendButton | Set send button image. |
| rightButtons | Display button on right side of the Navigation Bar. For example logout button in right side of Navigation Bar. |
| progressView | Set progress bar color. |
| profileImage | Display profile picture with the title in Navigation Bar. |
| loadingText | Set loading text displayed in initialisation progress view |
| leftButtons | Display button on left side of the Navigation Bar. For example, displaying back navigation button in Navigation Bar. |
| inputView | inputView json-object represents the bottom text input area of chat screen. |
| initview | initView json-object represents the progress view displayed at the time initialisation of MFSDK. |
initView
| Property | Description |
|---|---|
| icon | Set status view icon image |
| icon | Set icon displayed in initialisation progress view |
| headerText | Display screen title in Navigation Bar. |
| header | header json-object represents the Navigation bar of chat screen |
Header
| Property | Description |
|---|---|
| footer | footer json-object represents the bottom input area of chat screen. It contains shortCutView and inputView. |
footer
| Property | Description |
|---|---|
| body | body json-object represents the chat content area of chat screen. |
List of UI properties
| Property | Description |
|---|---|
| image | Display image from drawable resource. Set drawable image name. |
| text | Set text. |
| textColor | Set text color(Hex color code). |
| backgroundColor | Set background color(Hex). |
| backgroundImage | Display background image from drawable resource. Set drawable image name. |
| placeholderText | Set hint text for EditText. |
| borderShape | Set view shape. Ex. rounded or rectangle. |
| micImage | Set drawable image name to display it as mic button. |
| sendImage | Set drawable image name to display it as send button. |
| borderColor | Set suggestion button border color. |
| borderWidth | Set suggestion button border width. |
| selectedBackgroundColor | Set suggestion button background color for selected state. |
| selectedTextColor | Set suggestion button text color for selected state. |
| color | Set color(Hex). |
| payload | Payload to send on click of the button. |
| statusBarColor | Change Android status bar color. |
| horizontalAlignment | Set view alignment to left, right or center. |
List of UI properties supported by UI components
| Property | Description |
|---|---|
| header.style | Prorperties are backgroundImage,backgroundColor,statusBarColor |
| leftButtons | Currently, you can display only single left button in Actionbar. You can change image of left button. Prorperties are image |
| rightButtons | Currently, you can display only single right button in Actionbar. You can set following properties for right button. Prorperties are image,text,textColor |
| headerText | Prorperties are text,textcolor,horizontalAlignment |
| subHeaderText | Prorperties are text,textColor |
| profileImage | Prorperties is image |
| StatusView | |
| title | text |
| title.style | textColor |
| subTitle.style | textColor |
| Body | |
| body.style | backgroundImage,backgroundColor |
| Footer | |
| inputView.style | backgroundColor |
| inputView.textInput | placeholderText |
| inputView.textInput.style | borderShape,backgroundColor,textColor |
| inputView.sendButton | sendImage,micImage |
| shortcutView.style | backgroundColor |
| shortcutView.style.button | borderColor, borderWidth, borderShape, textColor, backgroundColor,selectedBackgroundColor,selectedTextColor |
| shortcutView.content | text,image,payload |
| InitView | |
| icon | image |
| loadingText | text |
| style | textColor |
| progressView | color |
Voice Screen UI Config
Developer can change style of voice screen by just changing few properties.These properties are available in MFVoiceUIConfig.json, please update properties as below.
1. Config File
MFVoiceUIConfig.json file -
{
    "screen": {
        "id": "voice",
        "body": {
            "style": {
                "backgroundImage": "Home_Imge",
                "backgroundColor": "#F1F1F1"
            },
            "micImage":
            {
                "inprogress": "voiceMicbutton-InProgress",
                "idle": "voiceMicbutton-Idle",
                "active": "voiceMicbutton-Active",
            },
            "wave": {
                "style": {
                    "color": "#303BCA"
                }
            },
            "hintText": {
                "text": "What can I help you with?",
                "style": {
                    "textColor": "#1E4596"
                }
            },
            "suggestionText": {
                "text": "Sorry, I didn't quite catch that. Did you mean...",
                "rightImage": "siri-tick",
                "style": {
                    "textColor": "#000000"
                }
            },
            "voiceText": {
                "inprogress": "In progress",
                "idle": "Tap to Speak",
                "active": "Listening",
                "style": {
                    "textColor": "#1E4596"
                }
            },
            "backButton": {
                "image": "voiceClose"
            },
            "muteButton": {
                "unmuteImage": "UnMute",
                "muteImage": "Mute"
            }
        }
    }
}
2. Adding Config File
Add this file in assets folder of your project like below :

3. List of UI component
List of UI component displayed in voice screen. You can add, remove or change style of following available UI components.
| Object | Description |
|---|---|
| style | Set basic style properties for voice screen such as background image or background color. |
| micImage | Set mic image displayed at bottom of voice screen. |
| wave | Set wave color displayed on top of mic image. |
| hintText | Set hint text and its style displayed at top of the screen. |
| suggestionText | When recognised speech to text is less accurate, voice screen displays list of text as possible recognised text. You can change the style of those suggestion texts. |
| voiceText | Set text and style for voice status text. Ex. Listening..., In-progress and Processing. |
| backButton | Set style for top left back button. |
| muteButton | Set style for top right mute button. |
List of UI properties
| Property | Description |
|---|---|
| backgroundImage | Display background image from drawable resource. Set drawable image name. |
| backgroundColor | Set background color(Hex). |
| image | Set drawable image name to display image from drawable resource. |
| color | Set color(Hex). |
| text | Set text. |
| rightImage | Set drawable image for suggestion view right image. |
| textColor | Set text color(Hex color code). |
| idle | Set text for idle state of voice service. |
| inprogress | Set text for in-progress state of voice service. |
| active | Set text for active state of voice service. |
| unmuteImage | Set unmute image displayed at top right corner of the voice screen. |
| muteImage | Set mute image displayed at top right corner of the voice screen. |
List of UI properties supported by UI components
| Property | Description |
|---|---|
| body.style | backgroundImage,backgroundColor. |
| micImage | image |
| wave.style | color |
| hintText.text | text |
| hintText.style.textColor | textColor |
| suggestionText | text,rightImage |
| suggestionText.style | textColor |
| voiceText | inprogress, idle, active |
| voiceText.style | textColor |
| backButton | image |
| muteButton | unmuteImage,muteImage |
Internationalisation Config
MFSDK's default language is 'en-US' (US English). To change default language pass supported language code to setLanguage(Language.LANG_CODE) method of MFSDKSessionProperties.
MFSDK loads strings from MFLanguage.json. When you change MFSDK's default language you must mention all string for new language in MFLanguage.json.
Language codes are same as used in Java locale API.
1. Adding Config File
Add this file in assets folder of your project like below :

2. Config File
MFLanguages.json file
[
  {
    "lang": "en-US",
    "error_code": {
      "MEMD1": "Sorry error in processing your request - MEMD1",
      "MEMD2": "Sorry error in processing your request - MEMD2",
      "MEMS1": "Sorry error in processing your request - MEMS1",
      "MEMS2": "Sorry error in processing your request - MEMS2",
      "MEMS3": "Sorry error in processing your request - MEMS3",
      "MEMS4": "Sorry error in processing your request - MEMS4",
      "MEMS50": "Sorry error in processing your request - MEMS50",
      "MEMS51": "Sorry error in processing your request - MEMS51"
    },
    "resource": {
      "Account Balance": "Account Balance",
      "Alert": "Alert",
      "Are you sure you want to logout?": "Are you sure you want to logout?",
      "BALANCE": "BALANCE",
      "BILL PAYMENT": "BILL PAYMENT",
      "Block Cards": "Block Cards",
      "Camera": "Camera",
      "Cancel": "Cancel",
      "Choose": "Choose",
      "Choose image from": "Choose image from",
      "Close": "Close",
      "Did you mean?": "Did you mean?",
      "Enter Username": "Enter Username",
      "Fail to initialize sdk. Something went wrong, please try again.": "Fail to initialize sdk. Something went wrong, please try again.",
      "Fail to login, please try again later.": "Fail to login, please try again later.",
      "FUNDS TRANSFER": "FUNDS TRANSFER",
      "Funds Transfer": "Funds Transfer",
      "Home": "Home",
      "Initialization Fail": "Initialization Fail",
      "Loading": "Loading",
      "Loading...": "Loading...",
      "Login": "Login",
      "Login Successful.": "Login Successful.",
      "Login...": "Login...",
      "Logout": "Logout",
      "Morfeus": "Morfeus",
      "move and scale": "move and scale",
      "No internet connection. Make sure wifi or cellular data is turned on, then try again.": "No internet connection. Make sure wifi or cellular data is turned on, then try again.",
      "Online": "Online",
      "Password": "Password",
      "Photo library": "Photo library",
      "Please enter password": "Please enter password",
      "Please fill all the digits": "Please fill all the digits",
      "RECHARGE": "RECHARGE",
      "Recharge": "Recharge",
      "Retake": "Retake",
      "Retry": "Retry",
      "Secured Login": "Secured Login",
      "Send": "Send",
      "Type here...": "Type here...",
      "Use Photo": "Use Photo",
      "Username": "Username",
      "UserName": "UserName",
      "Waiting for Network...": "Waiting for Network...",
      "What can i help you with?": "What can i help you with?",
      "You have been logged out successfully. Thanks for using virtual bank assistant.": "You have been logged out successfully. Thanks for using virtual bank assistant.",
      "You have selected Google speech, do you want to proceed?": "You have selected Google speech, do you want to proceed?",
      "You have selected Nuance, do you want to proceed?": "You have selected Nuance, do you want to proceed?",
      "You're Logged Out": "You're Logged Out",
      "Image upload data request failed!" : "Image upload data request failed!",
      "<![CDATA[ Welcome to Morfeus.<br> I am <b><font color=#9C3B3C>Morfeus Assist.</b>]]>" : "<![CDATA[ Welcome to Morfeus.<br> I am <b><font color=#9C3B3C>Morfeus Assist.</b>]]>",
      "I am your smart banking chatbot that can help you with Opening new accounts or deposits, balance requests, transfers, Bill Payments, recharge, answer queries,  and much more. I shall do everything possible within my expertise to serve your banking needs." : "I am your smart banking chatbot that can help you with Opening new accounts or deposits, balance requests, transfers, Bill Payments, recharge, answer queries,  and much more. I shall do everything possible within my expertise to serve your banking needs.",
      "I am Morfeus’s smart chatbot (if I may say \n so). I can tell your balances, pay bills, \n recharge, and much more." : "I am Morfeus’s smart chatbot (if I may say \n so). I can tell your balances, pay bills, \n recharge, and much more."
    }
  },
  {
    "lang": "th-TH",
    "error_code": {
      "MEMD1": "Sorry error in processing your request - MEMD1",
      "MEMD2": "Sorry error in processing your request - MEMD2",
      "MEMS1": "Sorry error in processing your request - MEMS1",
      "MEMS2": "Sorry error in processing your request - MEMS2",
      "MEMS3": "Sorry error in processing your request - MEMS3",
      "MEMS4": "Sorry error in processing your request - MEMS4",
      "MEMS50": "Sorry error in processing your request - MEMS50",
      "MEMS51": "Sorry error in processing your request - MEMS51"
    },
    "resource": {
      "Account Balance": "ยอดเงินในบัญชี",
      "Alert": "เตือนภัย",
      "Are you sure you want to logout?": "คุณแน่ใจว่าคุณต้องการที่จะออกจากระบบ?",
      "BALANCE": "สมดุล",
      "BILL PAYMENT": "จ่ายบิล",
      "Block Cards": "บล็อกการ์ด",
      "Camera": "กล้อง",
      "Cancel": "ยกเลิก",
      "Choose": "เลือก",
      "Choose image from": "เลือกภาพจาก",
      "Close": "ปิด",
      "Did you mean?": "คุณหมายถึงอะไร?",
      "Enter Username": "ป้อนชื่อผู้ใช้",
      "Fail to initialize sdk. Something went wrong, please try again.": "ไม่สามารถเริ่มต้น SDK ได้ เกิดข้อผิดพลาดโปรดลองอีกครั้ง",
      "Fail to login, please try again later.": "ไม่สามารถเข้าสู่ระบบโปรดลองอีกครั้งในภายหลัง",
      "Funds Transfer": "การโอนเงิน",
      "FUNDS TRANSFER": "การโอนเงิน",
      "Home": "บ้าน",
      "Initialization Fail": "การเริ่มต้นล้มเหลว",
      "Loading": "กำลังโหลด",
      "Loading...": "กำลังโหลด...",
      "Login": "เข้าสู่ระบบ",
      "Login Successful.": "เข้าสู่ระบบสำเร็จแล้ว",
      "Login...": "เข้าสู่ระบบ...",
      "Logout": "ออกจากระบบ",
      "Morfeus": "Morfeus",
      "move and scale": "ย้ายและสเกล",
      "No internet connection. Make sure wifi or cellular data is turned on, then try again.": "ไม่มีการเชื่อมต่ออินเทอร์เน็ต. ตรวจสอบว่าได้เปิดใช้งาน WiFi หรือข้อมูลมือถือแล้วลองอีกครั้ง",
      "Online": "สวัสดี",
      "Password": "รหัสผ่าน",
      "Photo library": "ไลบรารีรูปภาพ",
      "Please enter password": "โปรดป้อนรหัสผ่าน",
      "Please fill all the digits": "โปรดกรอกตัวเลขทั้งหมด",
      "Recharge": "เติมเงิน",
      "RECHARGE": "เติมเงิน",
      "Retake": "เอาคืน",
      "Retry": "ลองอีกครั้ง",
      "Secured Login": "เข้าสู่ระบบ",
      "Send": "ส่ง",
      "Type here...": "พิมพ์ที่นี่...",
      "Use Photo": "ใช้รูปภาพ",
      "Username": "ชื่อผู้ใช้",
      "UserName": "ชื่อผู้ใช้",
      "Waiting for Network...": "กำลังรอเครือข่าย ...",
      "What can i help you with?": "อะไรที่ฉันสามารถช่วยคุณได้?",
      "You have been logged out successfully. Thanks for using virtual bank assistant.": "คุณออกจากระบบเรียบร้อยแล้ว ขอขอบคุณที่ใช้ผู้ช่วยธนาคารเสมือนจริง",
      "You have selected Google speech, do you want to proceed?": "คุณเลือกคำพูดของ Google แล้วคุณต้องการดำเนินการต่อหรือไม่?",
      "You have selected Nuance, do you want to proceed?": "คุณเลือก Nuance แล้วคุณต้องการดำเนินการต่อหรือไม่?",
      "You're Logged Out": "คุณออกจากระบบแล้ว",
      "Image upload data request failed!" : "Image upload data request failed!"
    }
  }
]
Security Features
SSL Pinning
MFSDK has support for SSL (Secure Sockets Layer), to enable encrypted communication between client and server. MFSDK doesn't trust SSL certificates stored in the device's trust store. Instead, it only trusts the certificates which are pass to the MFSDKProperties
Please check the following code snippet to enable SSL pinning.
MFSDKProperties sdkProperties = new MFSDKProperties
                .Builder(BOT_END_POINT_URL)
                .enableSSL(true, new String[] {PUBKEY_CA})  // Enable SSL check
                ...
                .build();
When SSL is enabled, MFSDK verify the certificates which are passed to the MFSDKProperties

Rooted Device Check
You can prevent MFSDK from running on a rooted device. If enabled, MFSDK will not work on a rooted device.
You can use "enableRootedDeviceCheck" method of MFSDKProperties.Builder to enable this feature.
Please check the following code snippet to enable the rooted device check.
MFSDKProperties sdkProperties = new MFSDKProperties
                .Builder(BOT_END_POINT_URL)
                .enableRootedDeviceCheck(true) // Enable rooted device check
                ...
                .build();

Content Security(Screen capture)
You can prevent user/application from taking the screenshot of the chat. You can use "disableScreenShot" method of
MFSDKProperties.Builder to enable this feature. By default, MFSDK doesn't prevent the user from taking the screenshot.
Please check following code snippet.
MFSDKProperties sdkProperties = new MFSDKProperties
                .Builder(BOT_END_POINT_URL)
                .disableScreenShot(true) // Prevent screen capture
                ...
                .build();

Inactivity Timeout
In a case when MFSDK is running and the user is not using it actively, MFSDK automatically logs out the user from the current chat session after 5 min.
You can change this inactivity timeout limit using "setInactivityTimeout()" method of MFSDKProperties.Builder.
Please check the following code snippet to set inactivity timeout limit.
MFSDKProperties sdkProperties = new MFSDKProperties
                .Builder(BOT_END_POINT_URL)
                .setInactivityTimeout(240) // 4 minute timeout limit
                ...
                .build();
This page documents how to set up a Facebook channel.
Enable Facebook Channel
To enable the Facebook channel, go to the "Channels" section in your workspace and toggle the Facebook button.
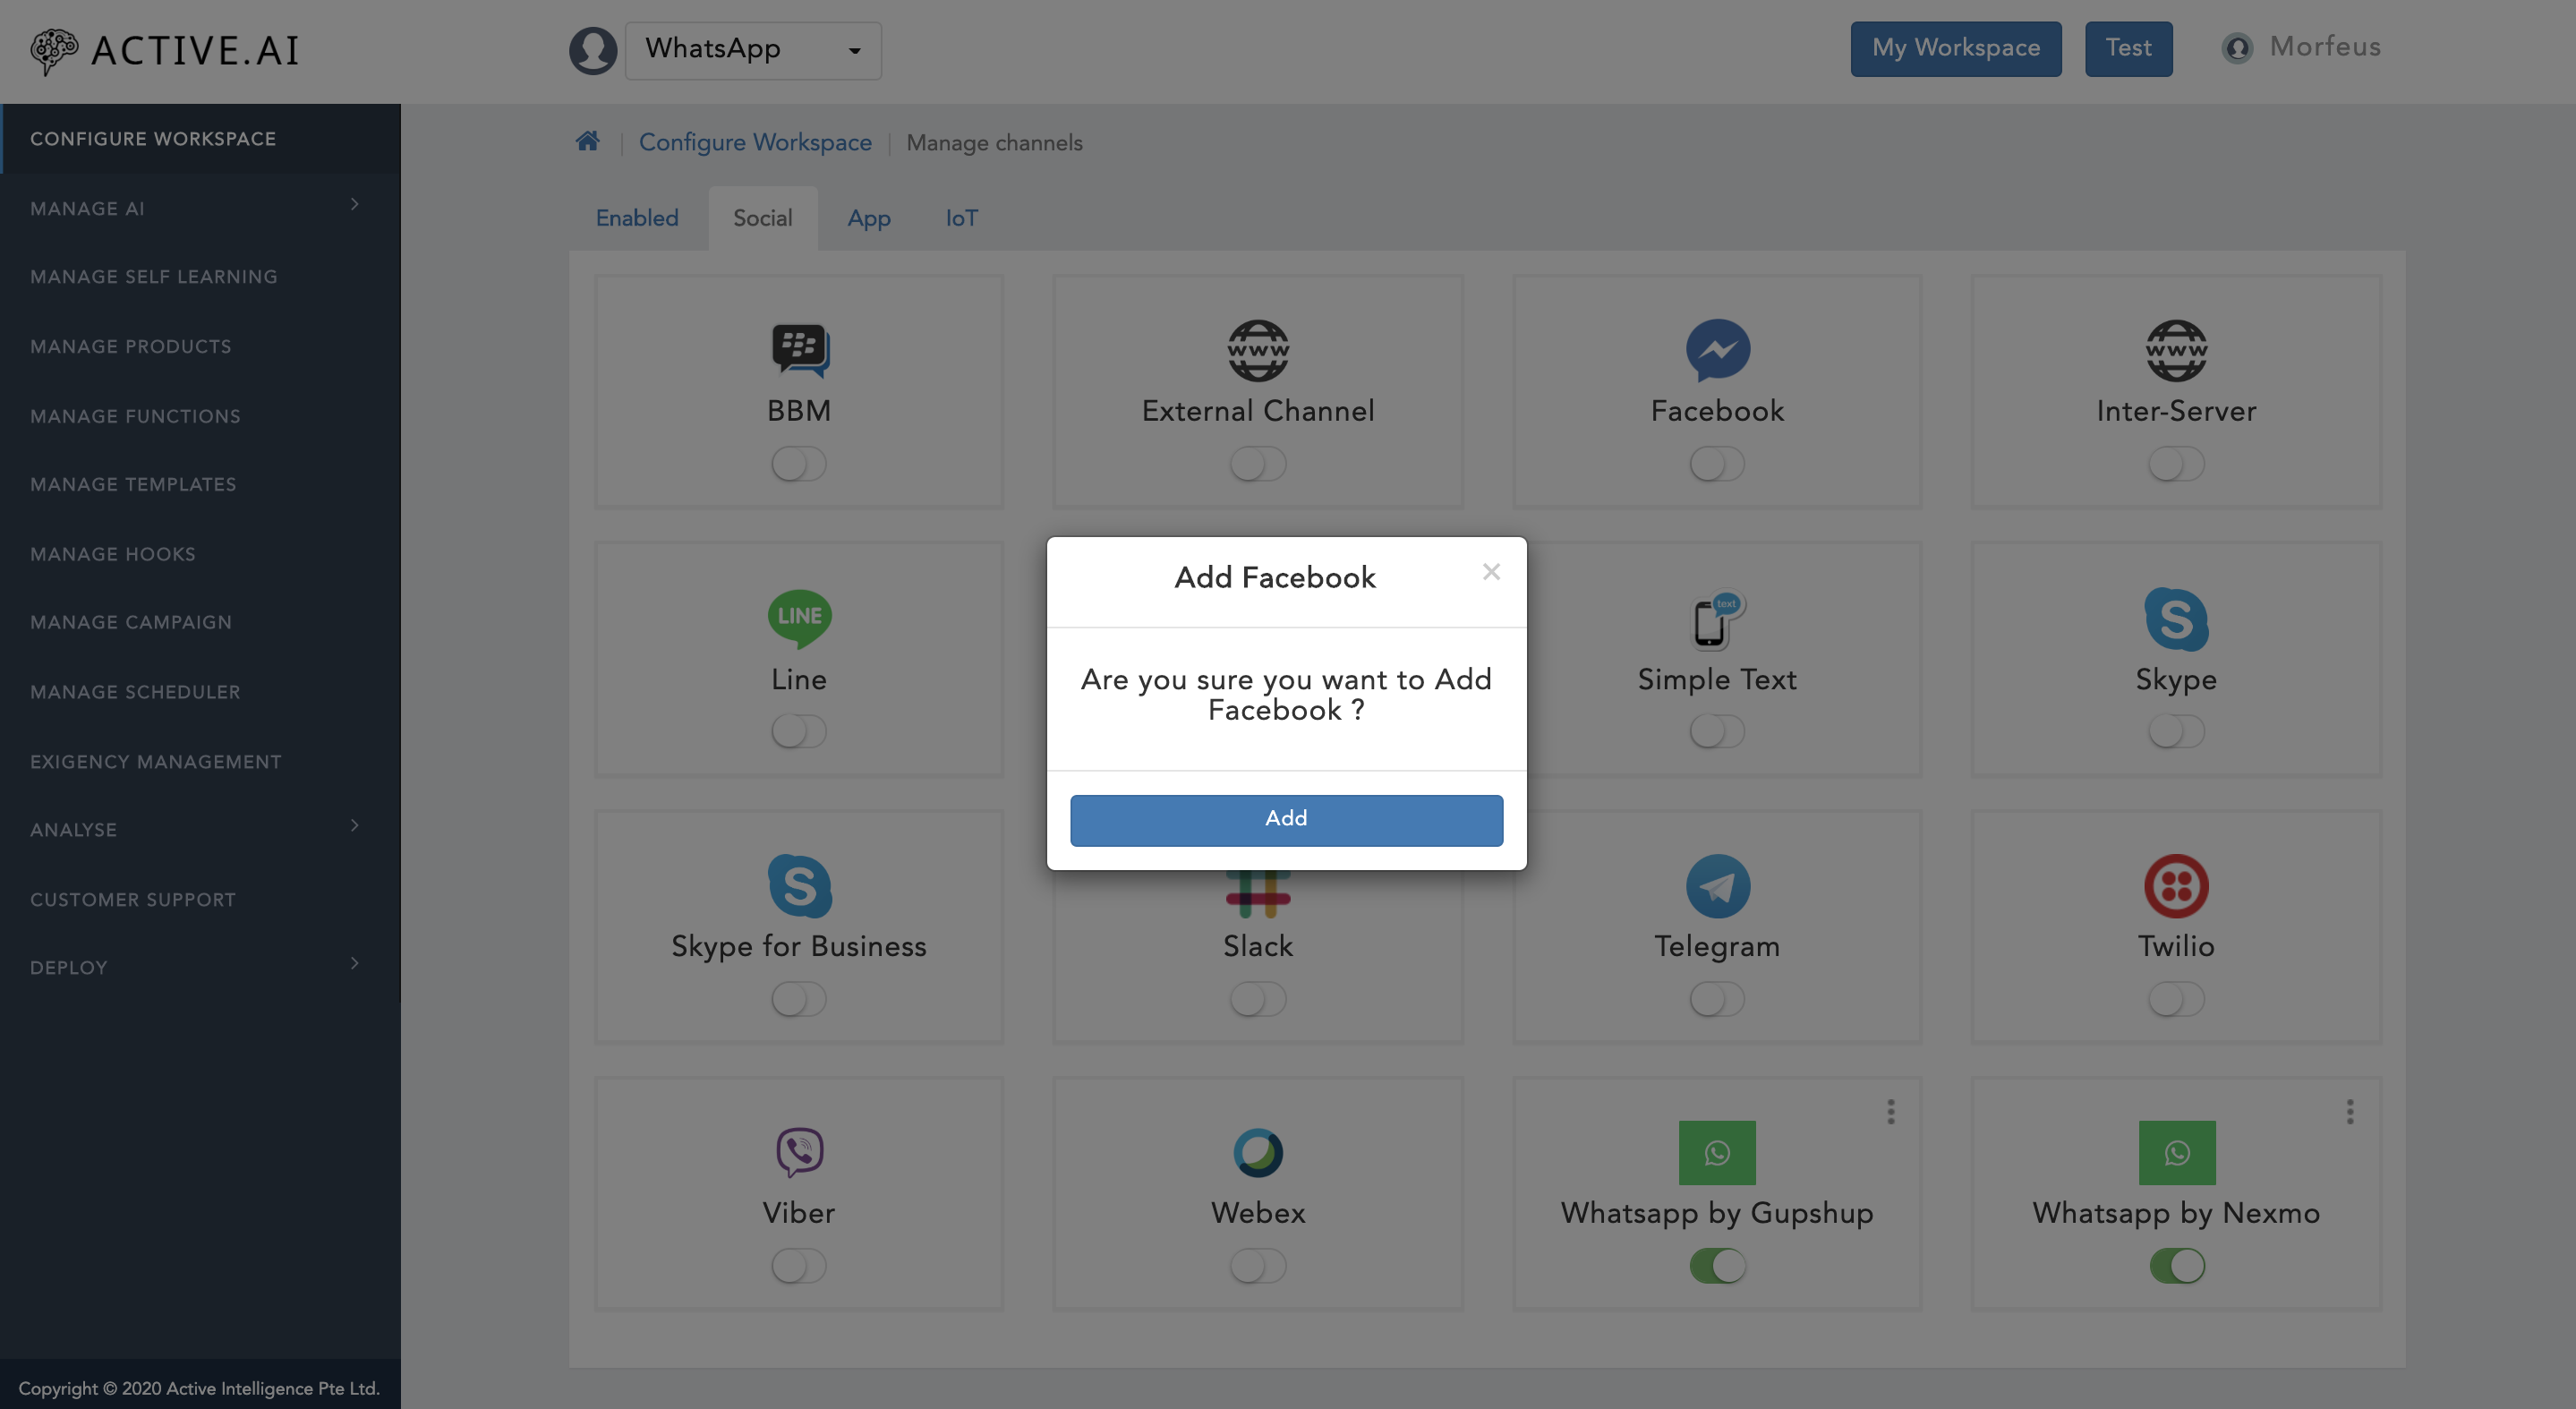
Before you proceed, you will need to have
- A Facebook Page,
- A Facebook Developer Account (You can use your own facebook account)
- A Facebook App.
For all these, you can follow Facebook Official Document to Setup Facebook App.
While setting up the Facebook App, you will need
- A webhook URL and
- A verification token.
For that use the Callback URL and Verify Token you get after enabling Facebook channel.
Configure Webhook
- In the 'Webhooks' section of the Messenger settings console, click on the 'Add call back URL' button.
Copy the Call back URL & Verify Token from Morfeus Admin, and paste it under Call back URL & Verify Token field of webhooks section, Click on 'Verify and Save'
At a minimum, we recommend you choose messages and messaging_postbacks to get started.
Configure Page Access Token And Secret Key
Morfeus requires the page access token for sending messages from the bot. Also, Secret Key is required to verify the requests are coming from Facebook, not from any unauthorized identity.
- Click on 'Add or Remove pages' under 'Access Tokens' on the same page, (If you have left the page then You can get it Under Products --> Messenger --> Settings --> Access Tokens)
Login with your account or continue with your logged in account and select the page you have created, Click on Next & Done
Goto 'Messenger Settings' & click on 'Generate token' under 'Access Tokens'
Check mark on the 'I Understand', Copy the Access Token and paste it in the 'Page Access Token' field in Morfeus Admin
For Secret Key, Click on Settings then select Basic, Copy the secret key and paste it under 'Secret Key' field on Morfeus Admin page
Test Your Messenger Bot
- You can search for your bot in messenger with the Bot/Page name or username that you have set
- You can also interact with your messenger bot invitation link
- Your Facebook bot should start responding with the trained queries if everything is correctly configured.
- To test that your app set up was successful, send a message to your Page from facebook.com or in Messenger.
Congratulations, you have finished setting up your Facebook bot.
Line
PreRequisites:
Create a new Line Bot. This is used as an identity of our bot for our users, chatting with bot looks exactly like chatting with the Line contacts.
Visit Line Developer portal and log in using your Line account credentials if you already have, otherwise install Line in your phone, create an account and log in to the portal.
Create a Line bot following these steps
Enable Line channel in Morfeus and note down the Channel endpoint e.g. https:// yourdomainname/morfeus/v1/channels/yourbotchannelid/message and further follow the steps to setup Webhook in Line developer
You need to disable "Auto-reply messages" and Greeting messages
Disable Greeting message, Disable Auto-response and Enable webhooks
Setup
Please follow the procedure given below in order to set up line bot in Morfeus:
Copy Channel Access Token from line developer and paste it in Auth Token of morfeus admin
Copy the Secret key from Basic Information and paste it in Channel secret field on morfeus admin page
Congratulations! Your bot has been successfully created.
Go back to previous page (Developer portal), Scroll down Under Bot Informations, Scan the QR code from your LINE app to add the bot in your contact list and save this QR to share your bot with friends, you can also share your Basic ID to add in contacts
Supported Components
| Channel | Text | Card | Button | Carousel | List | Image | Quick Reply | Location | Videos |
|---|---|---|---|---|---|---|---|---|---|
| Line | ✔ | ✔ | ✔ | ✔ | ✗ | ✗ | ✗ | ✗ | ✗ |
Supported Features
| Features | Voice | Document Upload | Emoji | Sticker |
|---|---|---|---|---|
| Line | ✗ | ✗ | ✗ | ✗ |
Telegram
PreRequisites:
Go to "Play Store" on your Android phone or "App Store" in your iPhone and install "Telegram" app. Open the app, follow the required steps and create a telegram account.
Go to the telegram search bar on your phone and search for the “botfather” telegram bot (he’s the one that’ll assist you with creating and managing your bot).
Type /help to see all possible commands the botfather can handle.
Follow the steps in Bot Father to create bot
You should see a new API token generated for it e.g. 270485614:AAHfiqksKZ8WmR2zSjiQ7_v4TMAKdiHm9T0
Link your Telegram Bot to Microsoft Bot Framework
Log in to Microsoft Bot Framework
Enter the Callback URL copied from triniti.ai page, while enabling channel and paste it in Message endpoint under Configuration
Create a Telegram Bot Service at Microsoft Azure Portal using the steps mentioned here, ensure that the messaging endpoint is set as the Channel endpoint mentioned earlier.
After saving that config, Navigate to the Channels page again on the left side panel and click on the the label - Telegram under Connect to Channels section. Congratulations! Bot setup is now complete!
Setup
Please follow the procedure given below in order to set up Telegram bot in Morfeus:
Login to morfeus admin and head over to Channel Settings for Telegram.
Paste the API token in Auth Token field of telegram channel on morfeus admin.
Search for your newly created bot on Telegram from the search bar by typing: "@Username". Now you can interact with your bot.
Supported Components:
| Channel | Text | Card | Button | Carousel | List | Image | Quick Reply | Location | Videos |
|---|---|---|---|---|---|---|---|---|---|
| Telegram | ✔ | ✔ | ✔ | ✗ | ✗ | ✗ | ✗ | ✗ | ✗ |
Supported Features:
| Features | Voice | Document Upload | Emoji | Sticker |
|---|---|---|---|---|
| Telegram | ✗ | ✗ | ✗ | ✗ |
Slack
PreRequisites:
First and foremost, Enable Slack channel in Morfeus and note down the Channel endpoint e.g. https://yourdomainname/morfeus/v1/channels/yourbotchannelid/message
Create Slack Workspace here. Provide your email id & click VERIFY.
Enter all the mandatory details and save the config.
Create Slack App here. Enter your App name, then select workspace & click CREATE APP.
Note: For Slack related queries, refer this.
Setup
Please follow the procedure given below in order to set up Slack bot in Morfeus:
Login to Morfeus Admin and head over to Channel Settings for Slack.
Navigate to Slack Bot Settings page where you just created a new App and click BASIC INFORMATION.
Scroll down and goto App Credentials, Copy Verification Token, head over to Slack Channel Settings and paste it under Secret Key.
Navigate to OAuth & Permissions, Scroll down, go to Scopes and search for chat:write:bot in drop down list of Select Permission Scope and add it. Similarly, search for im:read , im:write, users:read and add these too, and click SAVE CHANGES.
Navigate to Bot Users & click ADD BOT USER. Click SAVE CHANGES after Slack verifies the user.
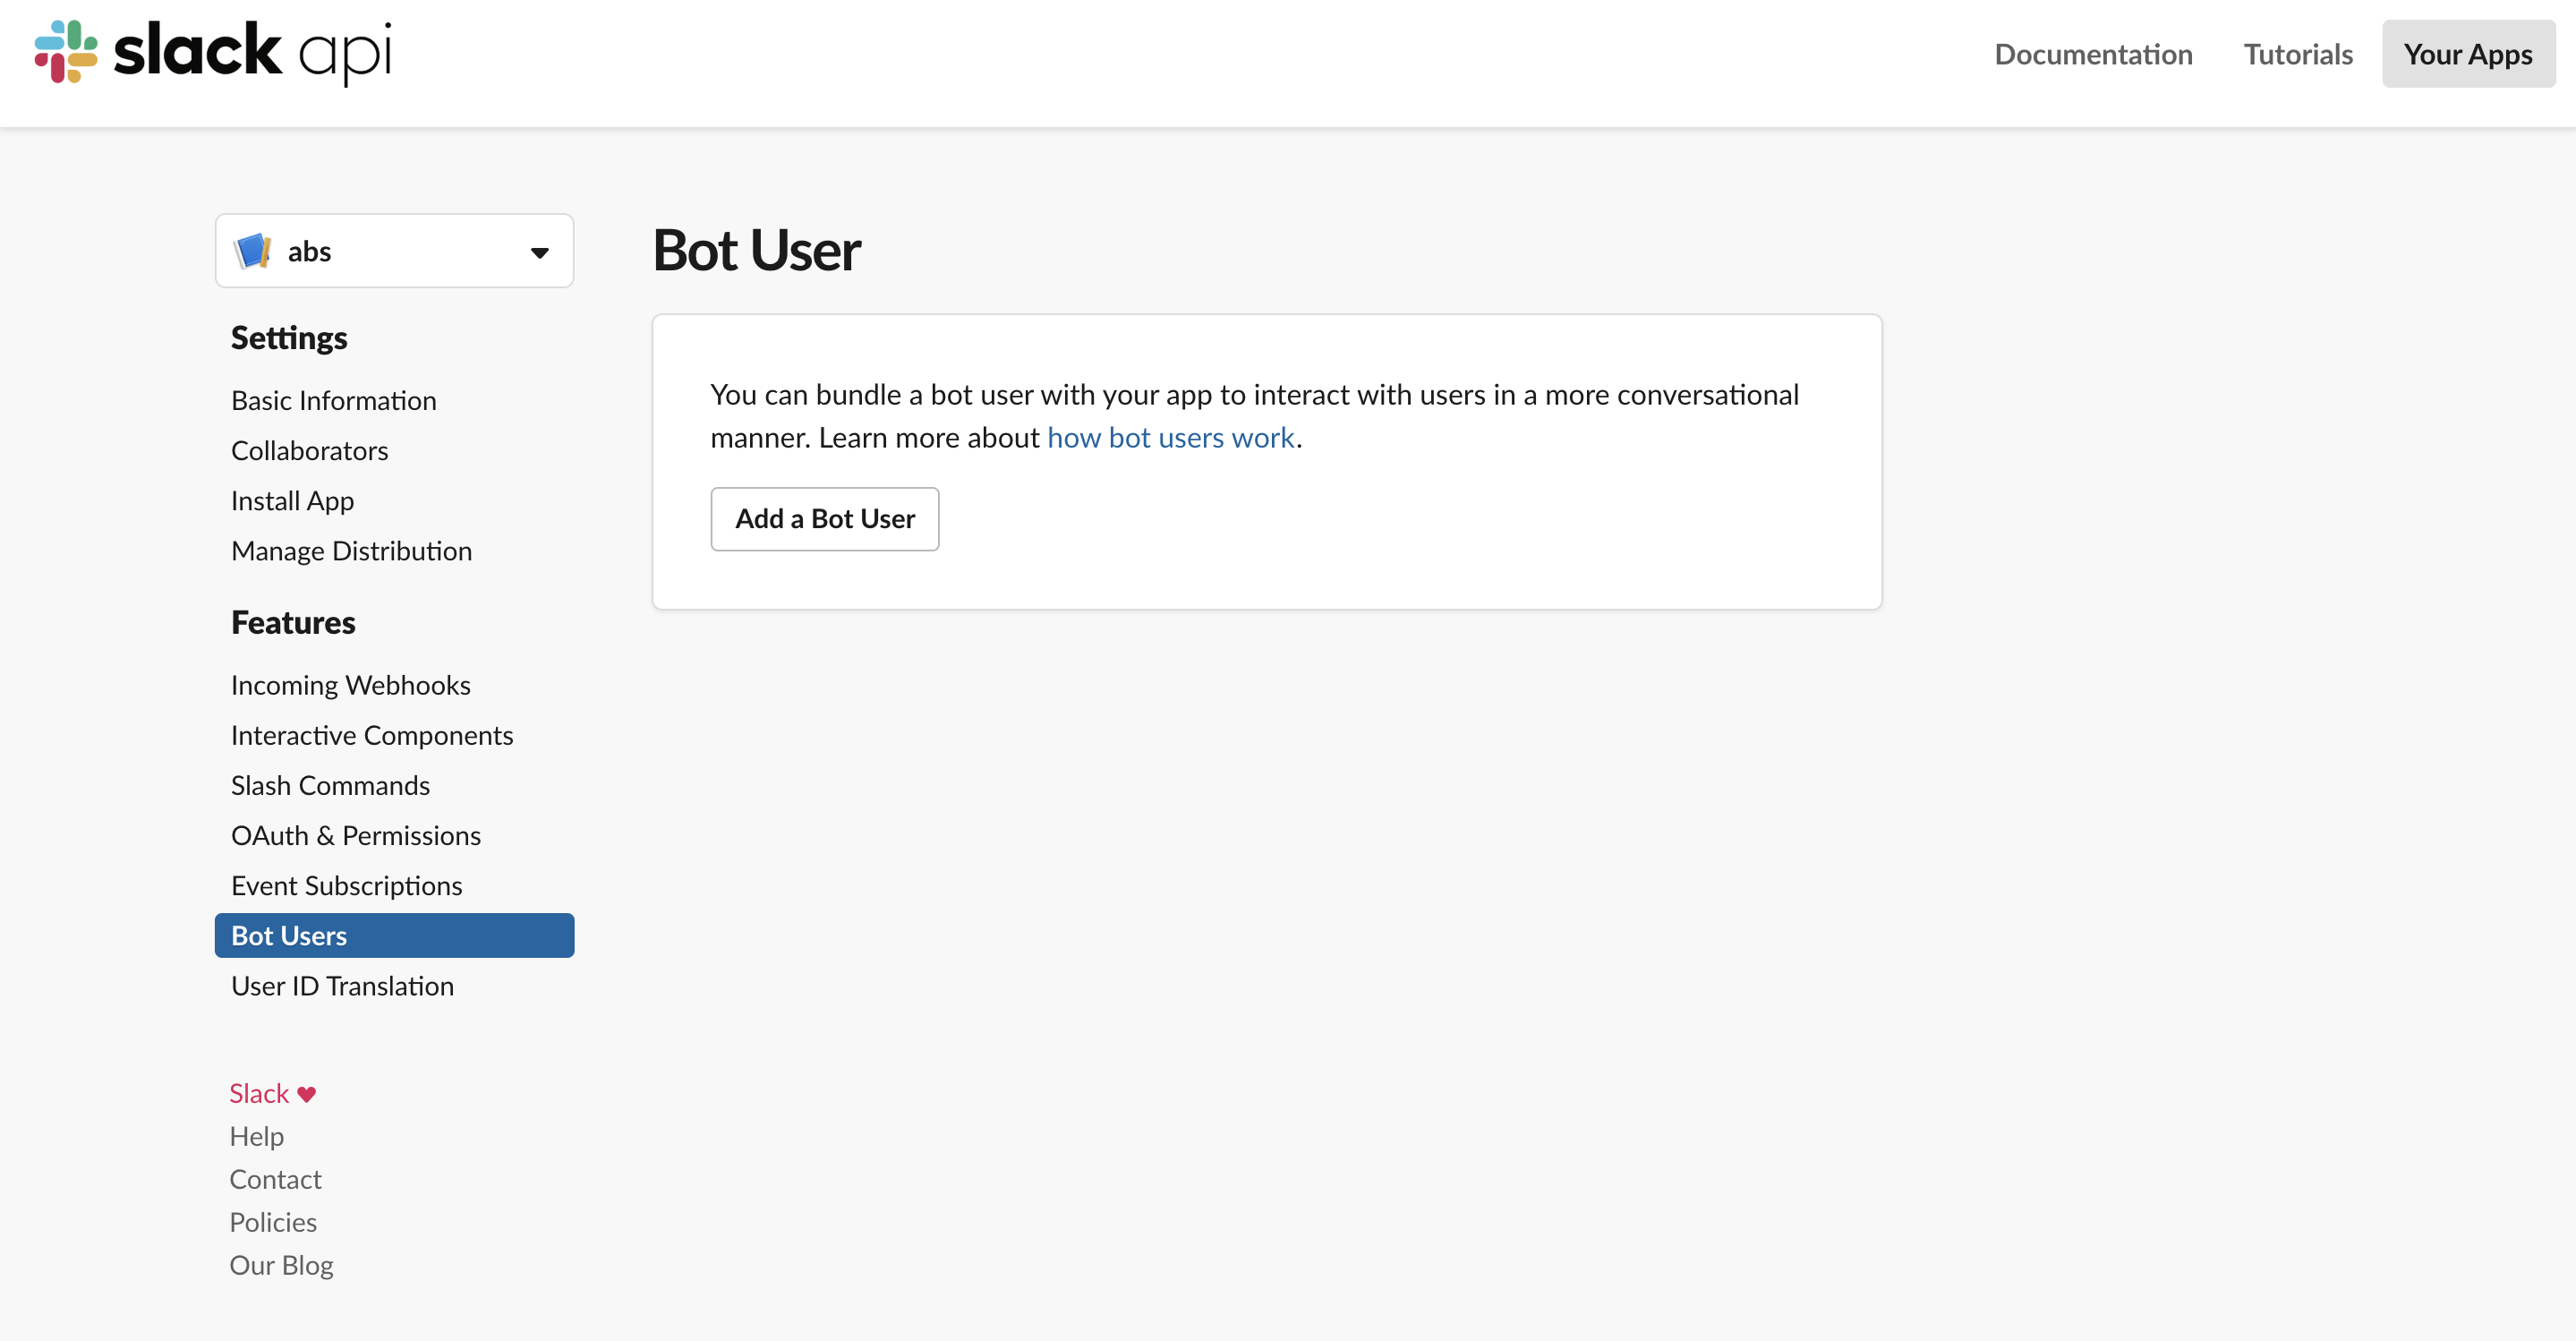
Navigate to Install App, Click Install App to Workspace
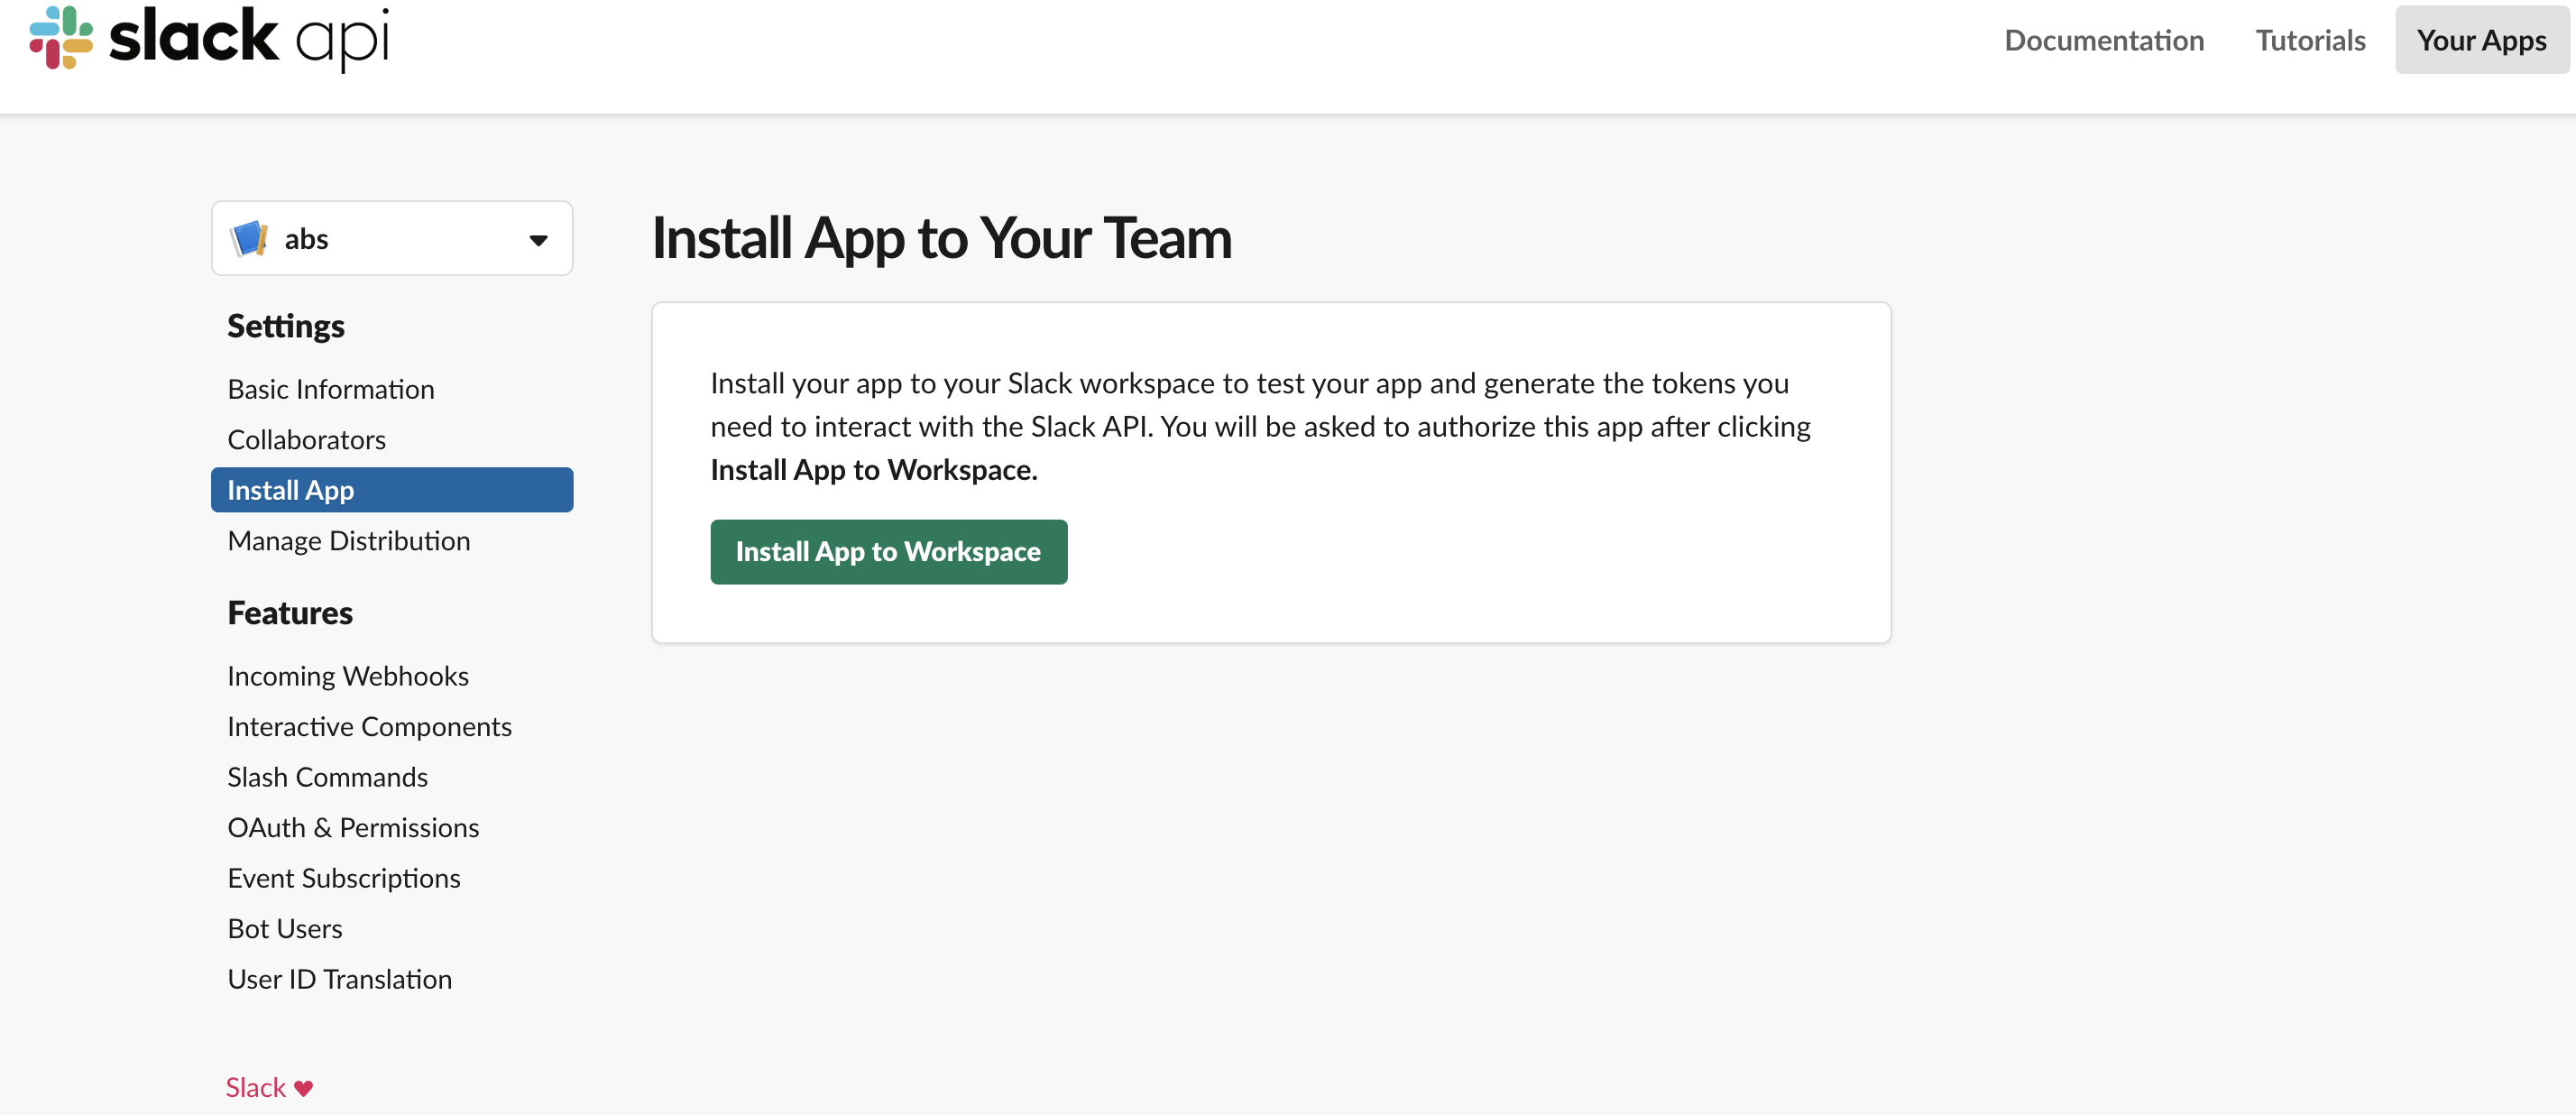
On the next page click ALLOW.
On clicking Allow, you will see OAuth Tokens & Redirect URLs, Copy the Bot User OAuth Access Token and paste it under Auth Token on Channel Settings page.
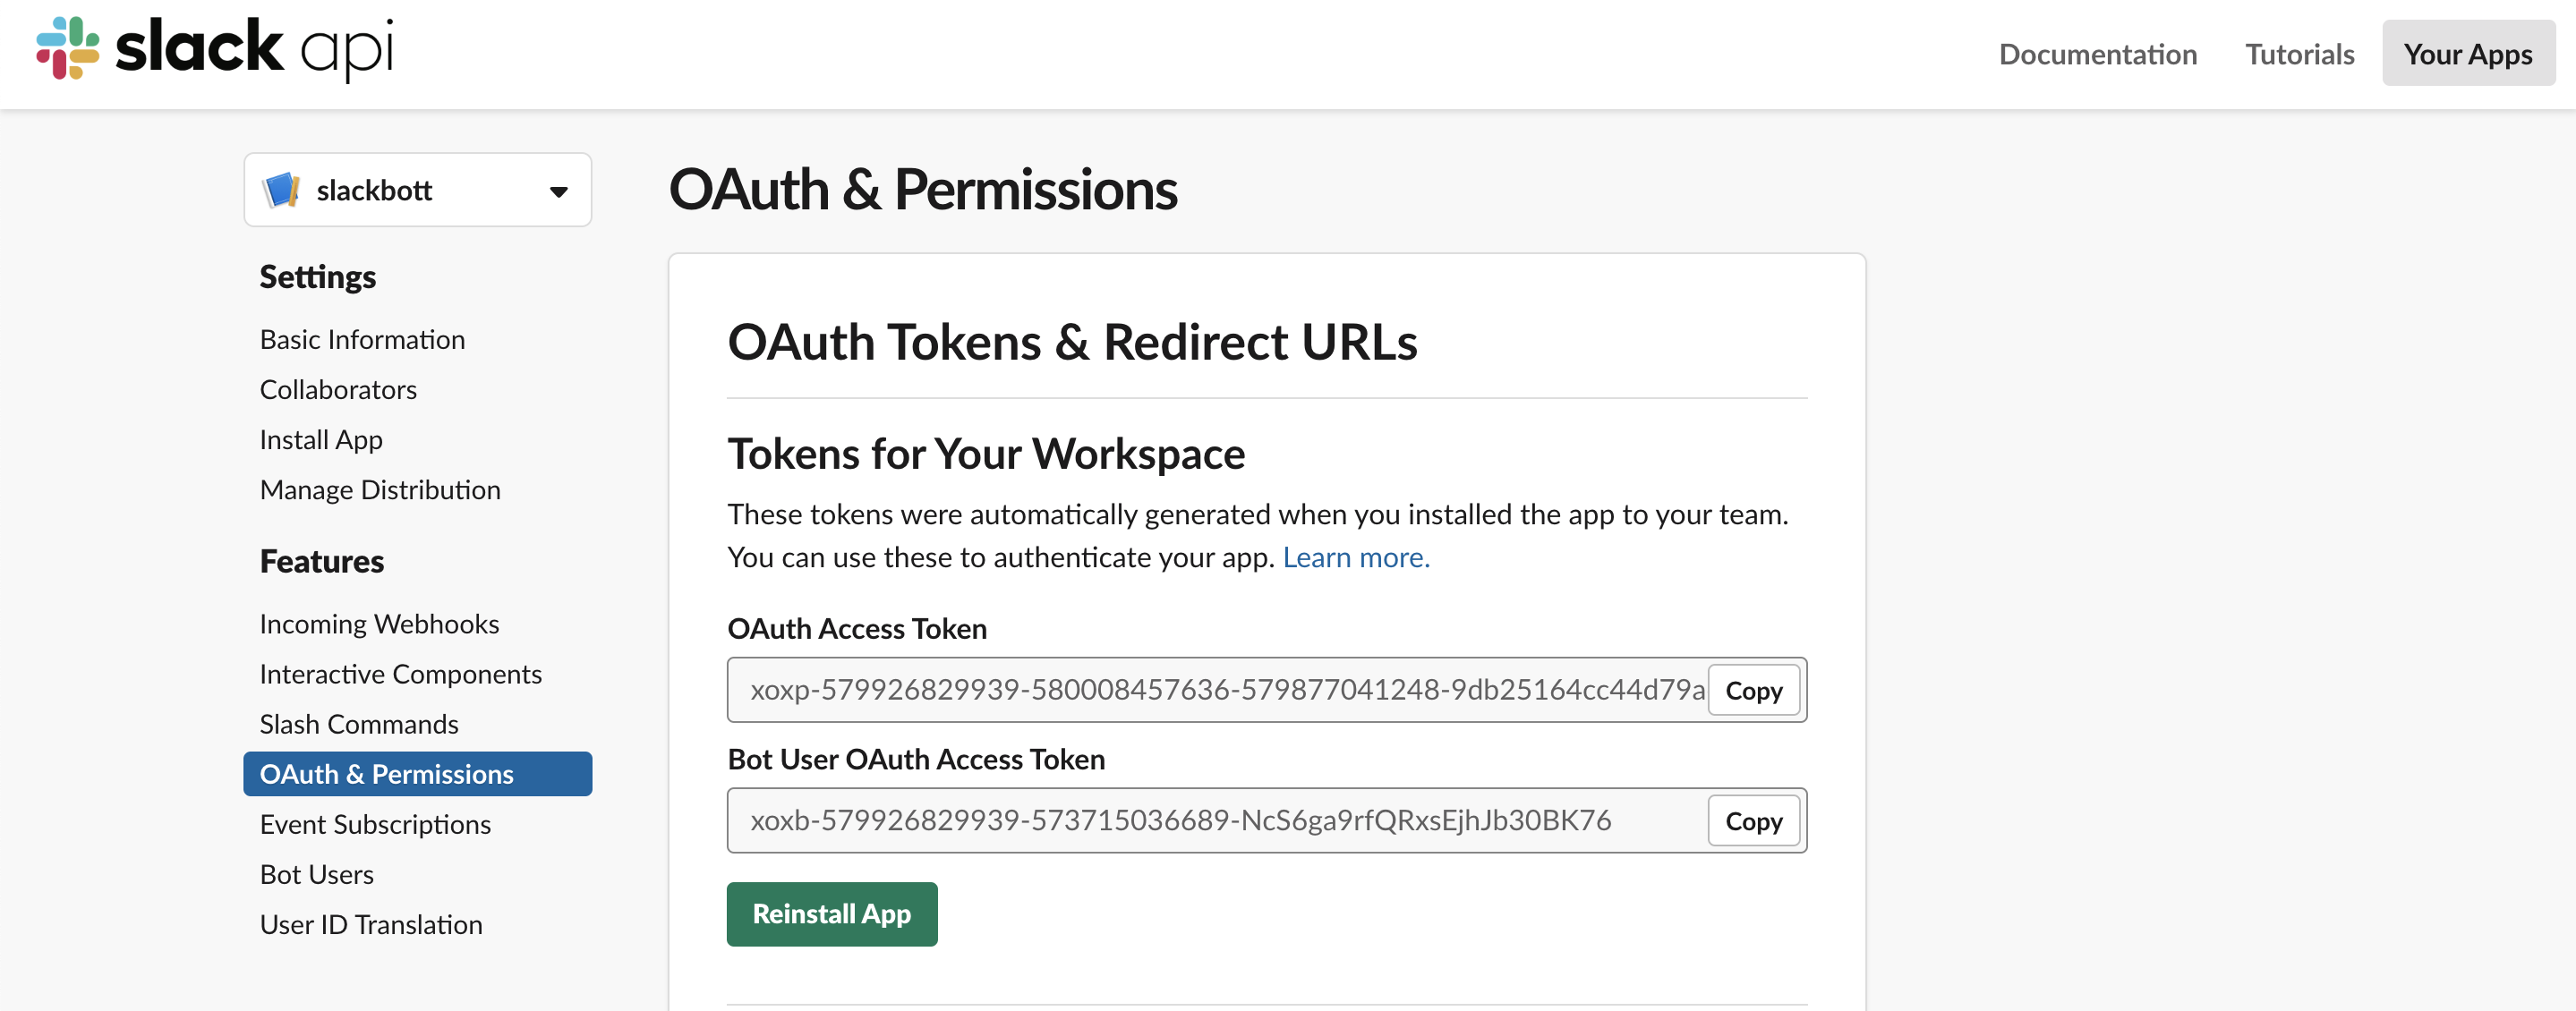
Navigate to Event Subscription, toggle on Enable Events.
In the Request URL field, paste the Messaging Endpoint of Slack channel retrieved from Channel Settings.
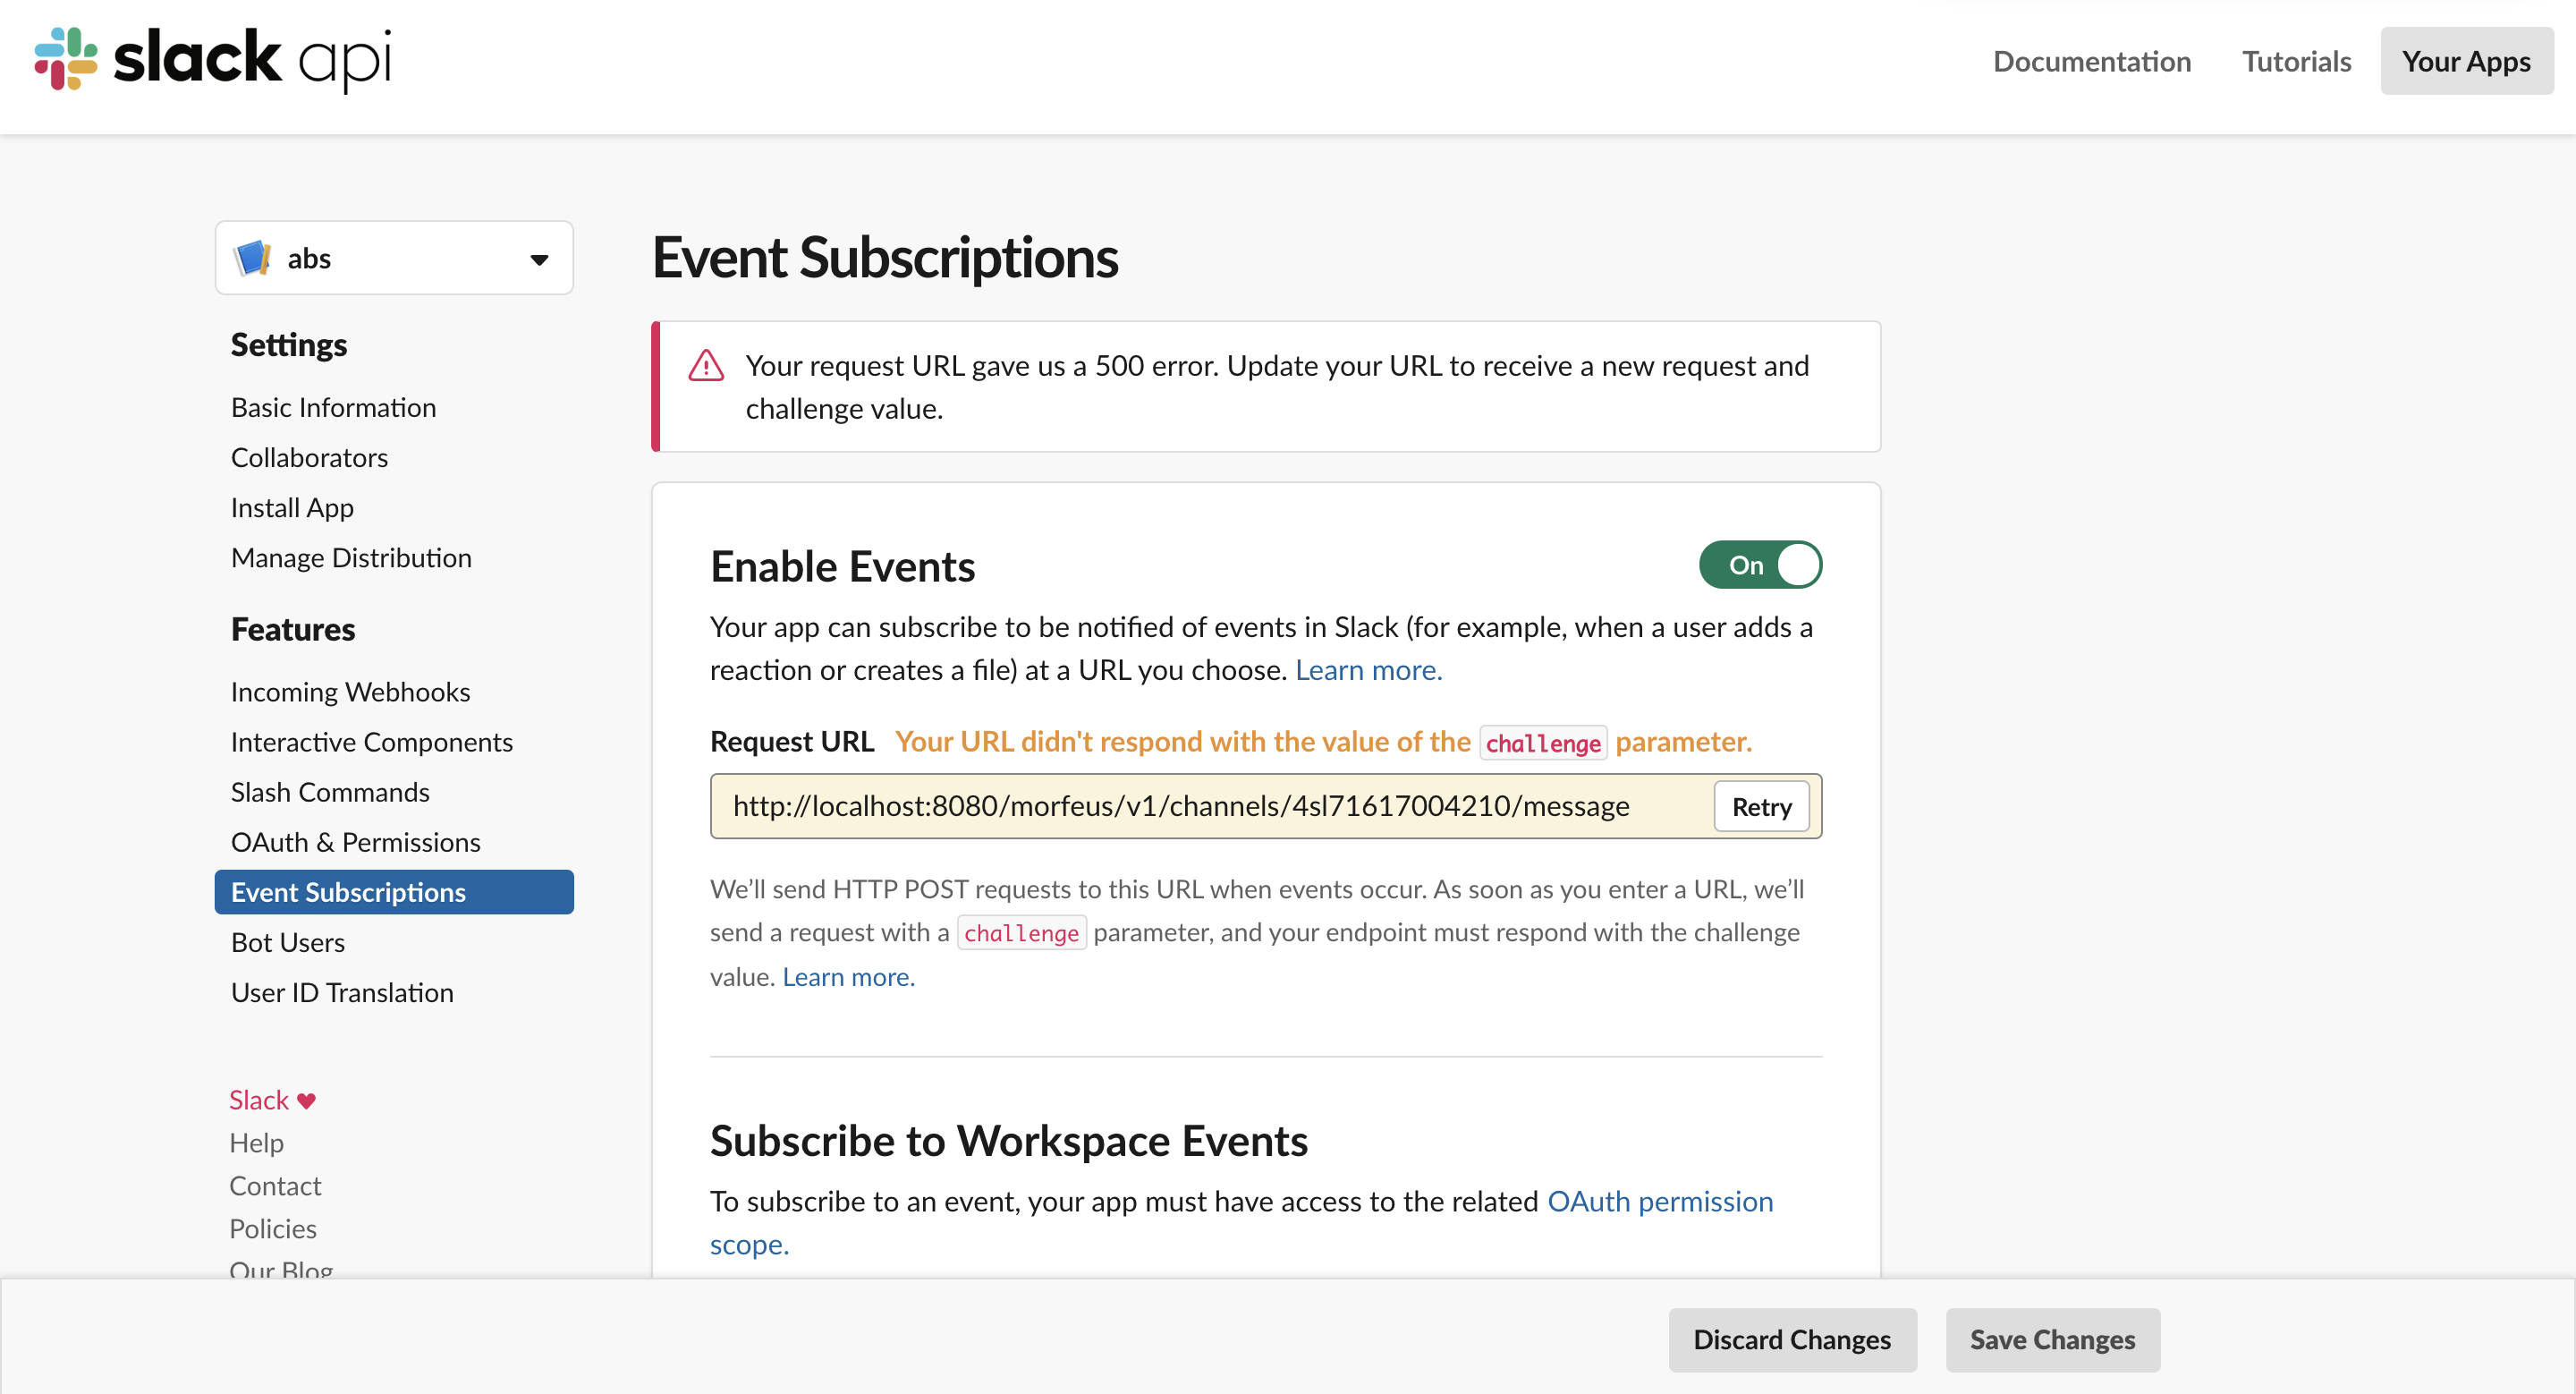
Once the url gets verified, on the same page go to Subscribe to Bot Events, click on the Add Bot User Event and add message.im bot user event and save it.
Navigate to Interactive Components, enable Interactivity and paste the same Request URL (which you pasted for Event Subscriptions). Click SAVE CHANGES.
Note: If you do any changes after setup, then Slack will ask to Reinstall the app as shown in screenshot, please reinstall the app clicking on Please reinstall your app in the alert or you can Reinstall app from the Install app tab.
Once all steps have been followed, Open Slack app and login with your credentials for the same workspace.
Click ADD MORE APPS.
Search for your bot by entering your bot name.
Start interacting with your bot.
Slack Bot Setup process is now complete!
Supported Components:
| Channel | Text | Card | Button | Carousel | List | Image | Quick Reply | Location | Videos |
|---|---|---|---|---|---|---|---|---|---|
| Slack | ✔ | ✔ | ✔ | ✔ | ✗ | ✔ | ✗ | ✗ | ✗ |
Supported Features:
| Features | Voice | Document Upload | Emoji | Sticker |
|---|---|---|---|---|
| Slack | ✗ | ✗ | ✔ | ✗ |
Skype
PreRequisites:
First and foremost, enable Skype channel in Morfeus and note down the Channel endpoint e.g. https://yourdomainname/morfeus/v1/channels/yourbotchannelid/message
Create a Skype Bot Service at Microsoft Azure Portal using the steps mentioned here, ensure that the messaging endpoint is set as the Channel endpoint mentioned earlier.
Kindly note down both the App ID and Password generated during Bot creation.
Connect Bot to Skype service following the procedure here.
Head over to Channels on the left side panel. On the Configure Skype page, select Enable Messaging and click Save.
After saving that config, Navigate to the Channels page again on the left side panel and click on the the label - Skype under Connect to Channels section.
You will be redirected to the invitation link for the newly created Skype Bot e.g. https://join.skype.com/bot/4c6ee262-3184-4173-a246-5deb03c0a780 Copy this invitation link and save it!
Setup
Please follow the procedure given below in order to set up Skype bot in Morfeus:
Login to morfeus admin and head over to Channel Settings for Skype.
Copy the Microsoft App ID generated earlier and paste it into the Auth Token field.
Similarly, Copy the Microsoft App Password and paste it into the Channel Secret field. Save the config.
Broadcast the Skype bot invitation link saved earlier to users so that they can start interacting with the bot.
To share the bot with any of your Skype Contacts, Click on Bot Name followed by Share Bot.
Skype Bot Setup process is now complete!
Supported Components
| Channel | Text | Card | Button | Carousel | List | Image | Quick Reply | Location | Videos |
|---|---|---|---|---|---|---|---|---|---|
| Skype | ✔ | ✔ | ✔ | ✔ | ✗ | ✔ | ✗ | ✗ | ✗ |
Supported Features
| Features | Voice | Document Upload | Emoji | Sticker |
|---|---|---|---|---|
| Skype | ✗ | ✗ | ✔ | ✗ |
Google Assistant
PreRequisites:
Go to dialogflow and create a dialogflow Agent
After your agent is now created, you can see it below the Dialogflow logo.
Click on Intents, Click on Default Fallback Intent
Scroll Down to Responses and delete all the default text responses.
Add google assistant(Click on + symbol beside Default).
When added, disable the toggle with name Use responses from the DEFAULT tab as the first responses.
Scroll down to Fullfillment, Check the option Enable webhoook call for this intent, and click on SAVE.
Set Headers Accept as application/json & Content-Type as application/json, Enable webhook for smalltalk as well, and click SAVE.
Go back to intents, click on Default Welcome Intent and repeat steps 4 to 8.
Setup
Please follow the procedure given below in order to set up Google Assistant bot in Morfeus:
Login to morfeus admin and enable Google assistant channel.
Copy the Callback URL of Google Assistant channel from Channel Settings e.g. https://yourdomainname/morfeus/v1/channels/yourbotchannelid/message, and paste under URL field in Google Assistant Agent Settings page under Fulfilment - Webhook section.
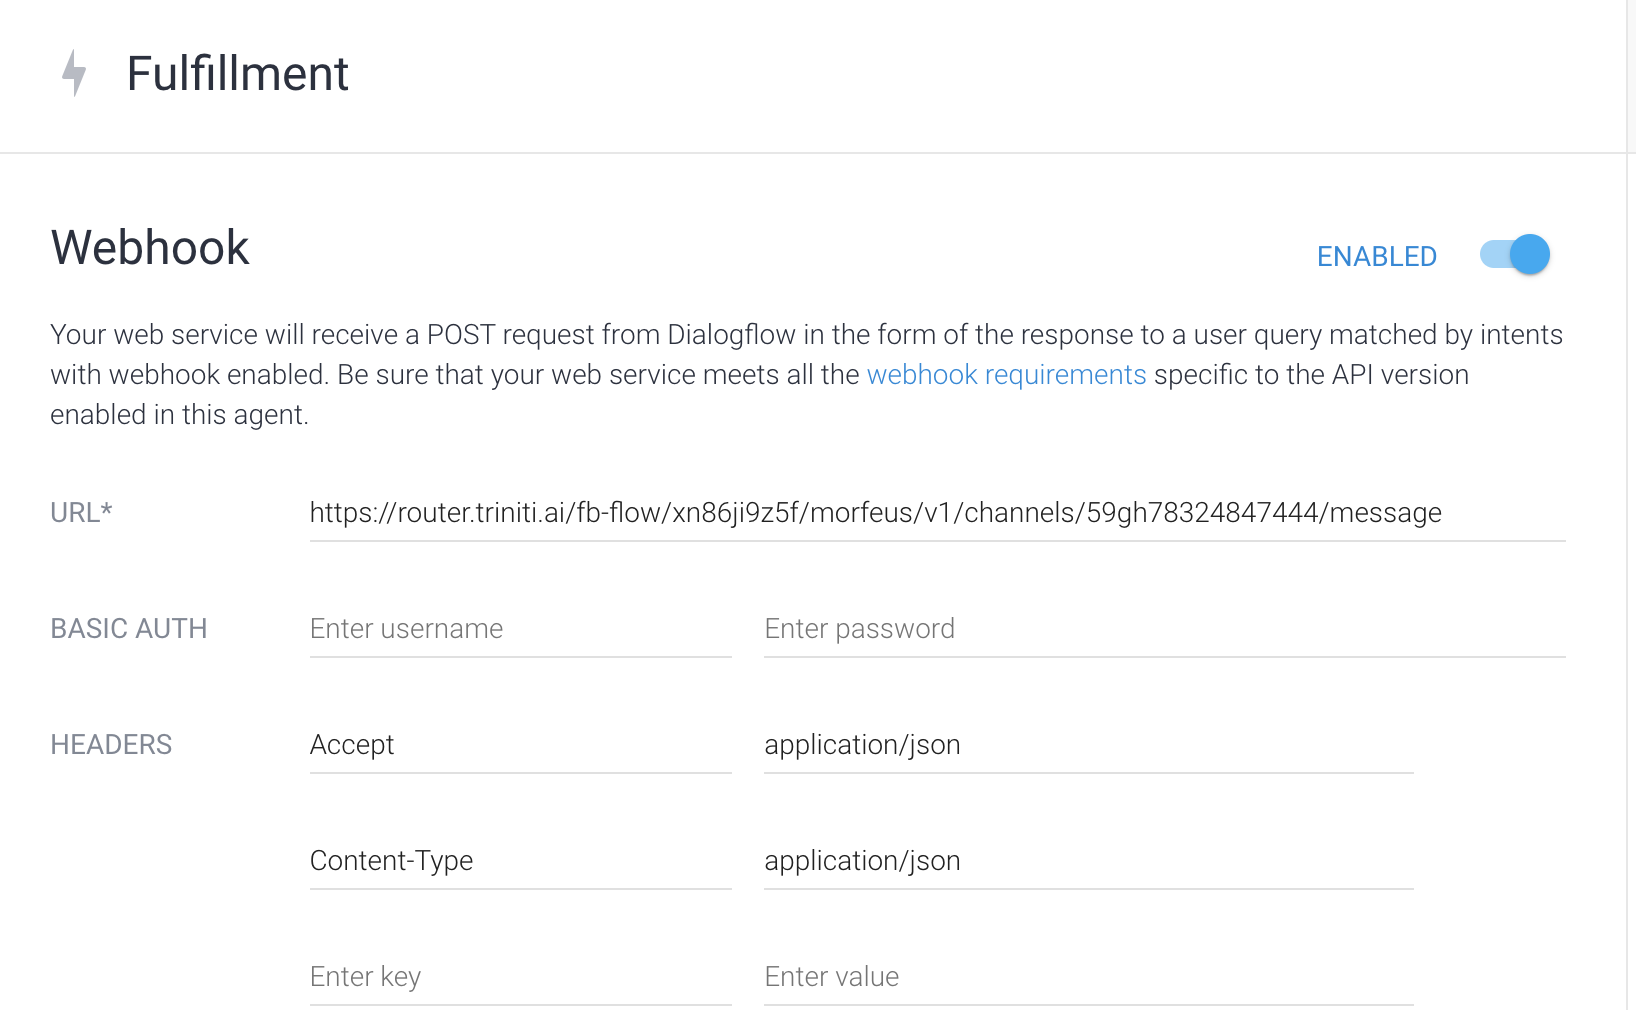
Your agent setup is almost done.
Now go to Action Console to test your dialogflow agent.
You can use your bot on any google assistant enabled device with the email id you have used to create agent.
Now your bot is ready to be interacted with!
Onboarding
- For OAuth2 onboarding, refer the documentation here.
Supported Components :
| Channel | Text | Card | Button | Carousel | List | Image | Quick Reply | Location | Videos |
|---|---|---|---|---|---|---|---|---|---|
| Google Assistant | ✔ | ✔ | ✔ | ✗ | ✔ | ✔ | ✗ | ✗ | ✗ |
| Google Home | ✔ | ✔ | ✔ | ✔ | ✔ | ✗ | ✗ | ✗ | ✗ |
Supported Features :
| Features | Voice | Document Upload | Emoji | Sticker |
|---|---|---|---|---|
| Google Assistant | ✔ | ✗ | ✗ | ✗ |
| Google Home | ✔ | ✗ | ✗ | ✗ |
Alexa
PreRequisites:
Login with Amazon developer account and click on amazon Alexa icon.
Click on Get Started in Alexa Skill Set to start with your new skill. Now Create new skill by following Skills creatiopn document Note Build a custom skill
Open JSON Editor in Skill Builder page and paste your Alexa config JSON or drag and drop your JSON file to import our intents into your skill.
Enable Alexa channel in Morfeus and note down the Channel endpoint e.g. https://yourdomainname/morfeus/v1/channels/yourbotchannelid/message
Paste your endpoint in Skill Builder endpoint config page. Make sure you update your domain in endpoint.
You can find one dropdown list followed by endpoint input box, select options listed below and leave the remaining fields blank as shown in the screenshot and save endpoint. “My development endpoint is a sub-domain of a domain that has a wildcard certificate from a certificate authority”.

Enable Account linking option to proceed with Security Provider Information.
Select Auth Code Grant in Authorization Grant Type.Follow these steps for account linking
Setup
For account linking go to channel setting Oauth Configuration tab and for Authorization URI, change domain from following url as per your client and use it. "[https://yourdomain/morfeus/oauth/authorize] eg (https://workspaces.active.ai/morfeus/oauth/authorize)"
For Access Token URI, change domain from following url as per your client and use it "https://yourdomain/morfeus/oauth/token"
Update your alexa channel bot-id for Client ID.
Update client secret as "activesecret".
Select "Credentials in request body" for Client Authentication Scheme.
Copy Redirect URLs from Account Linking page and Insert Oauth Client Details in Database with your client id, client secret and redirect URLs (Should be comma seperated).
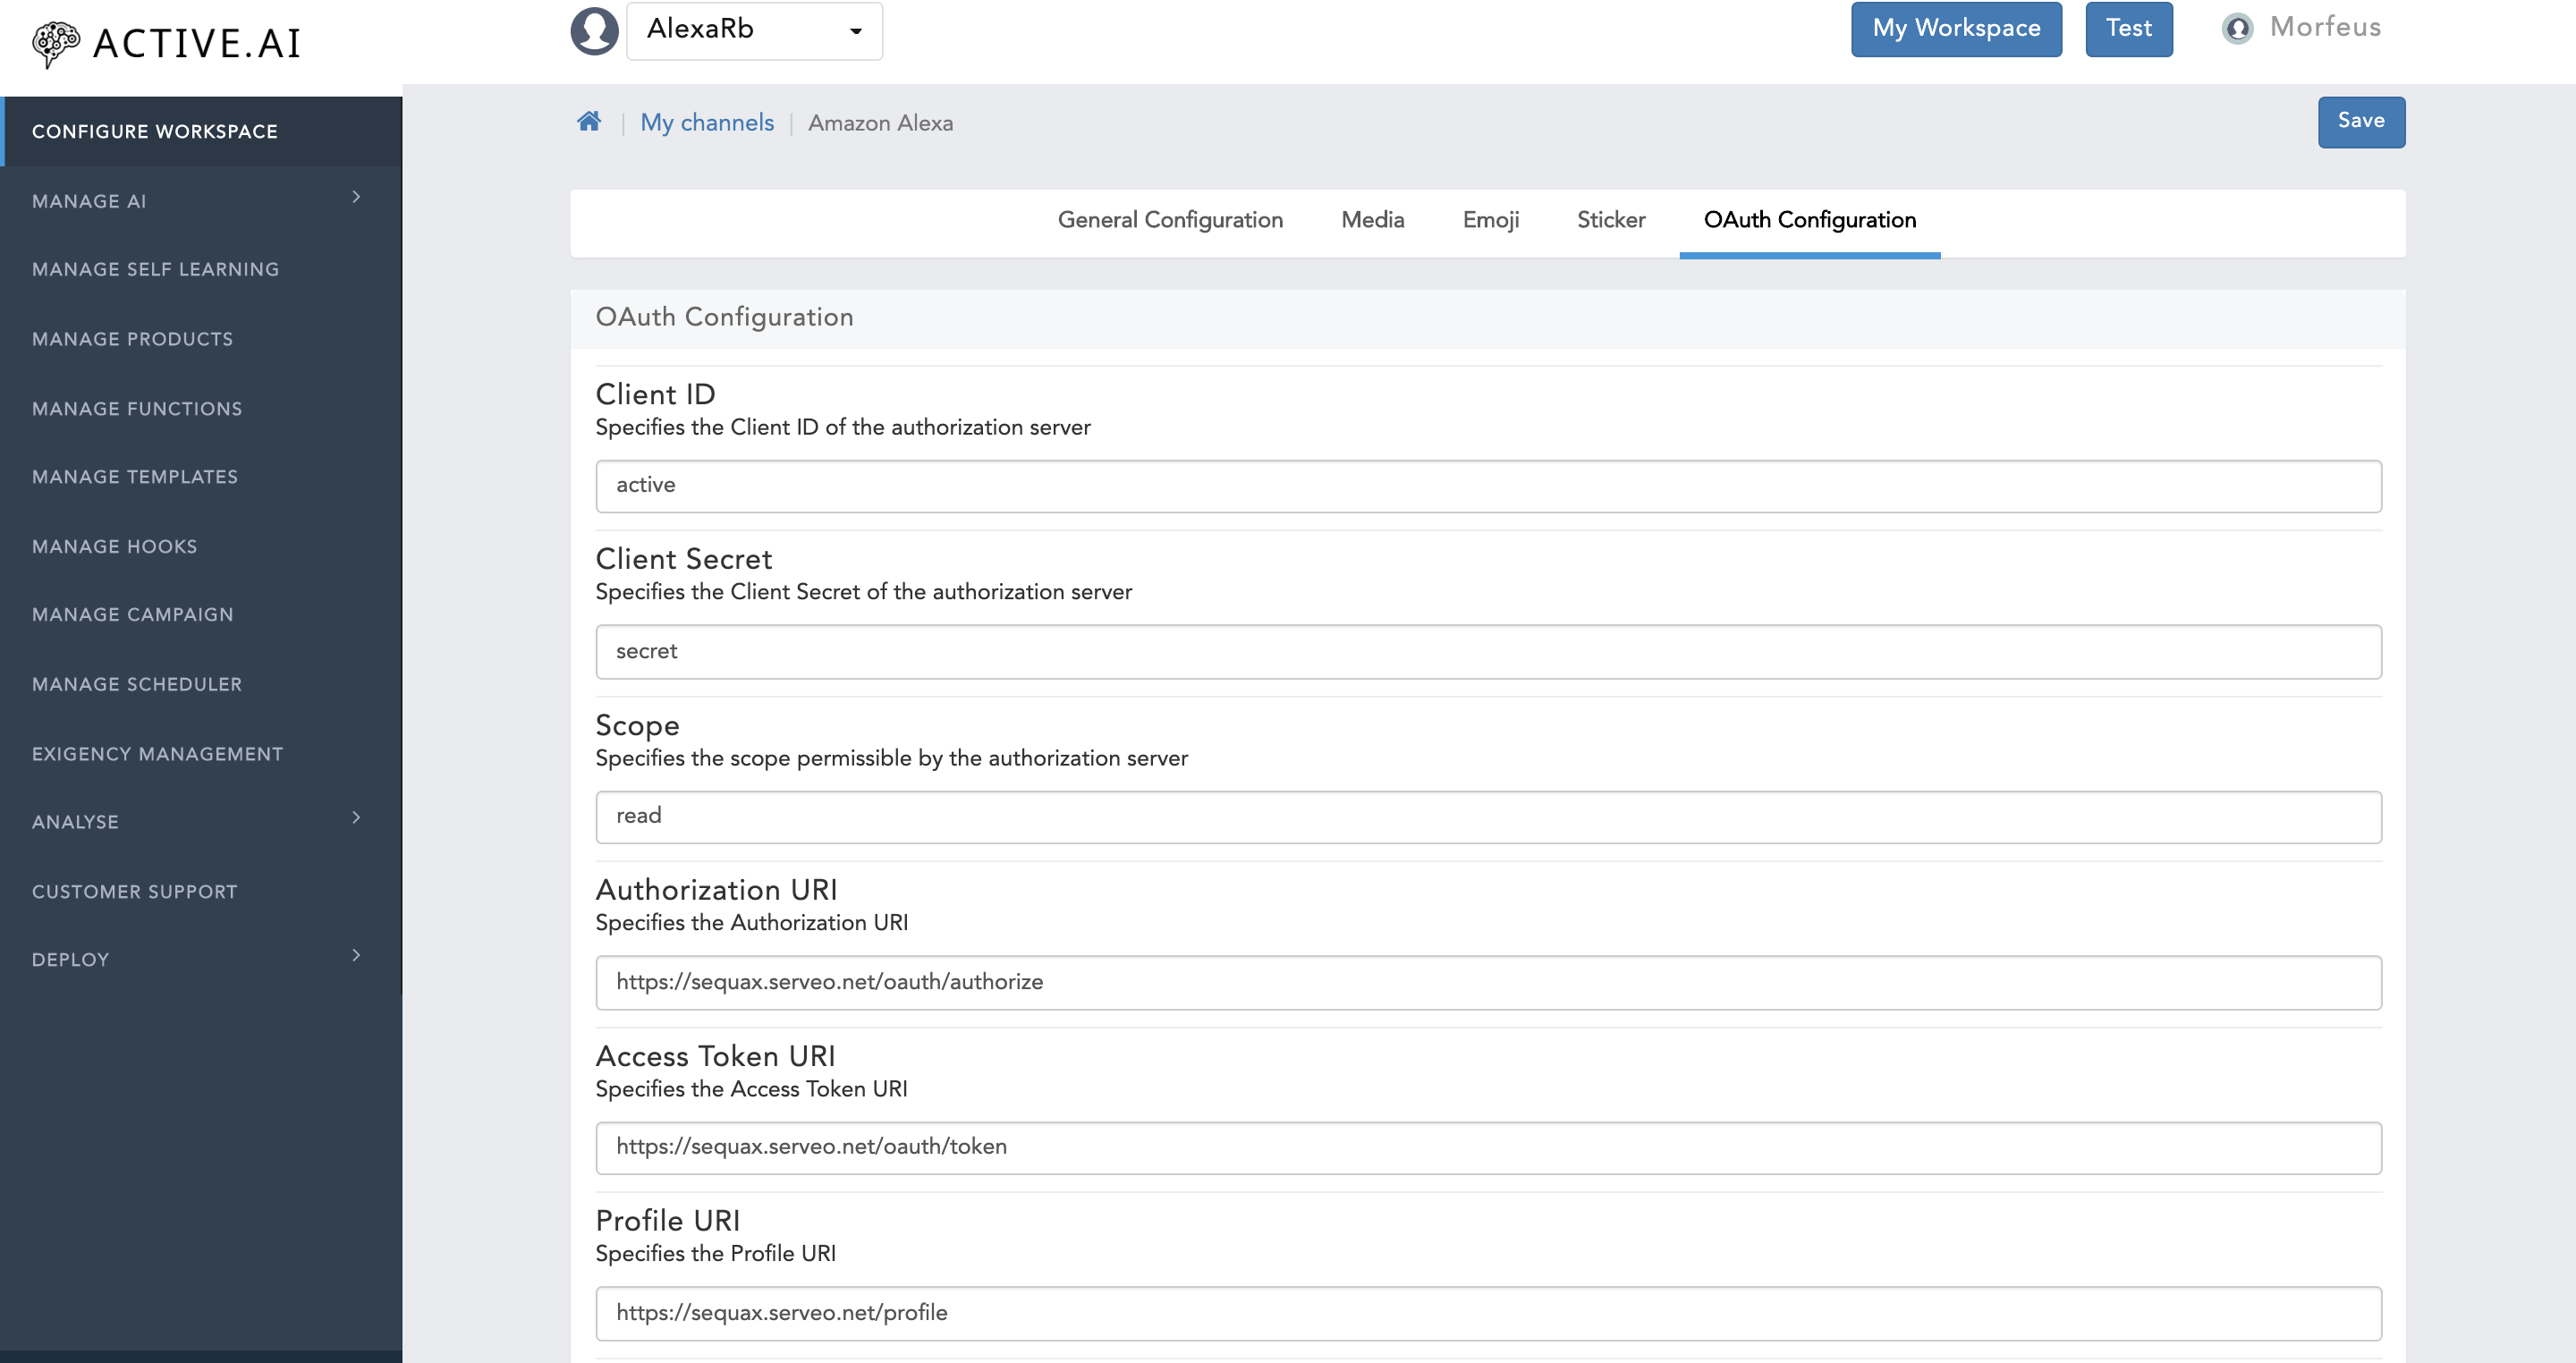

oAuth client details.sql
INSERT INTO oauth_client_details (
    client_id,
    resource_ids,
    client_secret,
    scope,
    authorized_grant_types,
    web_server_redirect_uri,
    authorities,
    access_token_validity,
    refresh_token_validity,
    additional_information,
    autoapprove
) VALUES (
    'YourBotId',
    NULL,
    'YourClientSecret',
    'read',
    'authorization_code,refresh_token',
    'YourRedirectUri(Comma seperated)',
    'ROLE_USER',
    86400,
    864000,
    NULL,
    'read'
);
- Thats it, Save your changes.
- Now navigate to Skill Builder page by clicking custom navigation segment bar and build your model.
Alexa-Skill Enable
- Visit Amazon Alexa home and click on your skill after clicking "your skills" button on the header.
- Enable your skill by clicking "Enable" button.
- Thats it, Now follow up the popup which asks you for account linking. Finish all steps.
Alexa-Skill Testing
- For testing, Navigate to amazon developer account and select your skill.
- Invoke your skill by invocation name to test it.
Viber
PreRequisites:
First and foremost, enable Viber channel in Morfeus and note down the Channel endpoint e.g. https://yourdomainname/morfeus/v1/channels/yourbotchannelid/message
In order to build a bot for Viber, one must have a Public Account. You’ll need to head over to the Viber website and fill in this form to apply and open a Public Account.
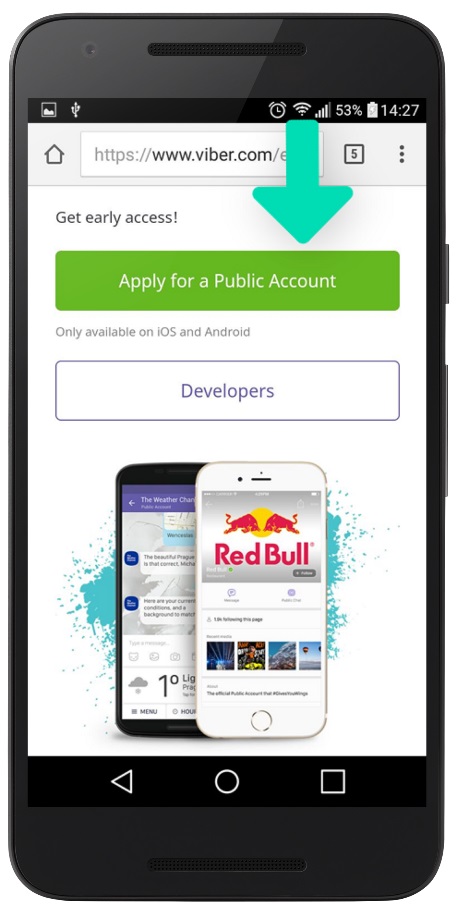
After your application has been approved, you will get a notification in your Viber mobile app.
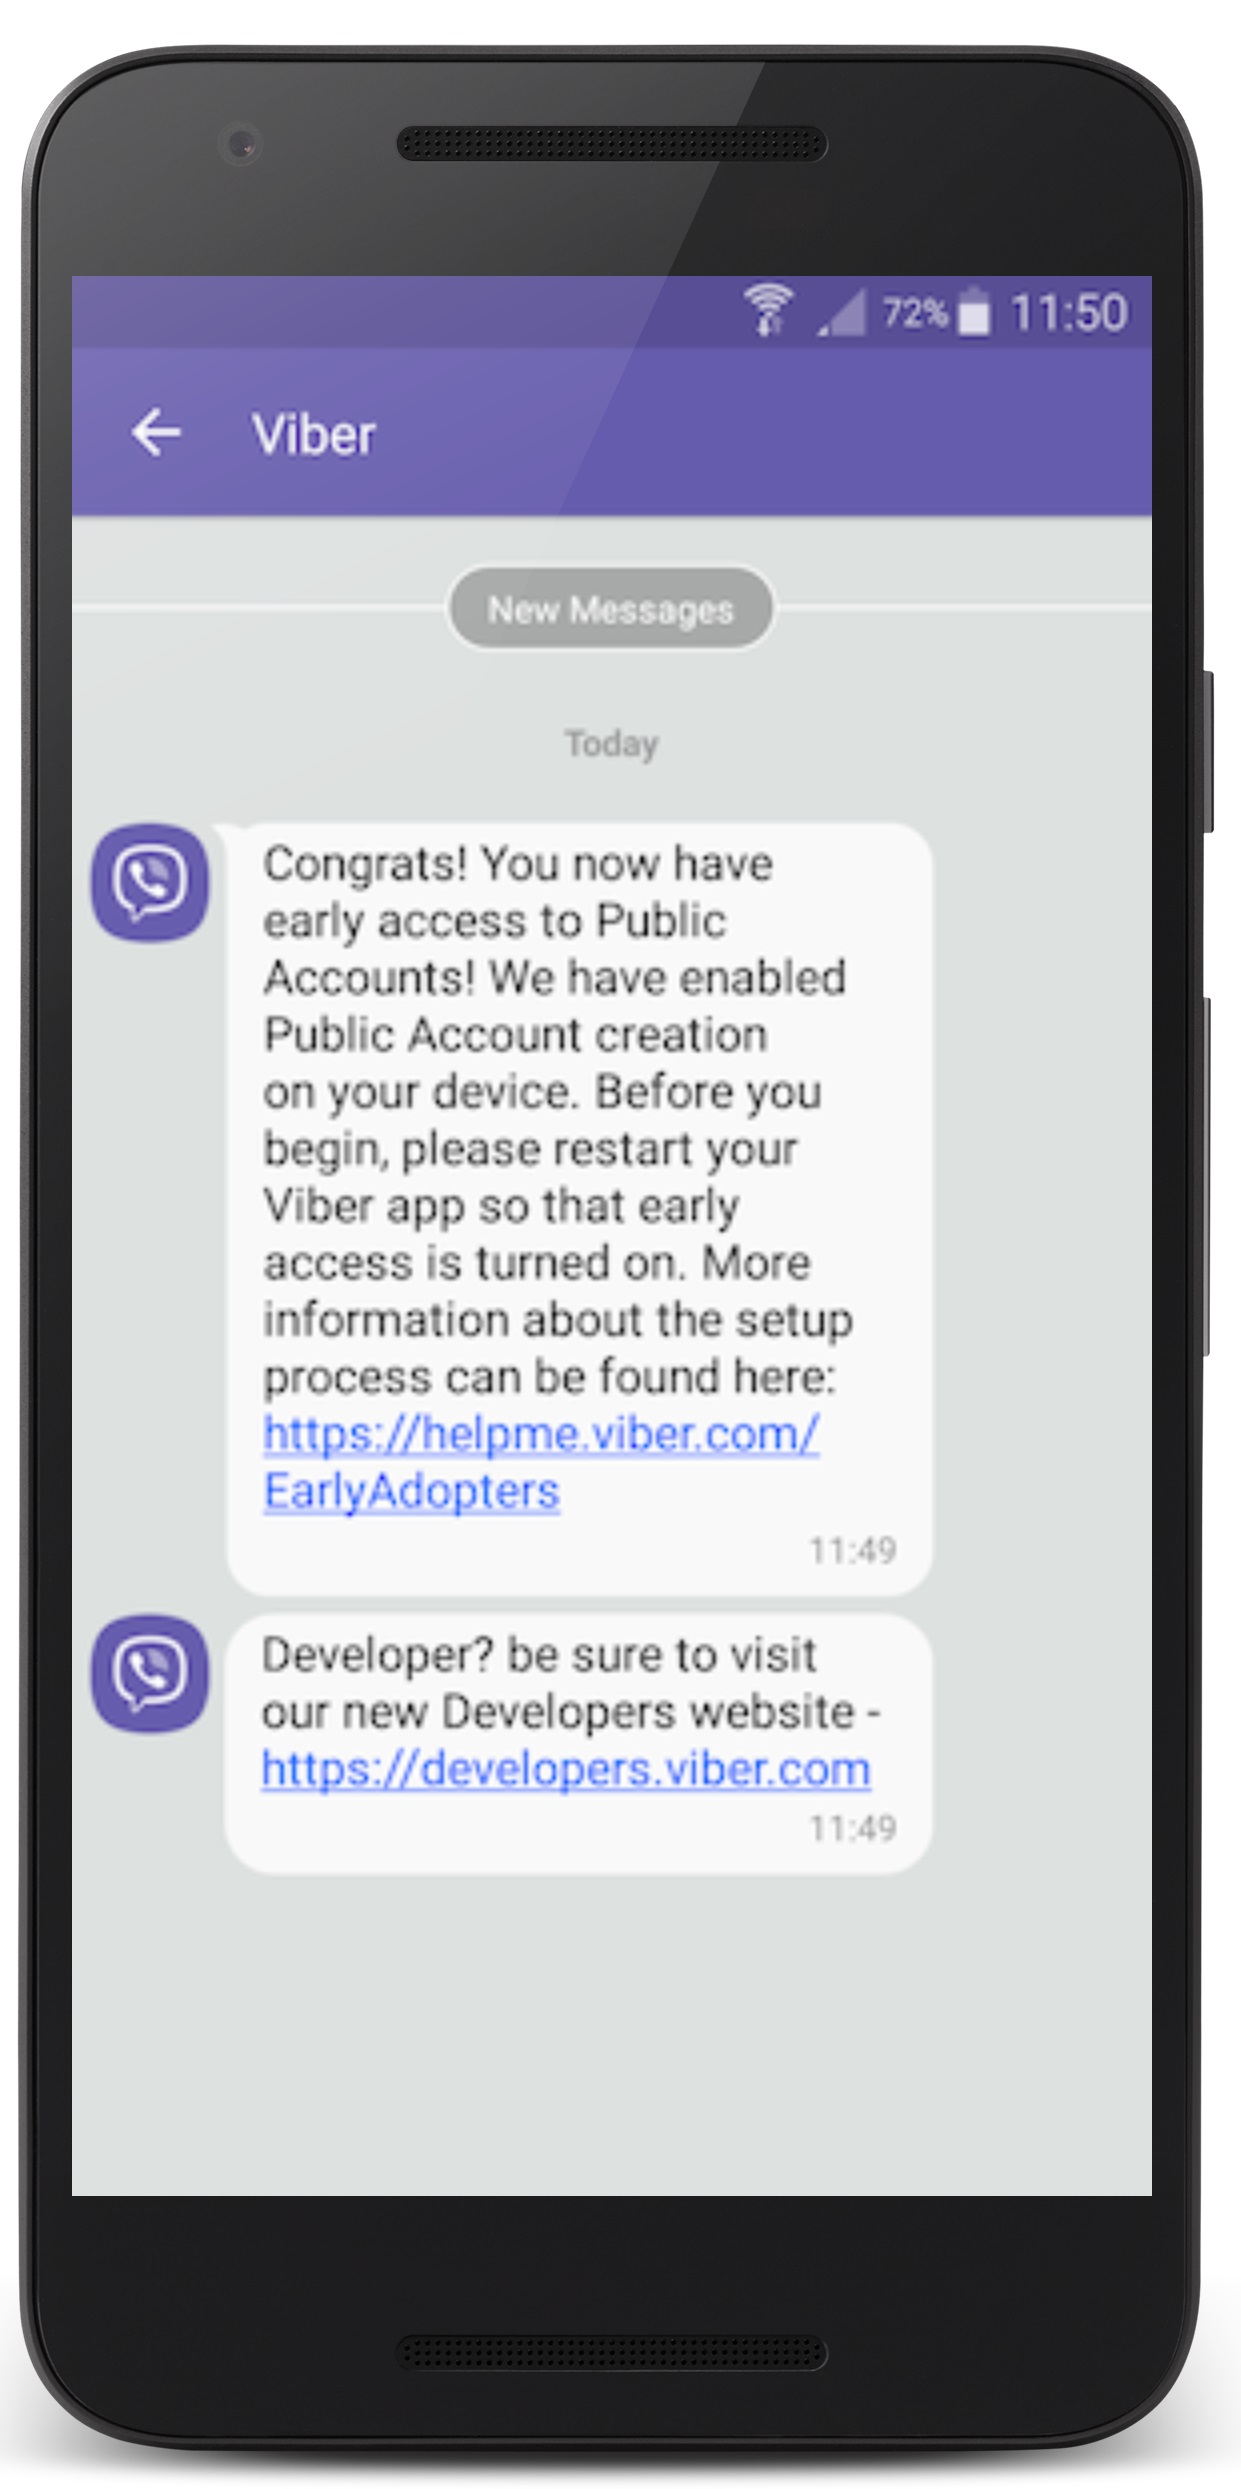
Once your application is approved, you will receive an email inviting you to start creating your Public Account. Tap on the link in your acceptance message to access the Admin Panel and complete creating your account.
After successful creation of account, you will receive an Auth token for the viber bot e.g. 46db2d78de27d070-31a83.7435bcbdd2-56805d173746365d. Kindly note down the token!
Setup
Please follow the procedure given below in order to set up Skype bot in Morfeus:
Login to morfeus admin and head over to Channel Settings for Viber.
Enable Viber channel in Morfeus and note down the Channel endpoint e.g. https://yourdomainname/morfeus/v1/channels/yourbotchannelid/message
Set up your webhook. The webhook must be set to Viber channel's messaging endpoint, which is to be retrived from Channel settings in Morfeus Admin. The headers and webhook URL need to be specified in the format illustrated below:
Set headers
 Note: Set the Auth token as a header value against key X-Viber-Auth-Token.
Set Body
 Note: Enter the endpoint url of the bot in the body for key url.
4. Search for your bot from the viber app and start chatting.
Viber Bot Setup process is now complete!
Supported Components:
| Channel | Text | Card | Button | Carousel | List | Image | Quick Reply | Location | Videos |
|---|---|---|---|---|---|---|---|---|---|
| Viber | ✔ | ✔ | ✔ | ✔ | ✗ | ✔ | ✗ | ✗ | ✗ |
Supported Features:
| Features | Voice | Document Upload | Emoji | Sticker |
|---|---|---|---|---|
| Viber | ✗ | ✗ | ✔ | ✔ |
Webex
PreRequisites:
Go to Webex developer site and Sign up Webex developer
Create a Webex Teams Bot.
Setup
Please follow the procedure given below in order to set up Webex bot in Morfeus:
Once bot is Successfully created, Copy Bot's Access Token and paste in Auth token of the admin panel in channel Webex
Copy Bot Name in and paste it in Refresh Token in admin
Copy Bot Username and paste it in SecretKey in admin, save the changes.
Webhook setup for Webex:
Go to create webhook to create a Webhook.
Fill all the necessary details. Note Write event as created. Leave the filter and secret field blank and hit RUN
Turn off the bearer toke toggle and copy you Bots Acess Token in that field.
NOTE: The above webhook will be created for the Bot that will send only Direct messages. To create a Webhook for a Bot to Reply in Group just add filter as --> roomType=group&personEmail=Bot Username.
Once successful registration of above Webhook you can add Bot to any space or can have a direct conversation with Bot
Supported Components:
| Channel | Text | Card | Button | Carousel | List | Image | Quick Reply | Location | Videos |
|---|---|---|---|---|---|---|---|---|---|
| Webex | ✔ | ✗ | ✗ | ✗ | ✗ | ✗ | ✗ | ✗ | ✗ |
Supported Features:
| Features | Voice | Document Upload | Emoji | Sticker |
|---|---|---|---|---|
| Webex | ✗ | ✗ | ✗ | ✗ |
Whatsapp by Gupshup Custom
Setup
Please follow the procedure given below in order to set up Whatsapp by gupshup bot in Morfeus:
Login to admin, Click on Manage Channels
Enable whatsapp gupshup custom from admin
Verify values for secret key, signature key, Base url is prefilled.
Verify isAsynch is set to true and Gupshup Request Type is Enterprise
Save “+91 76698 00346“ as a contact in your mobile
Copy the callback url and save it somewhere and save the Channel Config
With this, whatsapp setup is completed from admin
Call Back Url in Proxy Server
- Copy the given below curl and paste it in postman
- Replace the callback url from the one copied from admin channel's config
- Make sure vpn is tuned off and send the request
curl -X POST \ https://whatsapp.active.ai/whatsappproxy/morfeus/manage \ -H 'Content-Type: application/json' \ -H 'Postman-Token: dba7064e-a90f-426b-a6e4-8c30025cde7f' \ -H 'cache-control: no-cache' \ -d '{ "active":"https://596c-52-221-78-236.ngrok.io/morfeus/v1/channels/175wn16160558995/message" } - The Json Object contains bot name and call back url, the bot name can be changed, the call back url is from channel's config
{
"active":"https://596c-52-221-78-236.ngrok.io/morfeus/v1/channels/175wn16160558995/message"
}
5.Now open your whatsapp, open the above saved contact number and type open bot_name
6.bot_name can be anything, as per above curl, its active, so send open active on whatsapp, this command will add your bot on proxy server
5.Post sending this, Whatsapp Setup is done
Onboarding
- Your channel setup is complete now, You can configure and verify flows
Supported Components
| Channel | Text | Card | Button | Carousel | List | Image | Quick Reply | Location | Videos |
|---|---|---|---|---|---|---|---|---|---|
| Whatsapp by Gupshup | ✔ | ✔ | ✔ | ✔ | ✔ | ✔ | ✗ | ✗ | ✗ |
Supported Features
| Features | Voice | Document Upload | Emoji | Sticker |
|---|---|---|---|---|
| Whatsapp by Gupshup | ✔ | ✔ | ✔ | ✗ |
Request body
| Name | Type | Description |
|---|---|---|
| messageType | String | Type of the message eg Text, video, image etc |
| countryCode | String | Country code |
| sdkType | String | Sdk type |
| messageId | String | Unique identifier for each message |
| sdkVersion | String | Version of the sdk used |
| mobileNo | String | Mobile number of the user |
| isAuthDone | Boolean | Is authorization done |
| userchannelid | String | unique channel identifer |
| messageContent | String | Content of the message |
Response body
- Gupshup Response
| Name | Type | Description |
|---|---|---|
| id | String | Unique identifier of the request |
| timestamp | String | data and time info identifying the request |
| result | Array of single Response objects | Different types of response such as image, text, video etc |
| result.isAuthDone | Boolean | identifier to get is authentication done |
| result.isAuthReq | Boolean | identifier to get is authentication required |
| result.transactionStatus | Boolean | identifier to identify the transaction status |
Text response
| Name | Type | Description |
|---|---|---|
| lang | String | Language for the response |
| message | String | Message to be displayed in response |
| type | String | Different types of response in this case text |
Video response
| Name | Type | Description |
|---|---|---|
| lang | String | Language for the response |
| message | String | Message to be displayed in response |
| type | String | Different types of response in this case text |
| code | String | Unique template code for whatsapp |
| mediaurl | String | Unique media url |
| buttonEnabled | Boolean | Identifier for buttons in case of button Template |
| buttons | Array of button object | Button object if buttons are enabled |
Image response
| Name | Type | Description |
|---|---|---|
| lang | String | Language for the response |
| message | String | Message to be displayed in response |
| type | String | Different types of response in this case text |
| code | String | Unique template code for whatsapp |
| mediaurl | String | Unique media url |
File Response
| Name | Type | Description |
|---|---|---|
| lang | String | Language for the response |
| message | String | Message to be displayed in response |
| type | String | Different types of response in this case text |
| code | String | Unique template code for whatsapp |
| payload | String | Payload of the file |
Template Response
| Name | Type | Description |
|---|---|---|
| lang | String | Language for the response |
| message | String | Message to be displayed in response |
| type | String | Different types of response in this case text |
| code | String | Unique template code for whatsapp |
| mediaurl | String | Unique media url |
| buttonEnabled | Boolean | Identifier for buttons in case of button Template |
| buttons | Array of button object | Button object if buttons are enabled |
Button Object
| Name | Type | Description |
|---|---|---|
| type | String | Different types of button eg url,quick_reply,click_to_call |
| text | String | Unique template code for whatsapp |
| payload | String | Payload of the file |
User Profile Obejct
This object can be returned from the direct:whatsapp.request.profile route
If customer id is set, user will be treated as a logged in user
| Name | Type | Description |
|---|---|---|
| first_name | String | First name of the user |
| timezone | String | Timezone of the user |
| locale | String | Locale of the user |
| last_name | String | Last name of the user |
| gender | String | Gender of the user |
| profile_pic | String | Profile picture of the user |
| customer_id | String | Unique Customer id of the user |
| mobile_no | String | Registered whatsapp Mobile number |
Simple Text
PreRequisites:
1) The /message API allows the channel to send a user-typed message to Morfeus. This API is synchronous in nature and the client is expected to wait for the response from server.
2) First and foremost, enable Simple Text channel in Morfeus and note down the Channel endpoint e.g. https://yourdomainname/morfeus/v1/channels/yourbotchannelid/message
3) Request Header
| Name | Type | Description |
|---|---|---|
| Content-Type | String | Content Type. It must be application/json |
| Authorization | String | API-level bot specific authorisation key for security |
| Accept | String | API-level bot specific authorisation key for security |
4) Request Path Parameters
| Name | Type | Description |
|---|---|---|
| botChannelID | String | Unique identifier of the bot channel. e.g. 34st45845223 |
5) Request Body
| Name | Type | Description |
|---|---|---|
| id | String | Unique identifier of the bot channel. e.g. 34st45845223 |
| timestamp | String | data and time info identifying the request |
| sessionId | String | chat id specific to the session |
| type | String | the type of request i.e. “text” |
| content | String | the text message typed by the user |
| userId | String | user id for every user |
6) POST https://{domain}/morfeus/v1/channels/34st33145763139/ message
{
  "id": "r321243434",
  "timestamp": "2018-03-01T03:26:32+05:30",
  "sessionId": "s4564434",
  "type": "text",
  "content": "hello",
  "userId": "u12323434"
}
7) Receiving Responses
The response protocol consists of the responsessponse type and a list of corresponding responses ( text supported as of now ) sent from the server. Request Header
| Attribute | Type | Description |
|---|---|---|
| type | String | the response type i.e. text |
| responses | Array of strings | list of responses |
| userId | String | the same user id contained in request body |
Setup
1) First and foremost, enable Simple Text channel in Morfeus and note down the Channel endpoint e.g. https://yourdomainname/morfeus/v1/channels/yourbotchannelid/message
2) You will make a curl request. sample curl Request will look like
curl 'https://flow.noplasticsworld.xyz/morfeus/v1/channels/1st44884114504/message' \
-H 'content-type: application/json' \
-H 'accept: application/json'  \
-H 'x-api-key: x6aik17uoi' \
-H 'Authorization:secret' \
--data-binary '{"id":"mid.i6udytiw","type":"text","content":"what is the interest rate of your credit cards","userId":"54108045138", "sessionId":"a1471edd-63e8-4be3-953a-637480c6c53e"}'
3) Sample Response will look like POST https://{domain}/morfeus/v1/channels/34st33145763139/ message
Content-Type: application/json
{
  "type": "text",
  "responses": [
    "Hi! How can I help you?"
  ],
  "userId": "u12323434"
}
IVR
PreRequisites:
- Go to Vonage and signup and create a new application.
Setup
Vonage Dashboard
In the RTC field, you will select the method as HTTP POST and will give the proper URL to the RTC API. The sample URL will look like this https://gupshup.active.ai/websocket/api/event/rtc.
Copy the Input Message URL Endpoint from morfeus admin dashboard, and paste it inside Base Url, set this Same URL in the Vonage dashboard under the Voice section for the answer URL, event URL, and Fallback URL.
Copy the application id.
Click on generate a public key in the Vonage dashboard and open the downloaded file in any text editor.
Admin Dashboard
Enable the channel IVR in the Admin dashboard.
Paste the application Id from the Vonage dashboard in Auth Token.
Paste the generated key in the Secret Key section.
In the Token Expiry (Secs) you can enter an integer value, whereas in IVR will say a hold message after every x number of seconds.
In the WebSocket URI field, you will enter the Websocket URL, sample WebSocket URL will look like this wss://gupshup.active.ai/WebSocket/socket
Fallback time Interval for IVR you can configure this field in seconds for fallback to DTMF, in the below Number of Miss section u will give an integer value. This feature will fallback to DTMF input when you get low confidence for the configured number of missed times in the configured time interval
Make sure you save the configs.
In the deploy section of the dashboard under workspace configuration, you will add two JSON config files. one for IVR language config and the other will be for ASR config. Sample files are given below
Place websocket jar in webapps
LANGUAGE_PROPERTIES_IVR
[
  {
    "language": "en",
    "phone": [
      "18334641305"
    ],
    "context": "no thanks,yes please,yes,no,go ahead,please go ahead,platinum card,sms alert,signature card,unlock,pull service,please cancel the request,cancel the request,gold card,no thanks,no bye",
    "hold_text": [
      "Give me few seconds so that i can process your request.",
      "Please hold for a second, so that i can check your details",
      "Thanks, let me process your request"
    ],
    "user_silence_messages": [
      "I am sorry I could not hear you clearly",
      "Are you speaking",
      "please talk"
    ],
    "user_pause_messages": [
      "please hold",
      "wait for a while",
      "please wait",
      "1 min"
    ],
    "second_language ?": "hi",
    "primary_accent_code": "en-IN",
    "secondry_accent_code": [
      "en-IN"
    ],
    "tts_accent": "en-IN",
    "tts_accent_style": "2",
    "empty_input_message": "I am sorry I could not hear you clearly , Can you please read out slowly and clearly so that i can understand you better.",
    "bargeIn": true,
    "agent_numbers": [
      "919840664842"
    ],
    "asrConfidenceThreshHold":0.8
  },
  {
    "language": "hi",
    "phone": [
      "18442867802"
    ],
    "context": "abc,def,pqr",
    "hold_music_url": "www.sample.mp3",
    "hold_text": [
      "मुझे कुछ सेकंड दें ताकि मैं आपके अनुरोध को चेक कर सकूं",
      "कृपया कुछ सेकंड के लिए रुकें, ताकि मैं आपकी डिटेल्स चेक कर सकूं"
    ],
    "second_language": "hi",
    "primary_accent_code": "hi-IN",
    "secondry_accent_code": [
      "hi-IN"
    ],
    "tts_accent": "hi-IN",
    "tts_accent_style": "5",
    "empty_input_message": "मुझे खेद है कि मैं आपको स्पष्ट रूप से नहीं सुन सका, क्या आप कृपया धीरे और स्पष्ट रूप से पढ़ सकते हैं ताकि मैं आपको बेहतर समझ सकूं।",
    "bargeIn": true,
    "agent_numbers": [
      "919840664842"
    ],
    "asrConfidenceThreshHold":0.8
  }
]
This file is a language-specific file where inside the phone section you will insert the IVR numbers associated with that language.
[
{
"language": "ar",
"primary accent": "ar-EG",
"alternative language": [
  "ar-MA",
  "ar-OM"
],
"ttsAccentStyle": "ar-XA-Standard-B",
"context":"حظر بطاقتي,بطاقة سيغنتشر,حظر دائم,نعم من فضلك"
},
{
"language": "en",
"primary accent": "en-GB",
"alternative language": [
  "en-US",
  "en-SG"
],
"ttsAccentStyle": "en-IN-Standard-D",
"context":"transfer $500 to jack"
},
{
"language": "hi",
"primary accent": "hi-IN",
"alternative language": [
  "hi-IN"
],
"ttsAccentStyle": "hi-IN-Wavenet-D",
"context":"حظر بطاقتي,بطاقة سيغنتشر,حظر دائم,نعم من فضلك"
}
]
ASR config is for the configuration of the ASR where we use google as our ASR engine.
Finally, you can call on the IVR number that u have set with your application in the Vonage dashboard.
Supported Components
| Channel | Text | Card | Button | Carousel | List | Image | Quick Reply | Location | Videos |
|---|---|---|---|---|---|---|---|---|---|
| IVR | ✔ | ✗ | ✗ | ✗ | ✗ | ✗ | ✗ | ✗ | ✗ |
Supported Features
| Features | Voice | Document Upload | Emoji | Sticker |
|---|---|---|---|---|
| IVR | ✔ | ✗ | ✗ | ✗ |
Multichannel
Setup
Please follow the procedure given below in order to set up Multichannel bot in Morfeus:
- Login to Admin, Click on Manage Channels
- Enable Multichannel from Social tab and copy the base url
- With this, the basic multichannel setup is complete
- If you wish to have a security check, make Terms and Conditions true,when its true, each request should have
X-Hub-Signaturewith valuesha256=xxxxxxxxxx, security key has to be used/configured and same security key, request body is to be used to generate a sha256 hash key - Multichannel can work in synchronous/asynchronous mode, If isAsynch is true, then webhook url can be entered in Base Url
Supported Components
| Channel | Text | Card | Button | Carousel | List | Image | Quick Reply | Location | Videos |
|---|---|---|---|---|---|---|---|---|---|
| Multichannel | ✔ | ✔ | ✔ | ✔ | ✔ | ✔ | ✗ | ✗ | ✔ |
Supported Features
| Features | Voice | Document Upload | Emoji | Sticker |
|---|---|---|---|---|
| Multichannel | ✗ | ✗ | ✗ | ✗ |
Specifications
| Name | Type | Description |
|---|---|---|
| version | String | Version of the sdk used |
| request | Object | Contains content |
| content | Object | Contains type and text of request |
| type | String | Identify the type of the message either text or template |
| text | String | Message which we have to send |
| channelType | String | states the channelcode of different supporting channels |
| langCode | Boolean | Unique language code |
| userId | String | unique user identifer |
| requestId | String | Contains request Id |
| event | String | Mentions the type of event, default event is message |
| button | String | Contains the attribute of button template |
| event | String | Mentions the type of event, default event is message |


