Manage a Workspace
Workspaces are logical containers which host your Conversational AI bot/VA . Morfeus supports multi tenancy and you can create multipe bots with a logical separation with diiferent access controls for all bot related configuration including data , workflows and fulfillments , settings and customer data .
A Workspace can be thought of as a place where the user journey for different scenarios is described. It includes the training data for the AI engine and workflow to execute the Actions/Fulfillments.
Workspace Types
We are supporting two types of workspaces.
- CognitiveQnA(FAQs) Workspaces
In this type of workspace, you can configure only FAQs and Small talk, this is apt for information only Conversational AI bots. This workspace will not support transaction flows via intents. - Conversational Workspaces
This type of workspace, supports the full Conversational AI capabilities including both QnA(FAQs) and intents
Either you can configure your bot to give a response only for the user's query by selecting FAQ Workspace or you can configure your bot to perform transactions also by selecting Conversational Workspace.
If you don't select any workspace type then by default it will be FAQs only workspace.
Create a CognitiveQnA (FAQs) Workspace
In this type of workspace, you can configure only FAQs and Small talk, this is apt for information only Conversational AI bots. This workspace will not support transaction flows via intents.
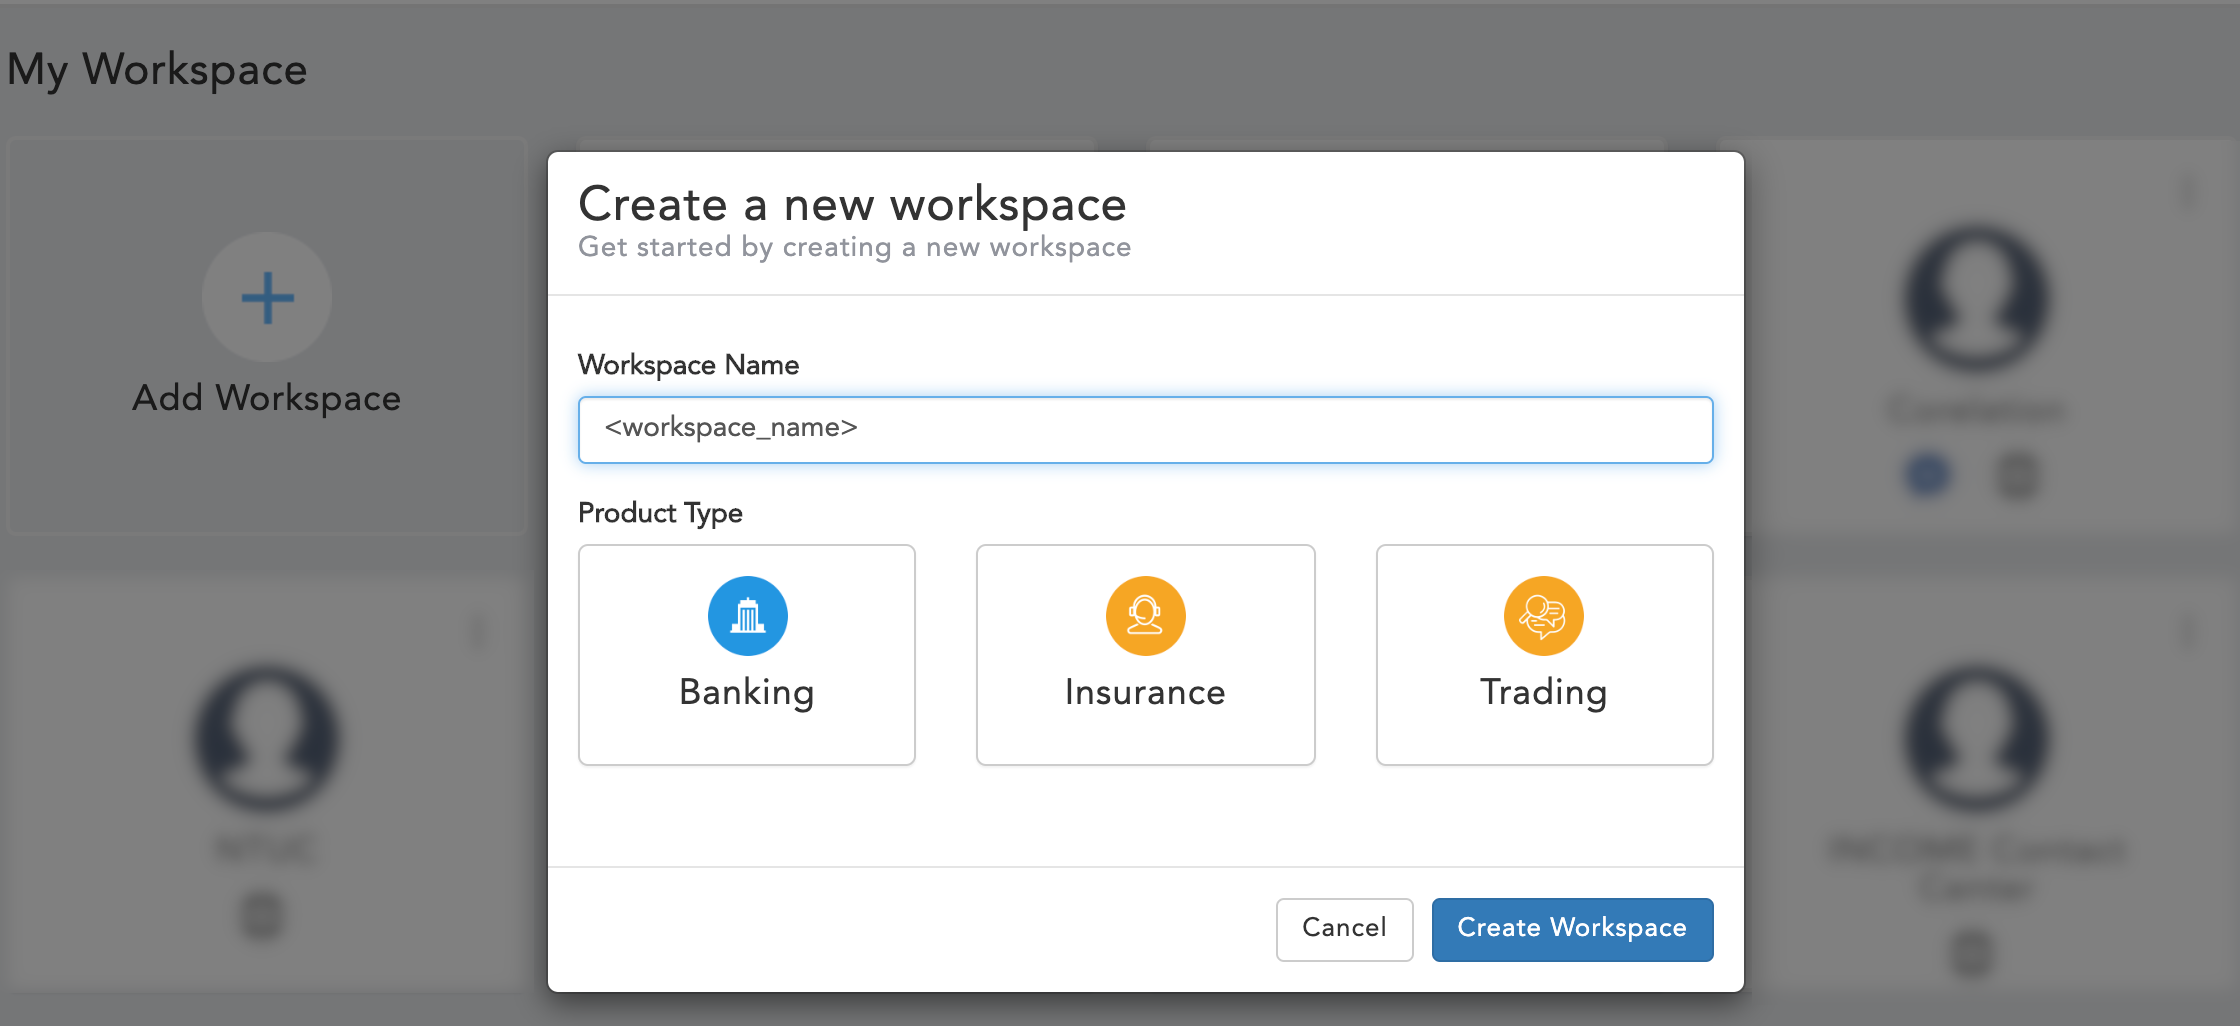
You can create a CognitiveQnA(FAQs) Workspace by following below steps:
- Click on "Add workspace".
- Mention the name of the workspace in the prompted window.
- Do not select any domain.
- Click on create a workspace.
FAQ Workspaces requires SmallTalk, FAQs, Spell Checker and Rule Validator out of all Conversational AI modules.
Create a Conversational Workspace
Converstaional Workspaces facilitate bots to provide on-par human chatting experience for the user and performs transactions along with responding to user's queries. This type of workspace is very useful to create a conversational AI experience.
You can create a Conversational Workspace by following below steps:
- Click on "Add workspace".
- Mention the name of the workspace in the prompted window.
- Select "Banking (Retail Banking, Corporate Banking or Retail lending) / Insurance / Trading / Custom" domain.
- Click on create a workspace.

Workspace creation will load base data and default data to the workspace as following :
Git sync will done while workspace creation will load faqs,intents,entities,spellcheck,smalltalk as part of base data
- Git url : To get Base Data, click here
- Git workspace : english_base
Base data Git sync default configuration exits in config.properties file
Path of file admin-backend-api/src/main/resources/properties/config.properties
Base data contains the minmal data to start the generate and train
Default data is also loaded to workspace
Default data is loaded to provide domain specific("Banking (Retail Banking, Corporate Banking or Retail lending) / Insurance / Trading / Custom") data
As part of default data templates,messages,hooks,workspace config,bot rules and ai rules will be loaded which are configurable
For Conversational Workspaces, all the AI data modules will be in use as mentioned under Conversational AI Modules.
Select a Workspace
- Login to the Admin portal to access/create a workspace
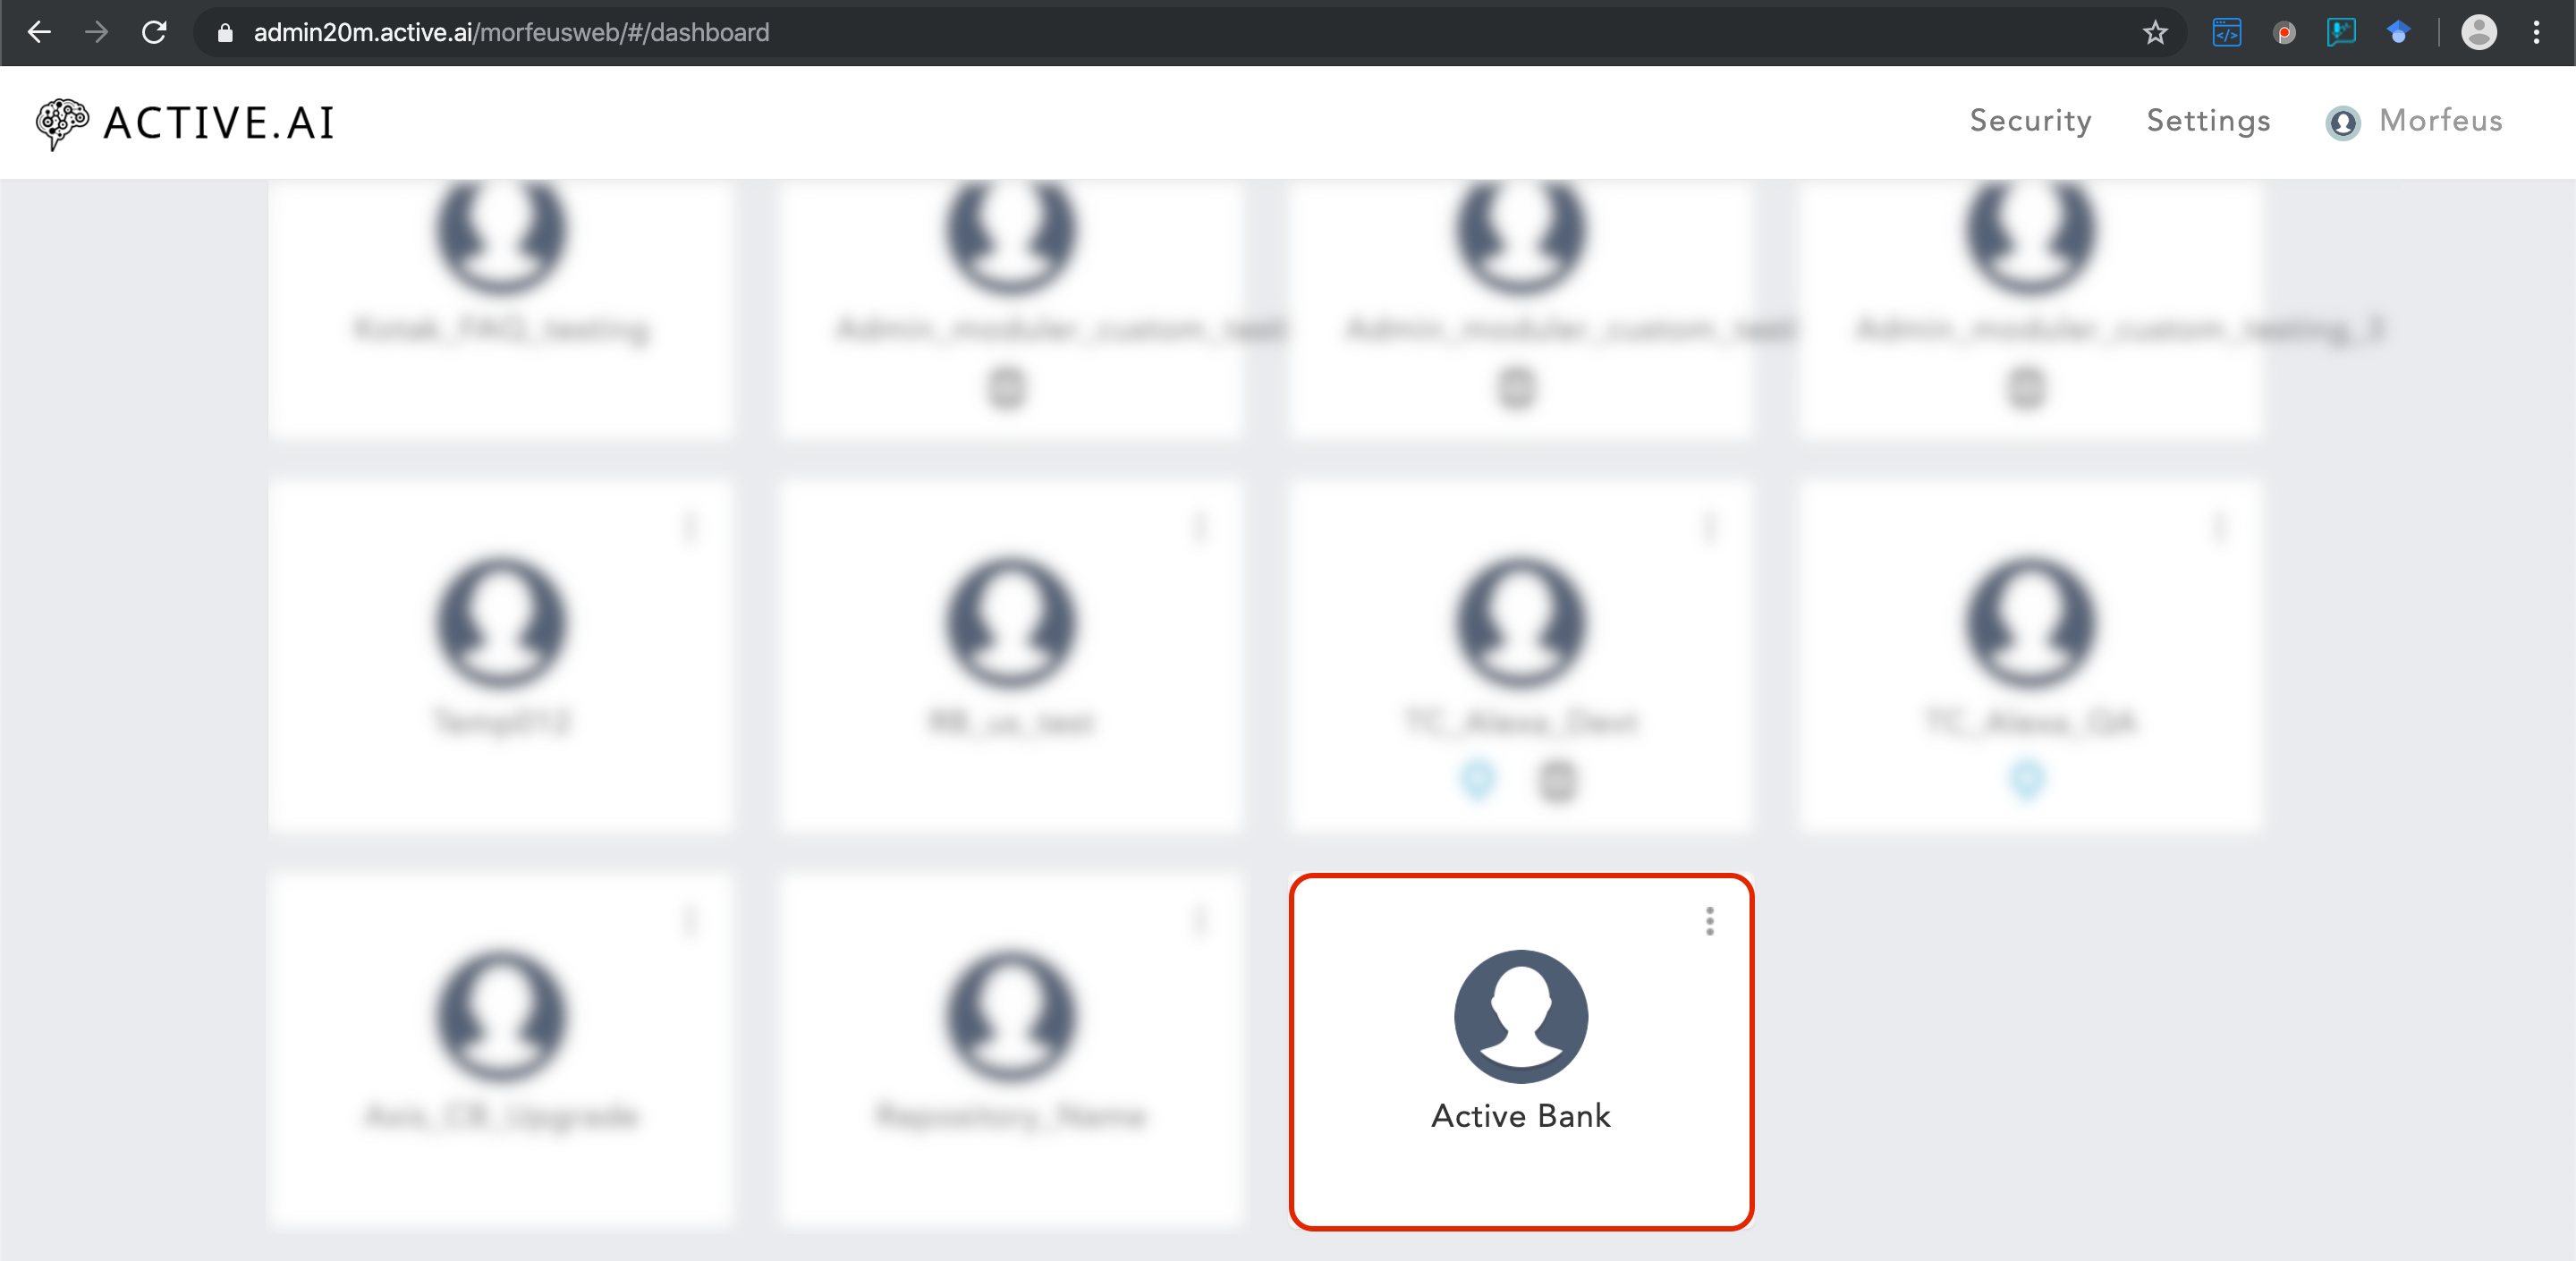
- Click on desired Workspace
- Login to Admin Portal
- Select your workspace
Export/Import Workspace
If you want to migrate your workspace configuration or clone it you can export and import your workspace. The export zip file contains all the artefacts of the workspace including Channels, Functions, Hooks, Rules, AI Data, Templates, Workflows, etc. If you are importing into an existing workspace the existing configuration will be over writen.
Importing a Workspace
You can import a workspace configuration by following these steps:
- Goto Morfeus Admin portal
- Click on 'Add Workspace' under My workspace
- Enter Workspace Name
- Select Product Type
- Click on Create Workspace
- Go to dashboard
- Click on menu icon of the created workspace click on 'Import Workspace'
- Upload a ZIP file that contains Configurations, Rules, Hooks, Functions, Templates, etc.
- Click 'Yes' on popup. (Are you sure you want to overwrite ?)
Exporting a Workspace
You can export the workspace by following these steps:
- Goto Morfeus Admin portal
- Go to Dashboard
- Navigate to the workspace(which you want to export)
- Click on menu icon on that workspace
- Click on 'Export Workspace'
It will download a ZIP file containing Channels, Functions, Hooks, Products, Rules, AI Data , Templates, Workflows, etc.

Deleting a Workspace
If you want to delete the not required or unnecessary workspaces then you can delete those workspaces by following these steps:
- Goto Morfeus Admin portal
- Go to Dashboard
- Navigate to the workspace(which you want to export)
- Click on menu icon on that workspace
- Click on 'Delete Workspace'
- Click 'Delete' on popup. (Are you sure you want to delete workspace?)
It will delete all the configuration of your workspace. And the workspace will be no longer available on your dashboard.

Managing Admin Users
This feature will allow you to manage the users for your workspace by adding the users, managing the users to your workspace. So this section will take you through how to add users, manage users, etc.
Eg; If you want to share your workspace with your colleagues or with someone for testing or other perspectives then you can add them as a user to the workspace and also you can manage the users for your workspace.
Note: Super admin, workspace admin or a user with the appropriate security profile can add or manage the user.
Eg; You can give them access to your workspace to the user as admin, Security, Operations, Customer Support, etc to test or contribute in your workspace to make your bot respond better.
Adding Users/ User ACL
This feature will allow you to add a user to your workspace. You can add users to the workspace by following these steps:
- Goto Morfeus portal
- Click on 'Security'
- Click on 'Add User'
- Enter the details (Name, phone number, email, country)
- Provide access 'role' (Admin, Business, Customer support, Data(Smalltalk/FAQ), Data, Security, Operations, Reports, Tech operations)
- Select 'User Verify Type' (Internal, Active Directory)
- Select 'Authorization type' (Root, Maker, Checker)
- Assign a workspace (you can assign for multiple & all also)
- Click on Add

Enabling and Disabling Users
You can Enable/Disable a user for your workspace by following these steps:
- Goto Morfeus portal
- Click on 'Security'
- Click on the edit icon (For which user you want to enable/disable)
- Click on Enable/Disable

User Audit Trail
The user audit trail feature is to audit the violation/access issue that happened on the APIs. You can even check the APIs(which are violated) with the user's name, IP Address, date & time. Also, you can export those Audit Trail by clicking on the 'Export' button.
Eg; If the user has tried to hit some API & API has refused the connection or sent unauthorized error etc.
- Goto Morfeus portal
- Click on 'Security'
- Navigate to Audit Trail

User Authentications
You can add the user to access or manage your workspace. From a user authentication perspective, you can manage the user's authentication type like how you are allowing them to log in to your workspace & manage your workspace. We are supporting two types of authentication(User Verify Type) as Internal or Active Directory.

You can provide authentication for the added users or while adding the users as:
Internal: It will authorize the user based on credentials that are stored for that user.
Active Directory: It will authorize the user based on AD/LDAP that will be configured in the AD/LDAP 'Configuration' section under 'Settings'

Azure AD SSO
let's start to find out how we can do integrate admin with Azure AD using SAML implementation.
We can divide this into three parts
1) Azure AD portal Configuration
2) SAML-SSO configuration
3) Admin configuration
Azure AD Portal Configuration
Refer to quick starthere
post was done with the configurations kindly add User Attributes and claims as shared in the below screenshot as we are using the same to create a session
adid is added as an additional property u can map any value which we are mapping inside the employeeId of admin user
*Always Reply URL should match with the endpoint which ur requesting in saml-sso

SAML-SSO configuration
- Get the war fromArtifactory
- If u want to do customization clone the project from theBitbucket
- deploy to the place where morfeusadmin exists
refer the below properties and update as explained in below
- saml.discovery.entity-id=https://sts.windows.net/1ea4687b-53b1-4285-babf-3f92fe915792/
- spring.thymeleaf.cache=false
- spring.thymeleaf.enabled=true
- spring.security.saml2.network.read-timeout=10000
- spring.security.saml2.network.connect-timeout=5000
- spring.security.saml2.service-provider.basePath=https://localhost:8443/saml-sso/
- spring.security.saml2.service-provider.sign-metadata=false
- spring.security.saml2.service-provider.sign-requests=false
- spring.security.saml2.service-provider.want-assertions-signed=true
- spring.security.saml2.service-provider.single-logout-enabled=true
- spring.security.saml2.service-provider.encrypt-assertions=false
- spring.security.saml2.service-provider.name-ids=urn:oasis:names:tc:SAML:2.0:nameid-format:persistent, urn:oasis:names:tc:SAML:1.1:nameid-format:emailAddress, urn:oasis:names:tc:SAML:1.1:nameid-format:unspecified
- spring.security.saml2.service-provider.keys.active.name=sp-signing-key-1
- spring.security.saml2.service-provider.providers[0].alias=enter-into-saml-sso-alias
- spring.security.saml2.service-provider.providers[0].metadata=https://login.microsoftonline.com/1ea4687b-53b1-4285-babf-3f92fe915792/federationmetadata/2007-06/federationmetadata.xml?appid=8e34231d-e07e-44bd-a5b1-732aa0be5974
- spring.security.saml2.service-provider.providers[0].skip-ssl-validation=true
- spring.security.saml2.service-provider.providers[0].link-text=enter-into-saml-sso-link-text
- spring.security.saml2.service-provider.providers[0].authentication-request-binding=urn:oasis:names:tc:SAML:2.0:bindings:HTTP-POST
- app-context-path=/morfeusweb/#/dashboard

saml.discovery.entity-id : You can copy the value from Azure Ad Identifier and replace the value as shown in the above image
spring.security.saml2.service-provider.basePath : Path in which application deployed
ex:- Our application is deployed in server https://localhost:8443 and war name is saml-sso hence we need to mention https://localhost:8443/saml-sso/
spring.security.saml2.service-provider.providers[0].metadata : You can copy the value from App Federation Metadata Url and replace the value as shown in the above image
app-context-path : In which application needs to be redirect post successful authentication.
can also give complete endpoint as shown below
https://localhost:8553/morfeusweb/#/dashboard
rest were optional configuration
All the above were default available values with updated properties u can name the file as saml-sso.properties and place anywhere in the server and mention the path in catalina.sh as shown below
JAVA_OPTS="$JAVA_OPTS -Dsaml.sso.resources=/Users/userName/Documents/active_apps/develop/properties"
where properties folder should contain the file named saml-sso.properties which you have created with updated values
Admin configuration(https://localhost:8443/morfeusweb/)

Workspace settings > SSO Tab > search for " SSO URL" and provide value in which saml-sso has hosted something like (https://localhost:8443/saml-sso/)( Default Value: NA )
Workspace settings > SSO Tab > search for "Default Role" and u can choose dropdown based on ur requirement, Below table gives Accessibility based on roles ( Default Value: Admin )
| Role | Accessability |
|---|---|
| Admin | Can access everything |
| Business | Analyse, Manage Product, Manage Template, Manage campaign |
| Customer Support | Customer Support |
| Data - SmallTalk/FAQ | samll talk, faq,self learning |
| Data | Manage AI |
| Security | Security Page |
| Operations | Deploy(AI and Workspace Configuration) |
| Reports | Analyse |
| Tech Operator | Configure workspace |
Maker Checker
Maker checker allows us to not directly modify the certain things, in this there are two types of user one is maker and other is checker. A maker user creates/update the data but this first goes to to checker user now checker user can either approve this requerst or rejects the request.
There are 3 classification for maker checker i.e. Live, Pending Approval & archive
- Live - Showcase existing data on which maker user can perform various actions like add, delete, edit.
- Pending Approval - This page showcase all the data that is pending for checker user approval.
- Archive - Showcases all the data on which action taken taken on pending approval page on this page there is a functionality to export data which is applicable for both maker and checker users.

Actions Supported On Maker/Checker
- Maker
- Delete
- Delete all
- Checker
- Approve
- Approve all
- Decline
- Decline all
Filter There are various filters available for both maker checker users to filter data this filter can be accessed by clicking on icon shown below

We have different filters for each category.
Live
- Last Modified Date
- Last Modified By
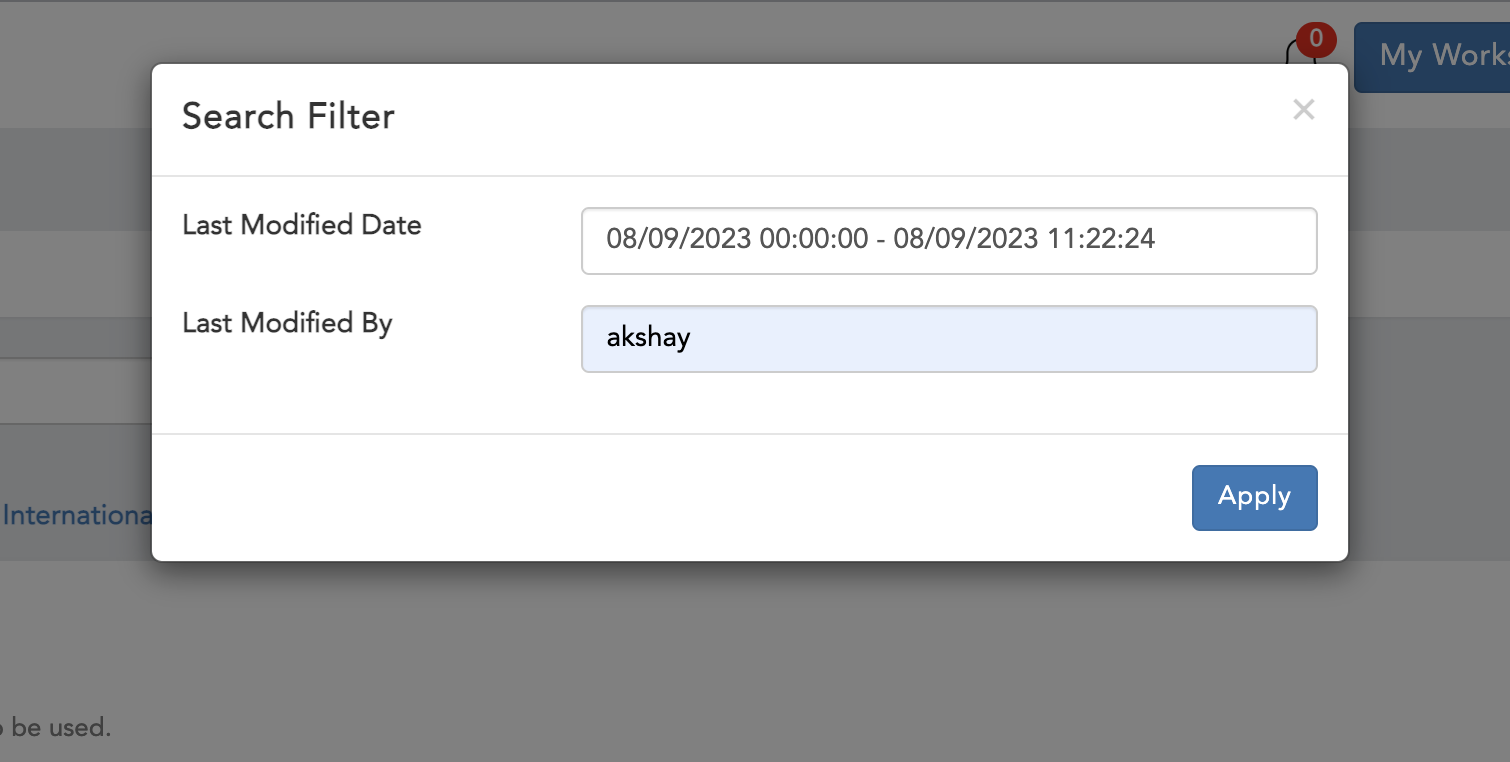 Figure 1.2 Live Filter
Pending Approval
- Reference Id
- Last Modified Date
- Last Modified By
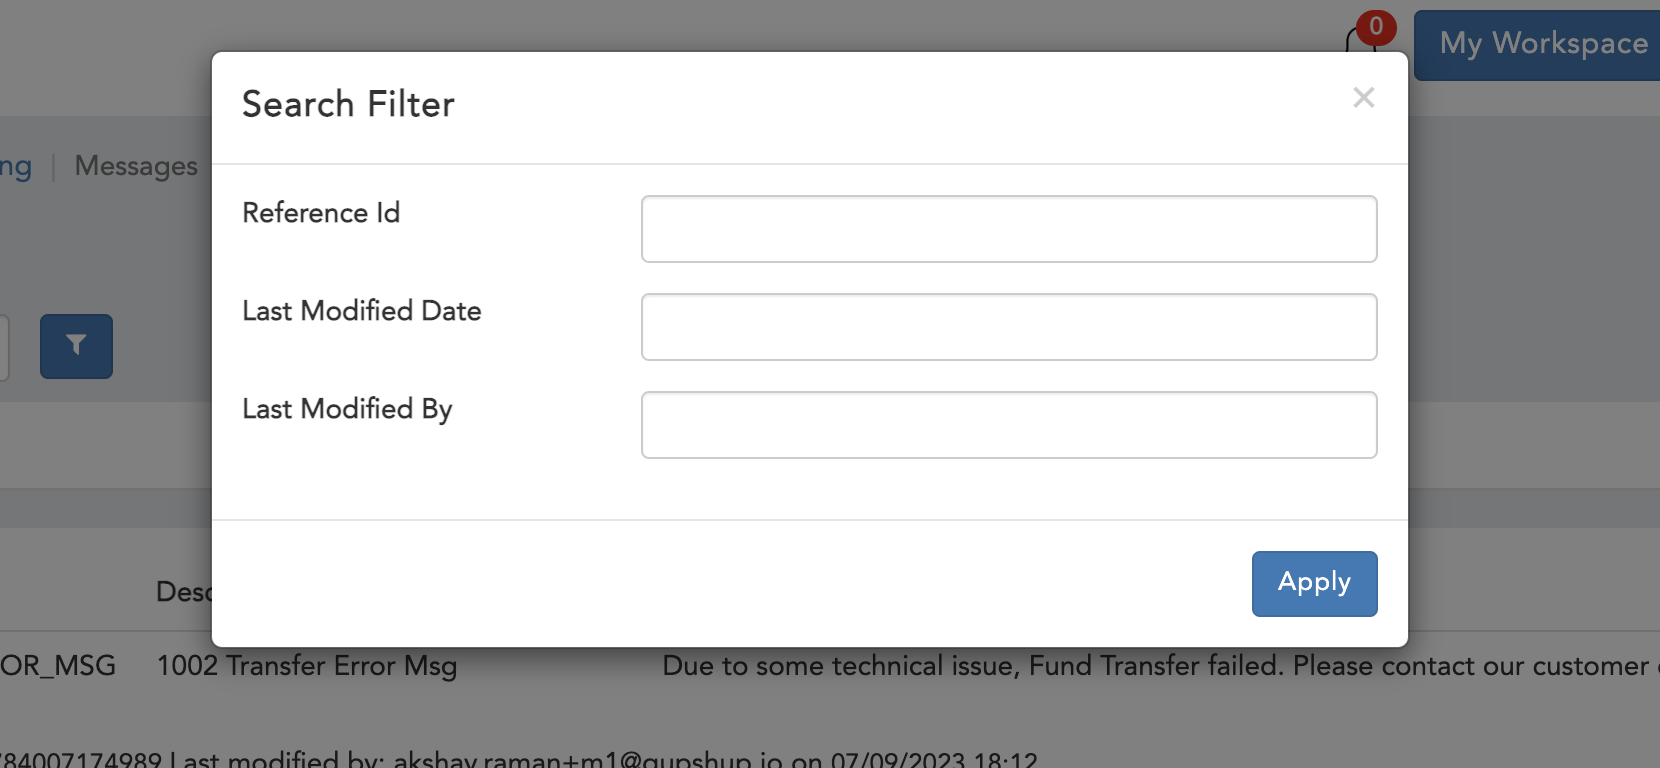 Figure 1.3 Pending Approval Filter
Archive
- Reference Id
- Last Modified Date
- Last Modified By
- Approved Date
- Approved By
- Status
- All
- Approved
- Decline
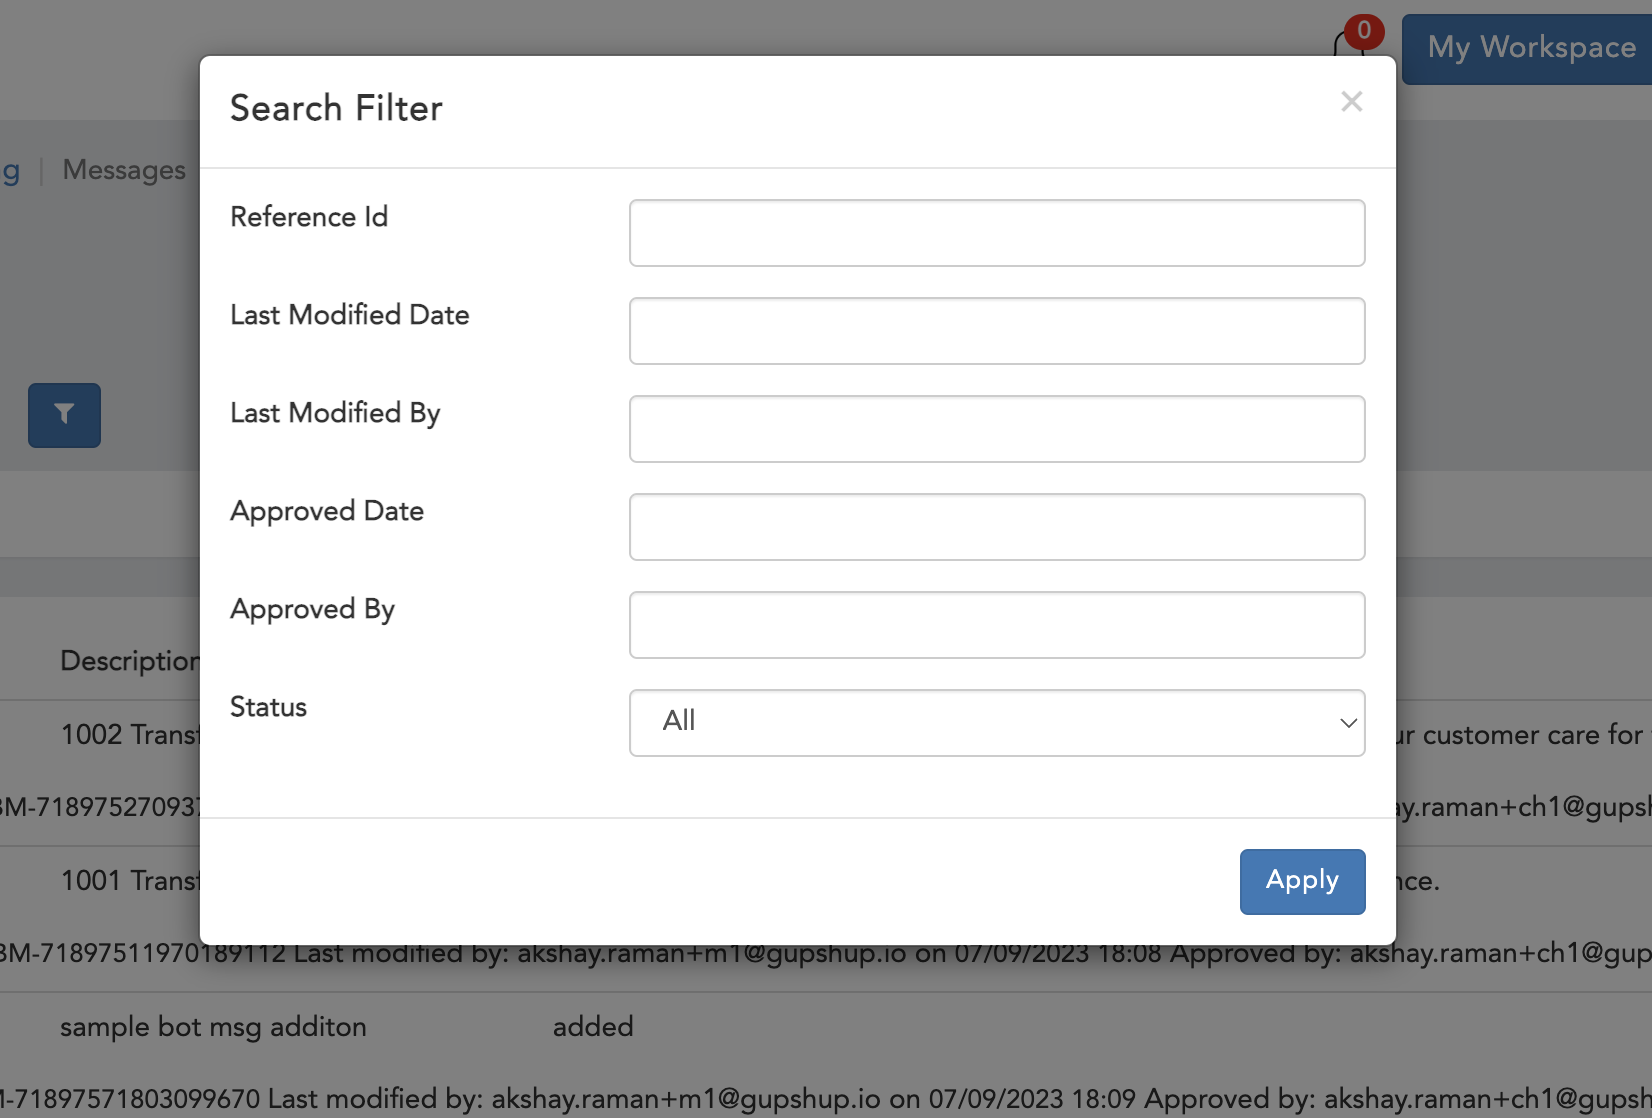 Figure 1.4 Archive Filter
Actions Supported On Data
- Add
- Edit/Update
- Delete
- Delete all
- Import
Once you perform any action using maker user the data will be sent to checker user for approval, Note a checker user is not allowed to perform any above action.
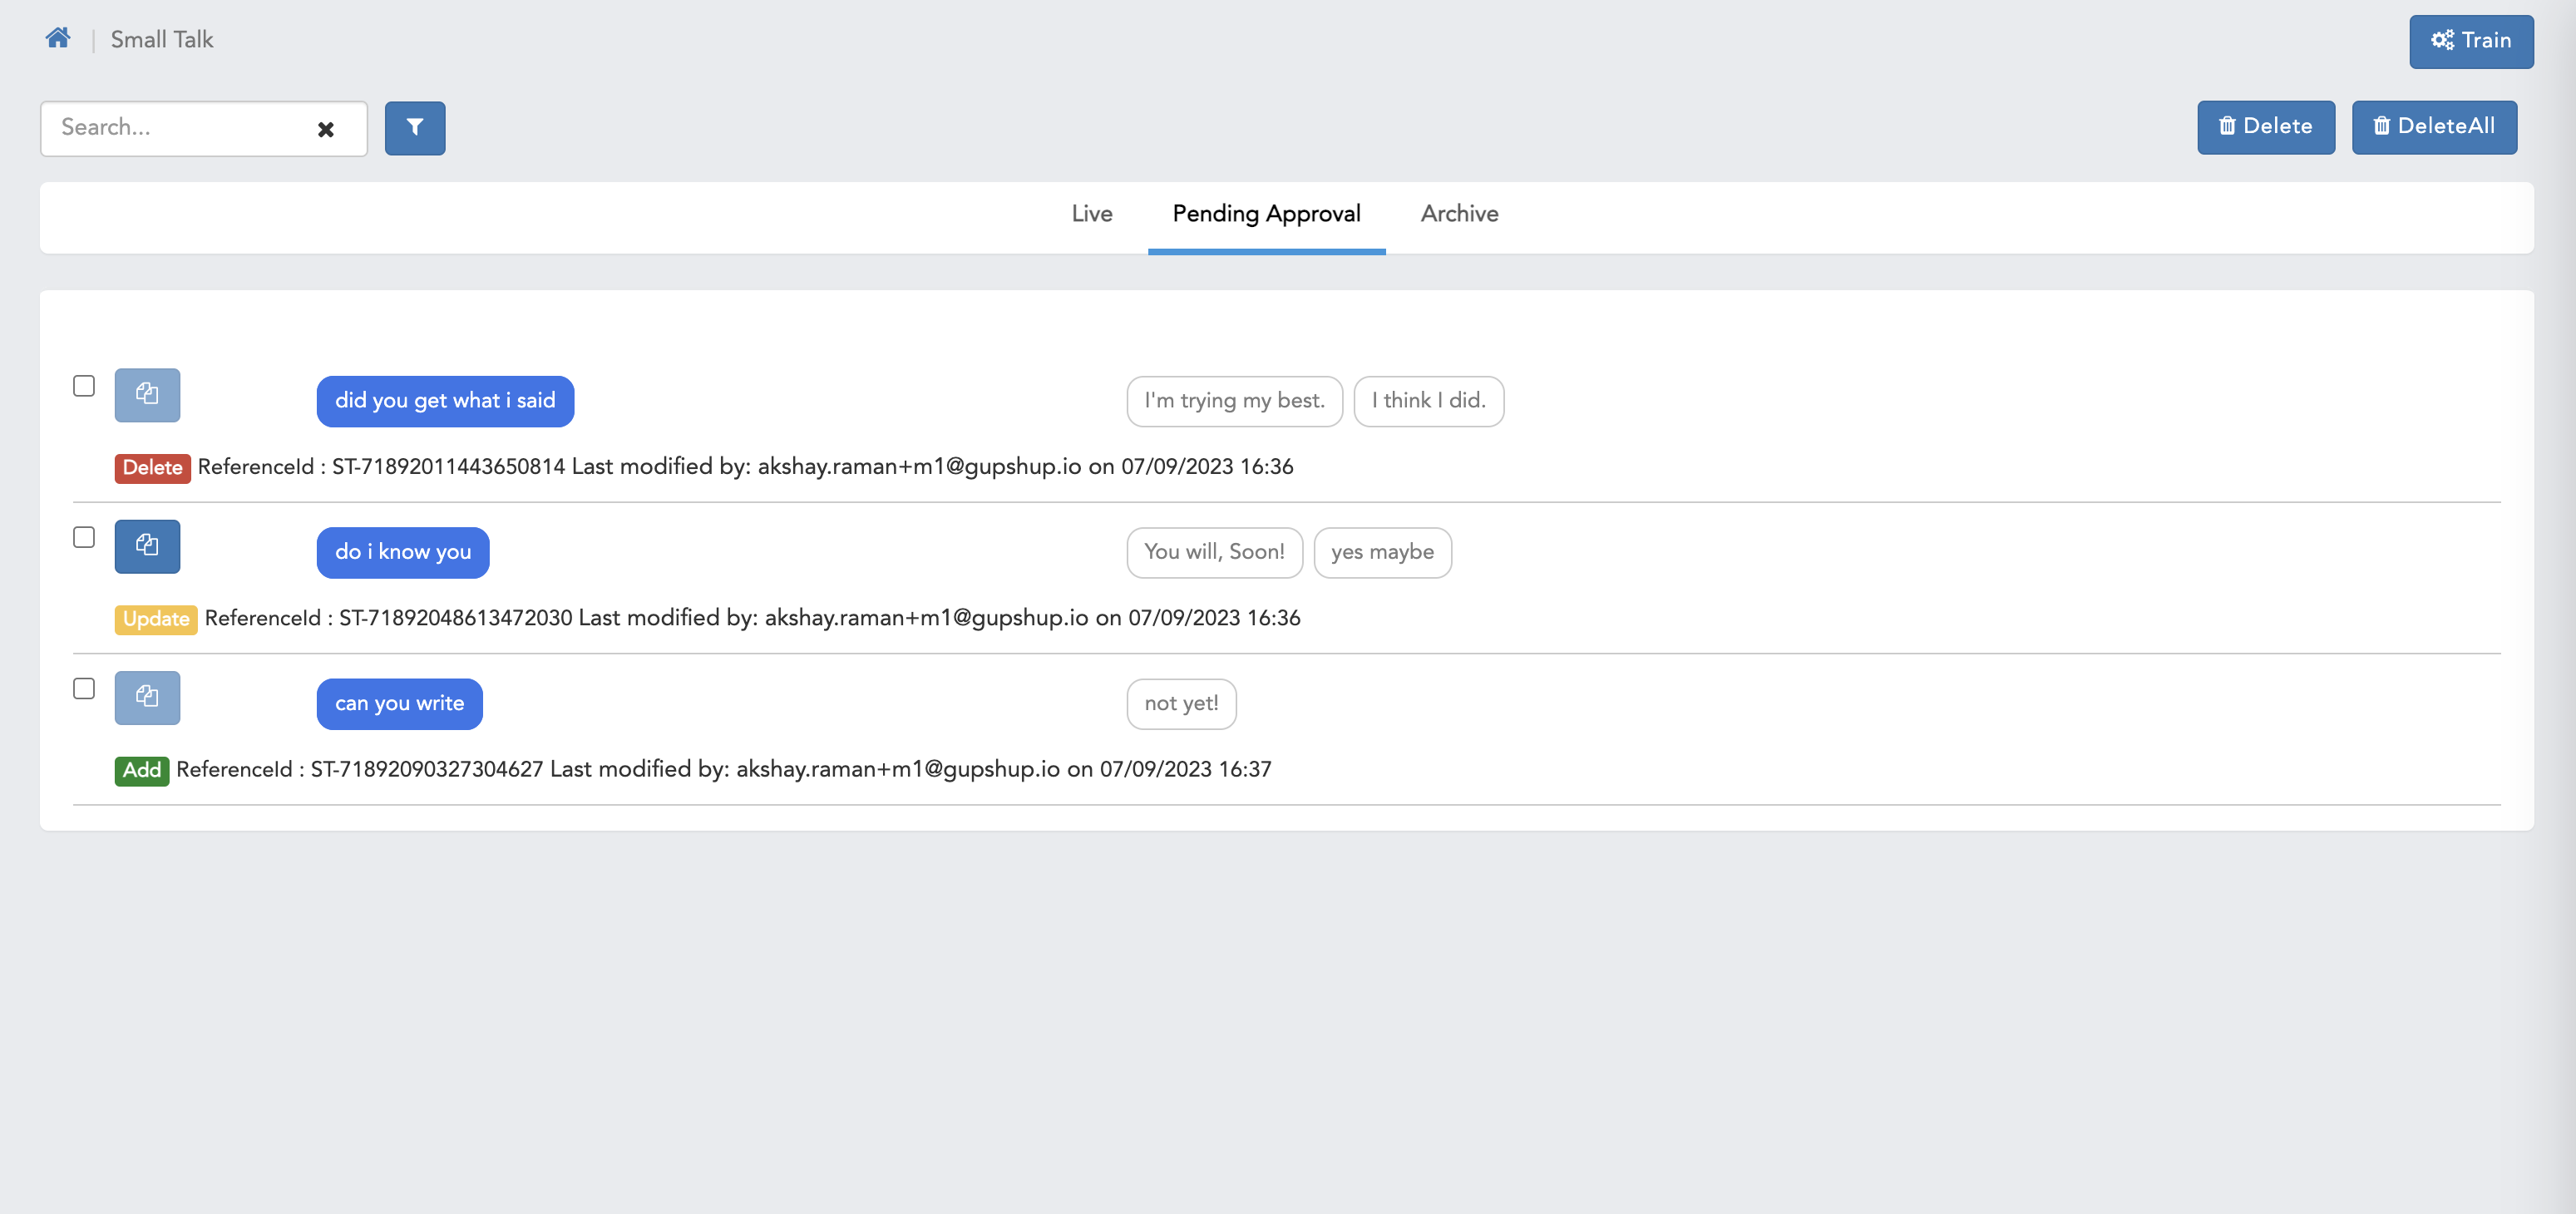
These data can be seen by both maker and checker on pending approval.
Here 4 options are available specifically for checker user i.e. approve, approve all, decline & decline all, and 2 options available for maker user i.e. delete & delete all
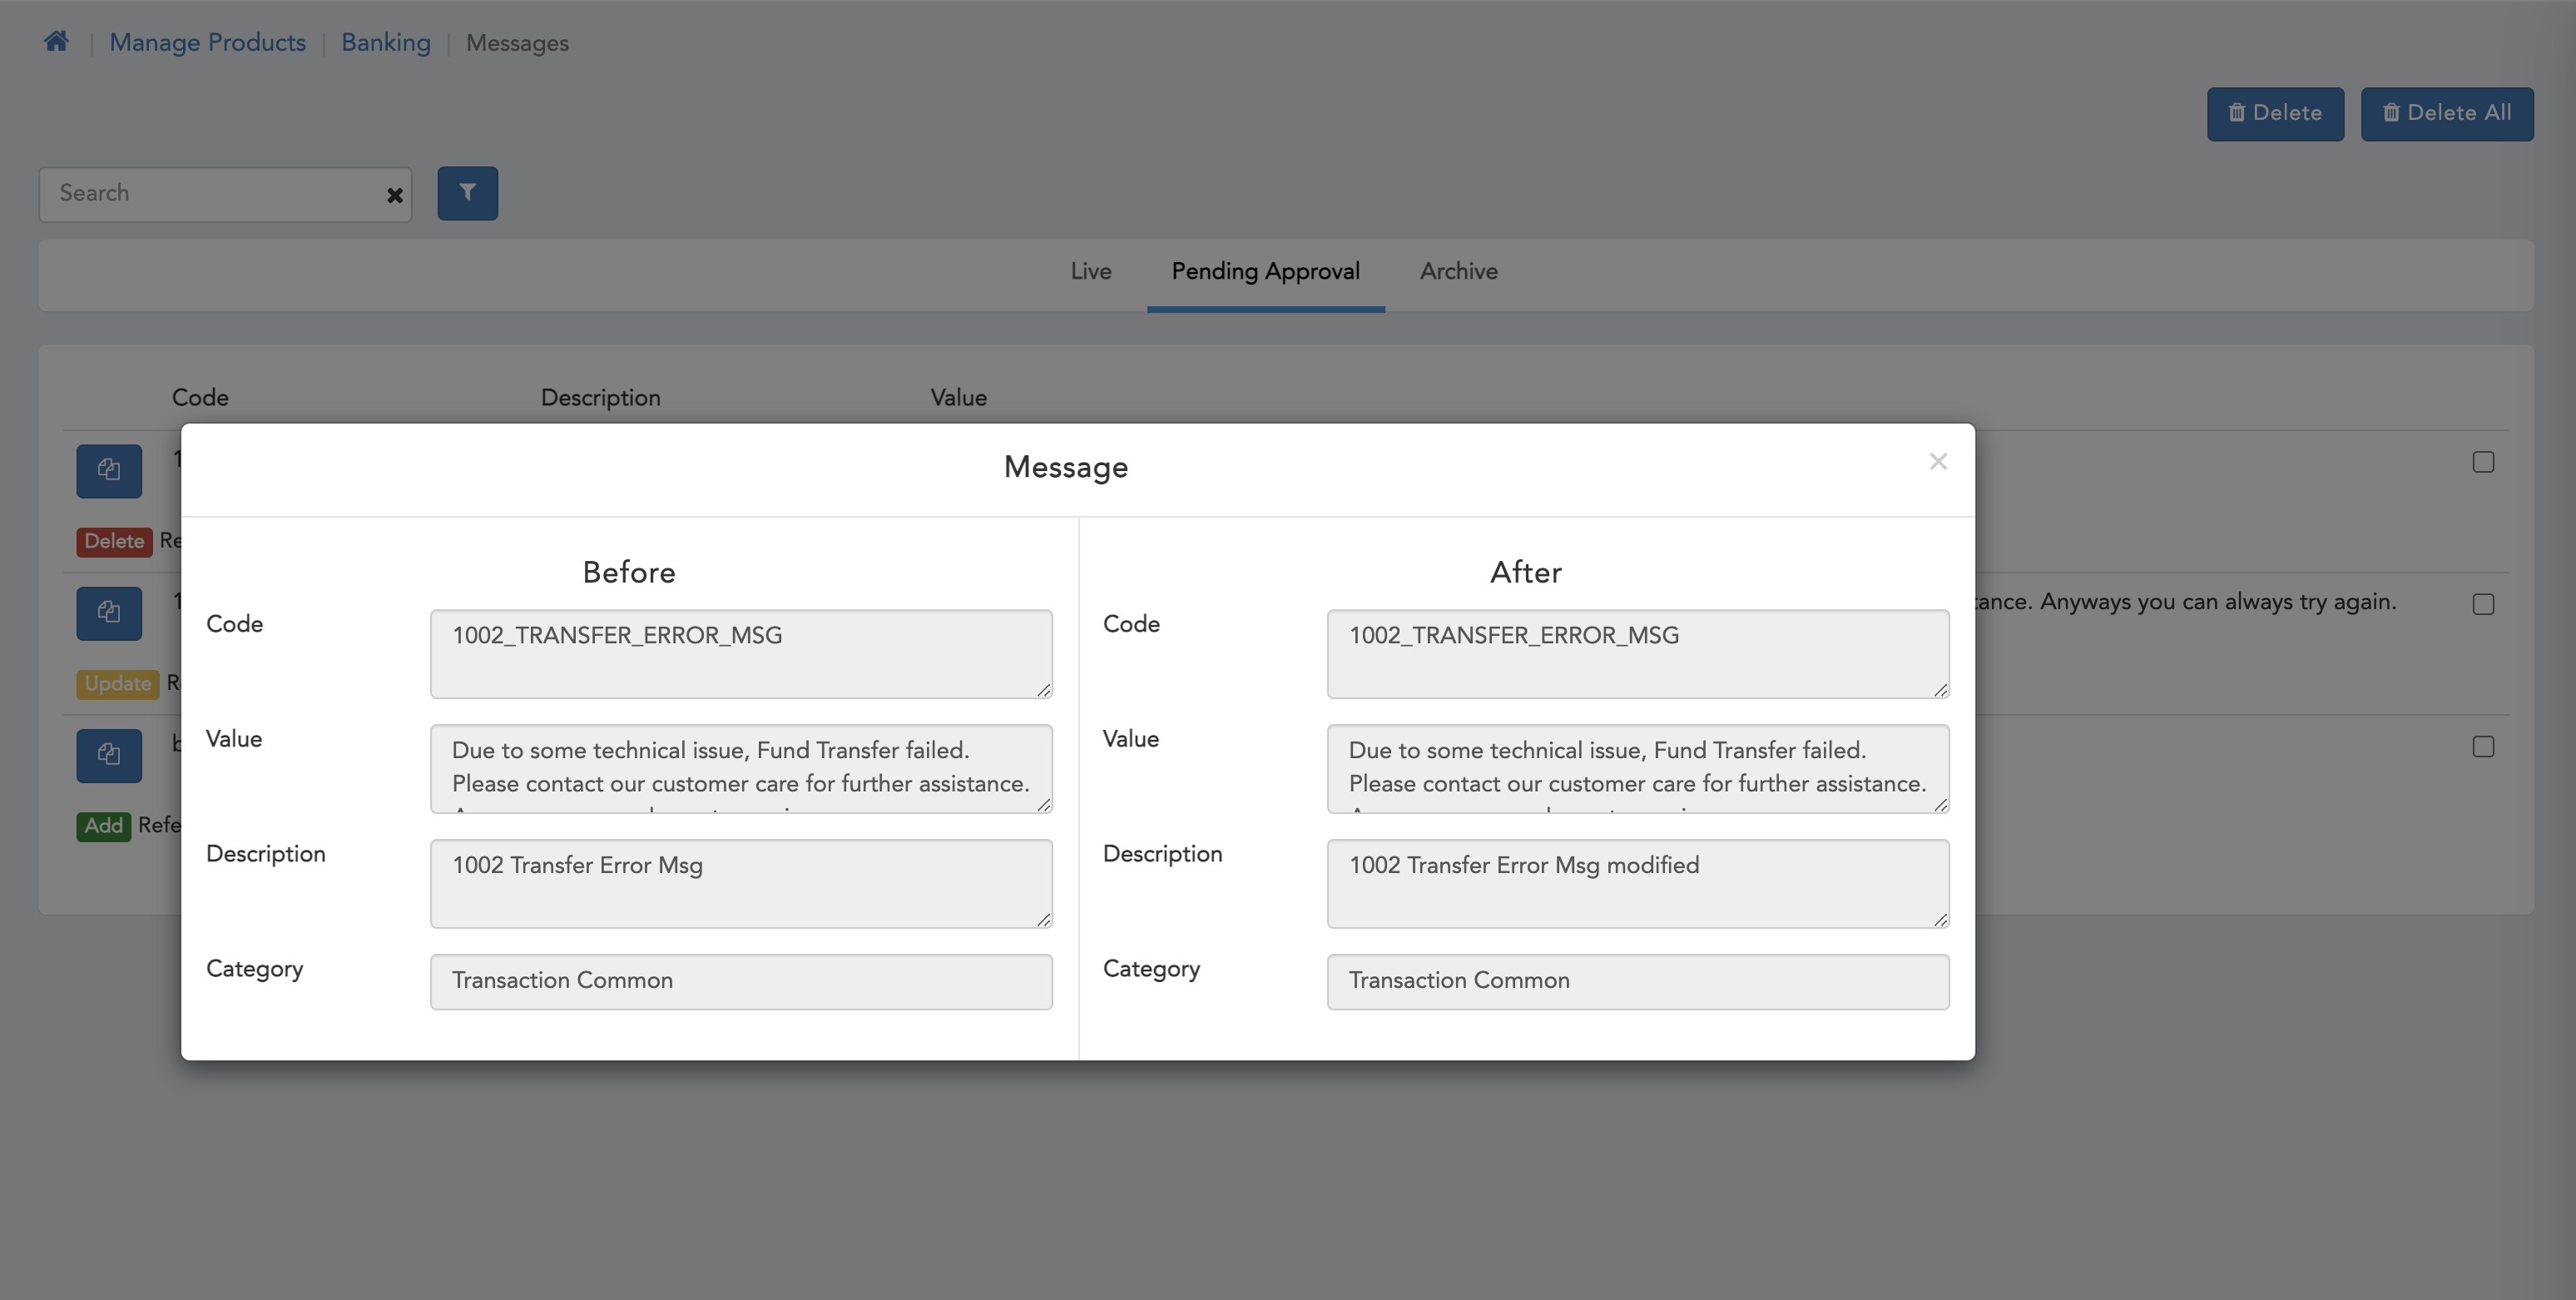
We can also compare data if update action is performed with the older data
Once we perform any of the above highlighted action the data will be processed further i.e (added, deleted or updated), this data can be seen on archive screen.
Modules Supported
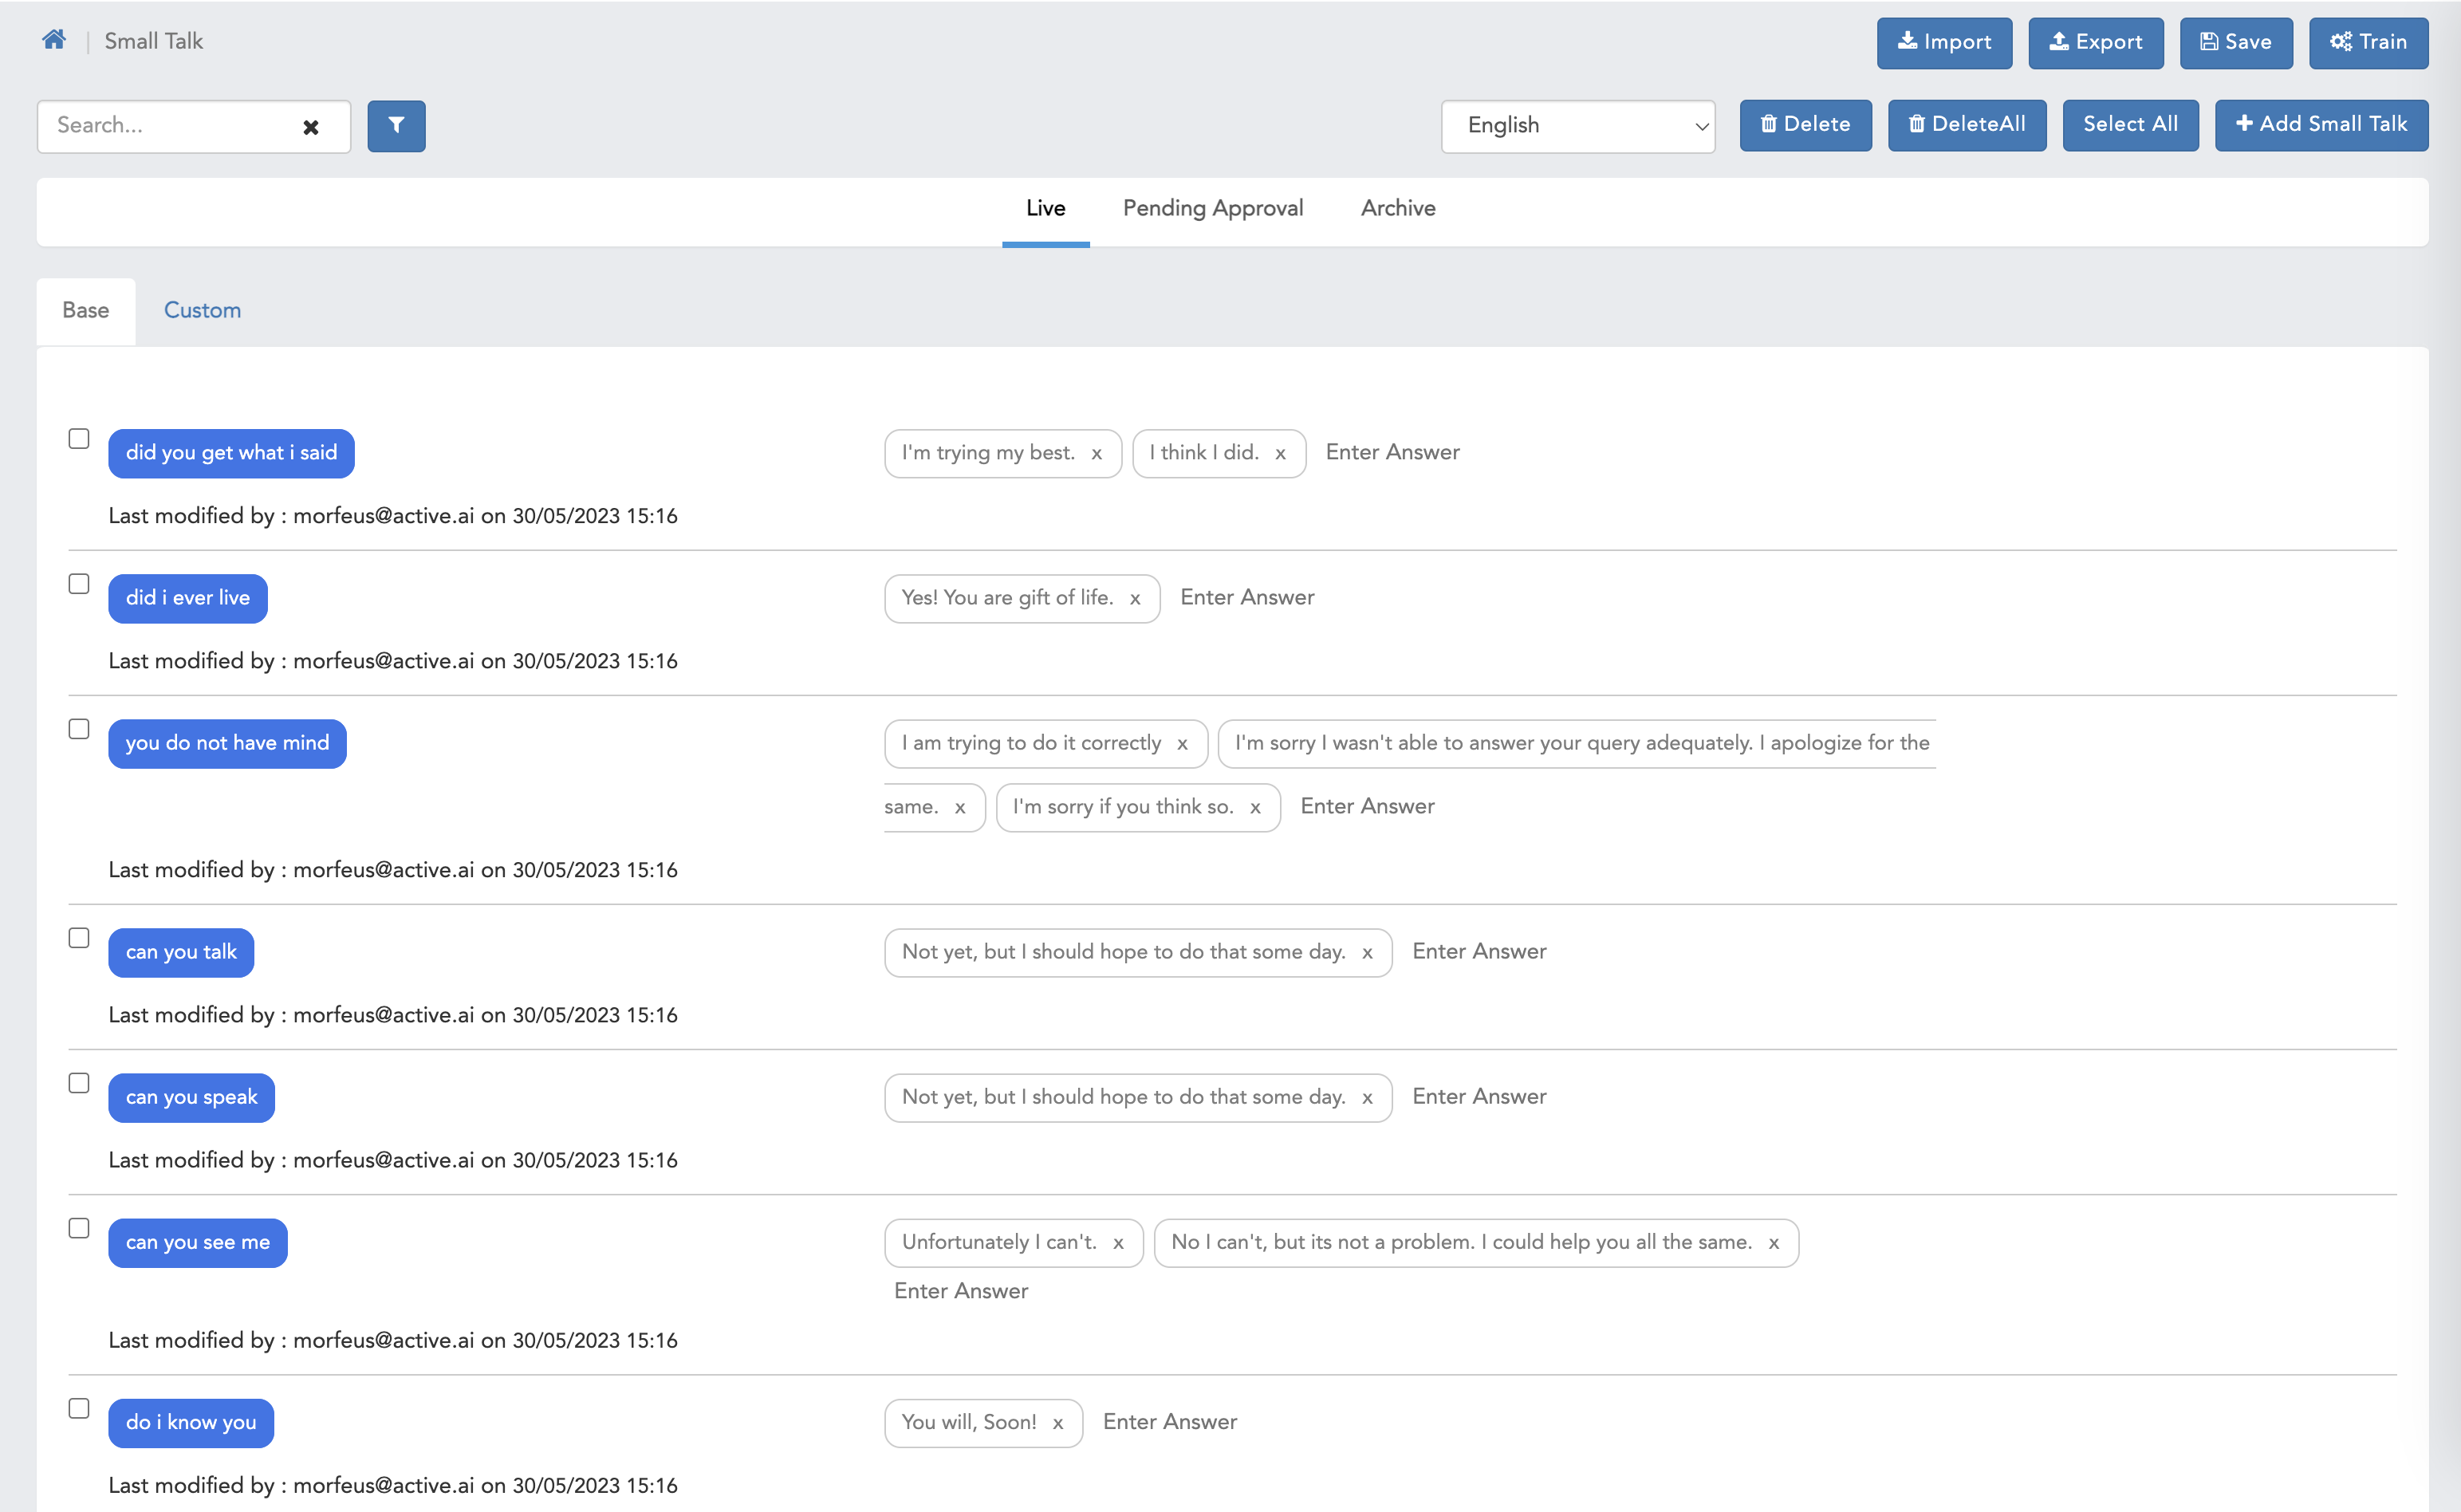
Smalltalk
- Here we can see default smalltalk page with all the functionalities with maker checker headers.
- Here we can see pending approval page for Maker user.
- Here we can see pending approval page for Checker user.
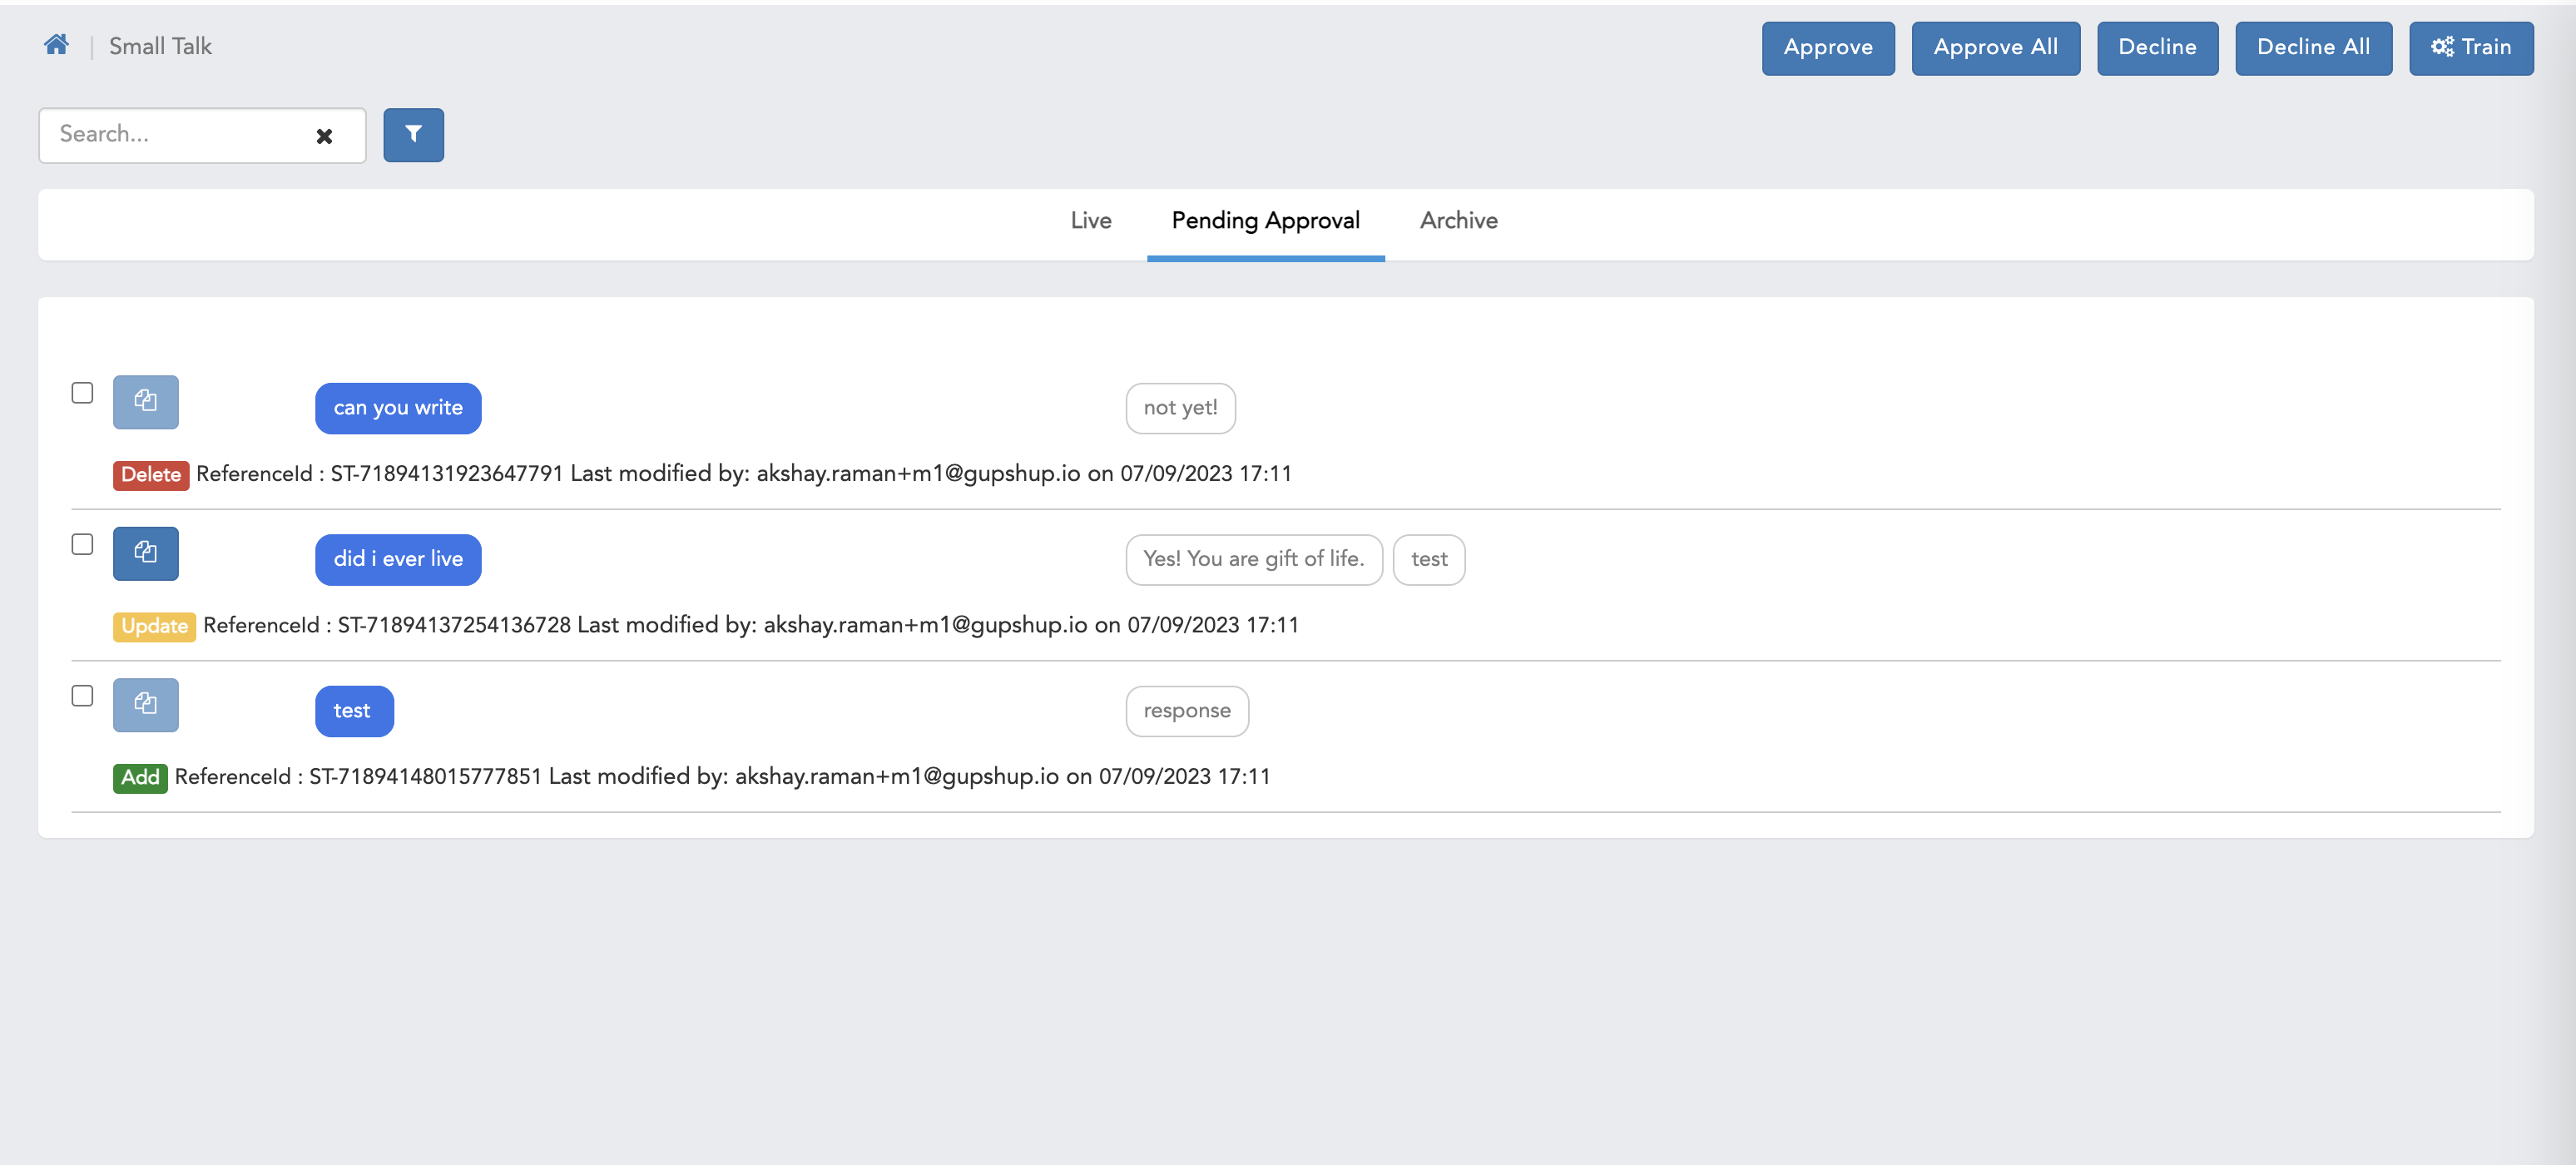
- Here we can see pending approval page with compare screen.
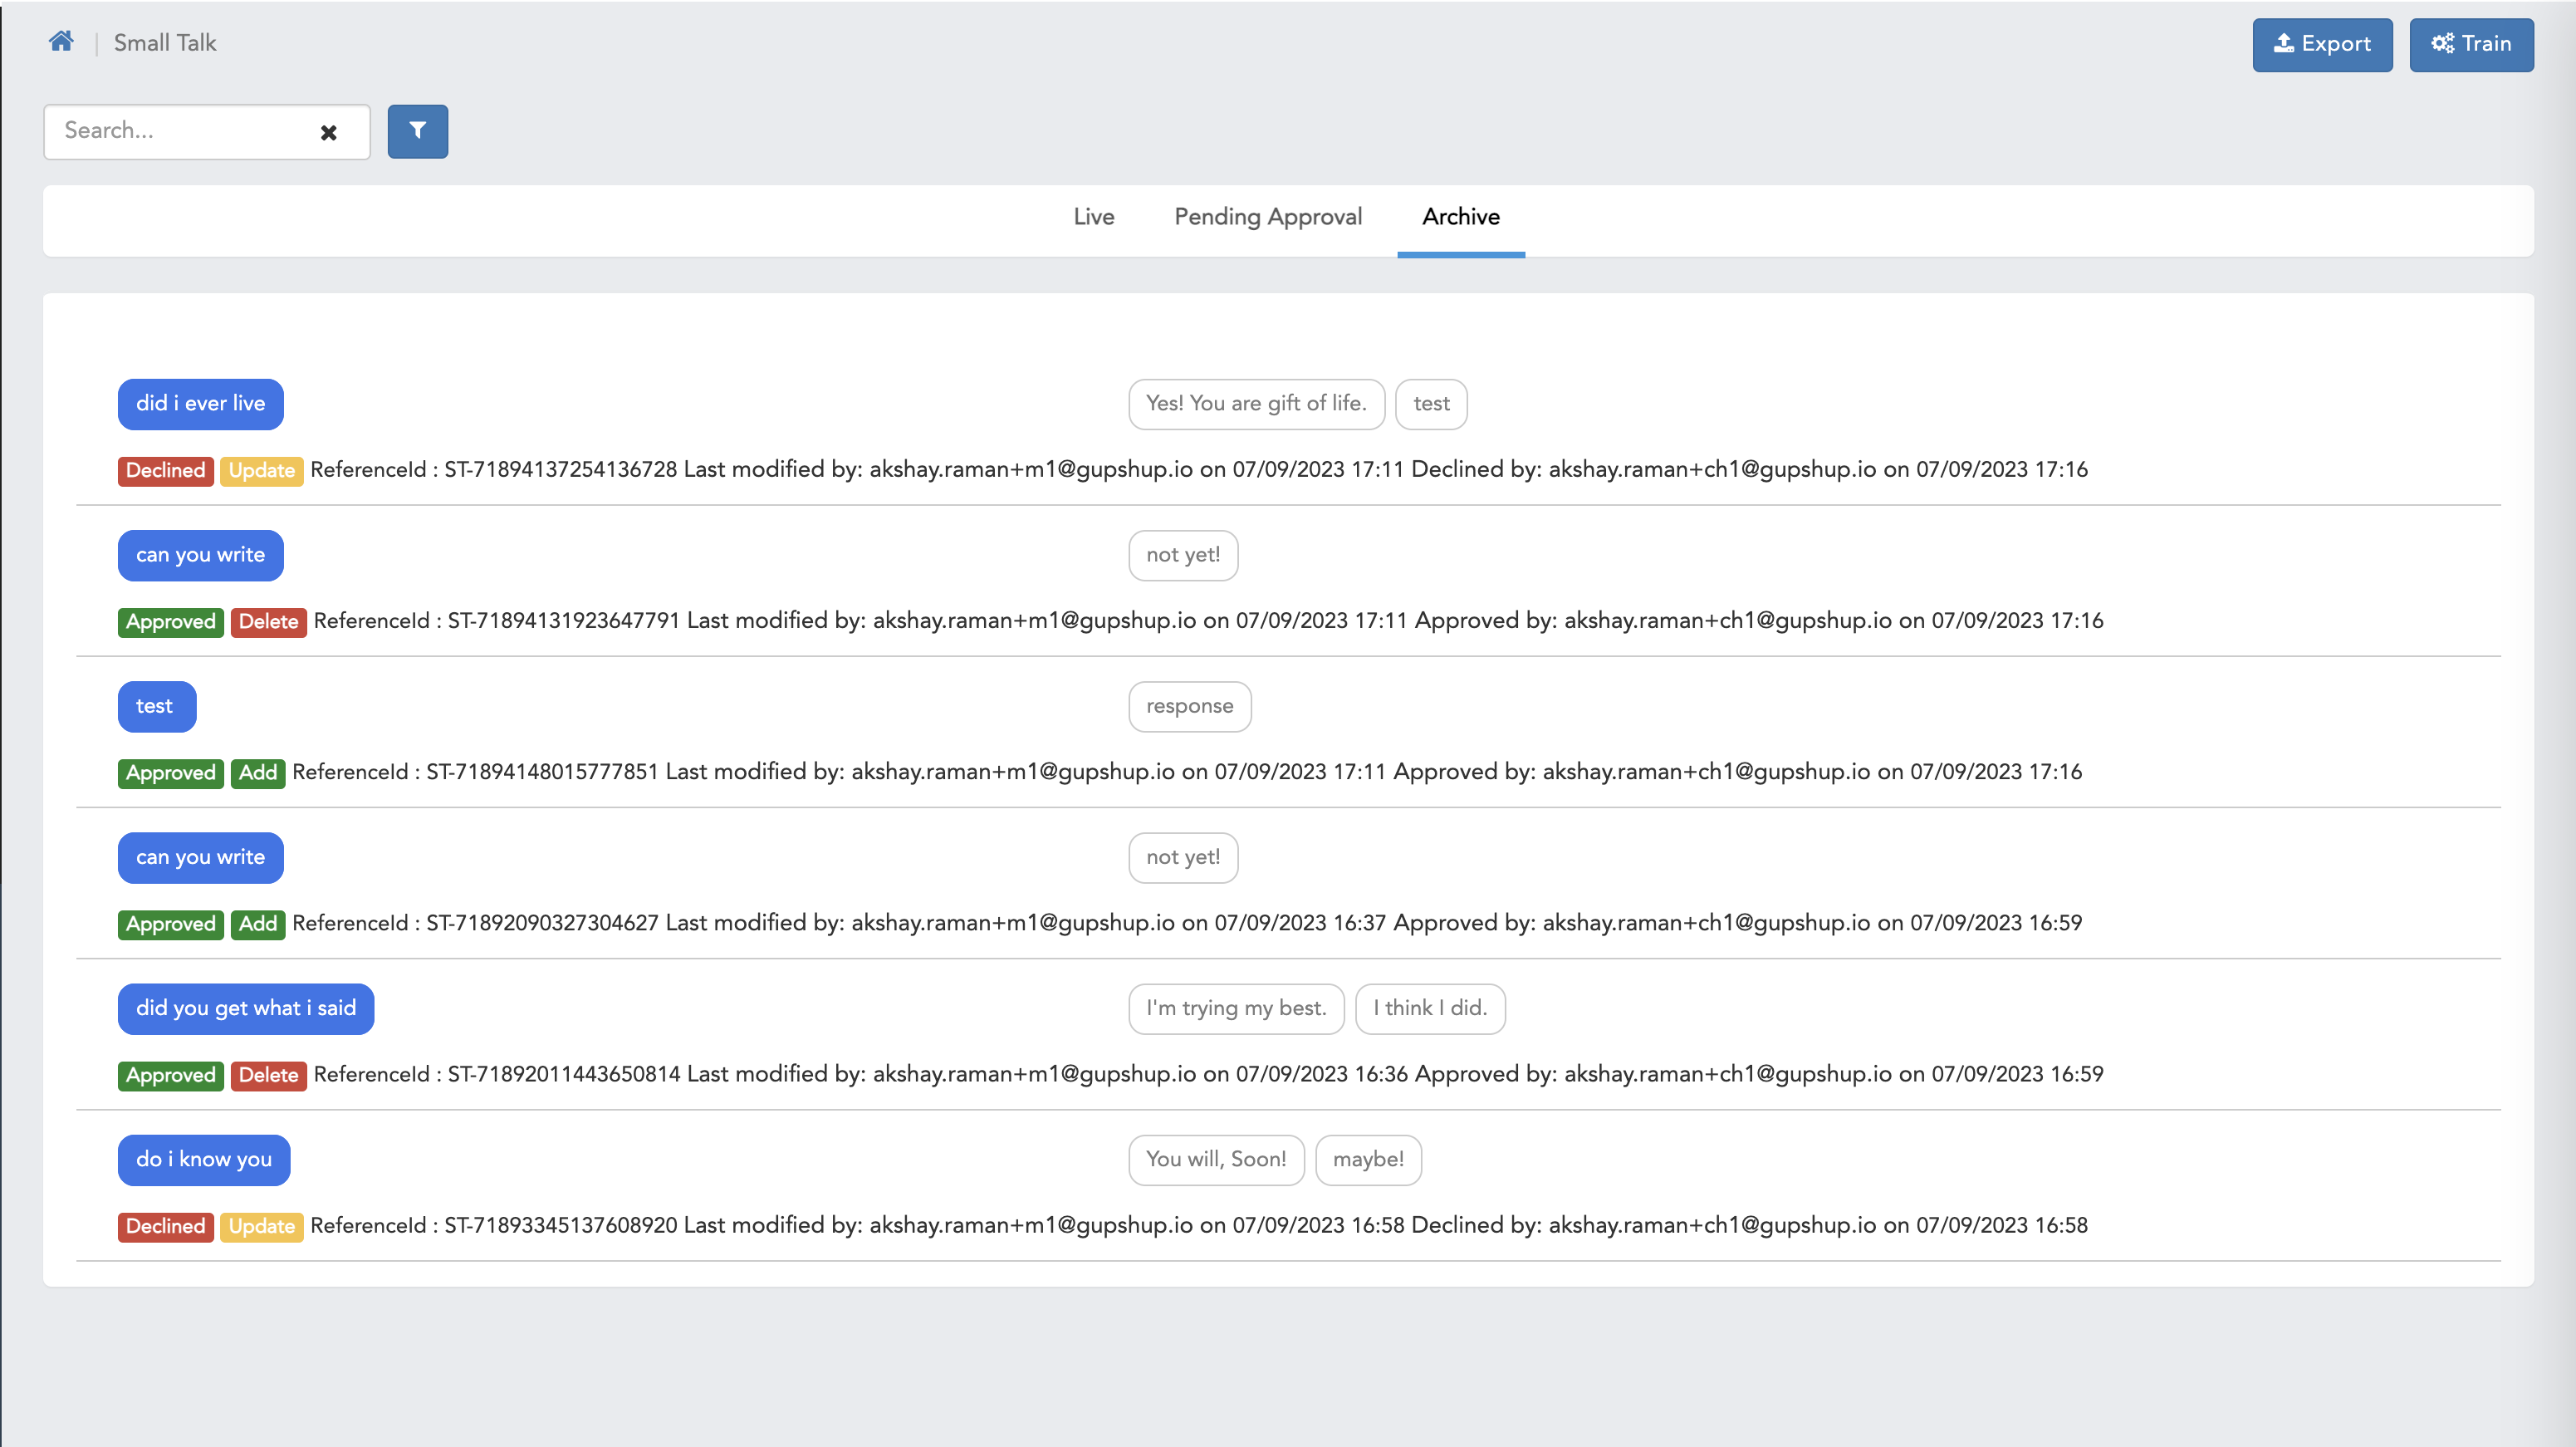
- Here we can see Archive screen.
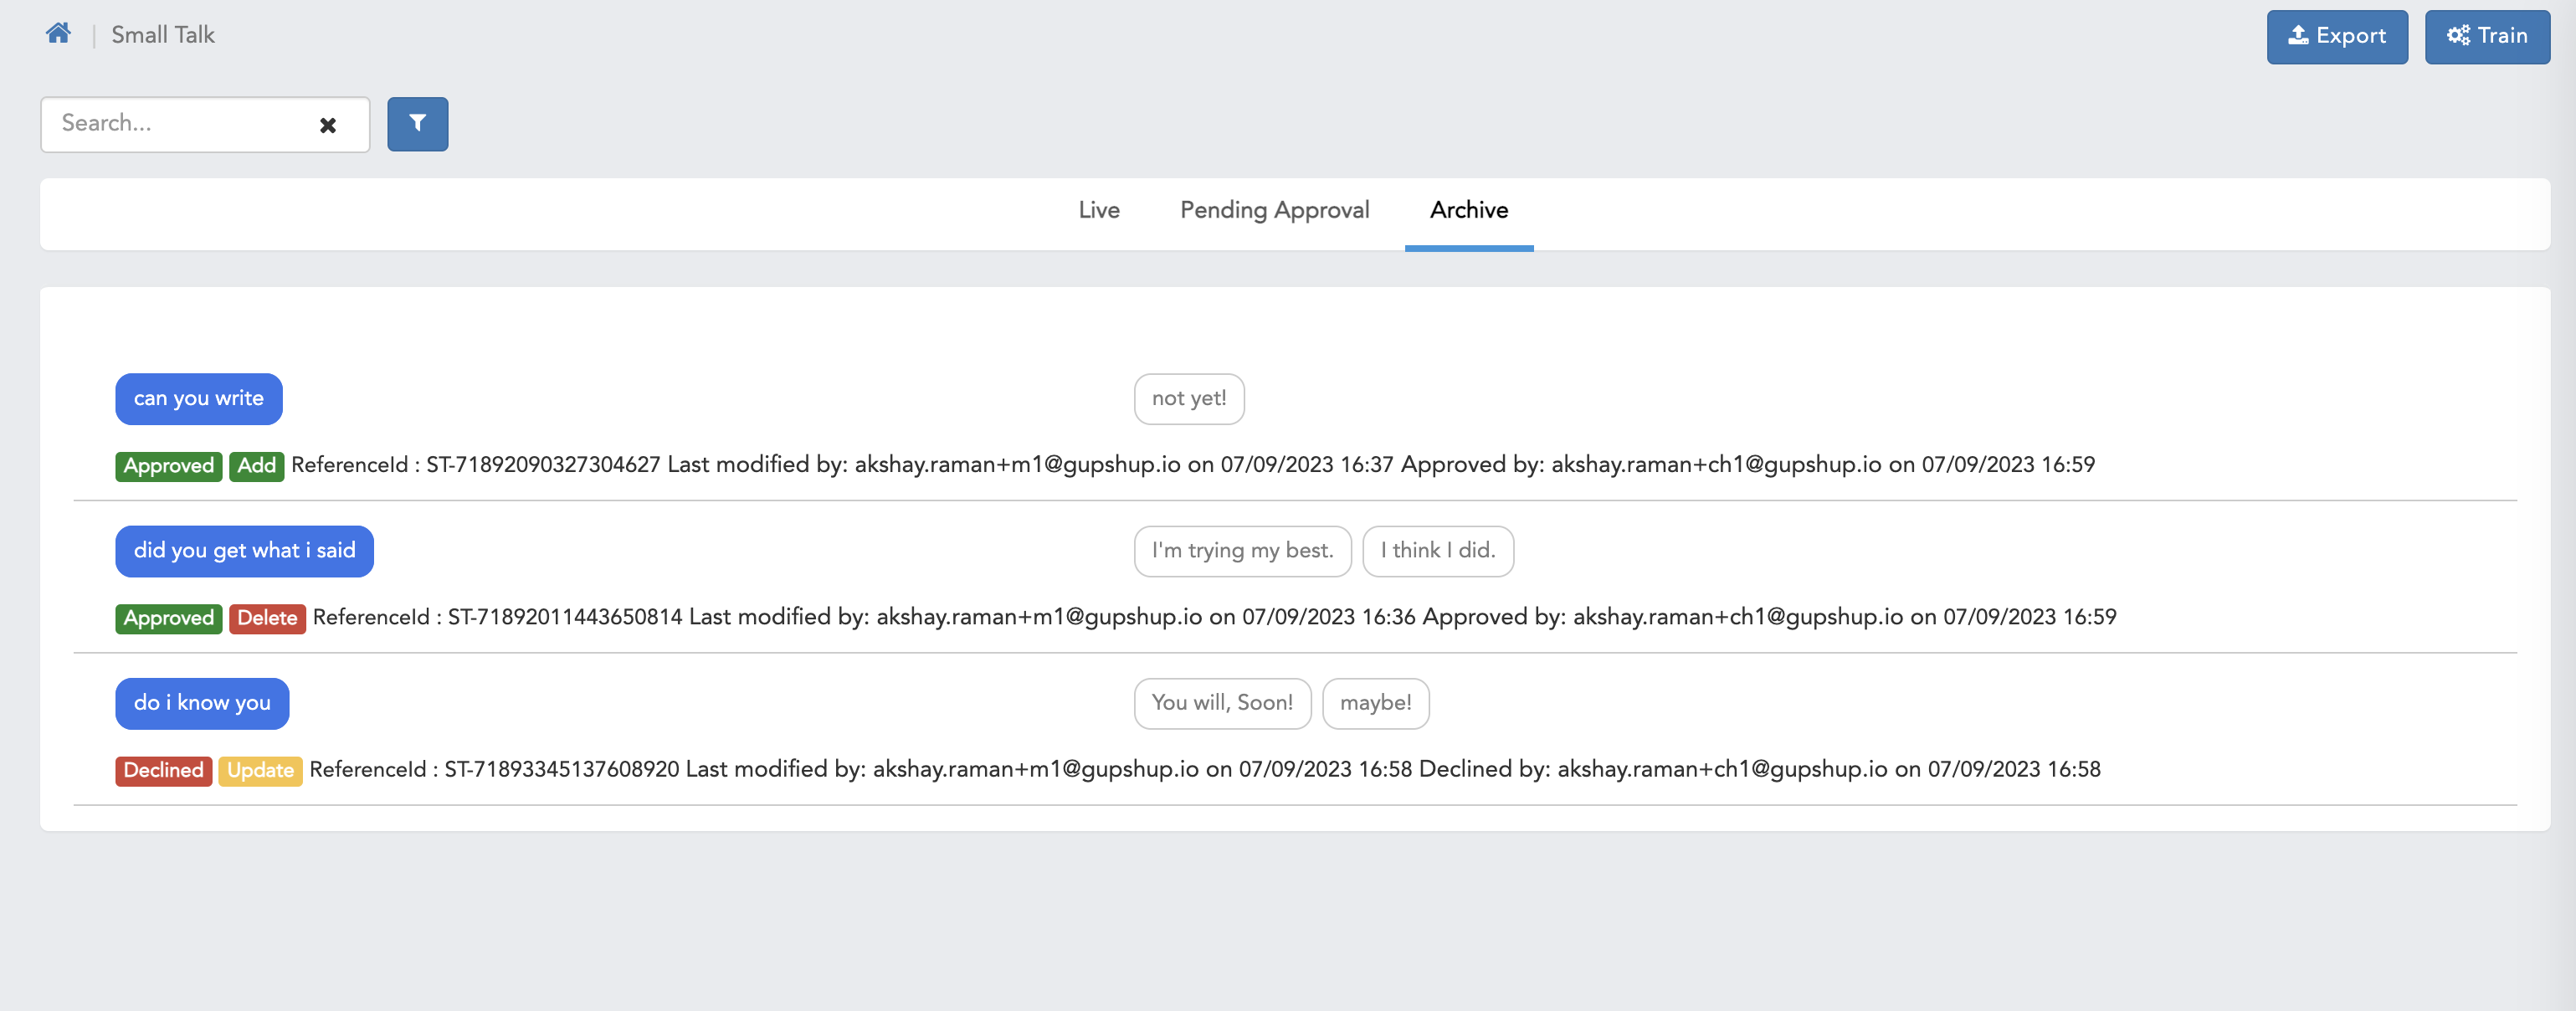
FAQ
- Here we can see default FAQ page with all the functionalities with maker checker headers.
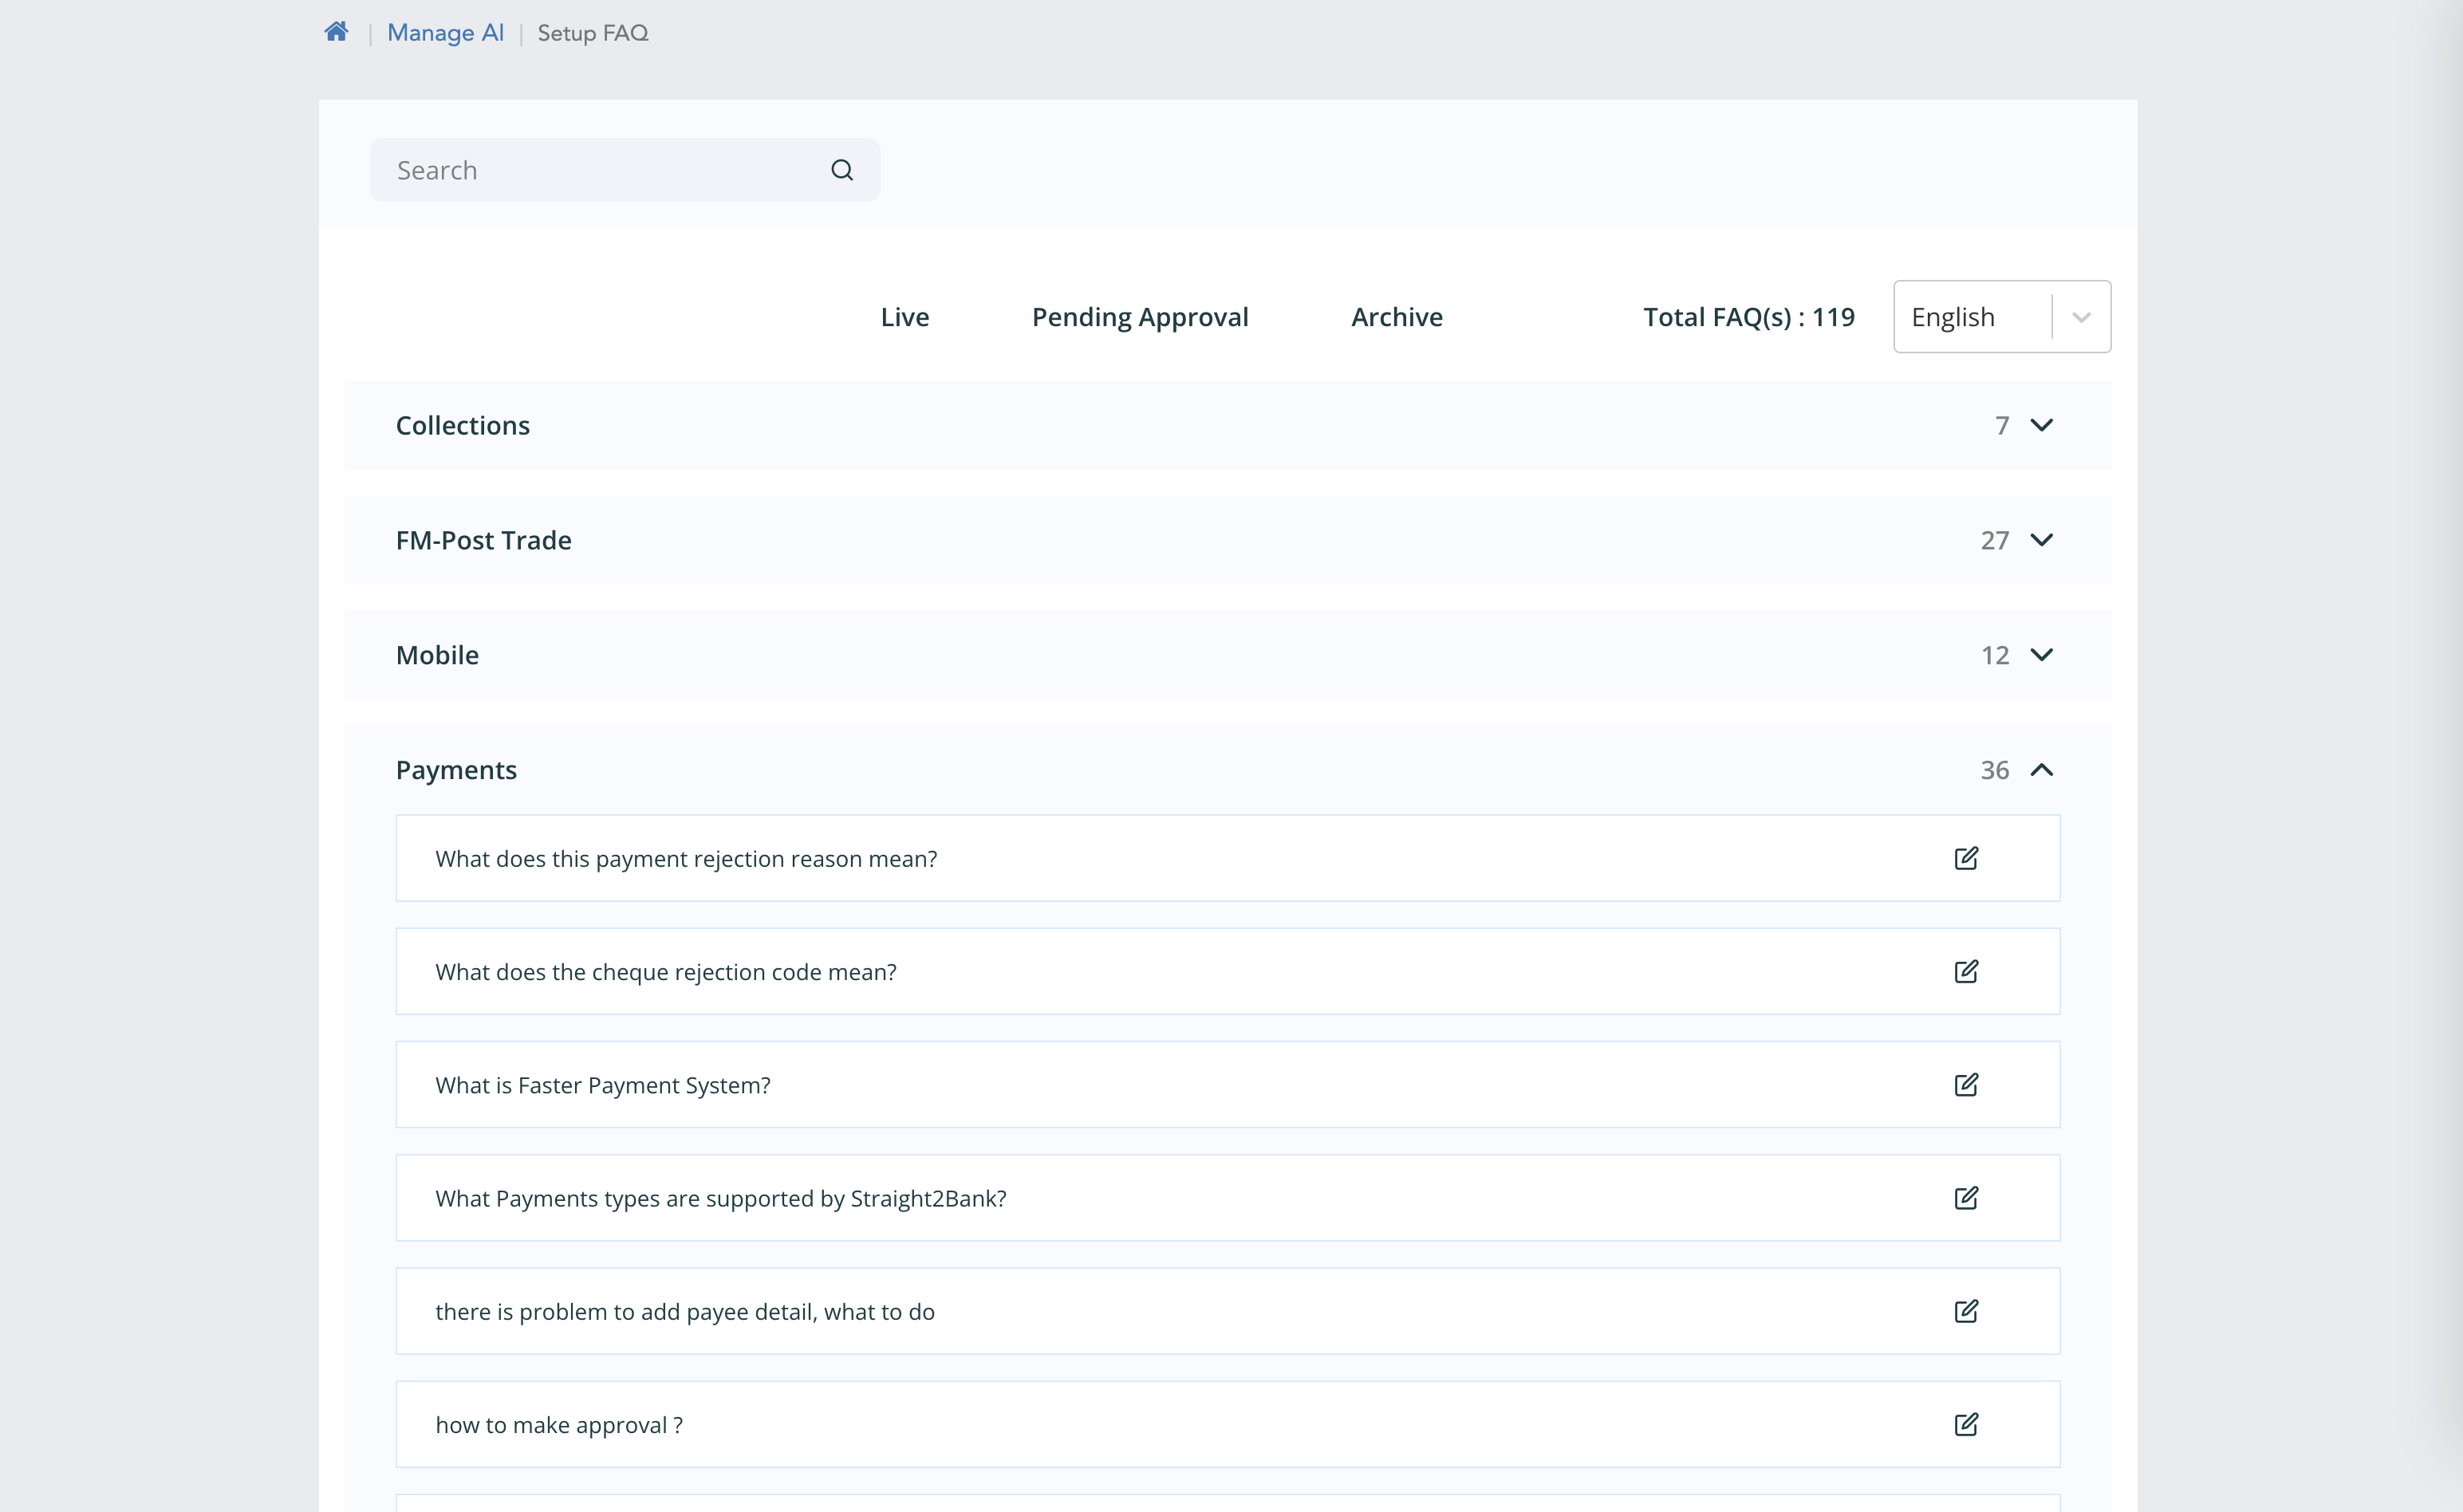
- Here we can see pending approval page for Maker user.
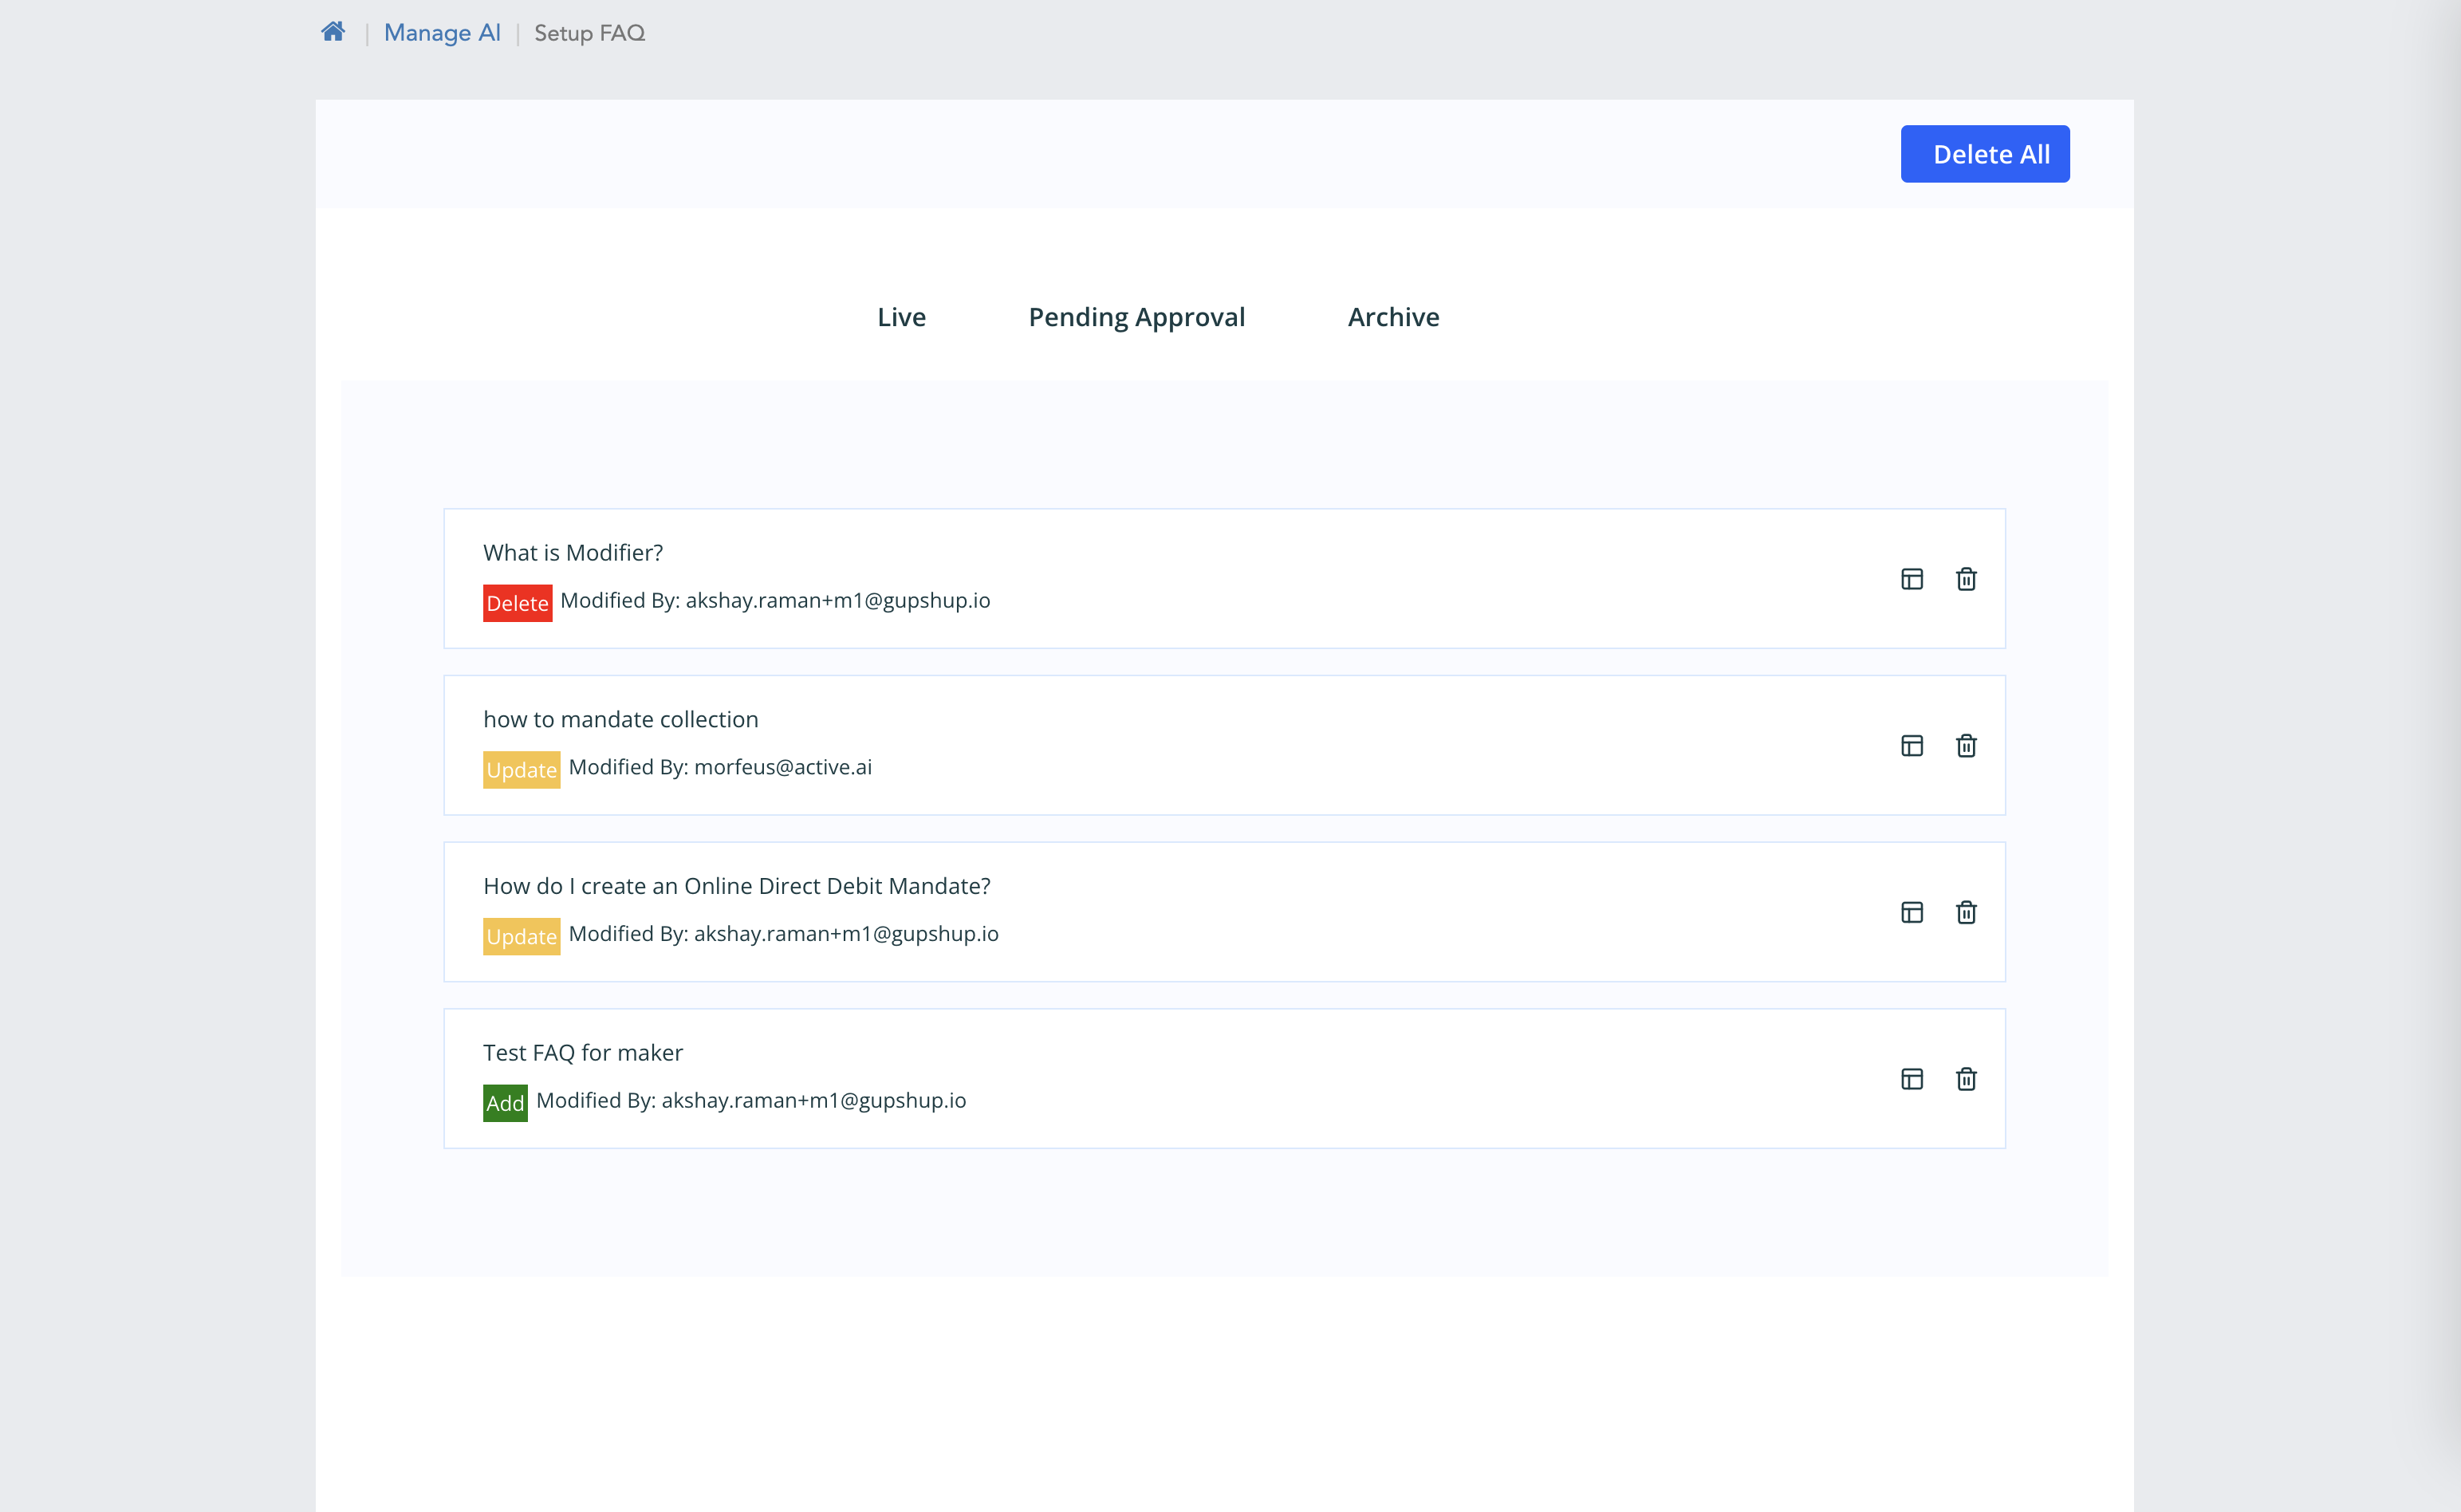
- Here we can see pending approval page for Checker user.
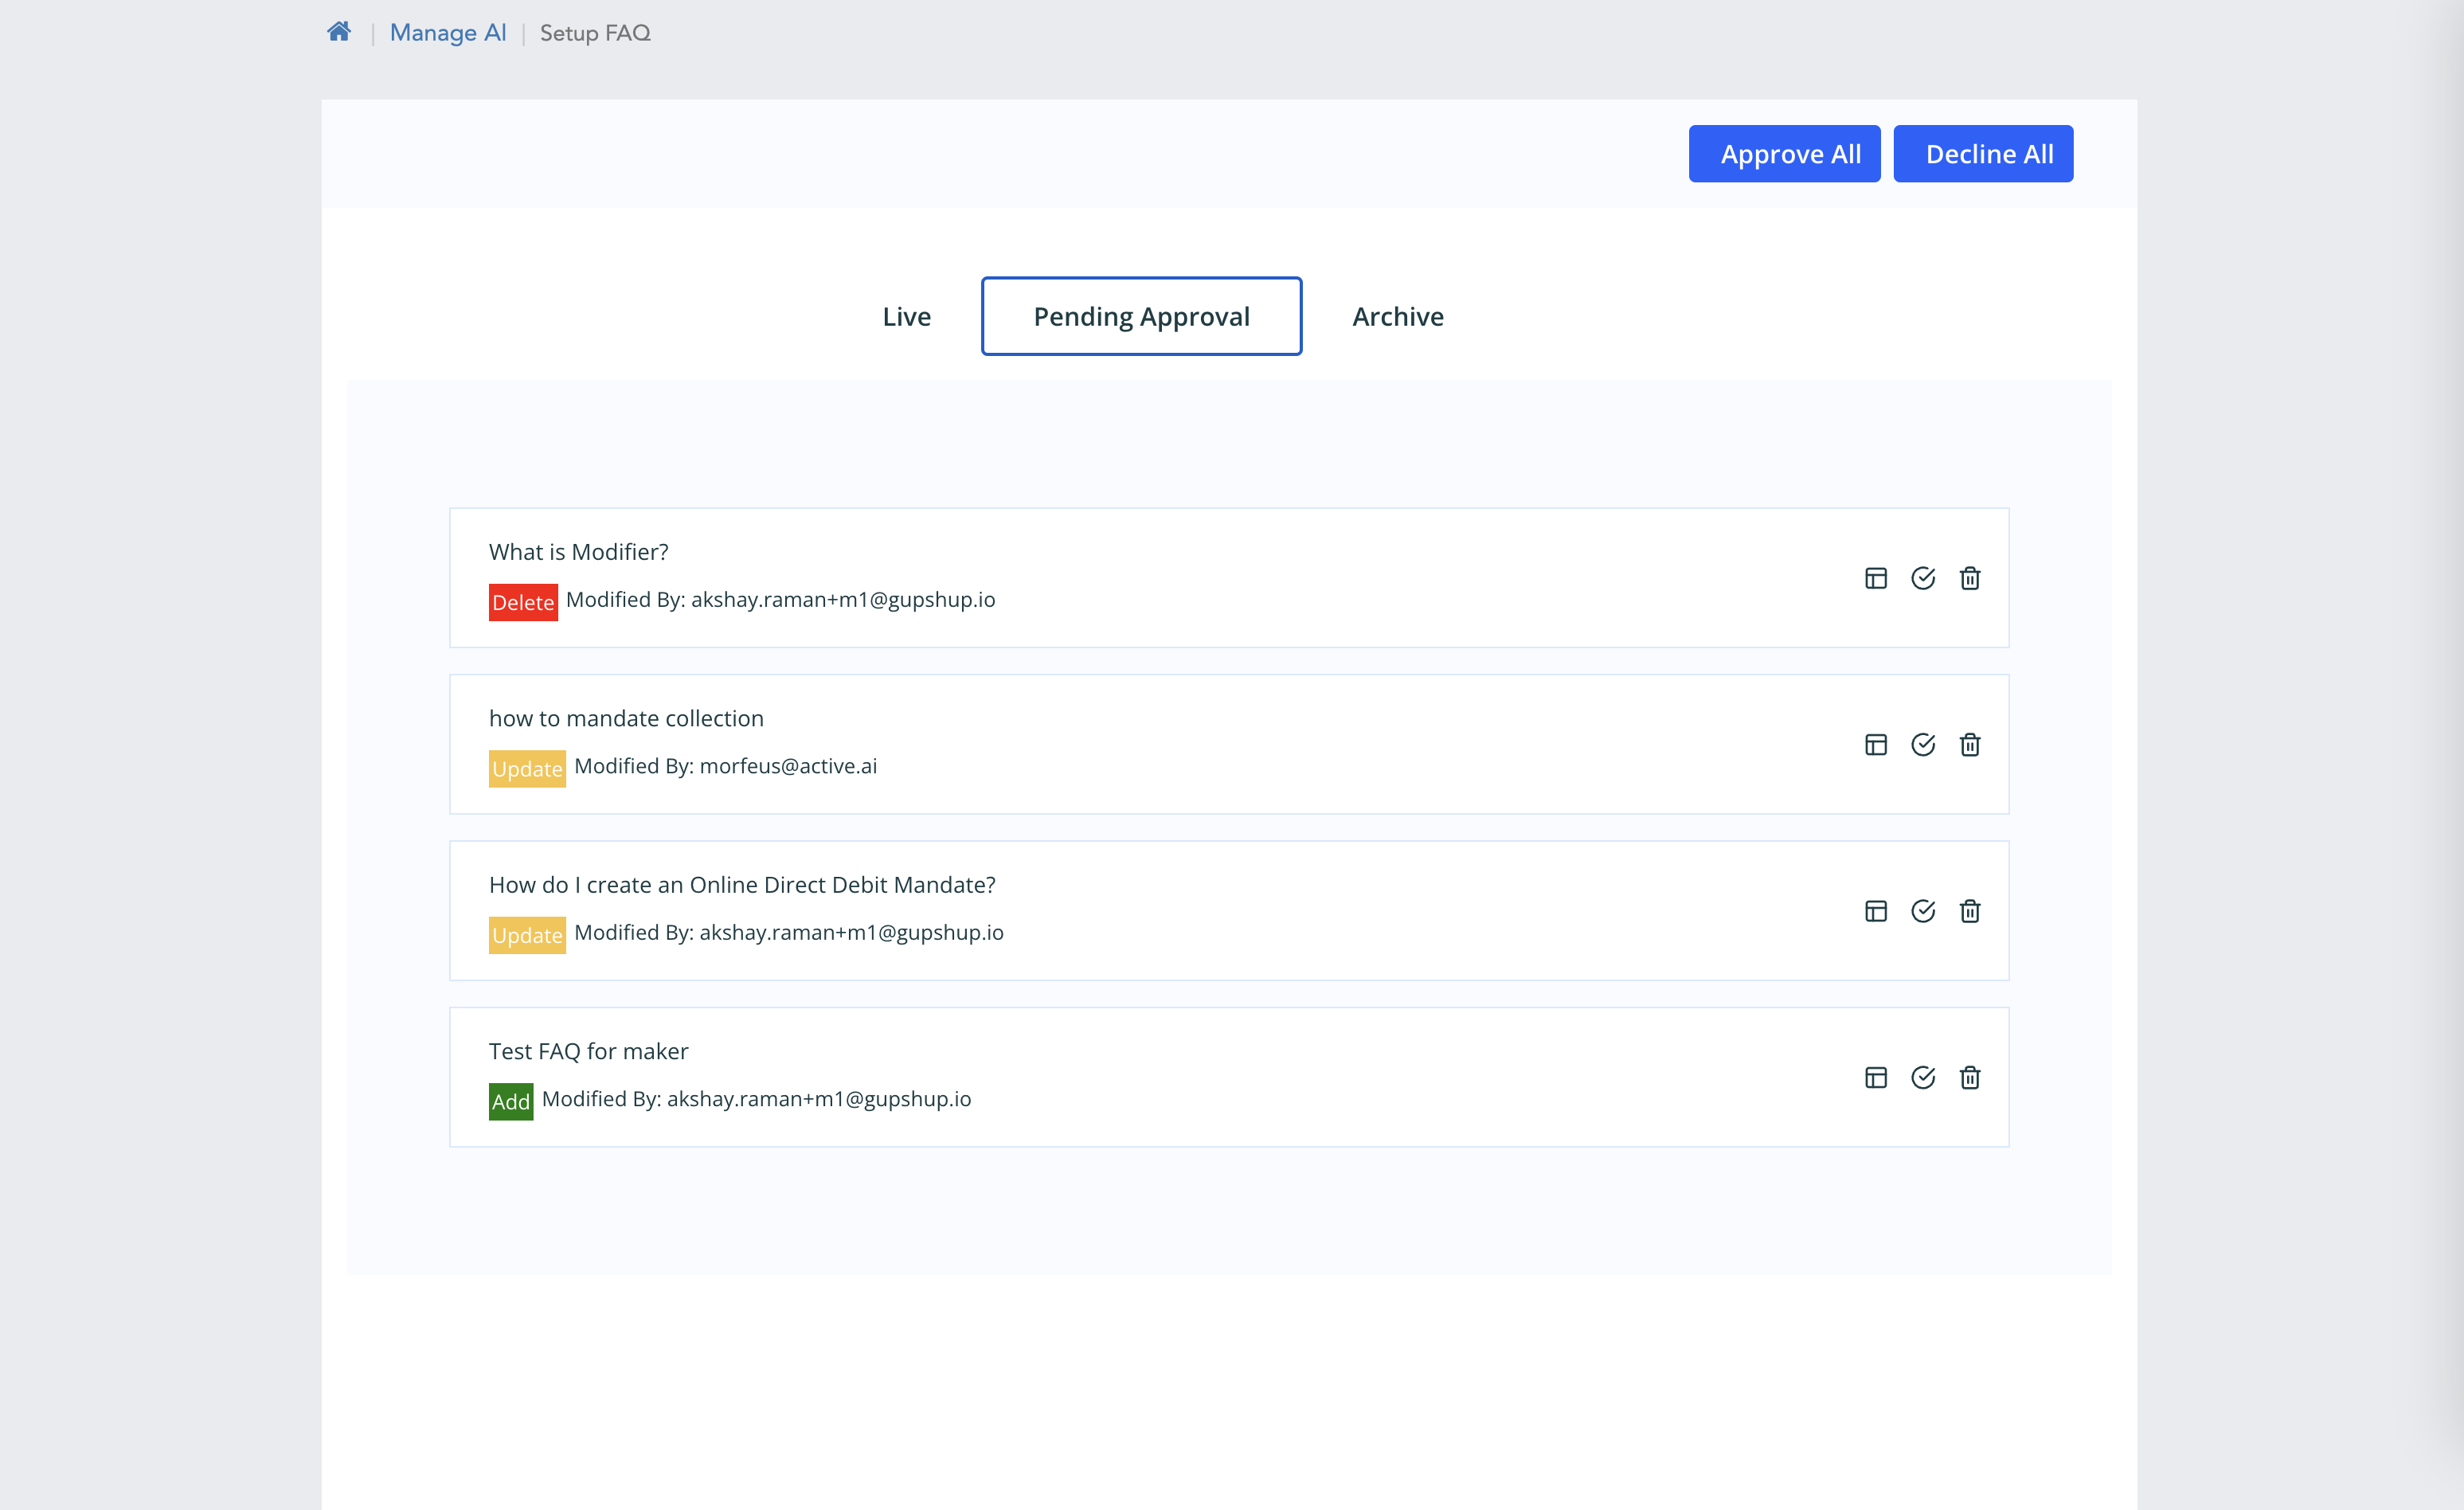
- Here we can see pending approval page with compare screen.
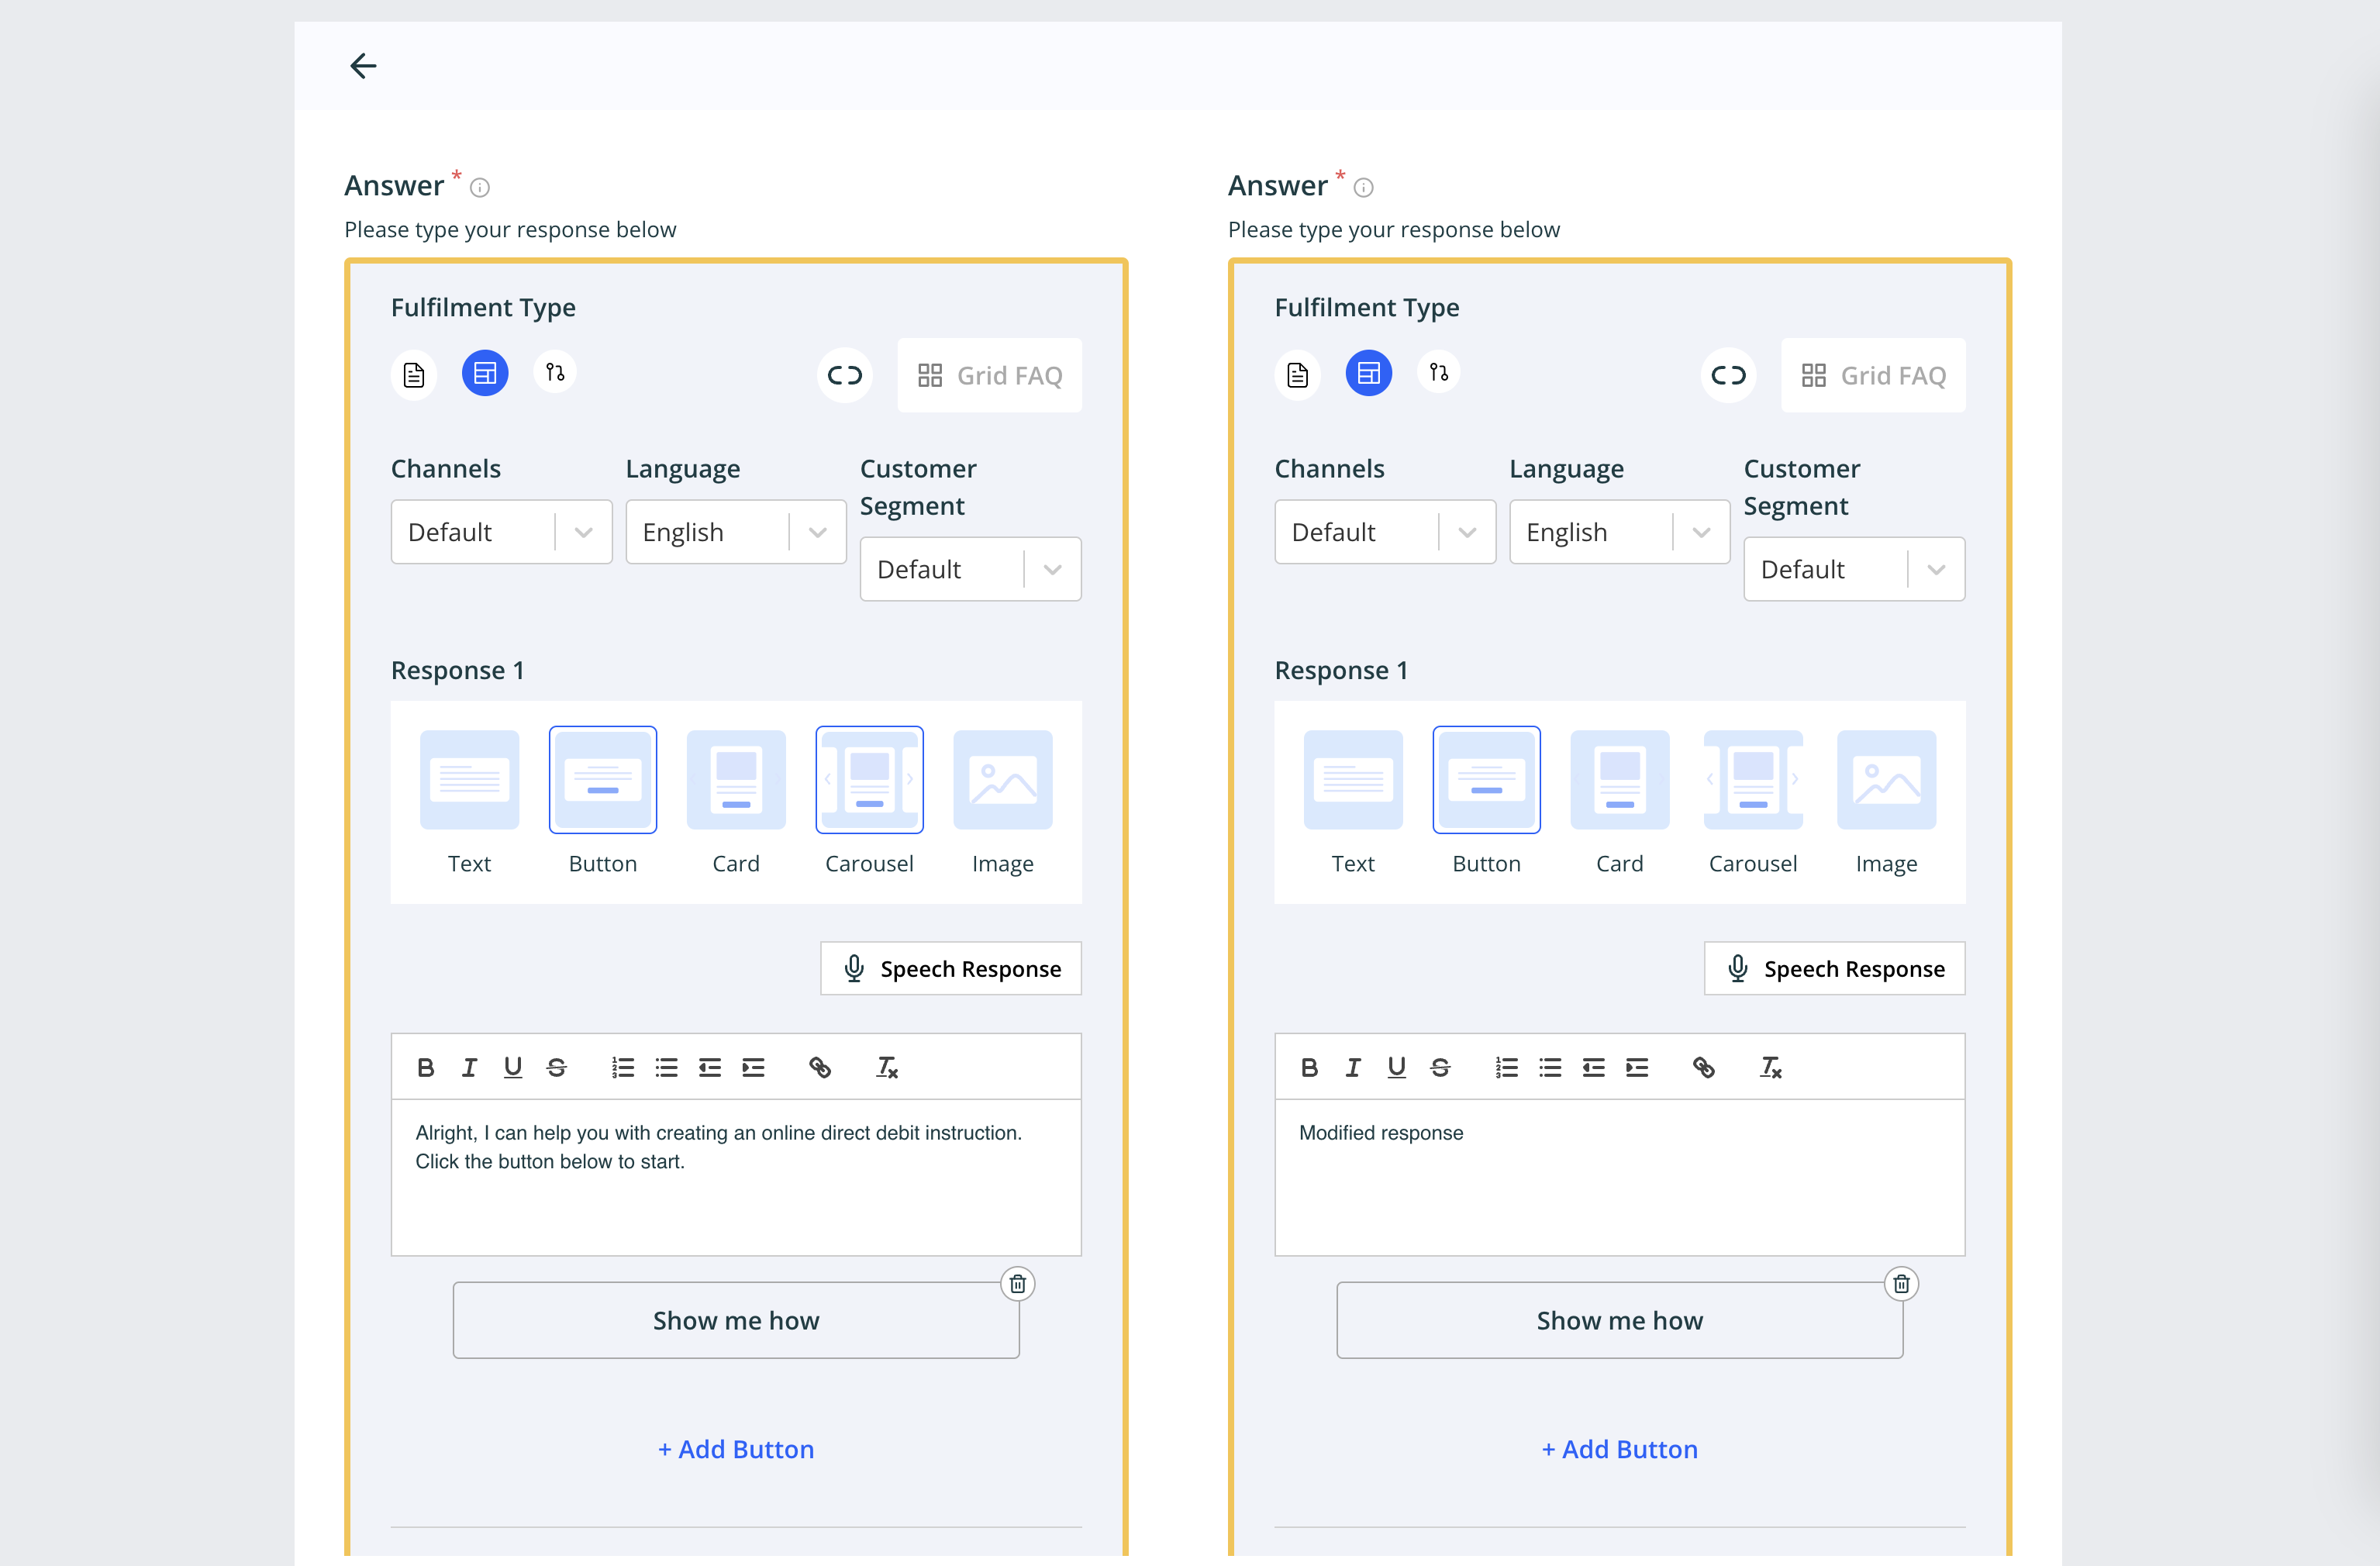
- Here we can see Archive screen.
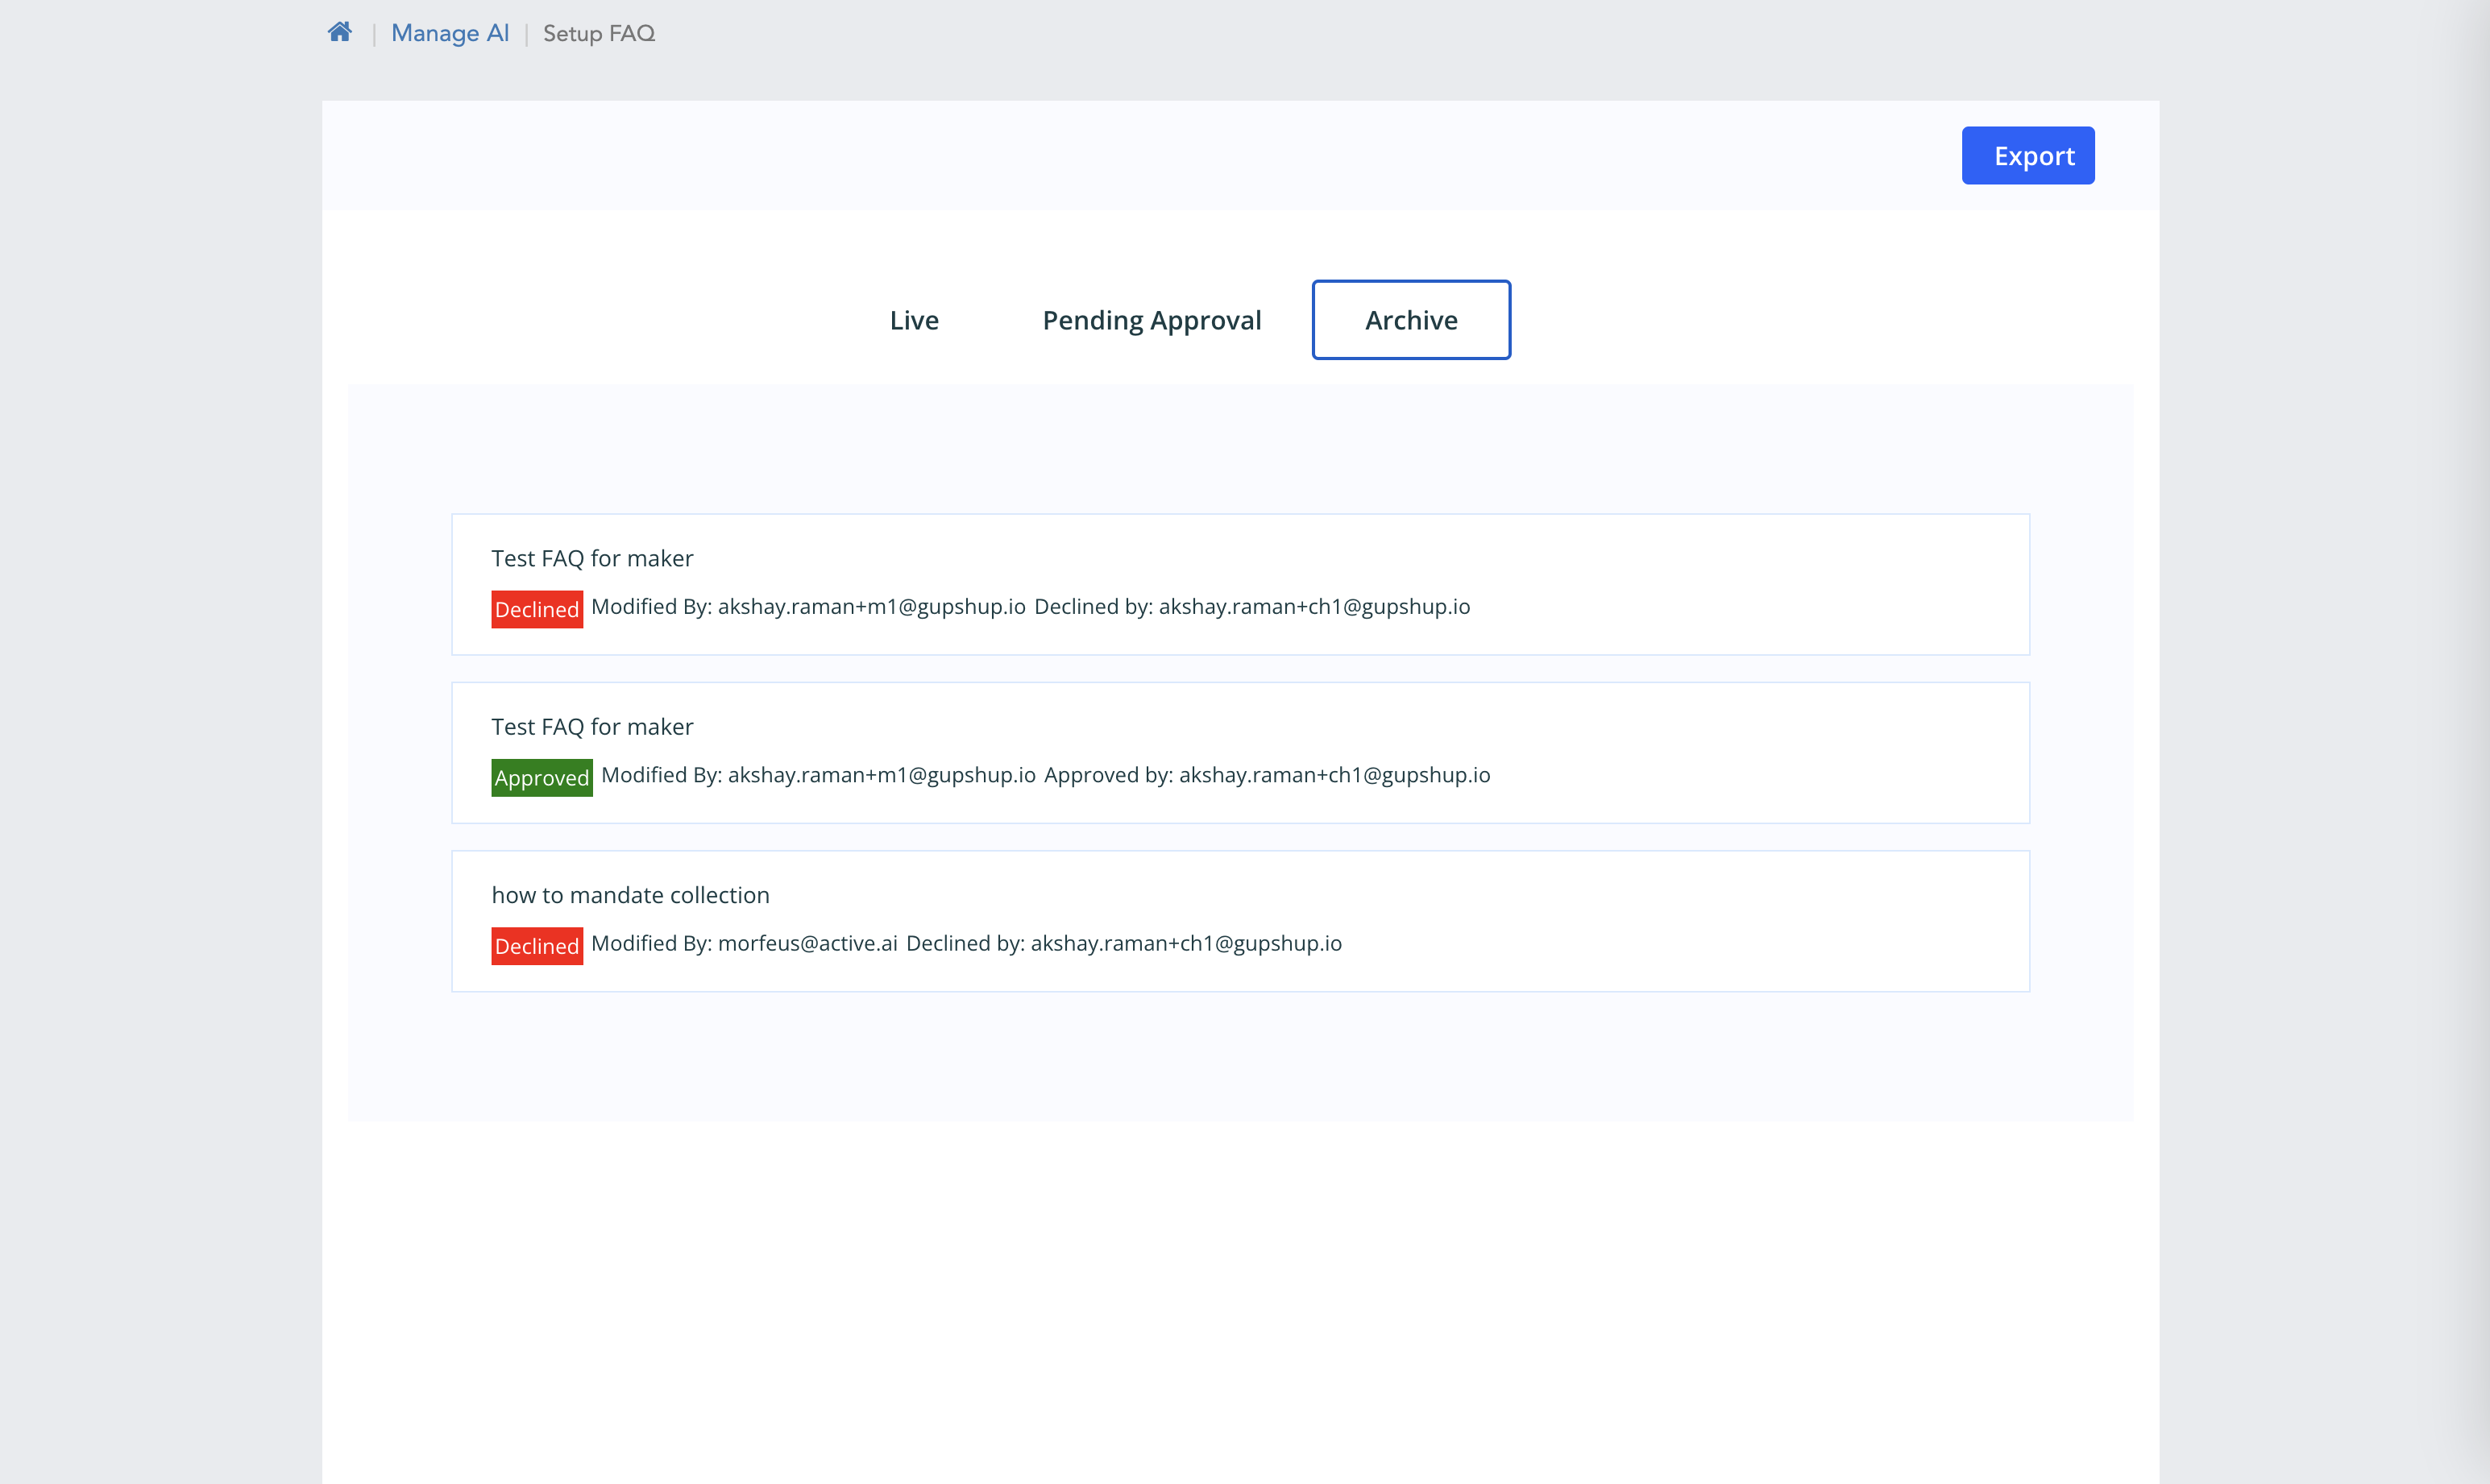
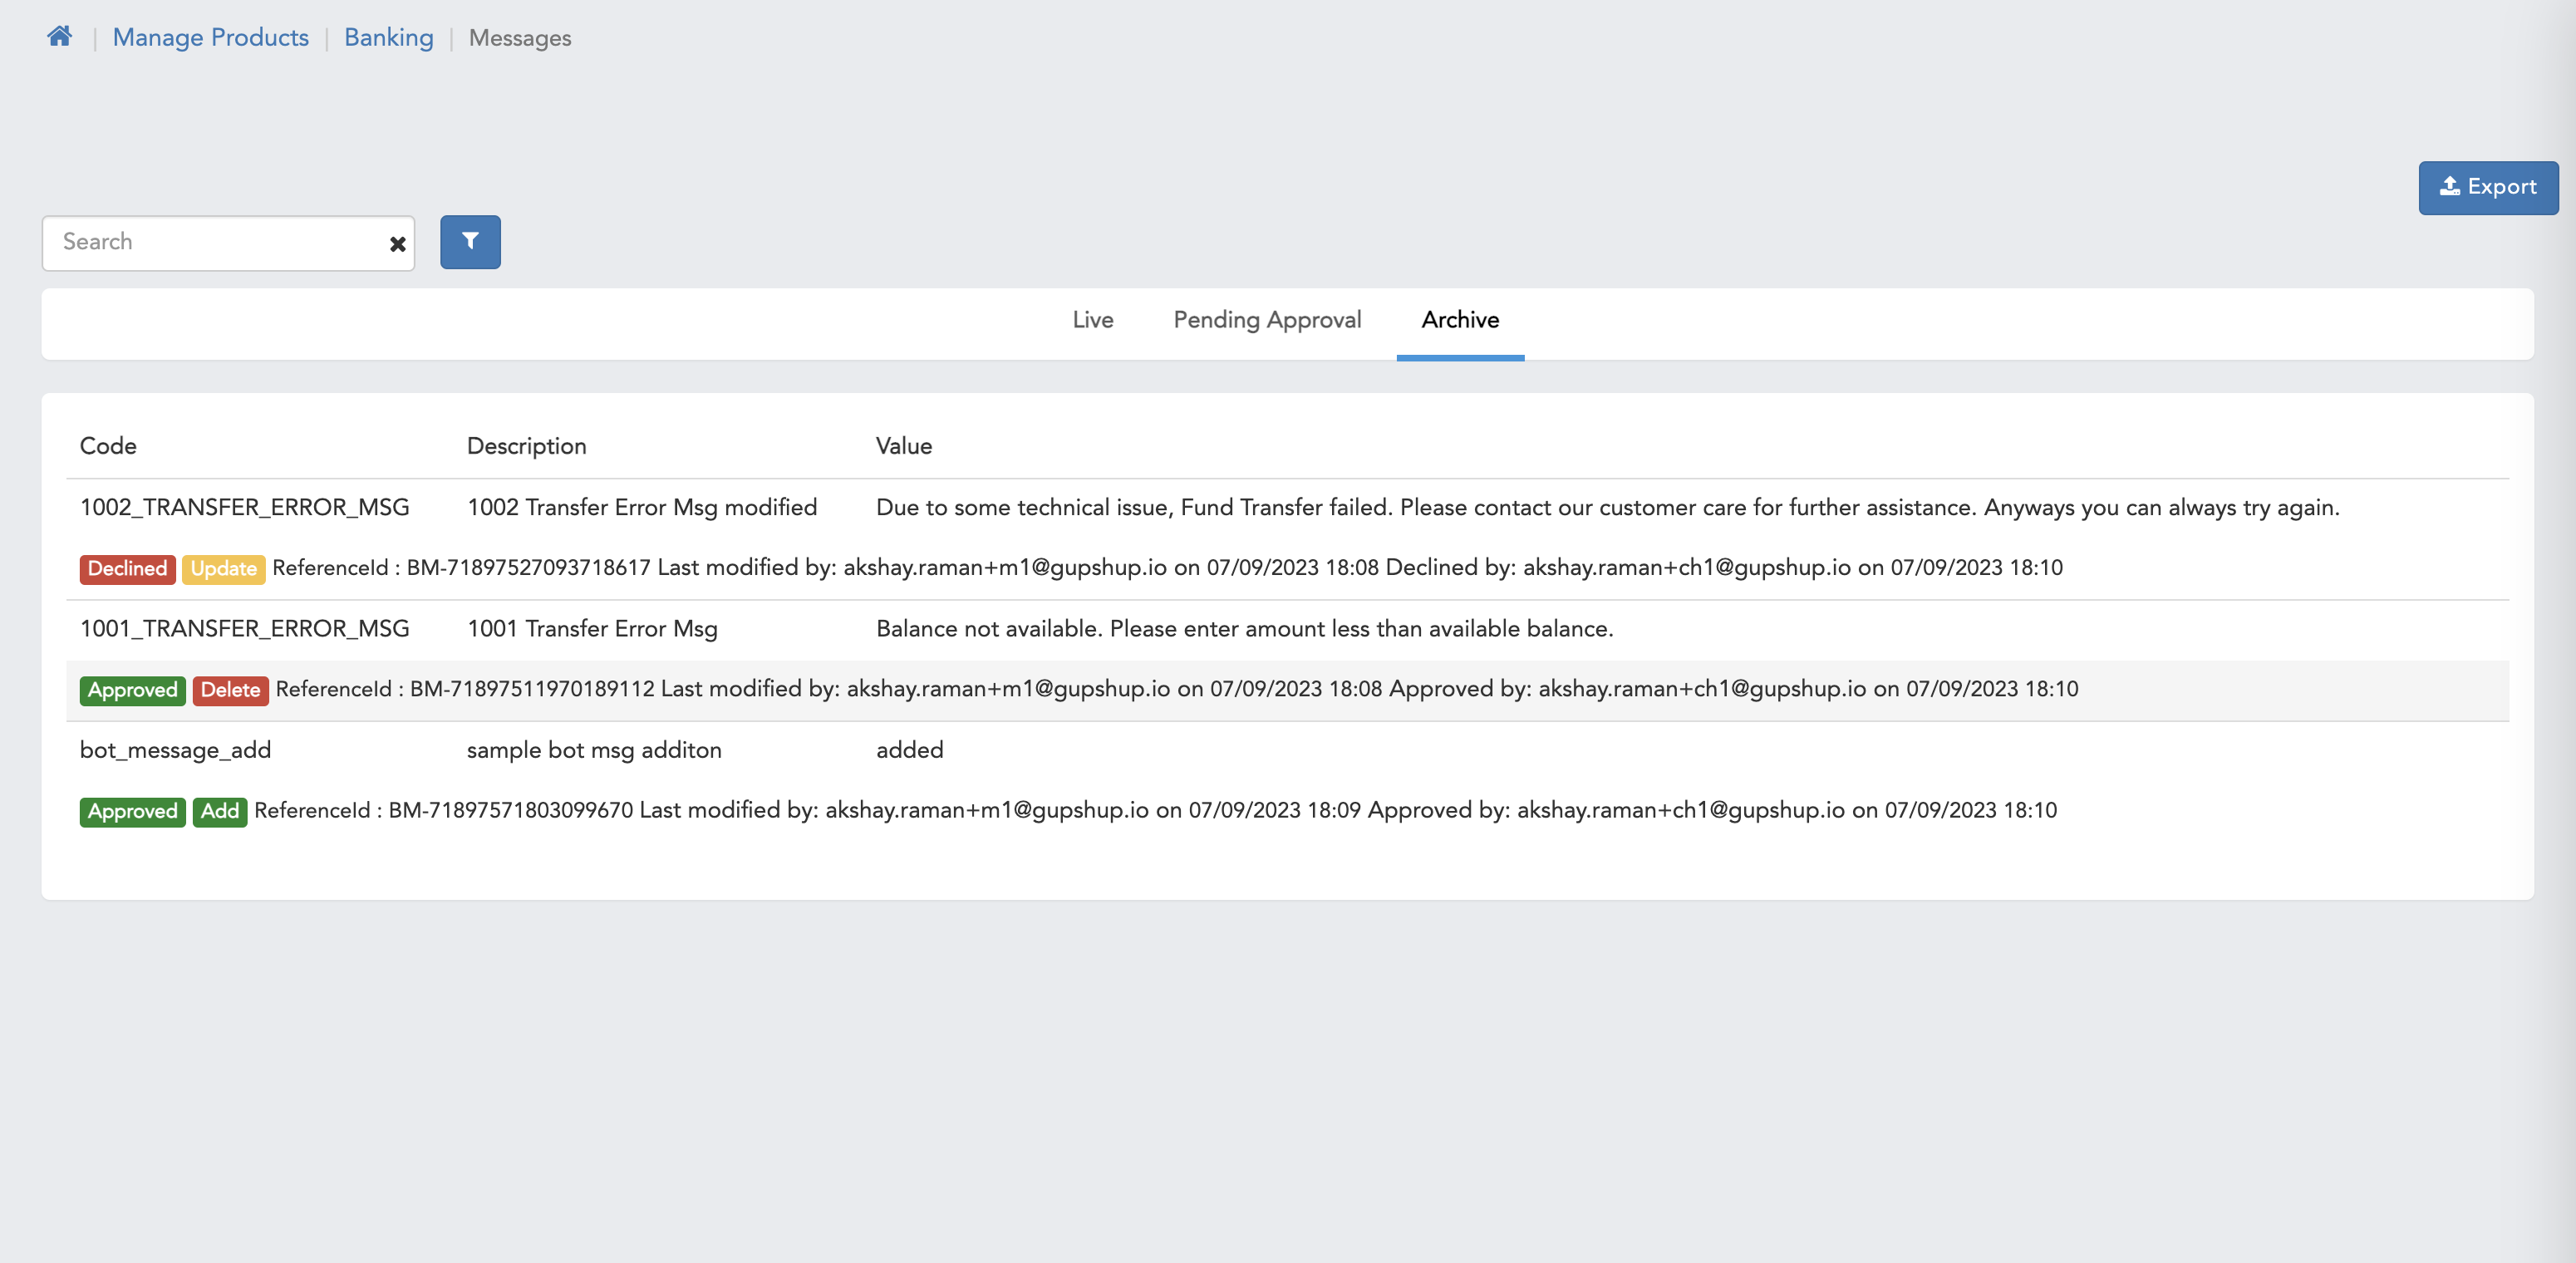
Bot Message
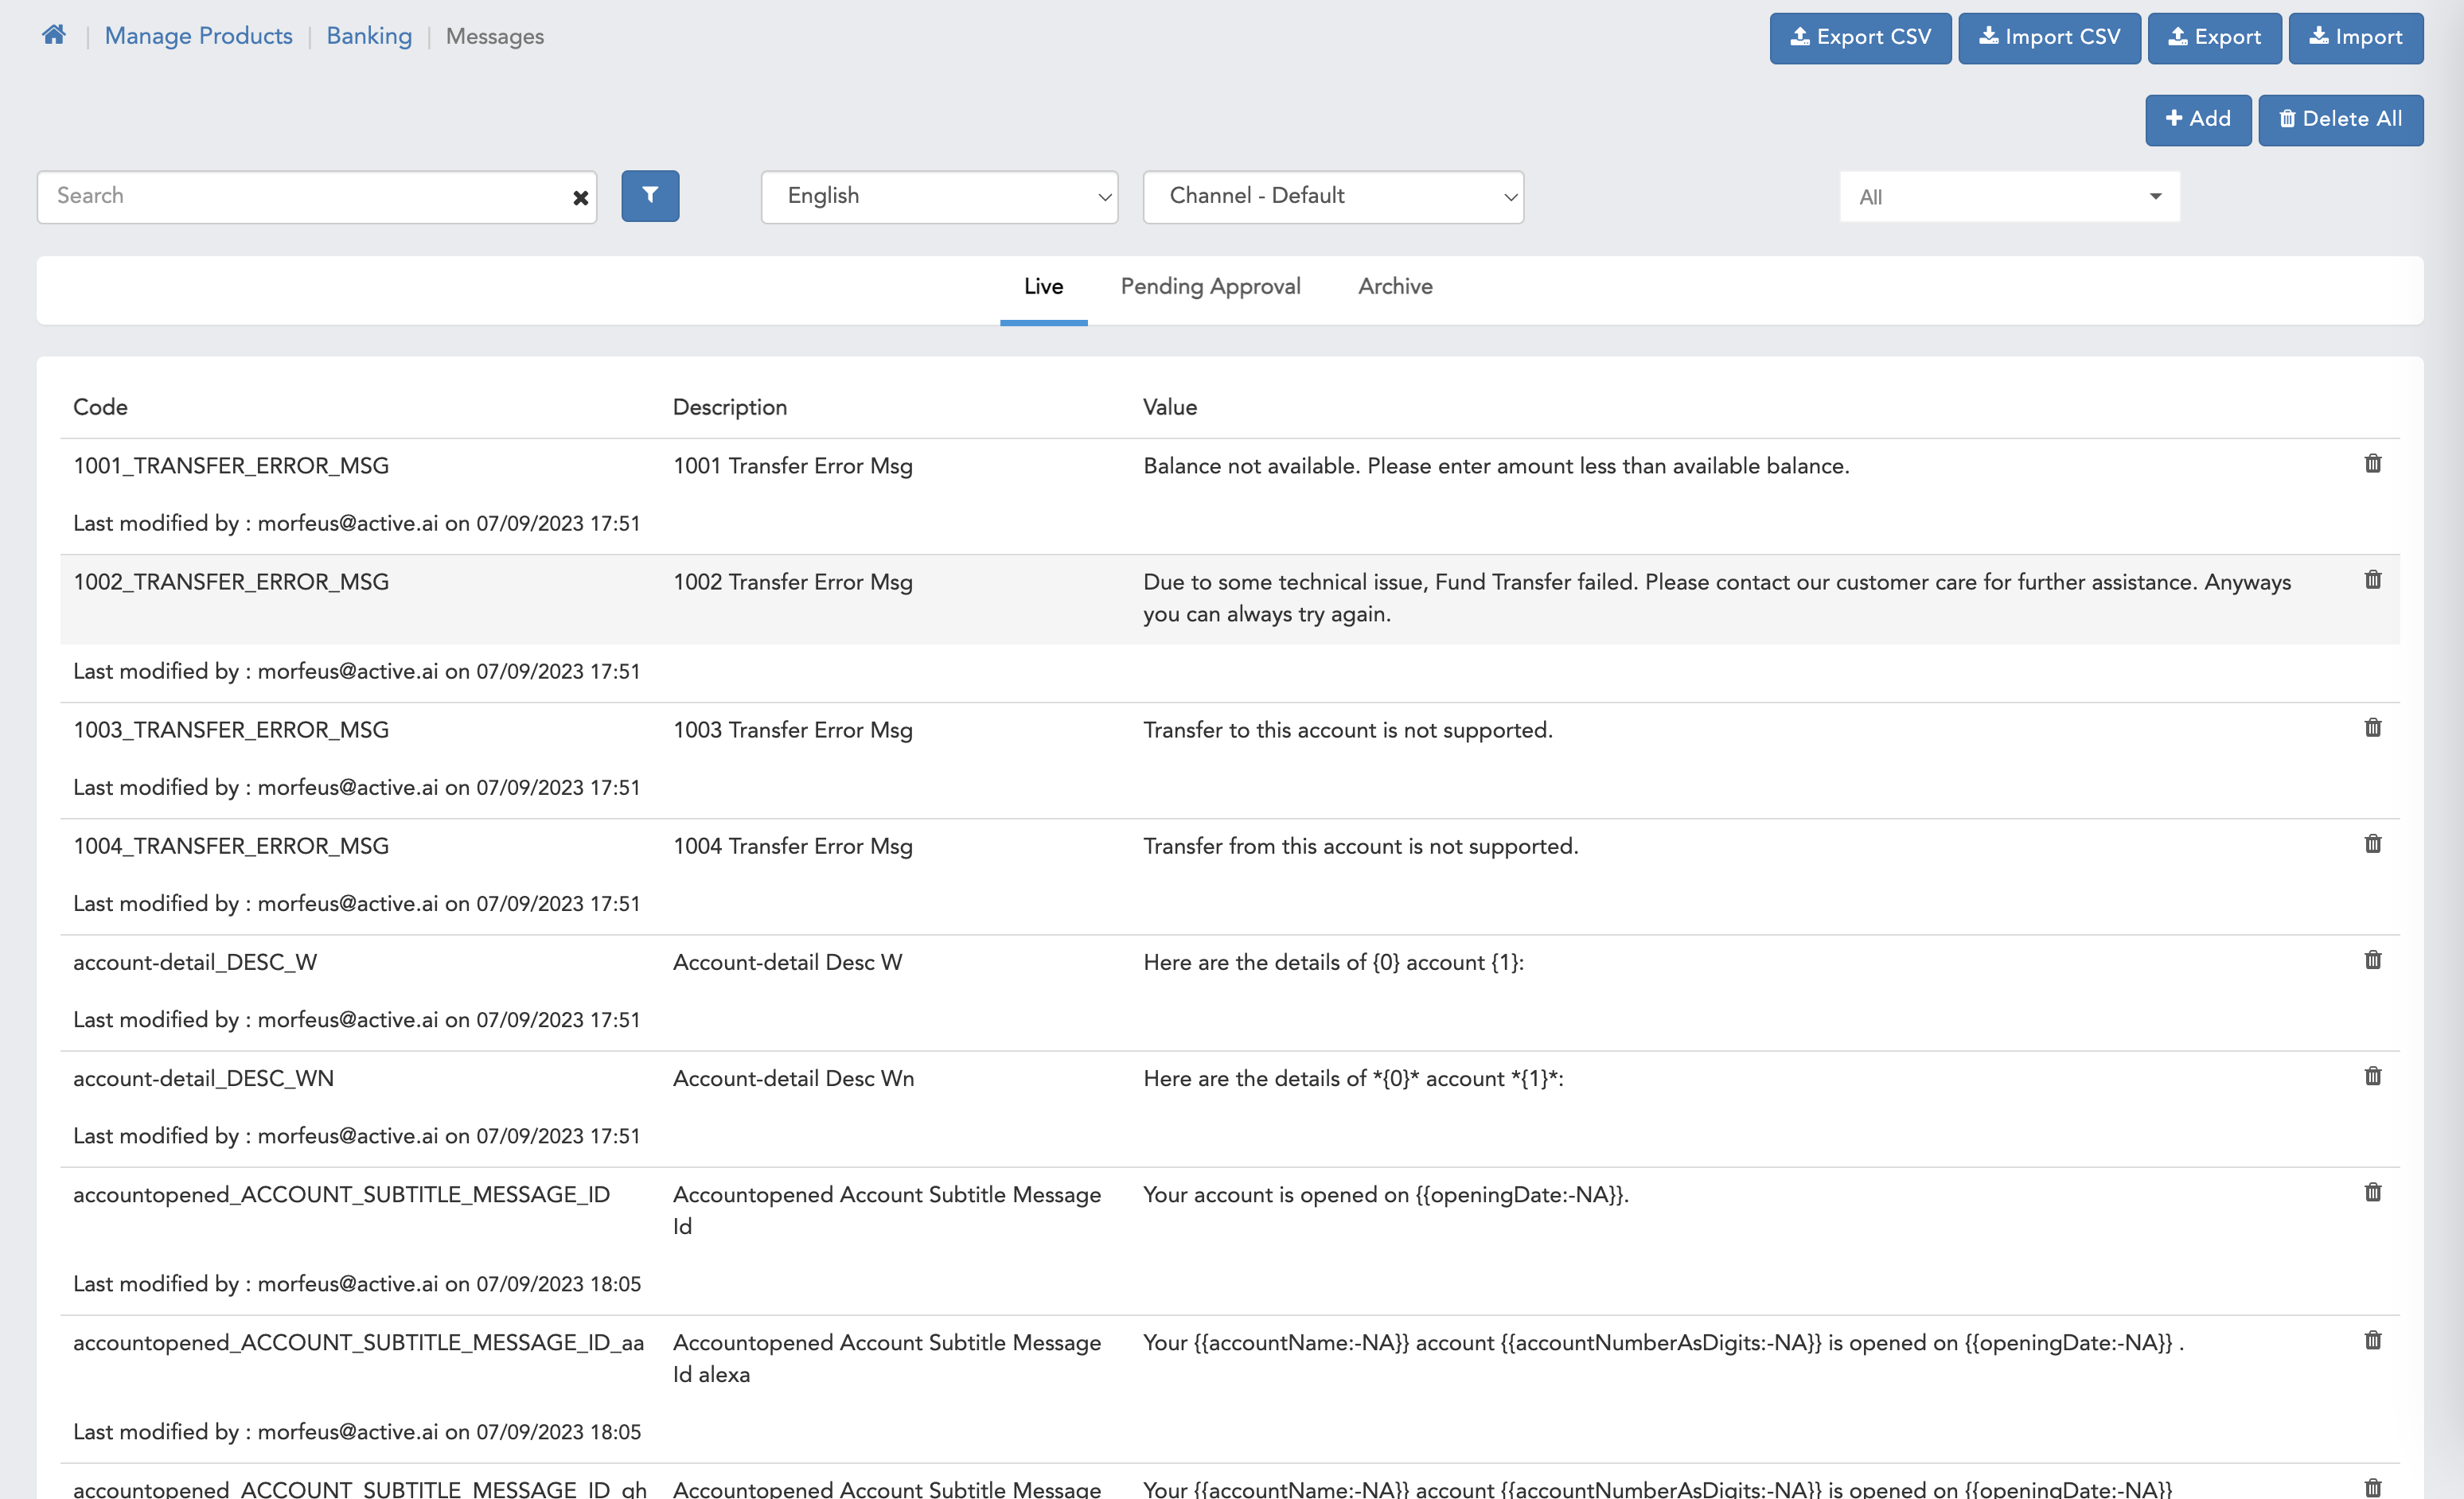
- Here we can see default Bot Message page with all the functionalities with maker checker headers.
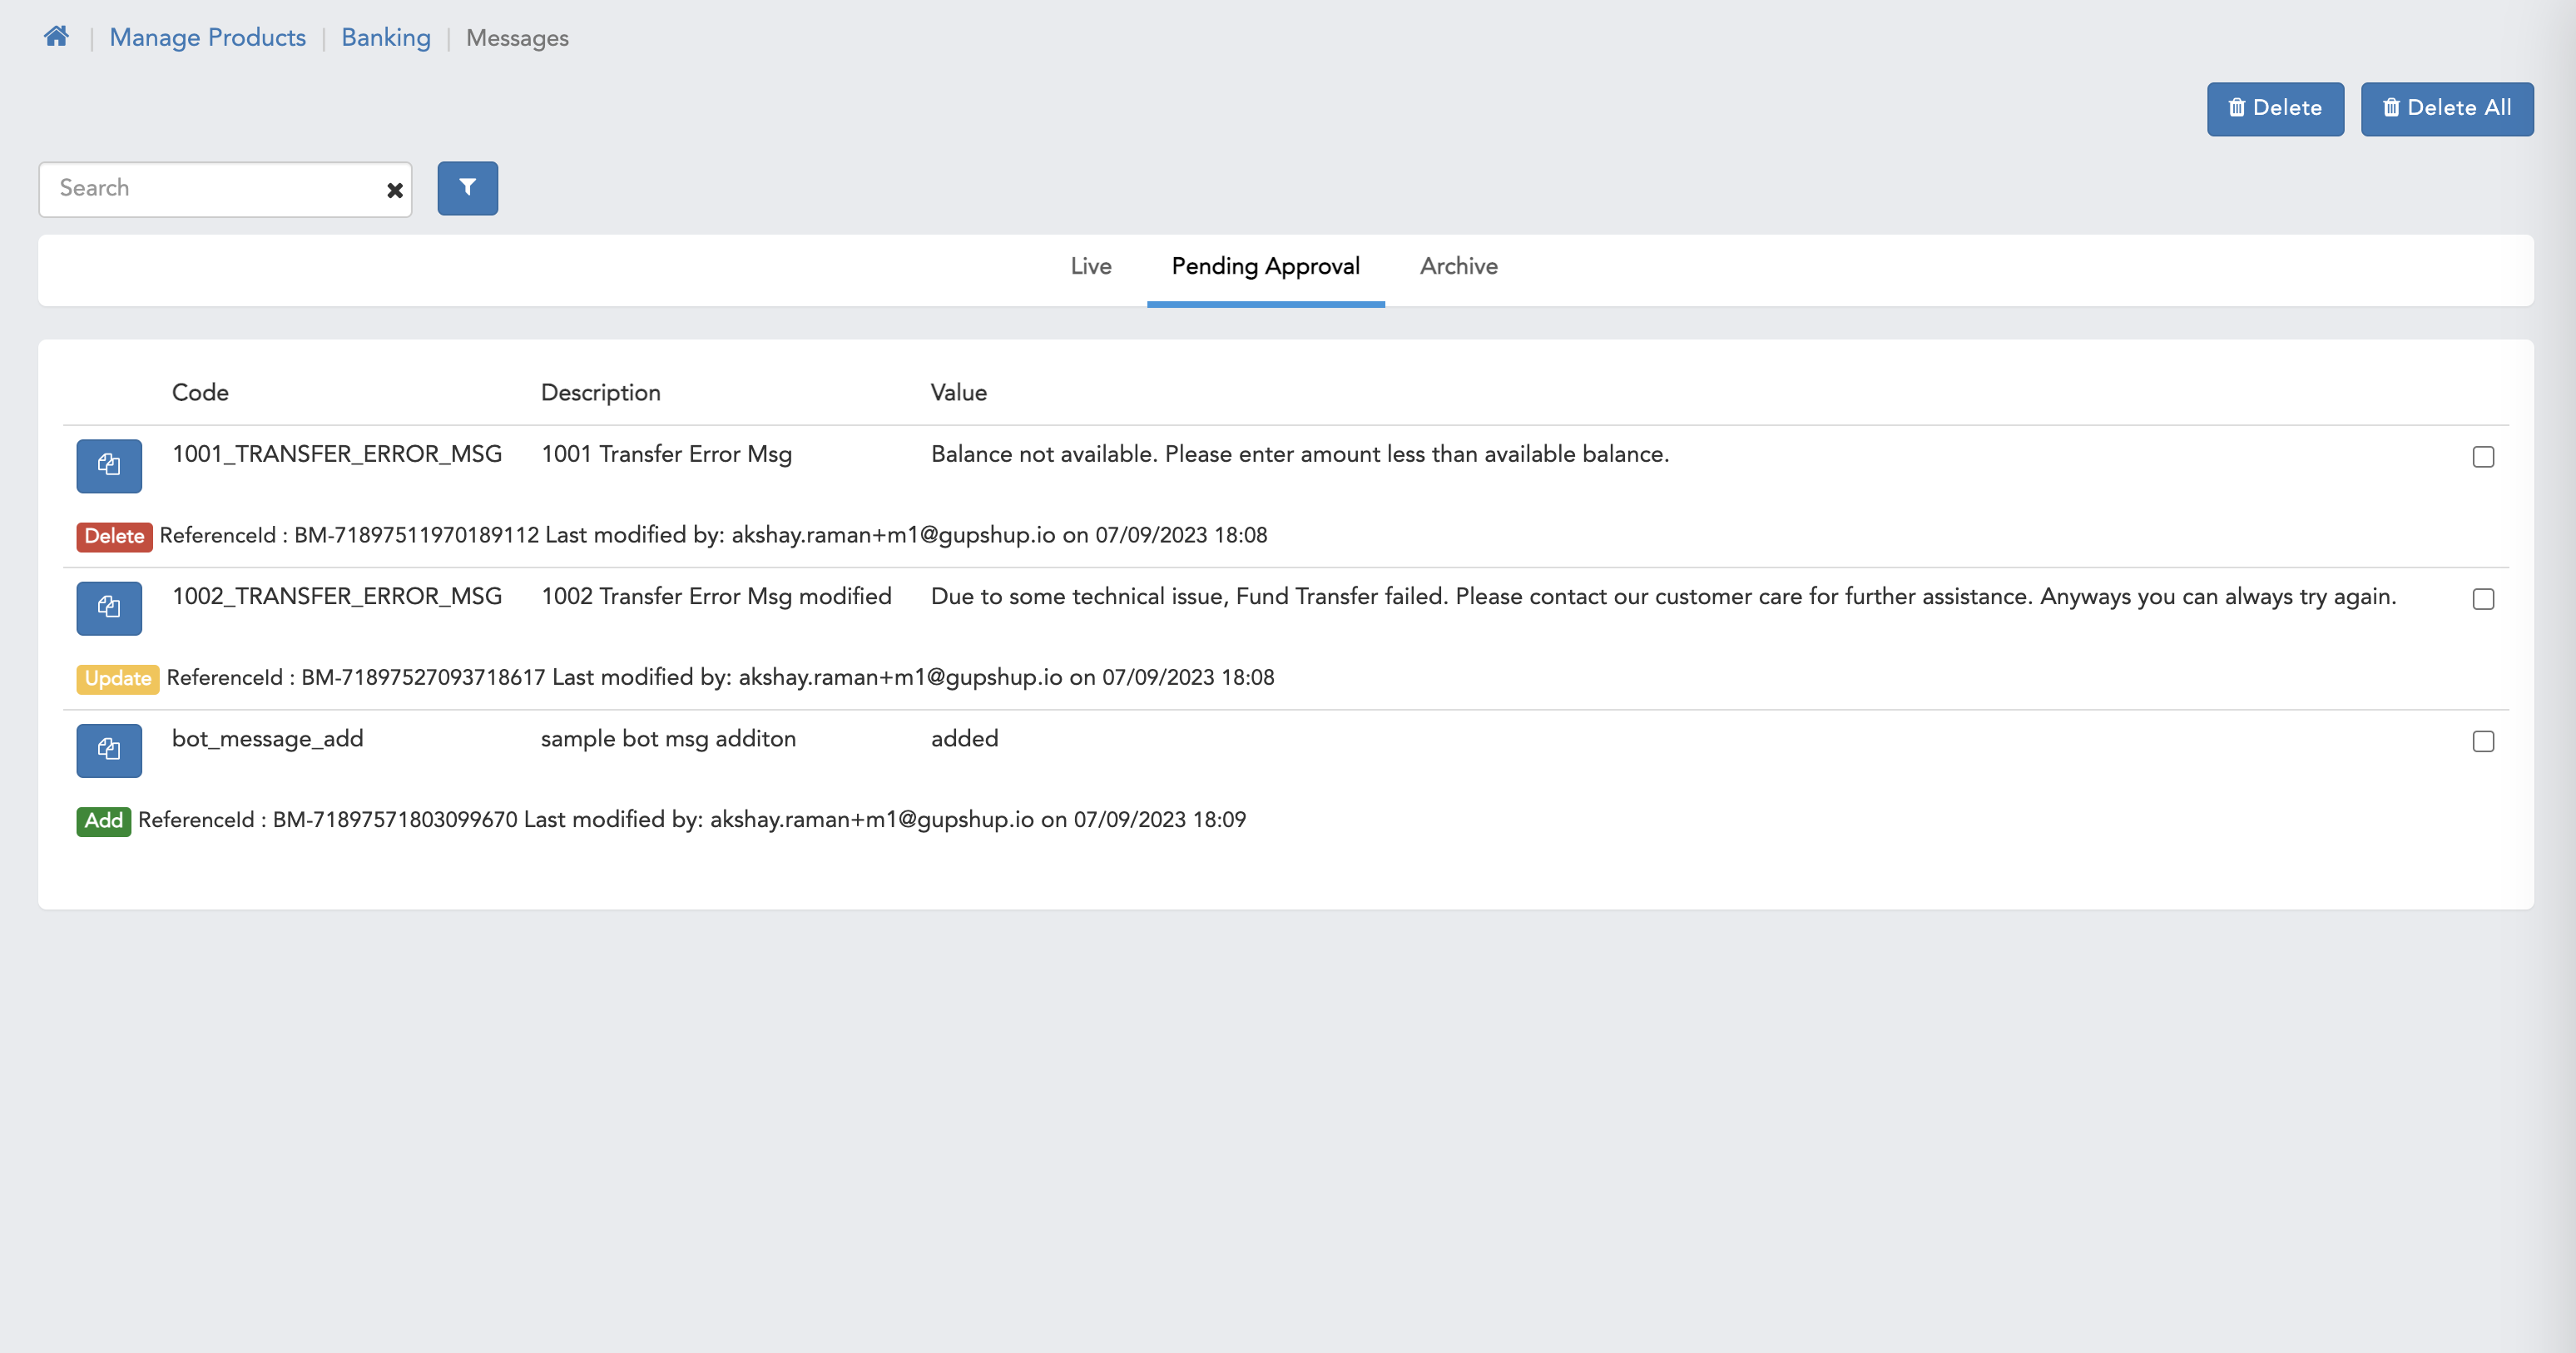
- Here we can see pending approval page for Maker user.
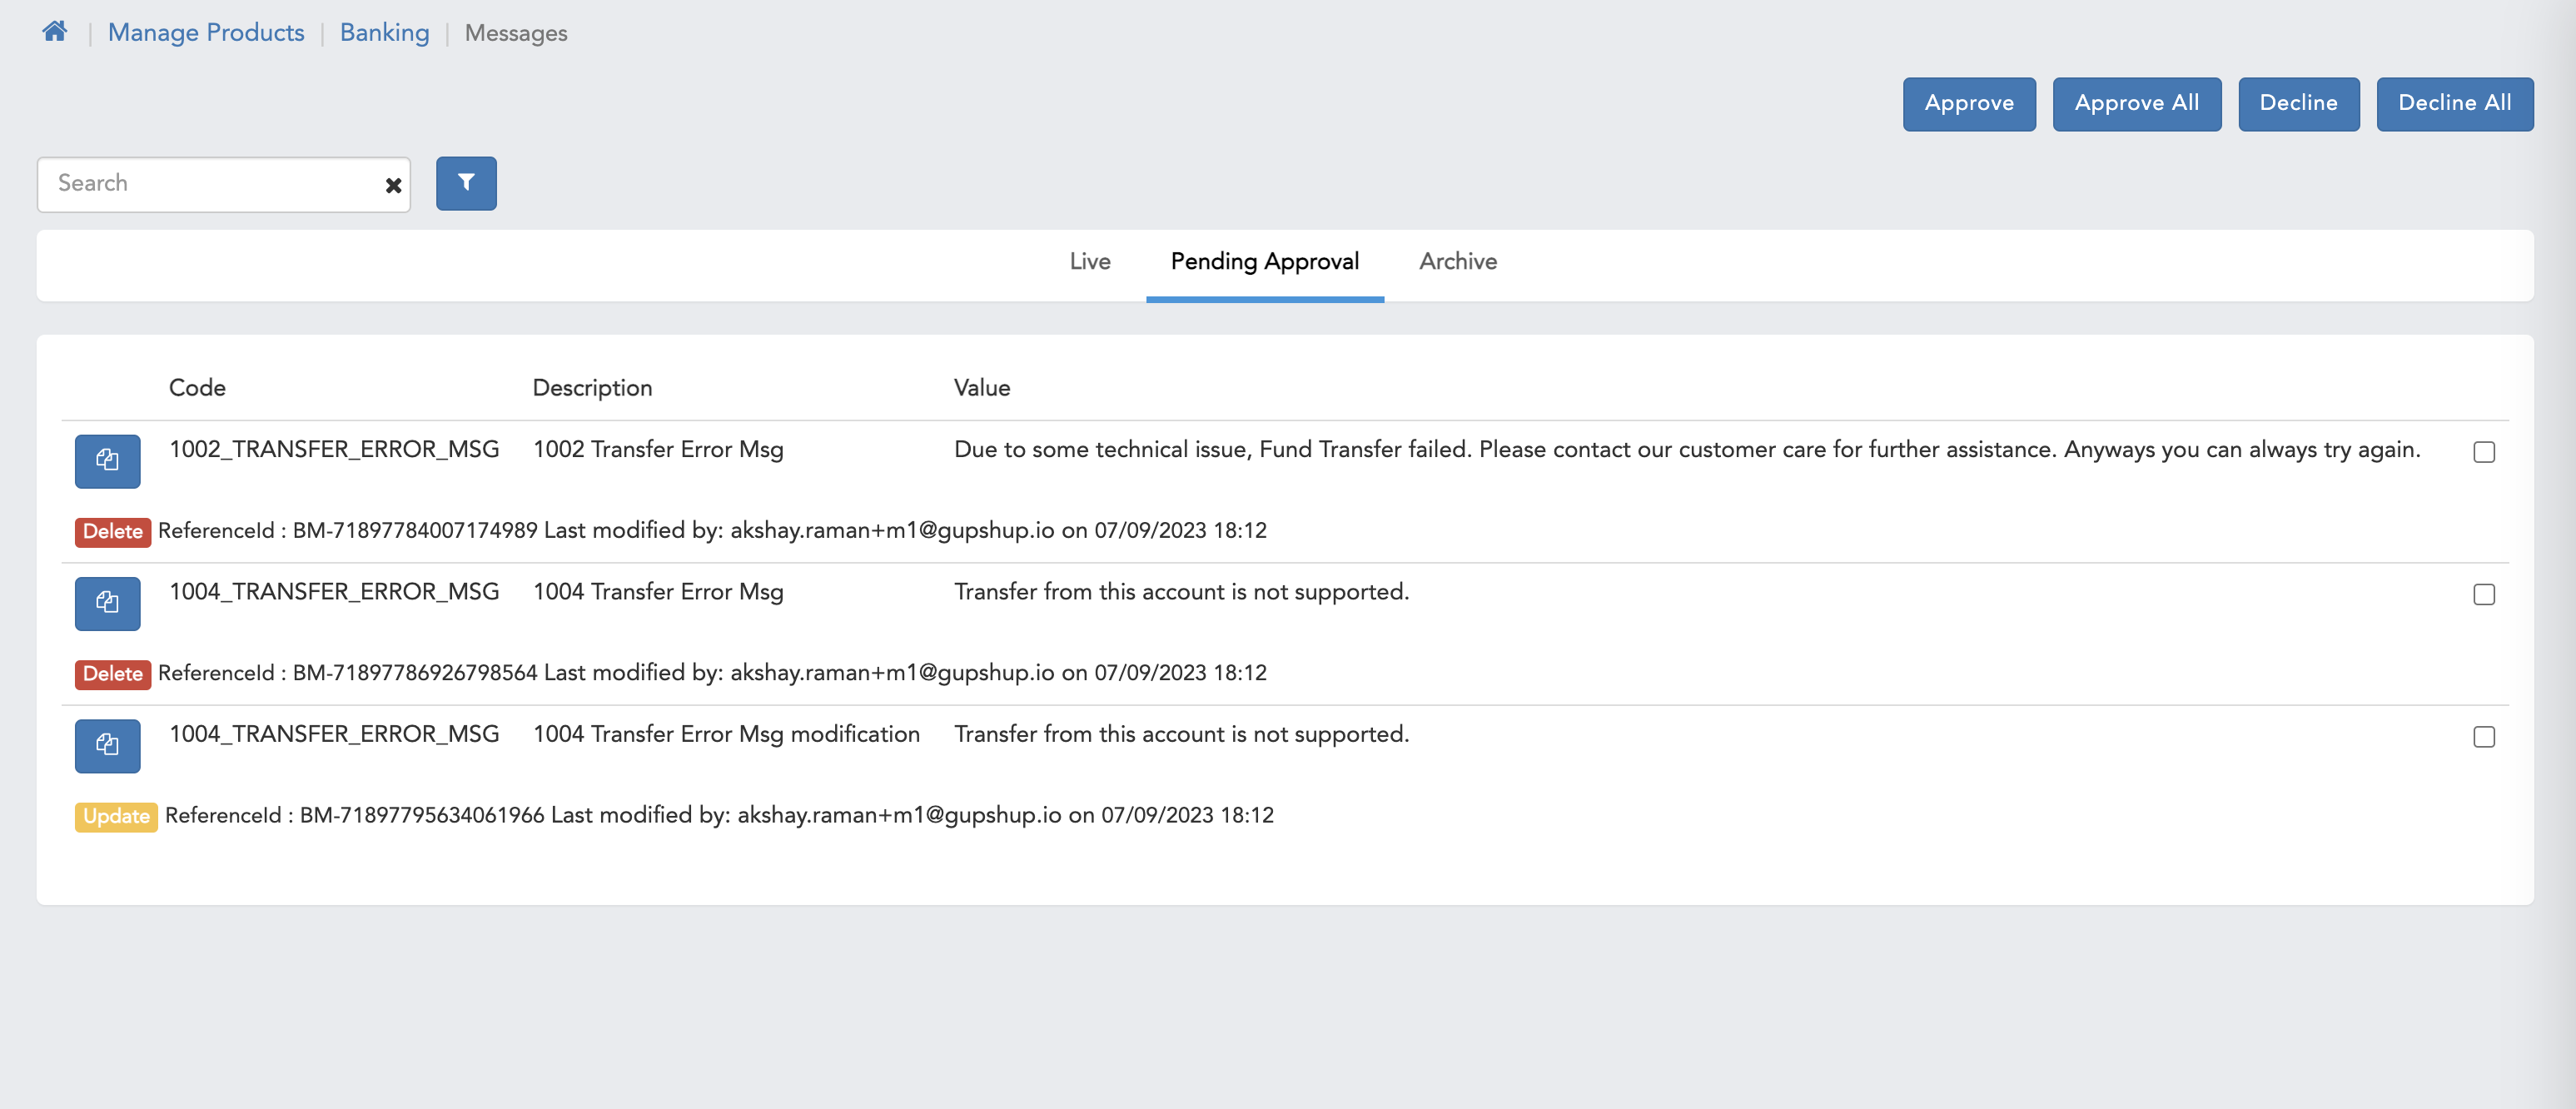
- Here we can see pending approval page for Checker user.
- Here we can see pending approval page with compare screen.
- Here we can see Archive screen.
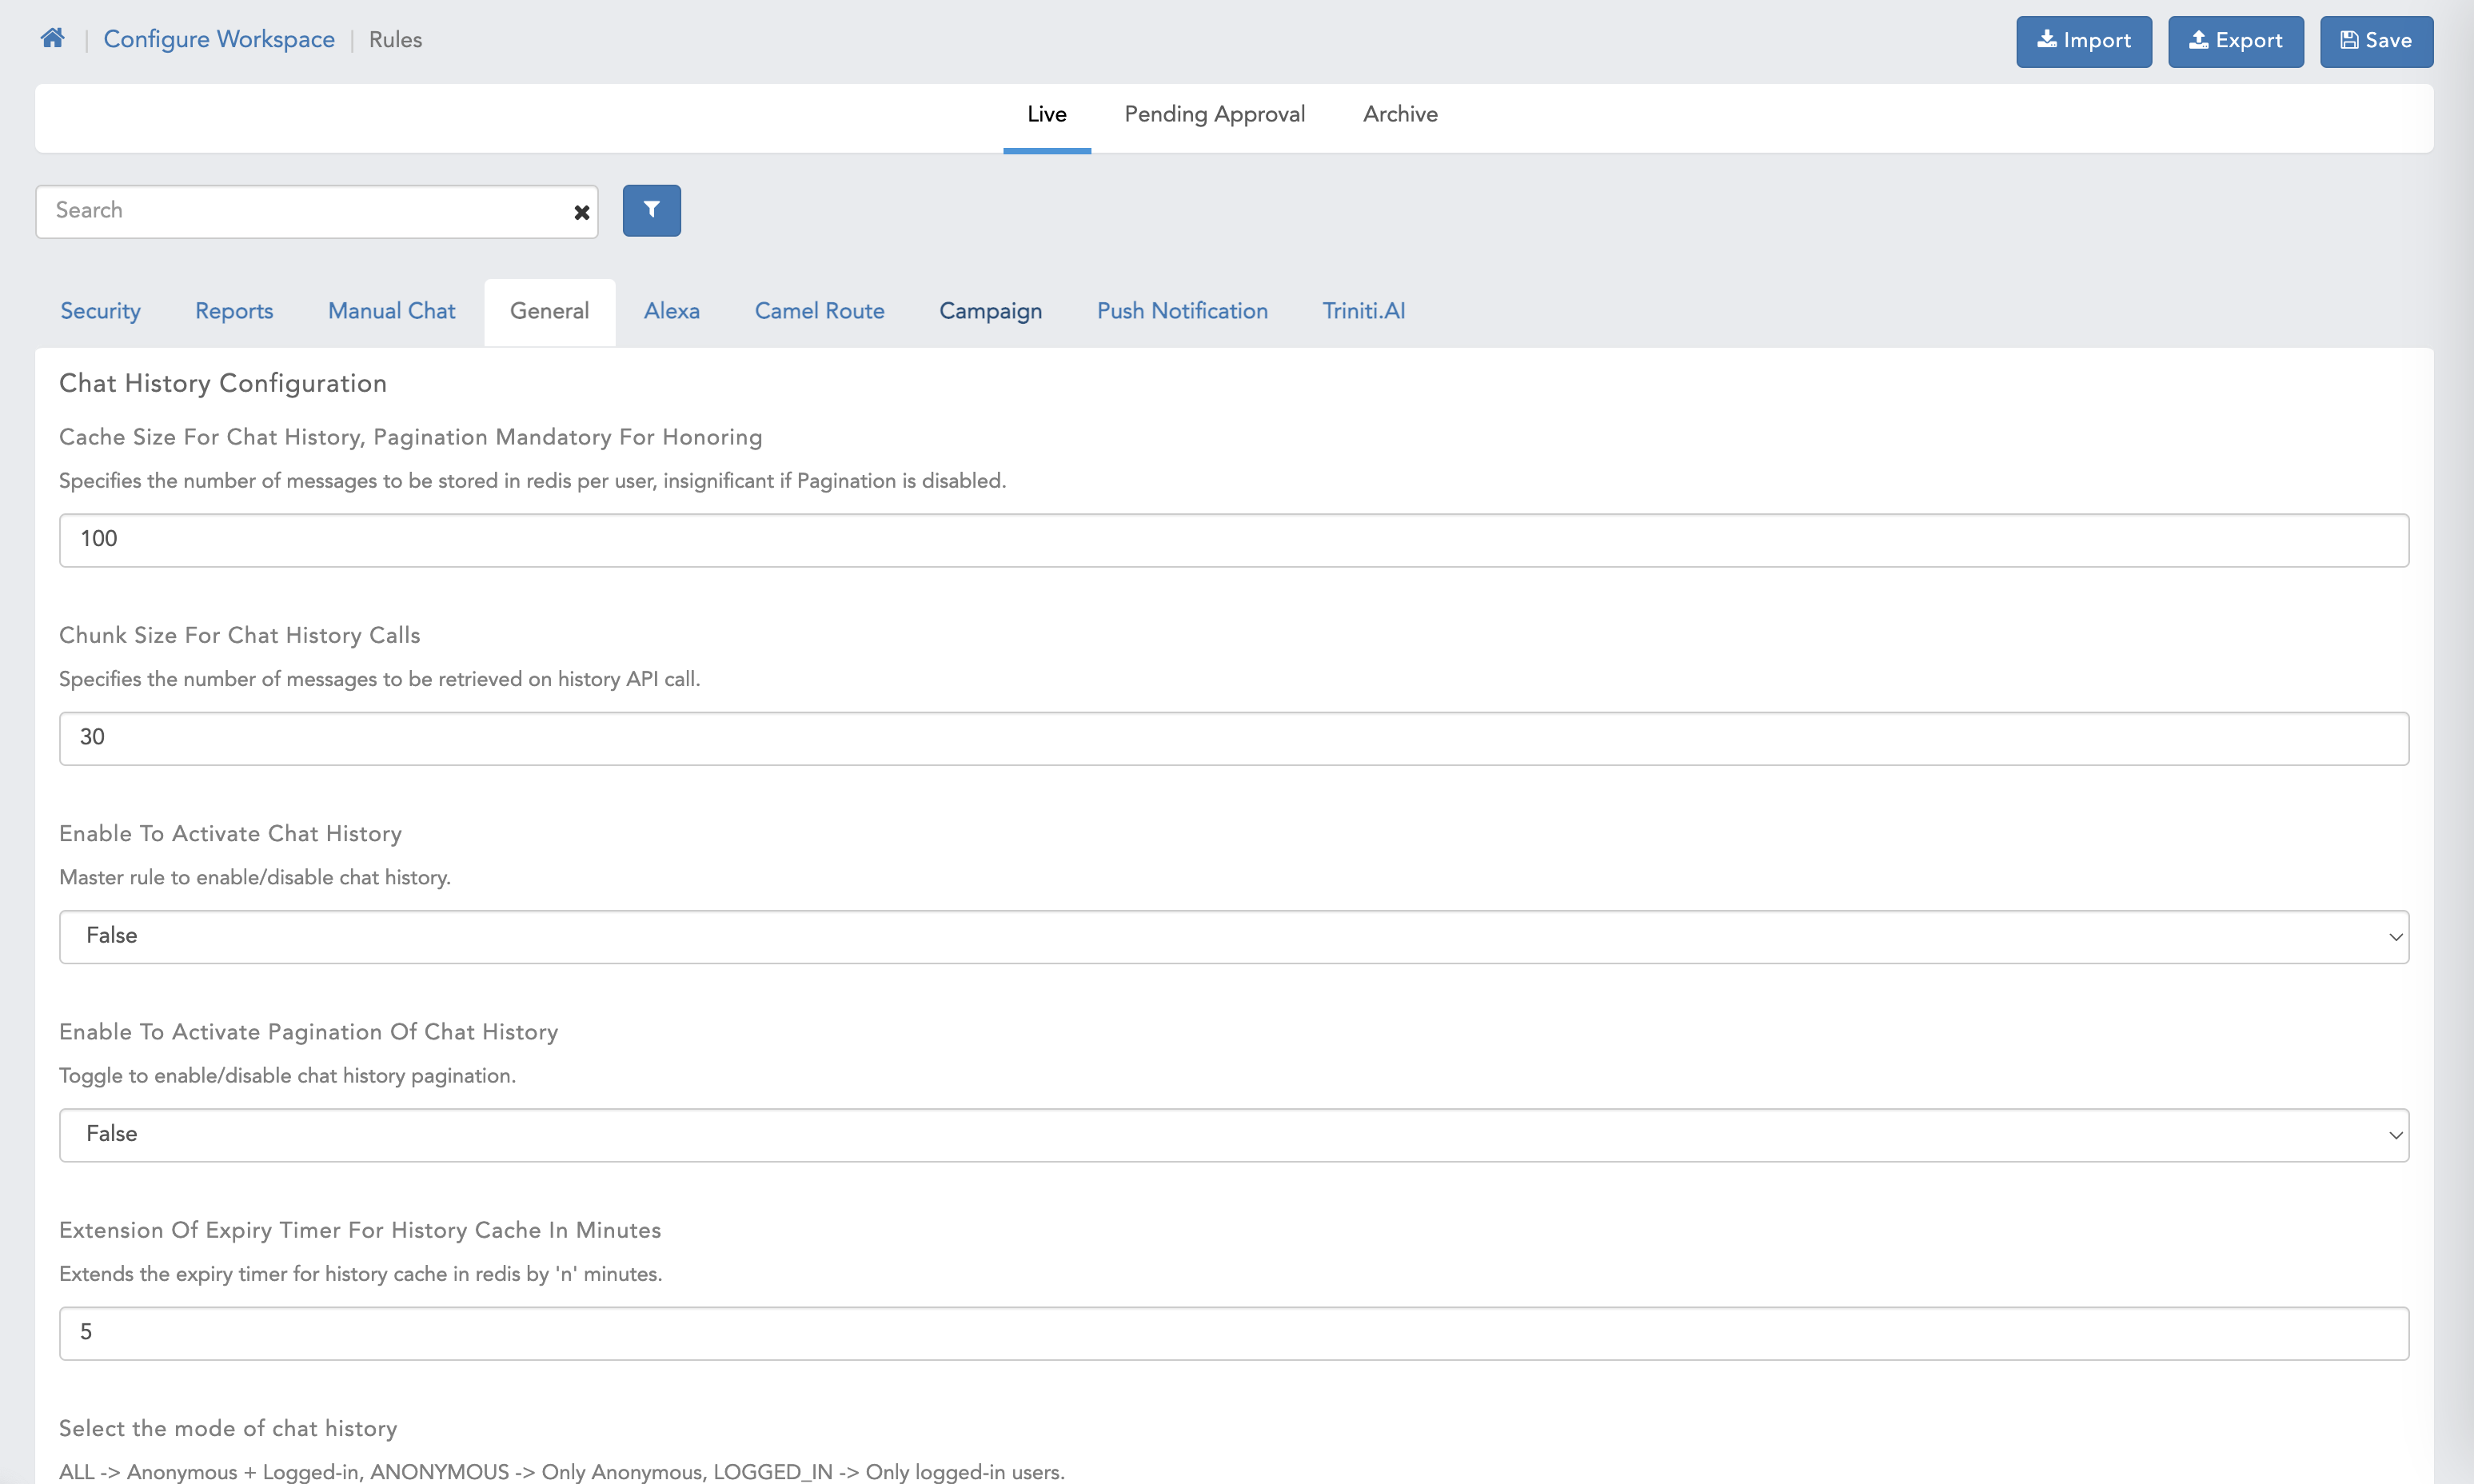
Manage Workspace Rules & Manage AI rules
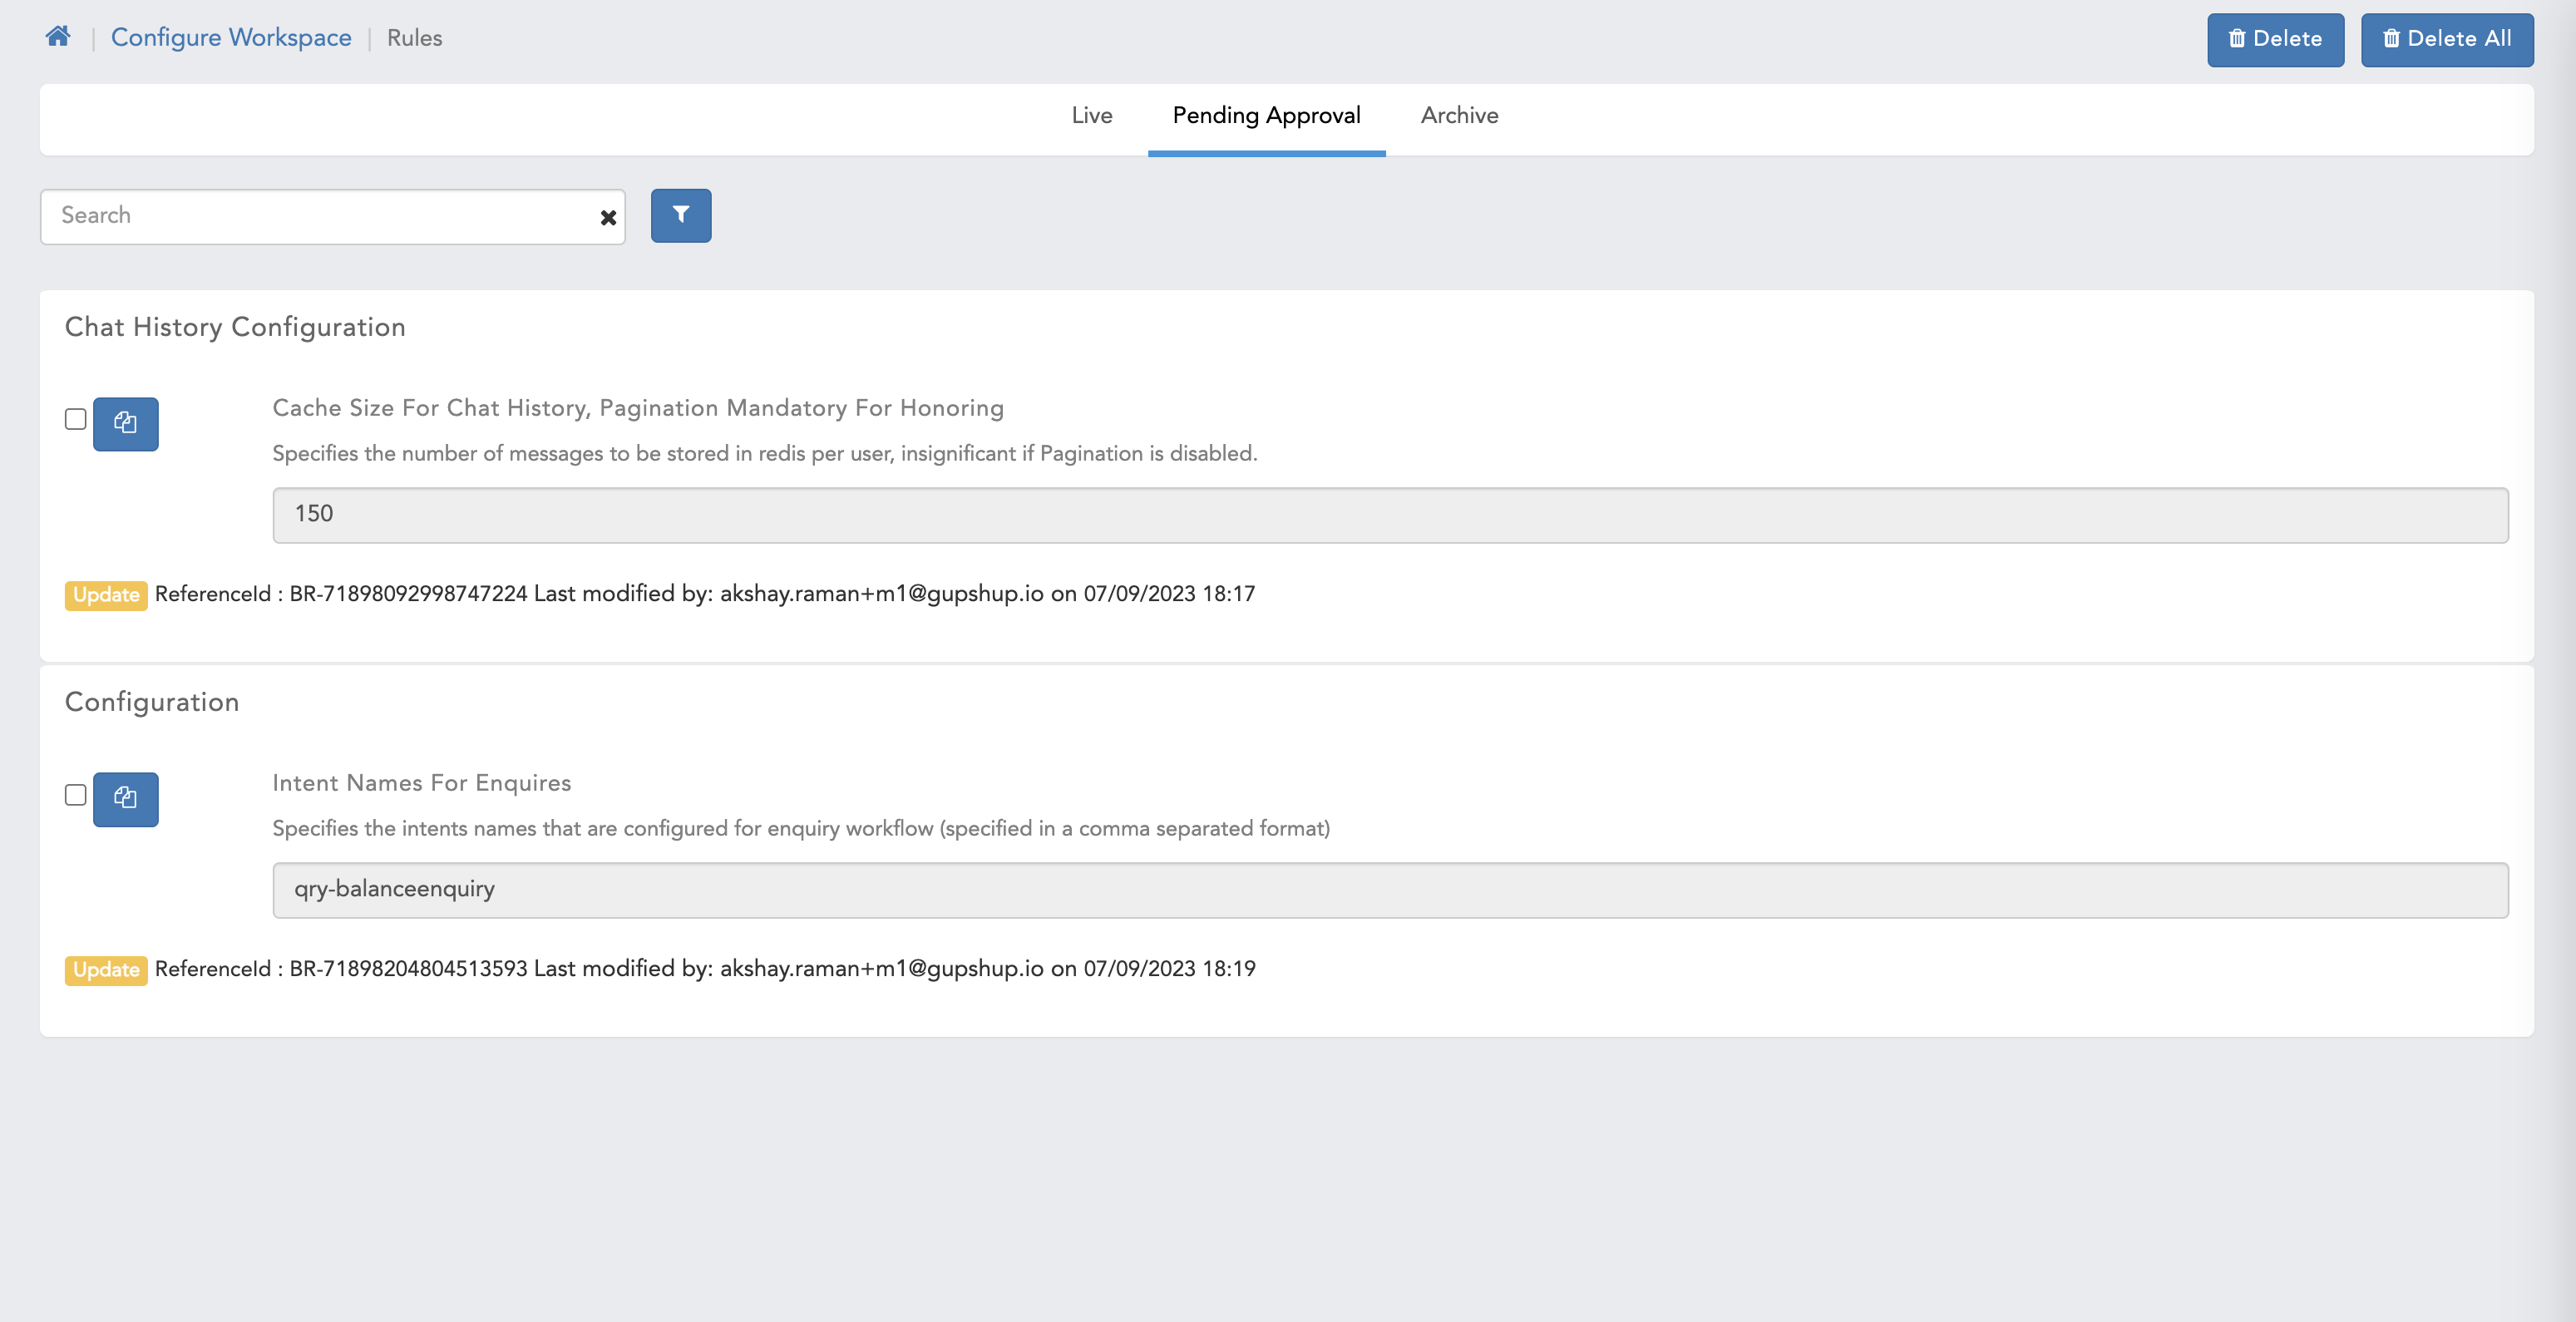
In Rules we can only modify the rules addition and deletion option is not supported.
- Here we can see default Manage Workspace Rules & Manage AI rules page with all the functionalities with maker checker headers.
- Here we can see pending approval page for Maker user.
- Here we can see pending approval page for Checker user.
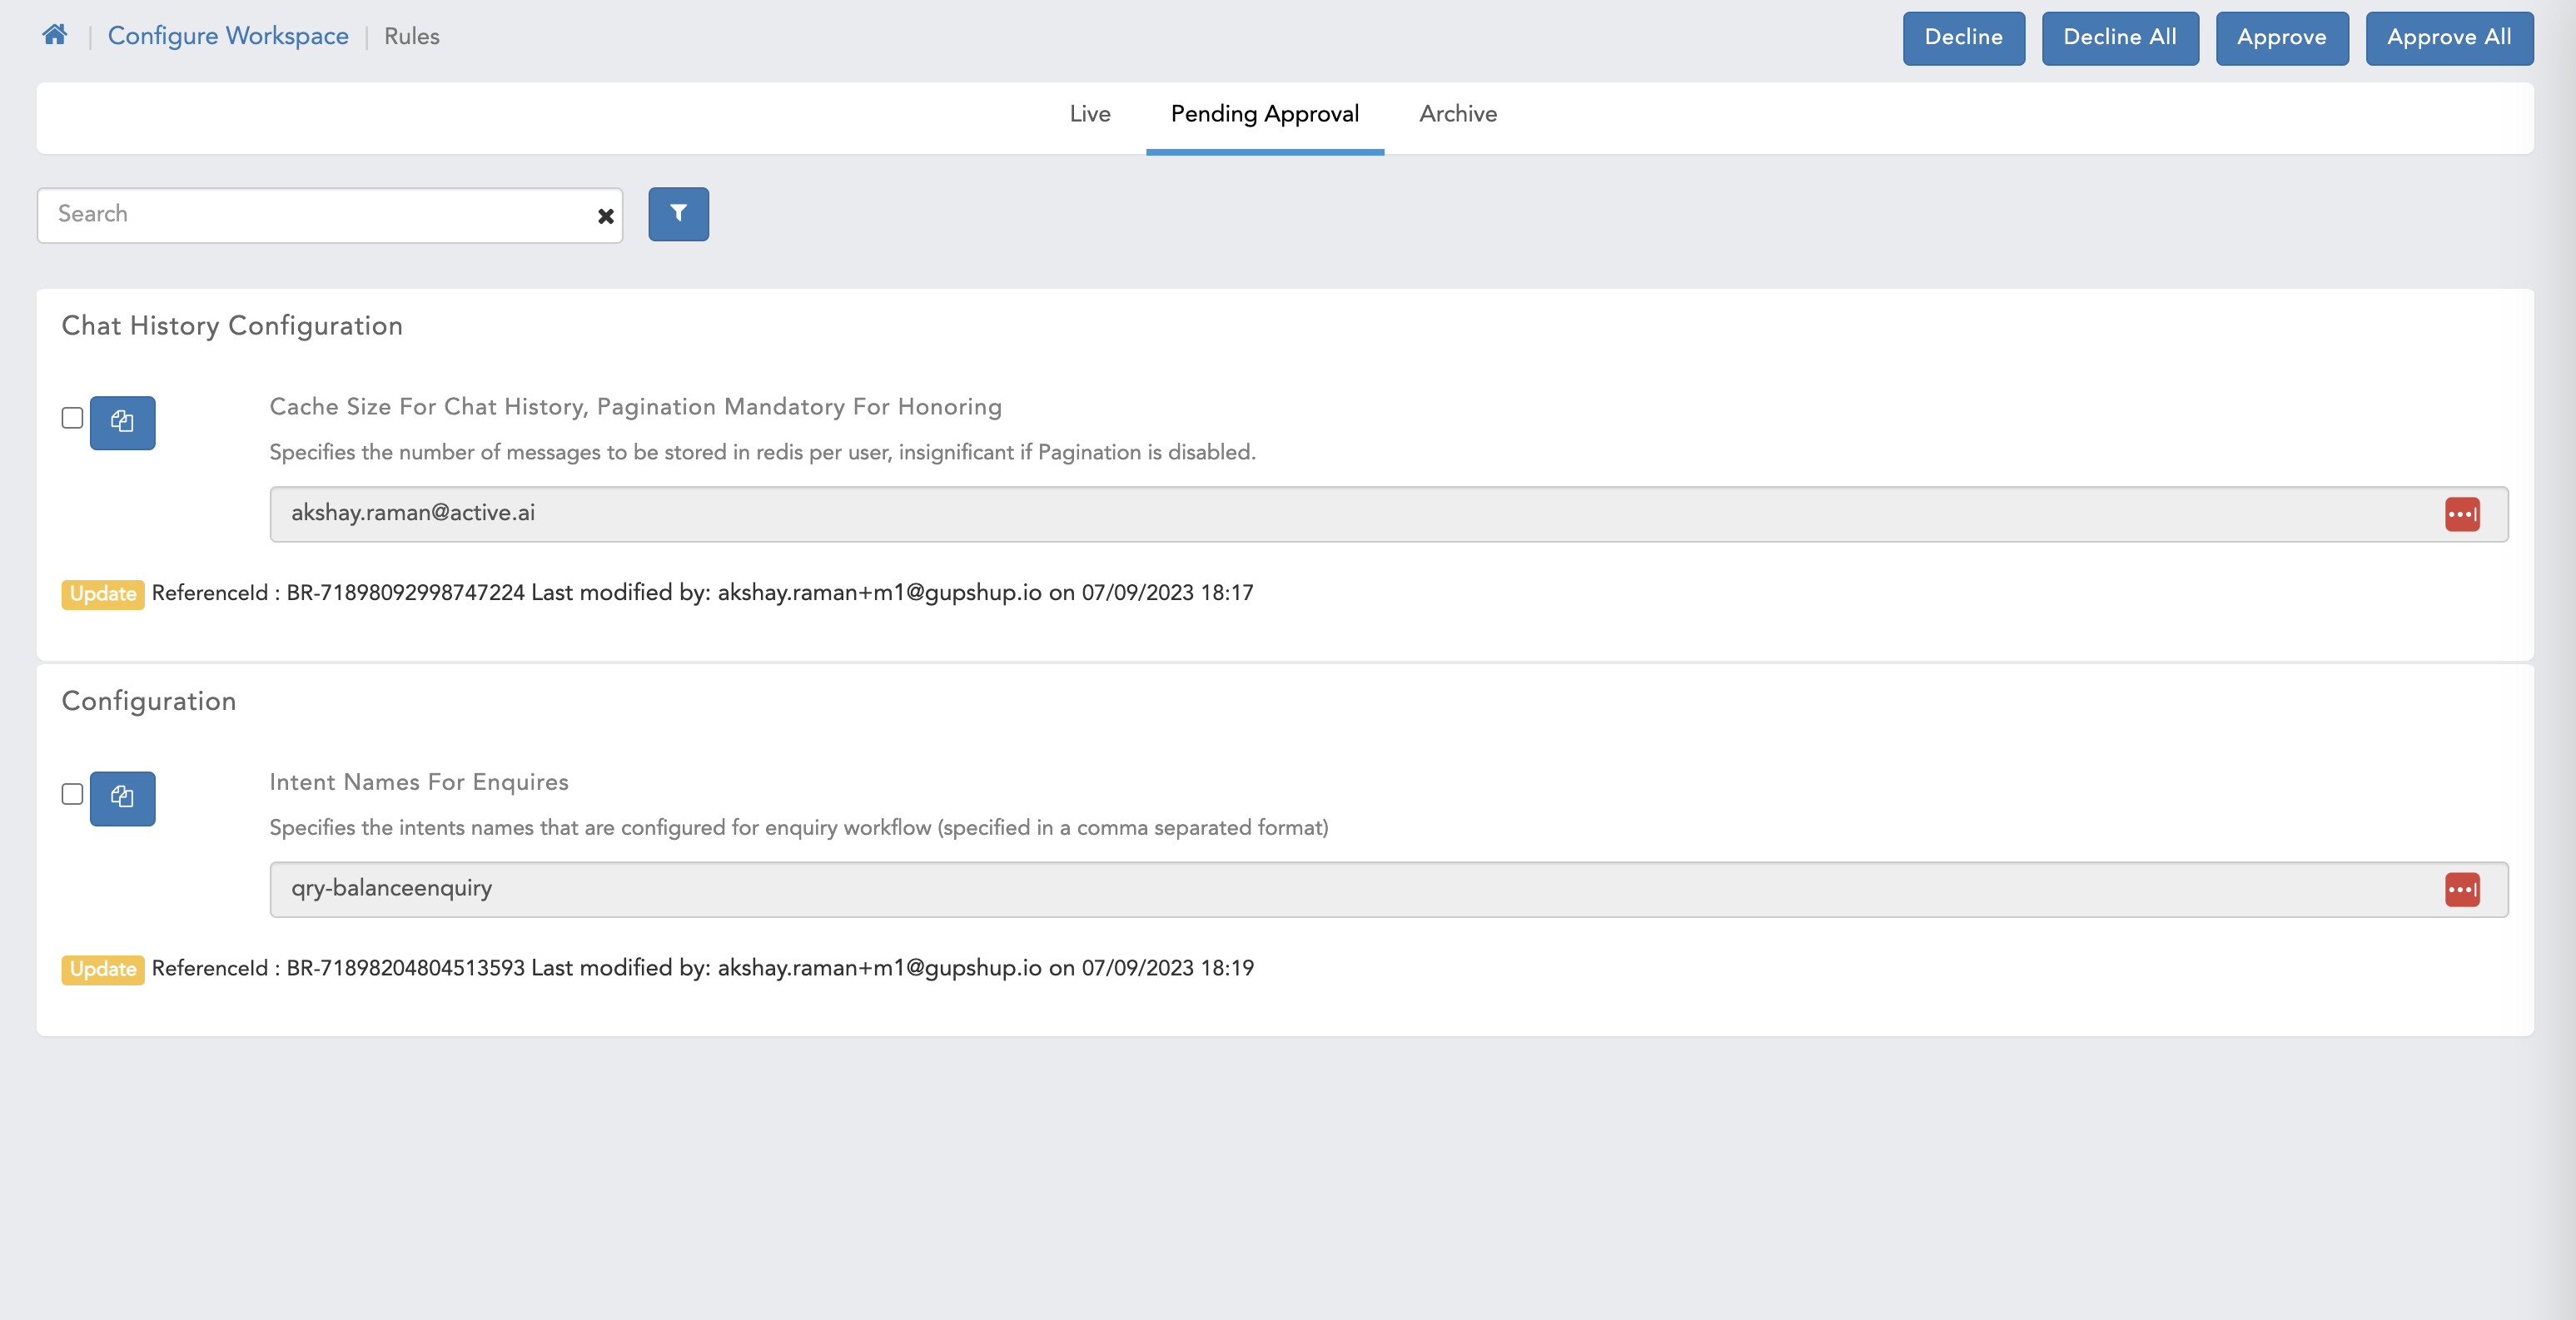
- Here we can see pending approval page with compare screen.
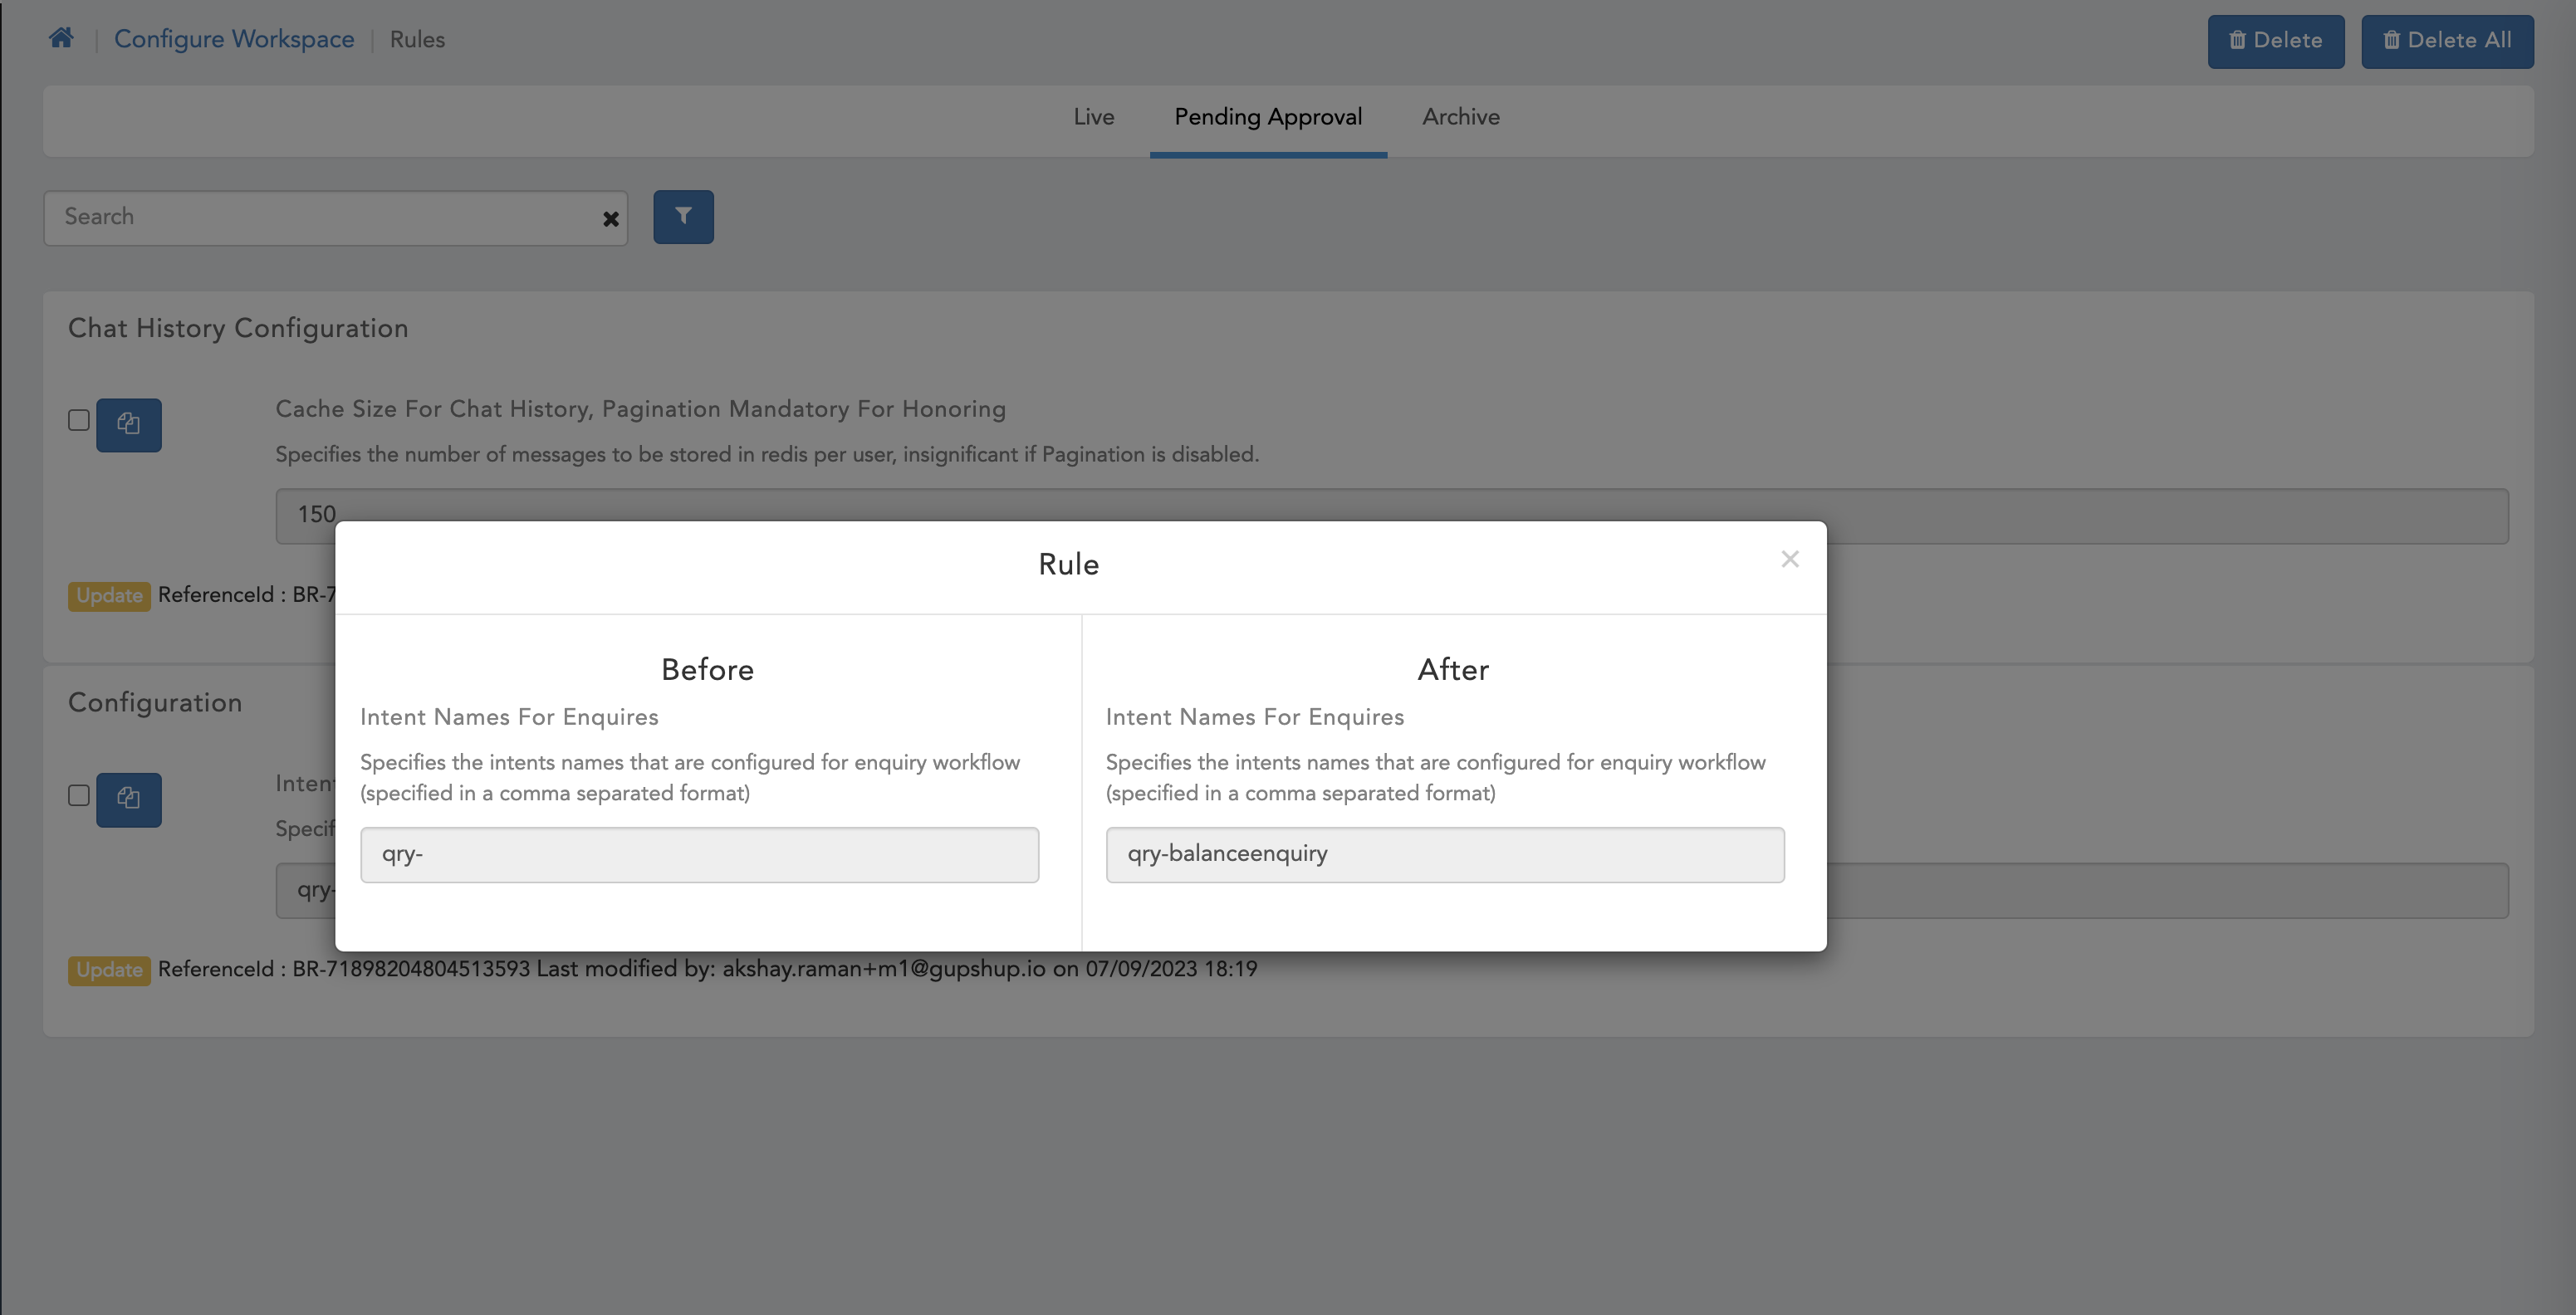
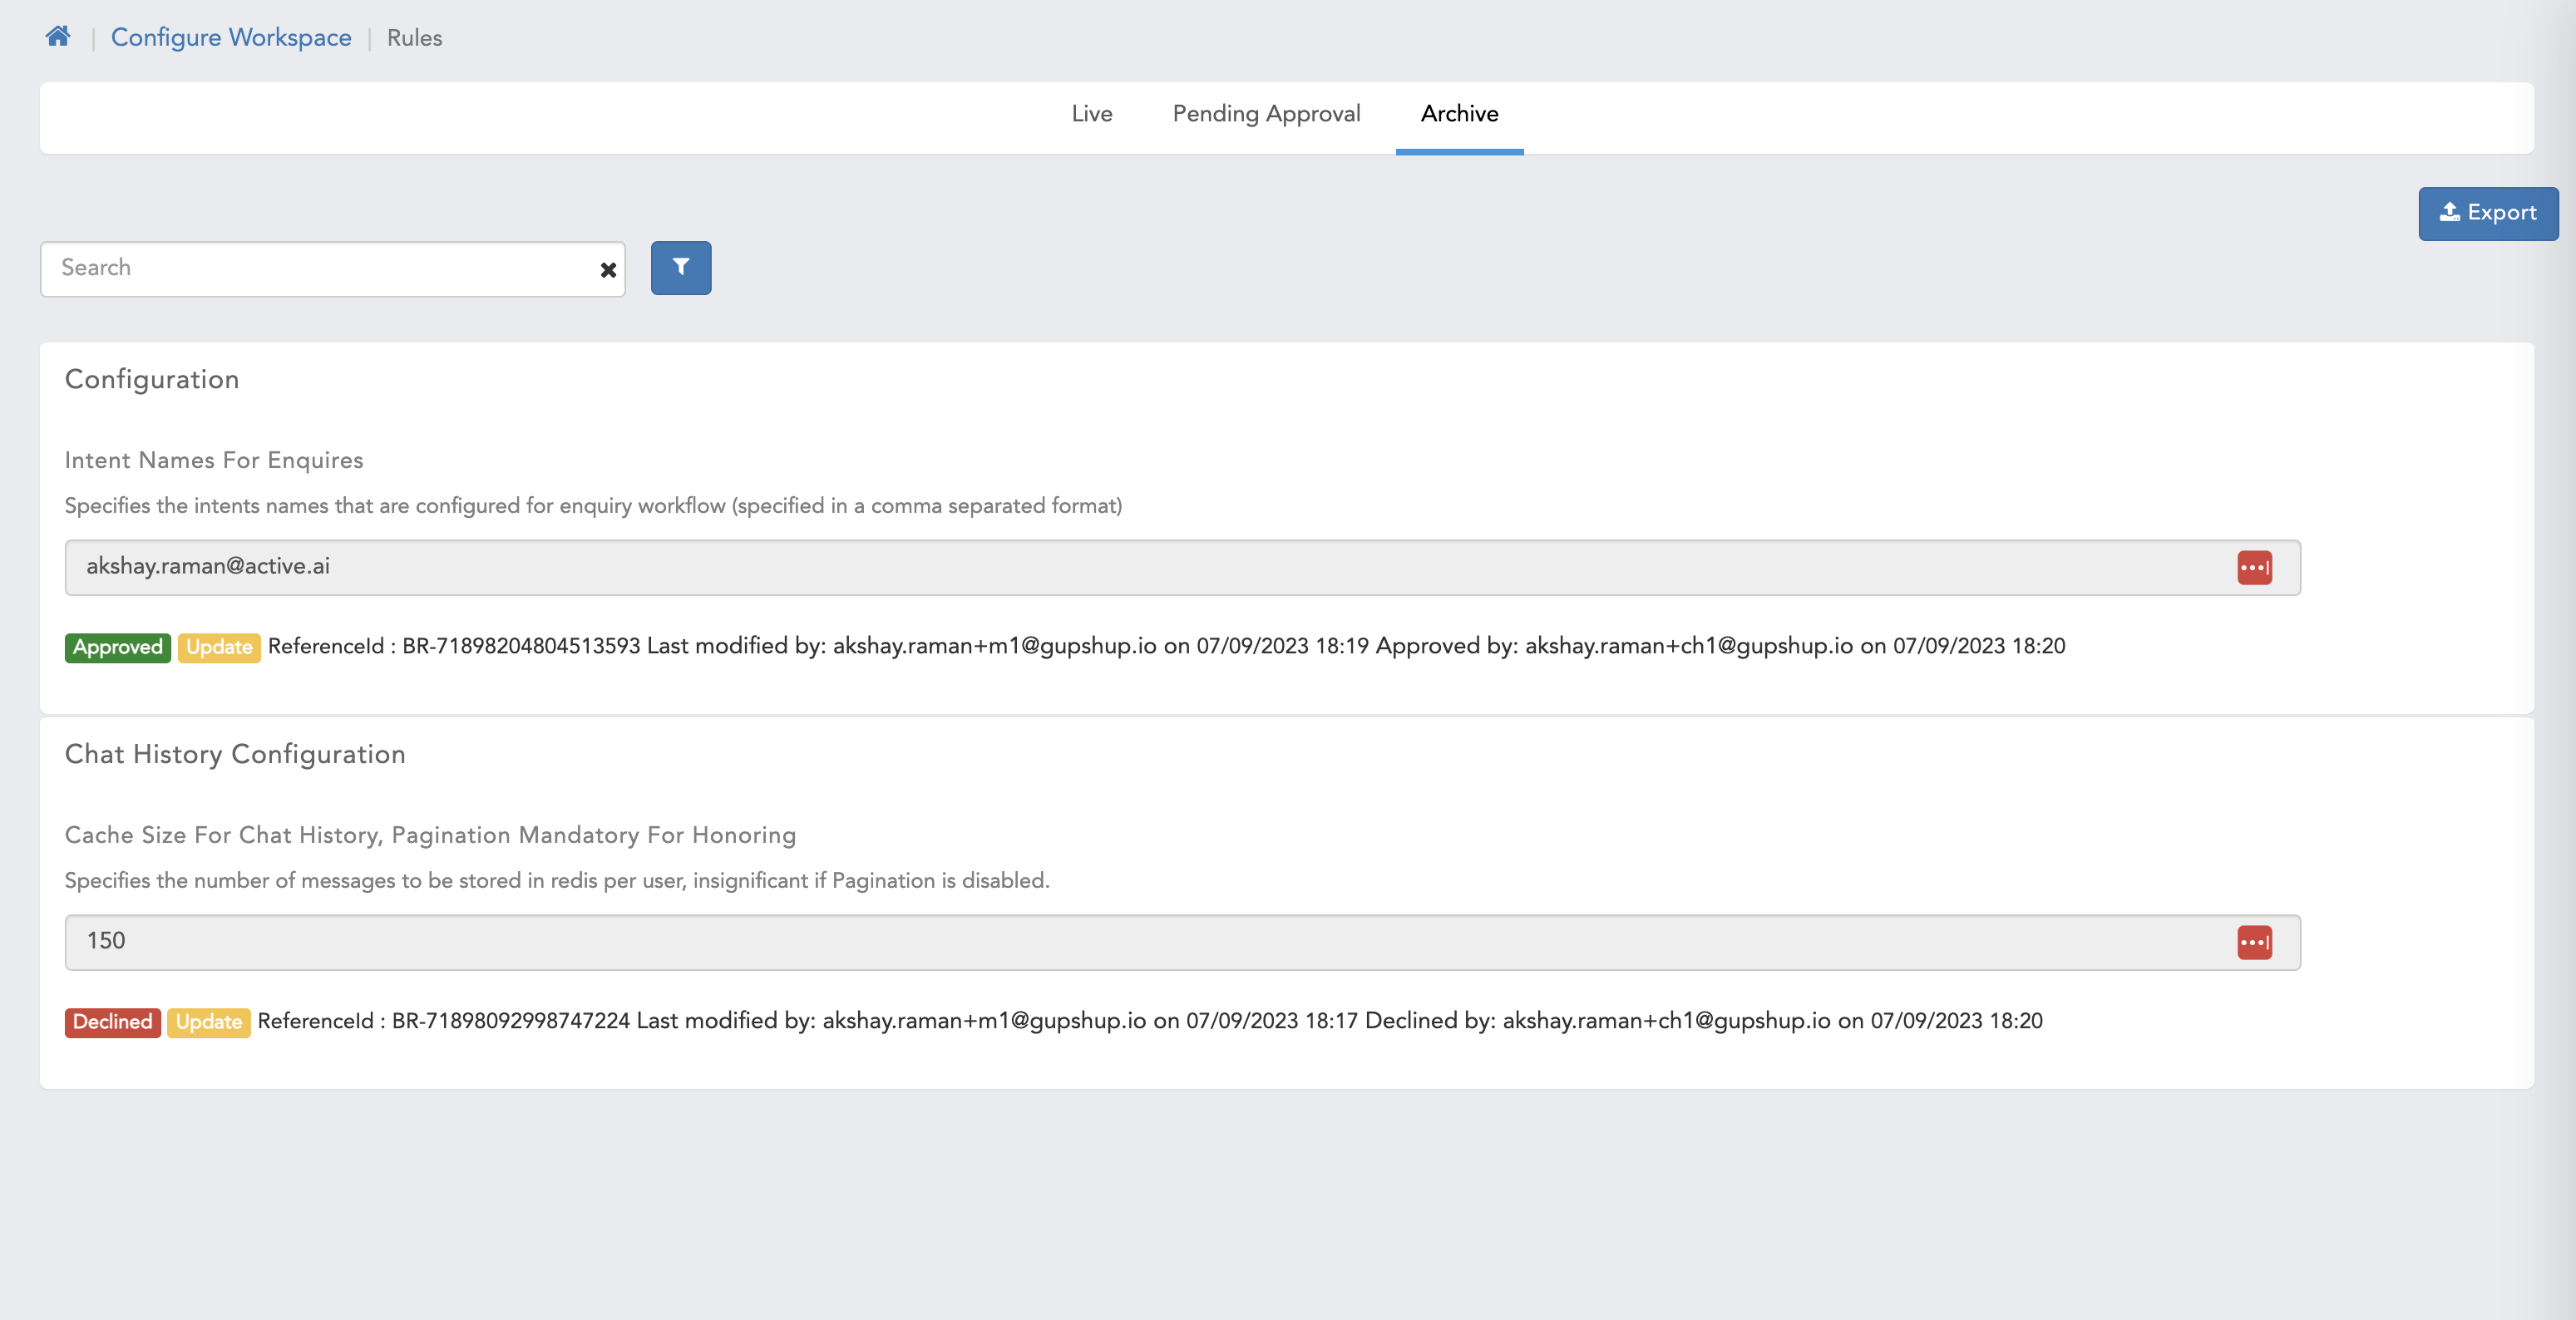
- Here we can see Archive screen.
Managing FAQs
Overview
The FAQs (Frequently Asked Questions) are the customer-specific questions that might be asked by the users. FAQa are usually about the business oriented product offerings. FAQs are usually interrogative in nature.You can add FAQs to your workspace as per your requirements so that bot will give a response of those FAQs which user will ask to your bot.
The FAQ screen has been revamped and had new functionalities also for the faq data. It has some enhancement as well for the data curation, duplication check, search functionality, grid tab and filters. The changes are listed down in points.
Details
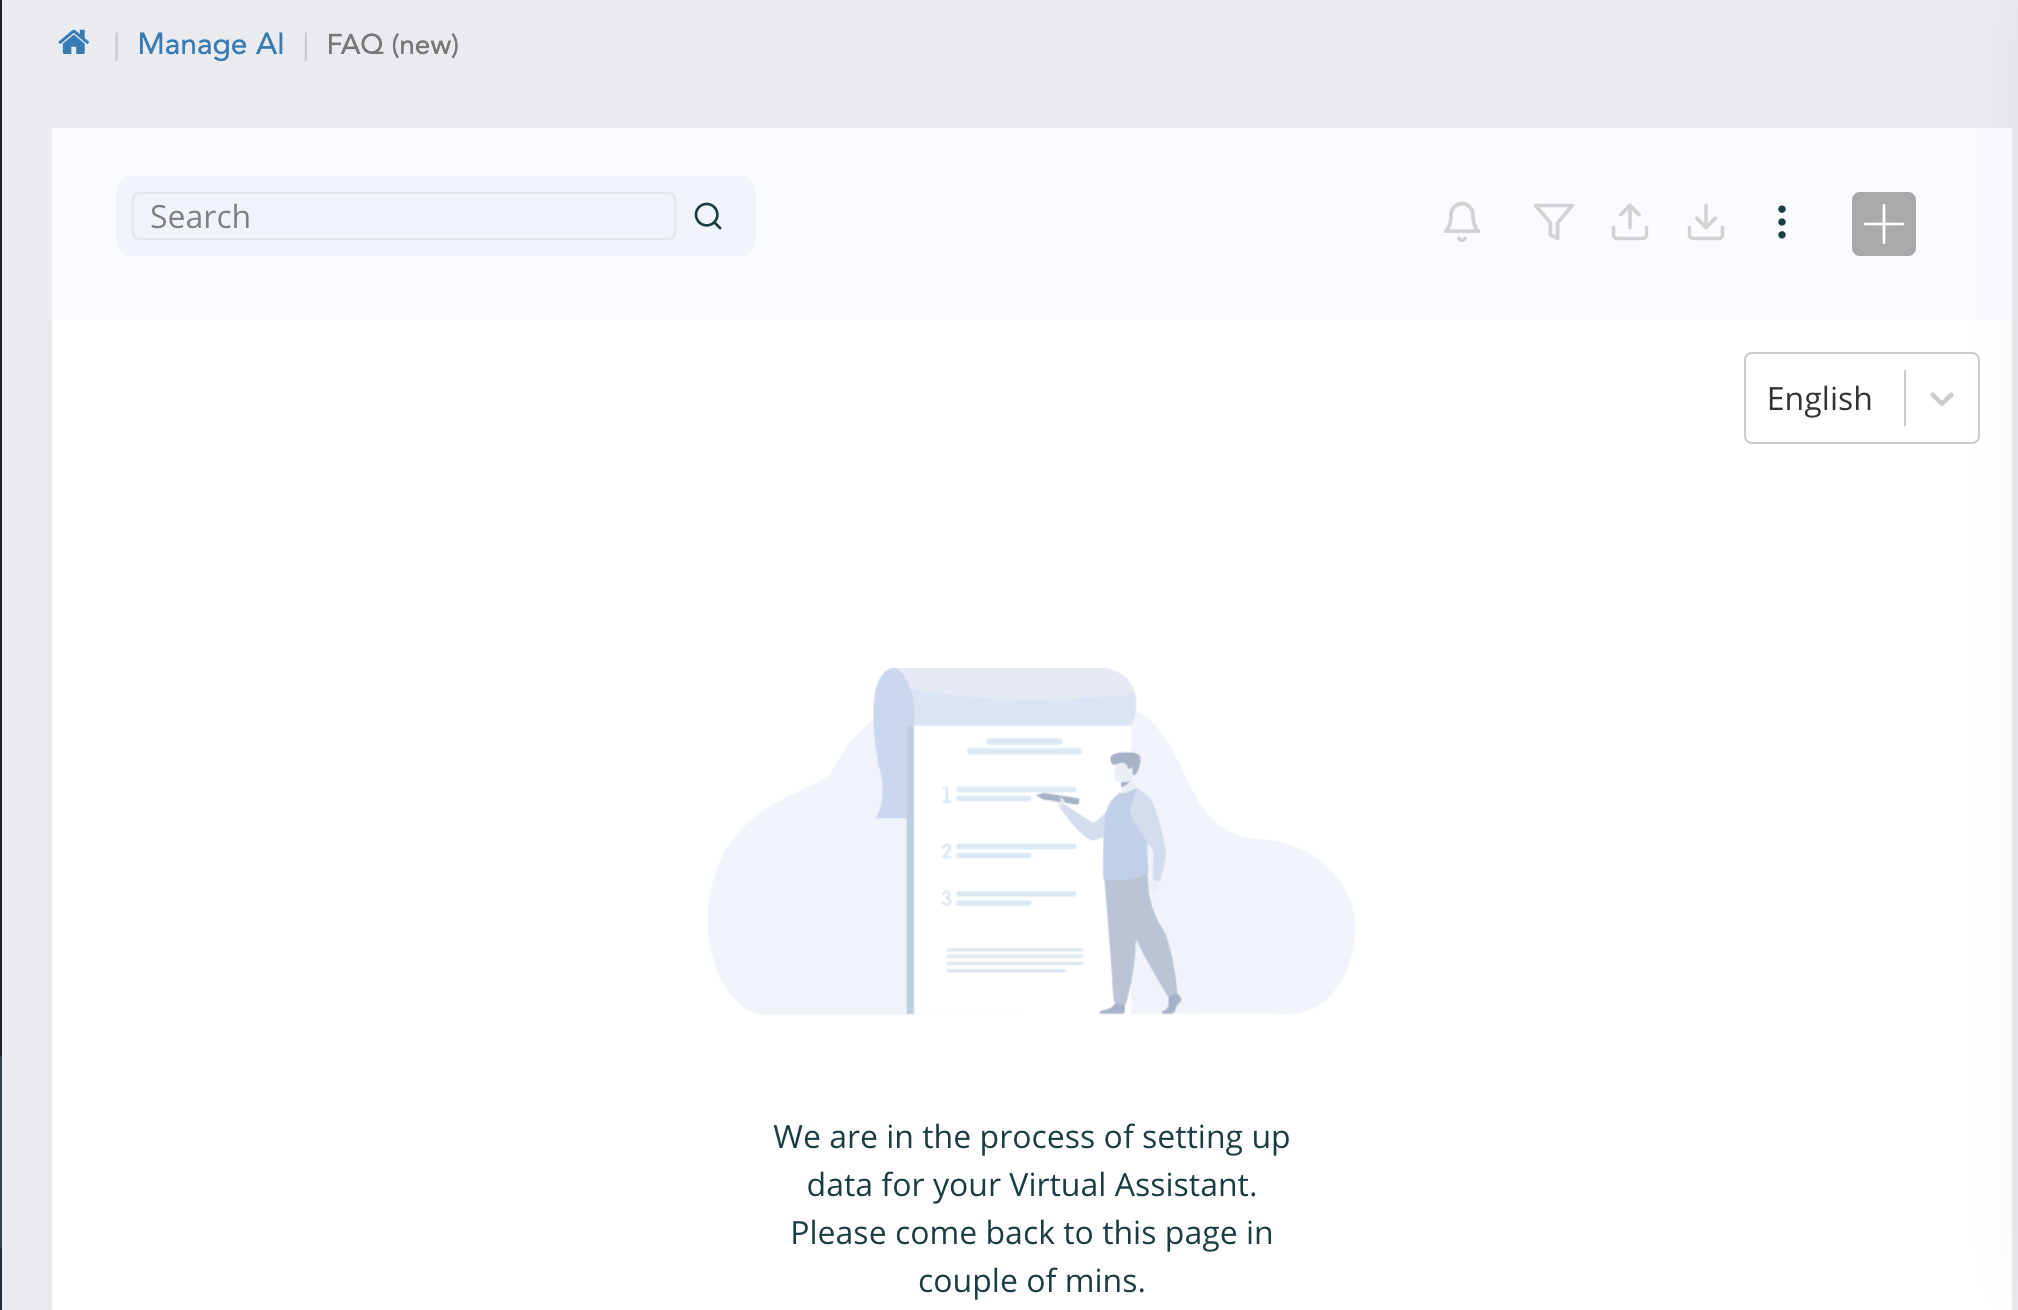
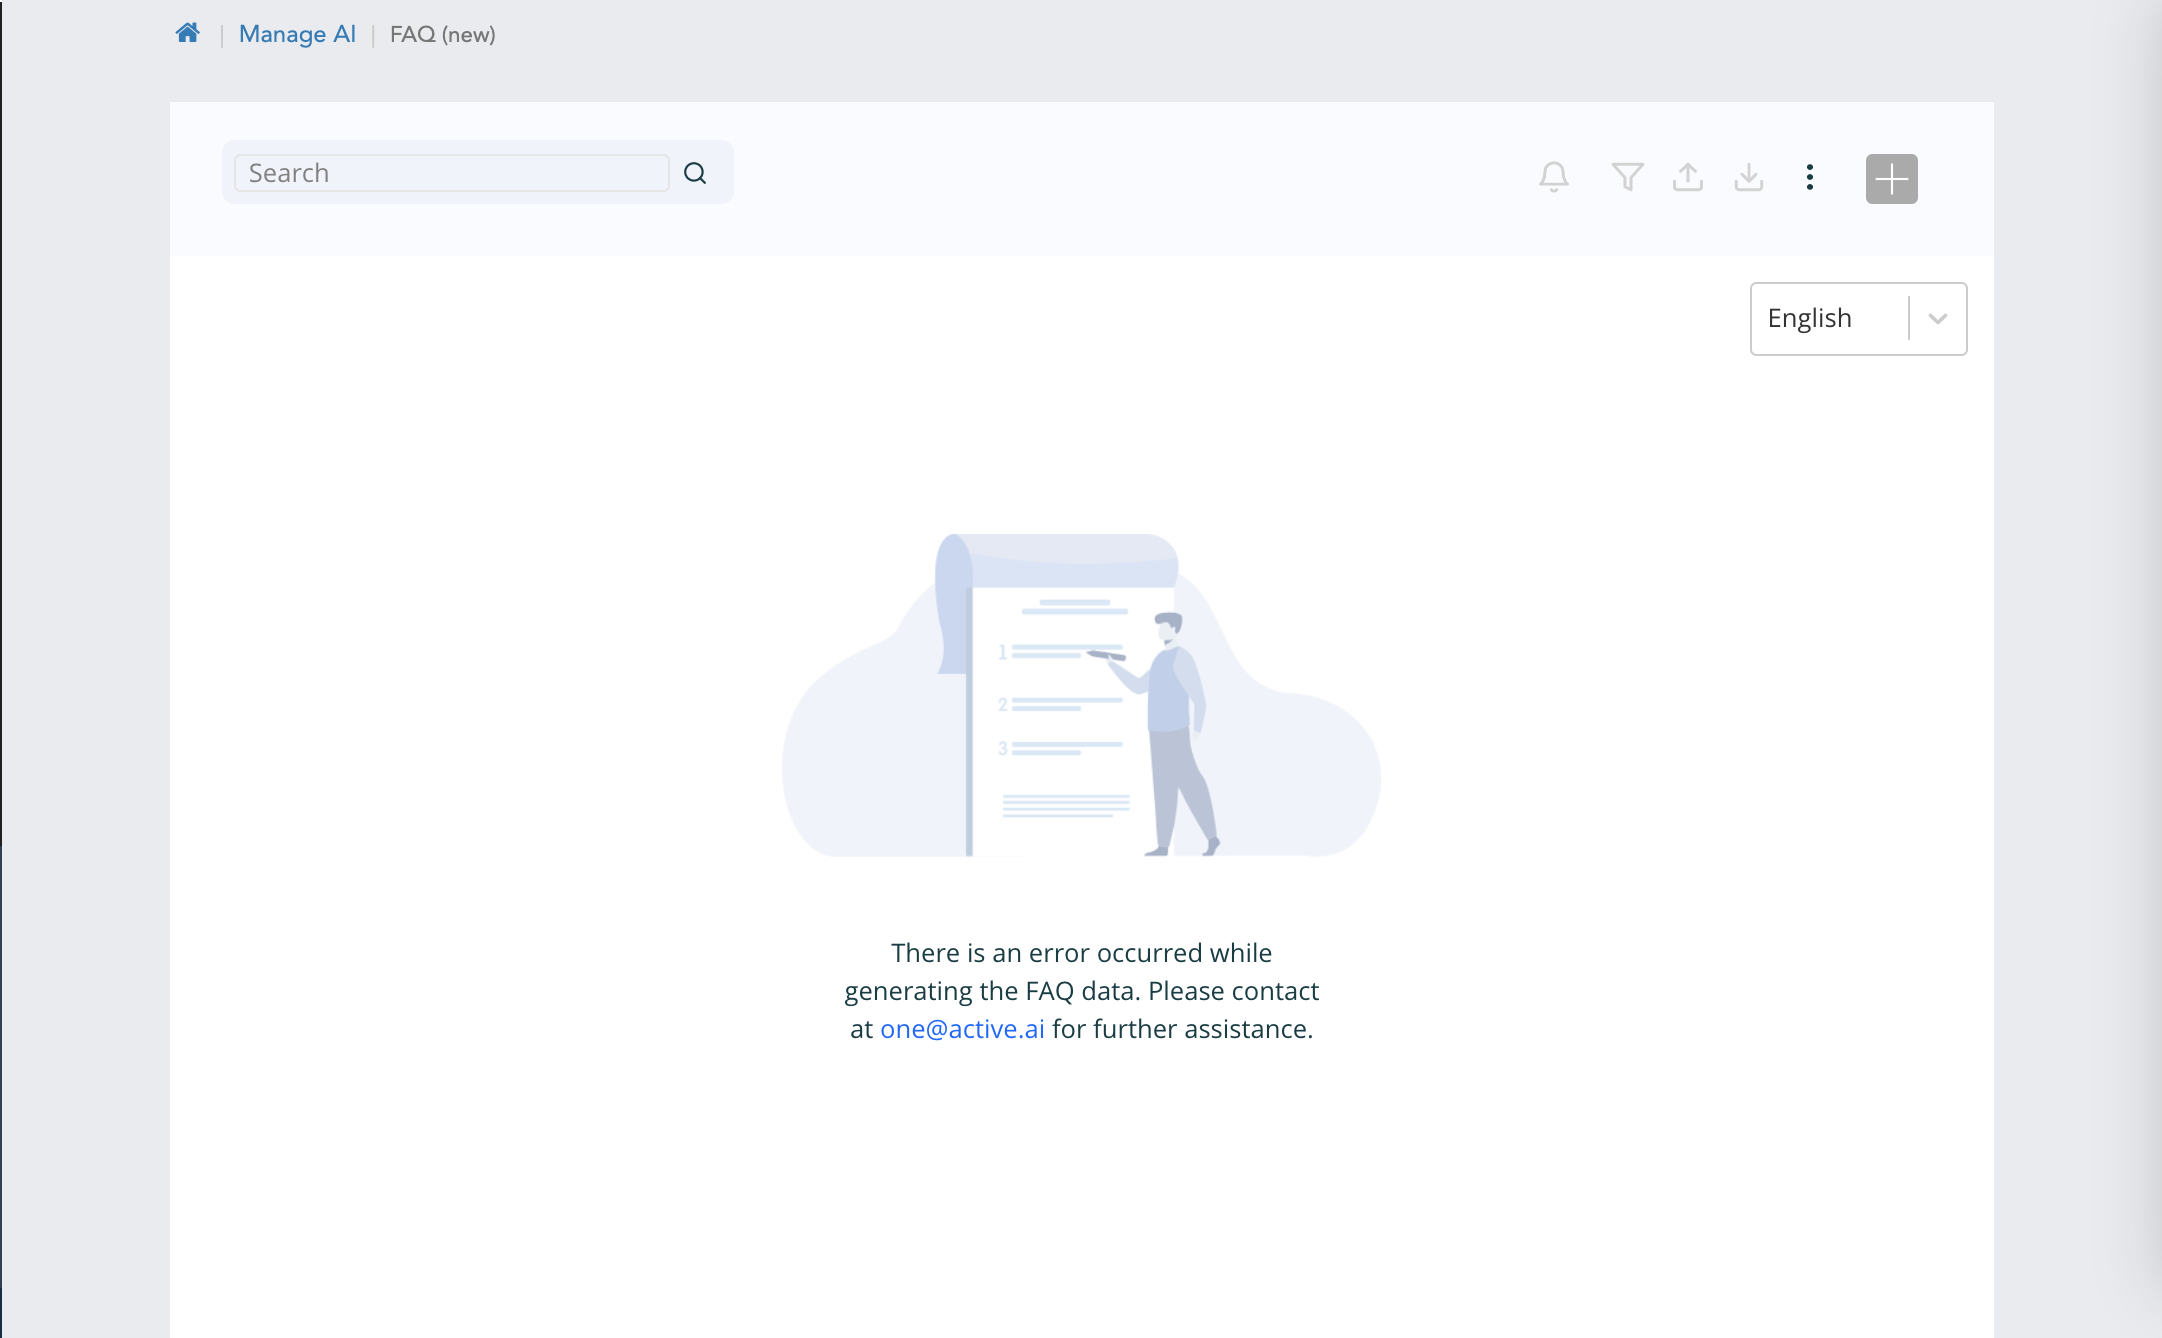
When we create a workspace, then at backend git sync happens. So new screen will have the status update for in progress, error or git sync completion for it.
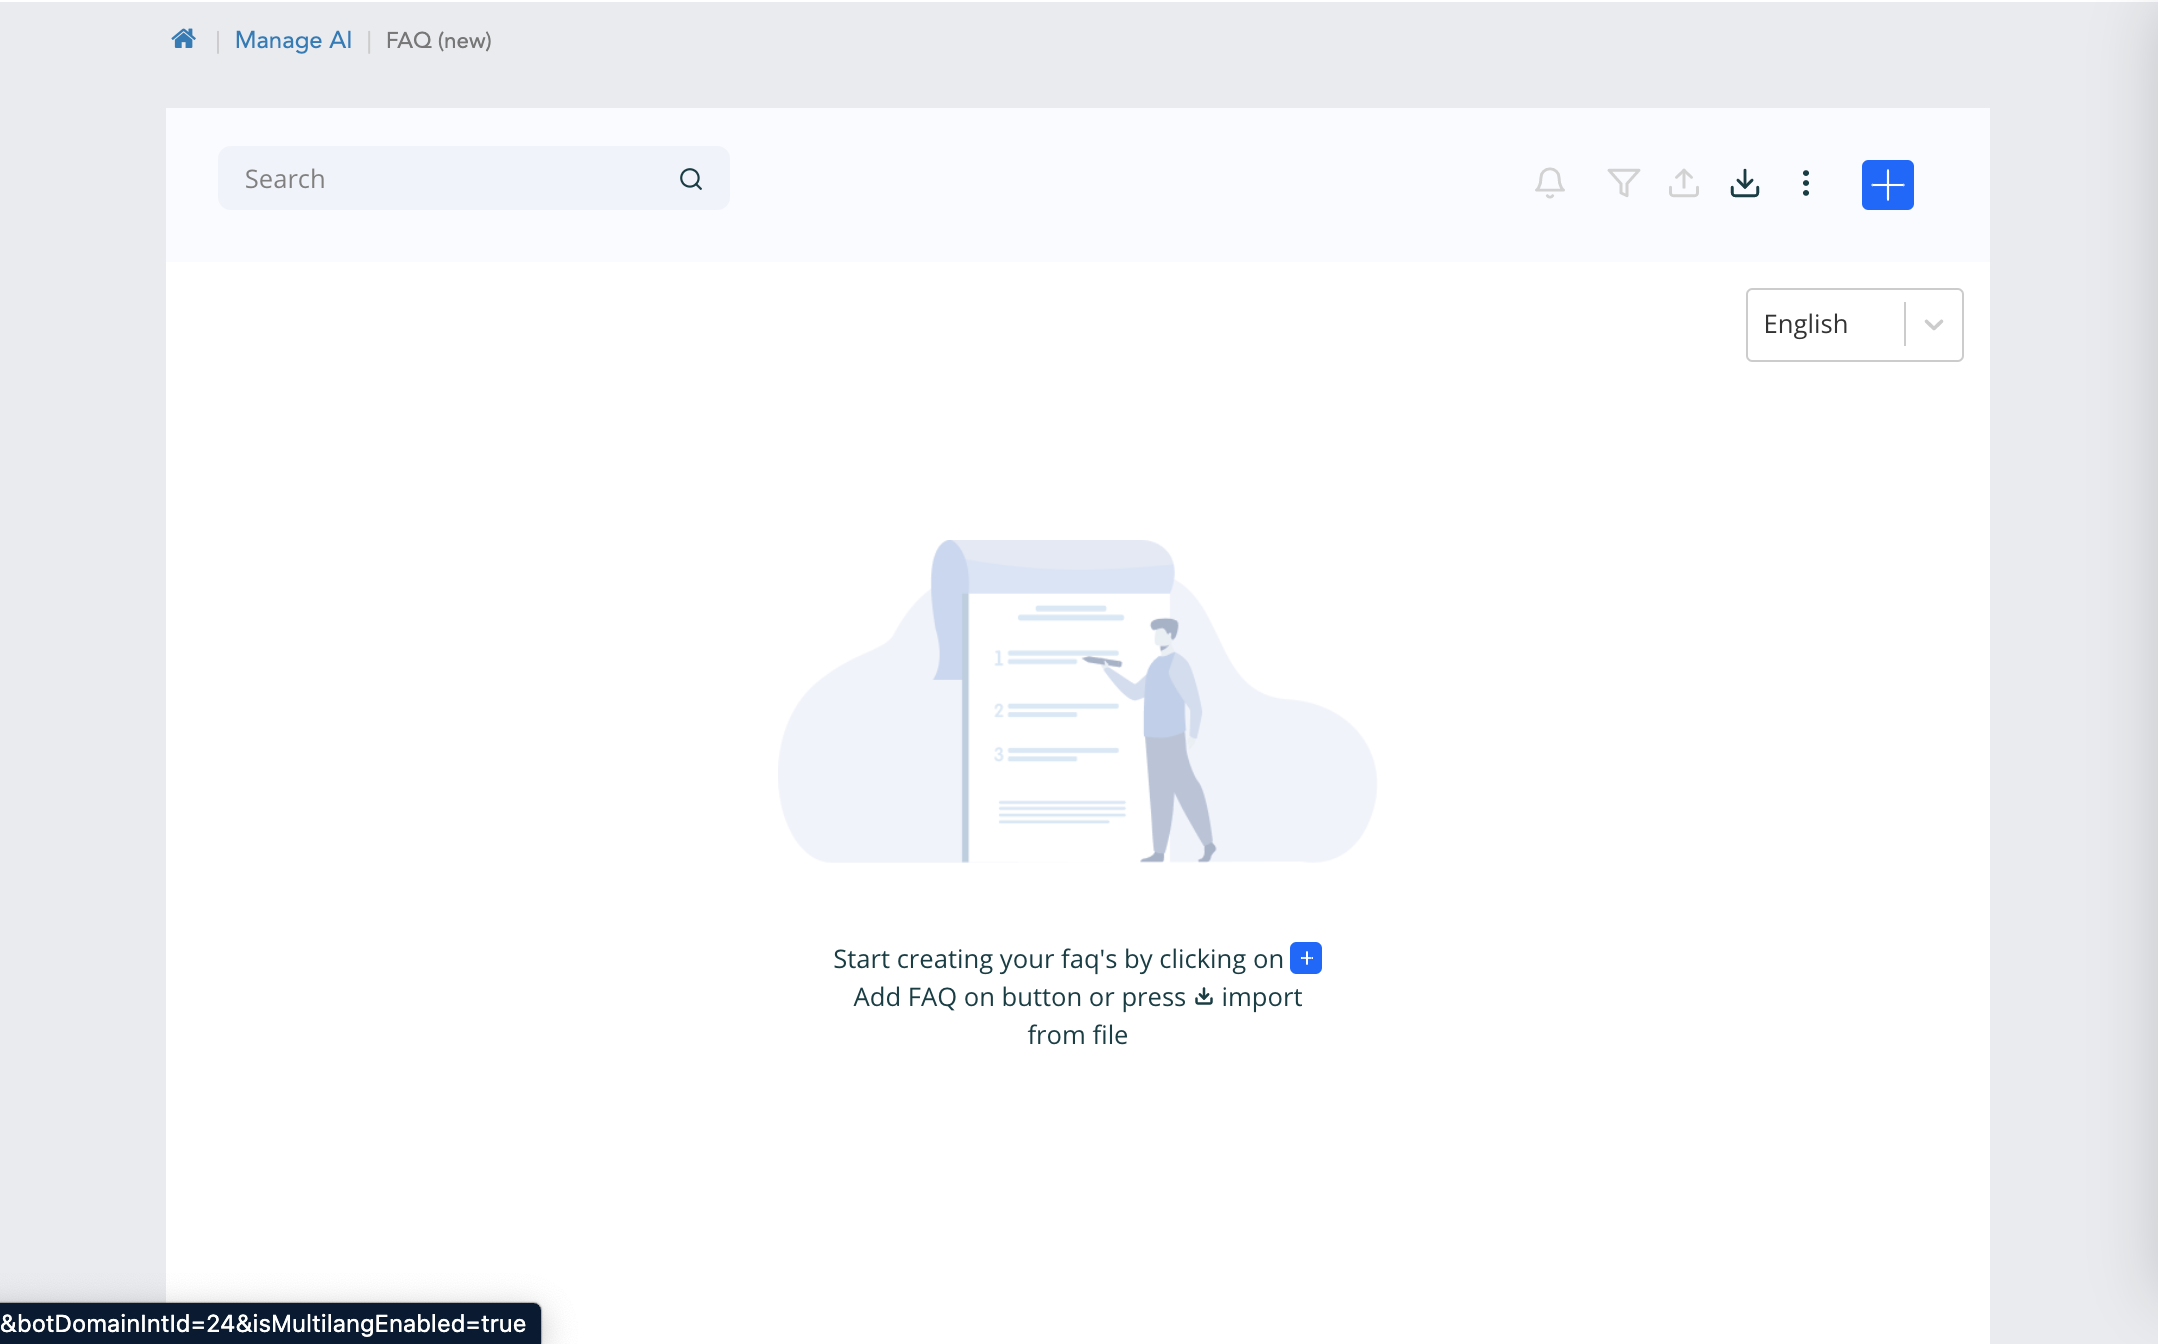
Create faqs and response
Creation of faq UI is changed, here all the response, variant w.r.t language and response type is at one place. Multi-response and multi-channel can be configured from one place only.
Click on add button at the top to create new faq.
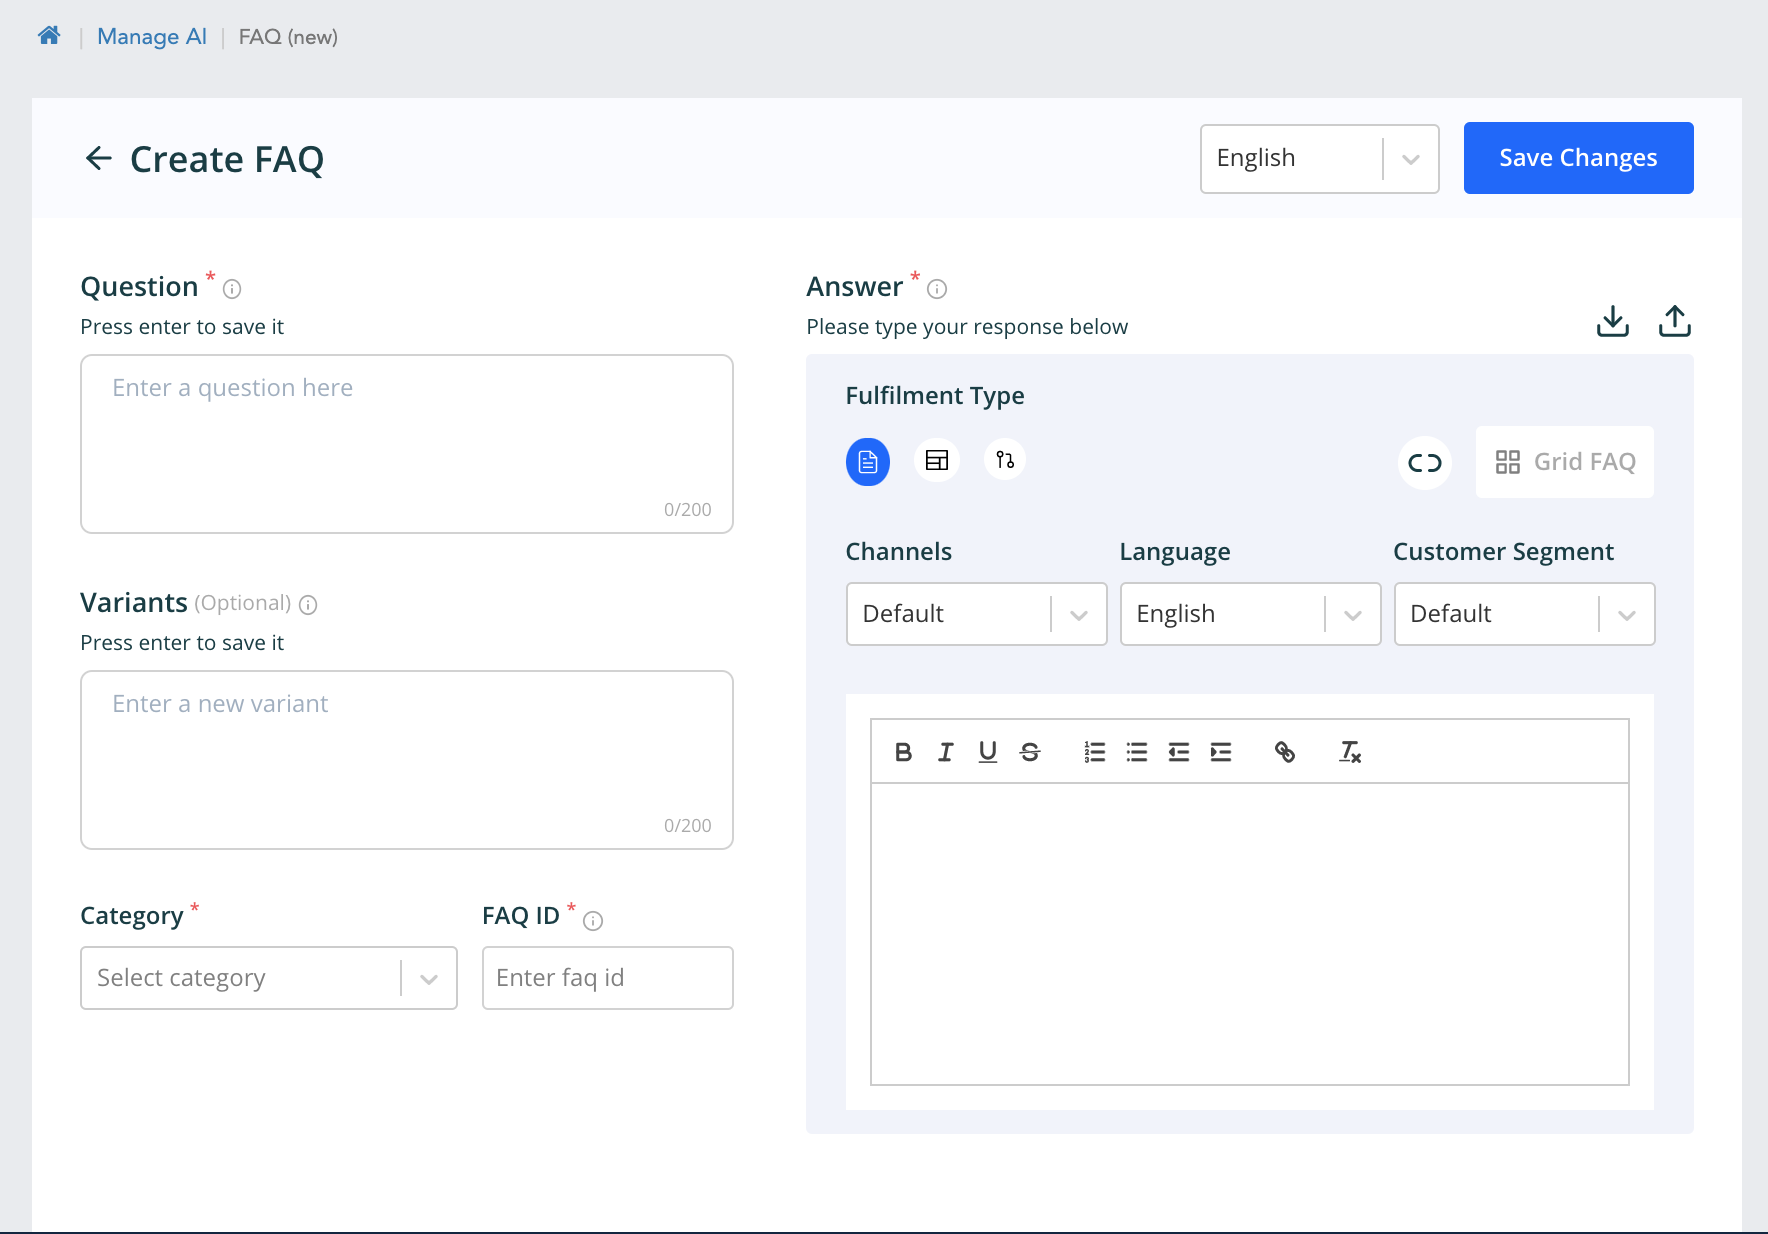
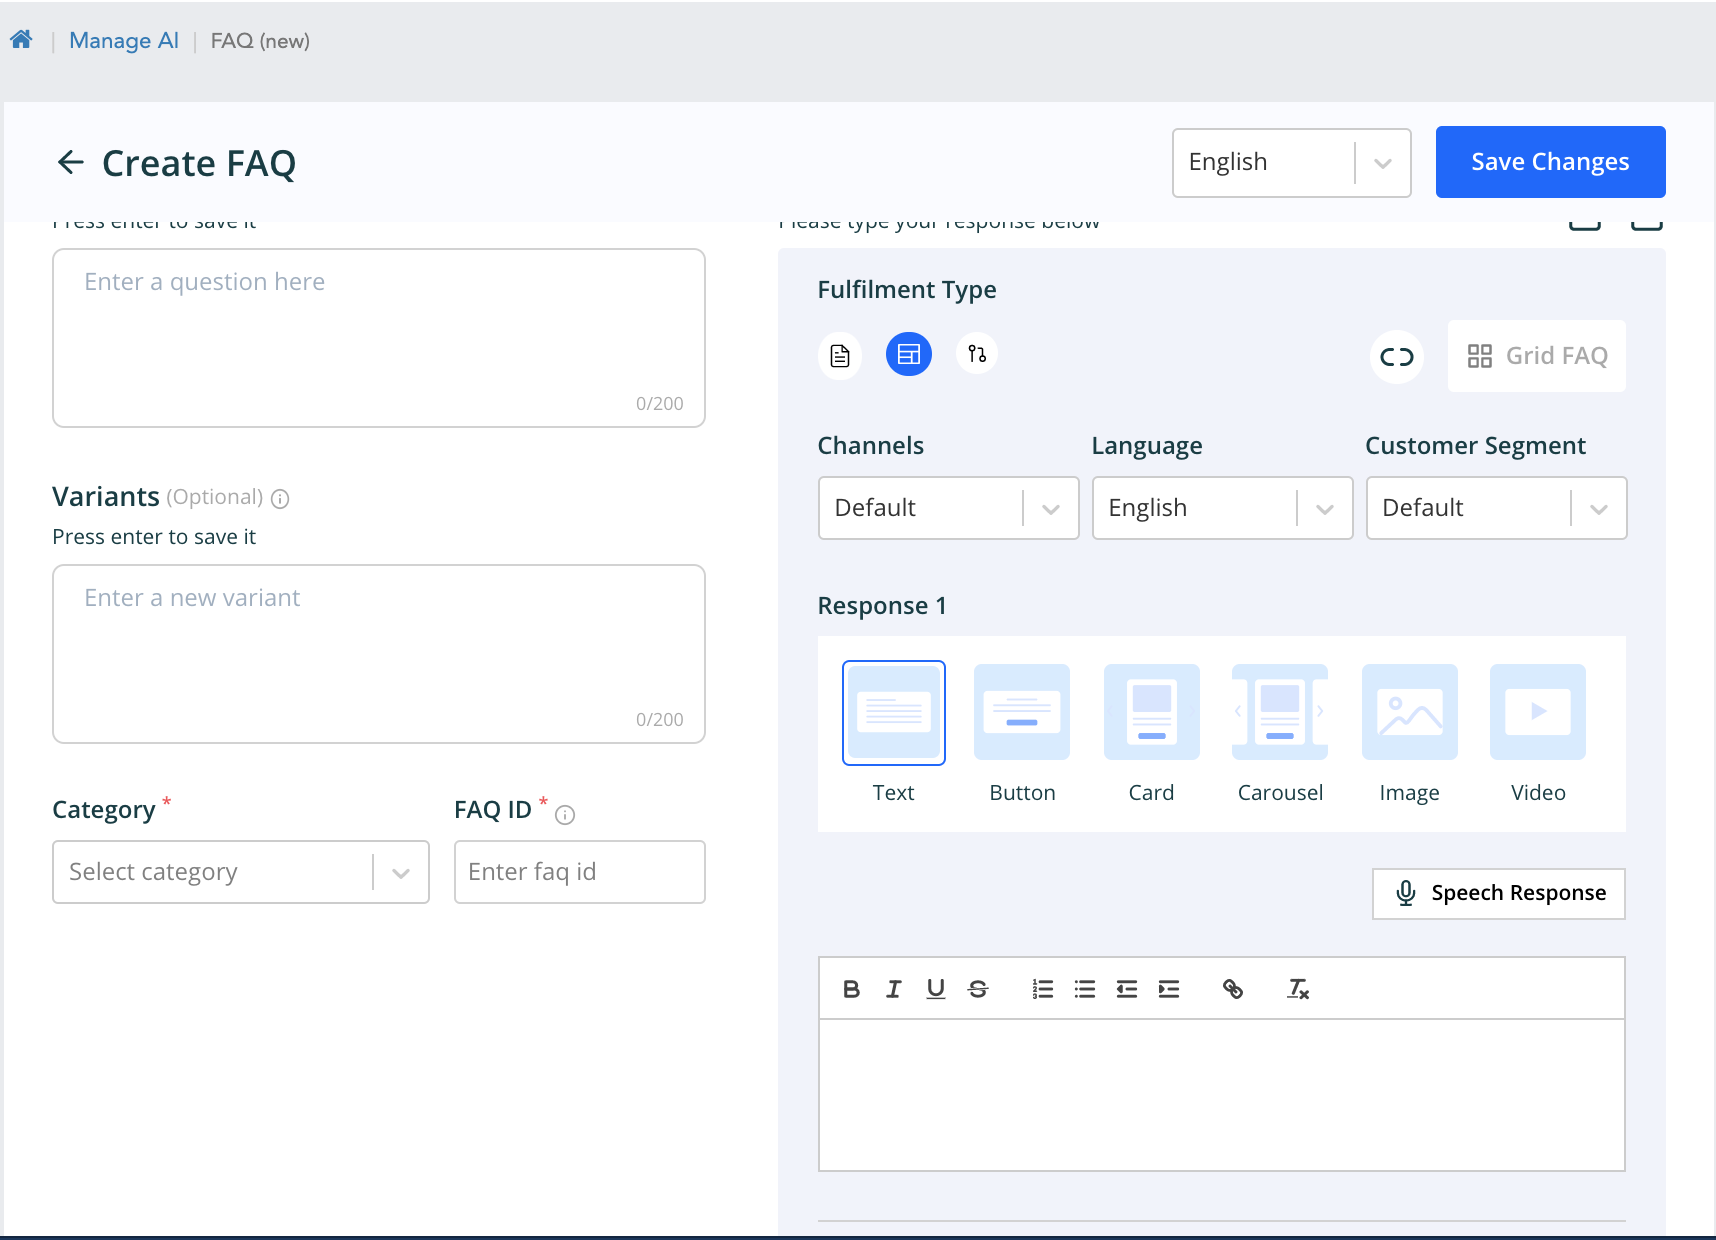
From the above page we can configure response of various types by selecting the Fulfilment type. The order is text, template and workflow response. The customer segment response can also be configured from here. The faqs can also be added with existing workflows.
The multi response can also be added by clicking on Add following response which will open same editor as shown to add more responses.
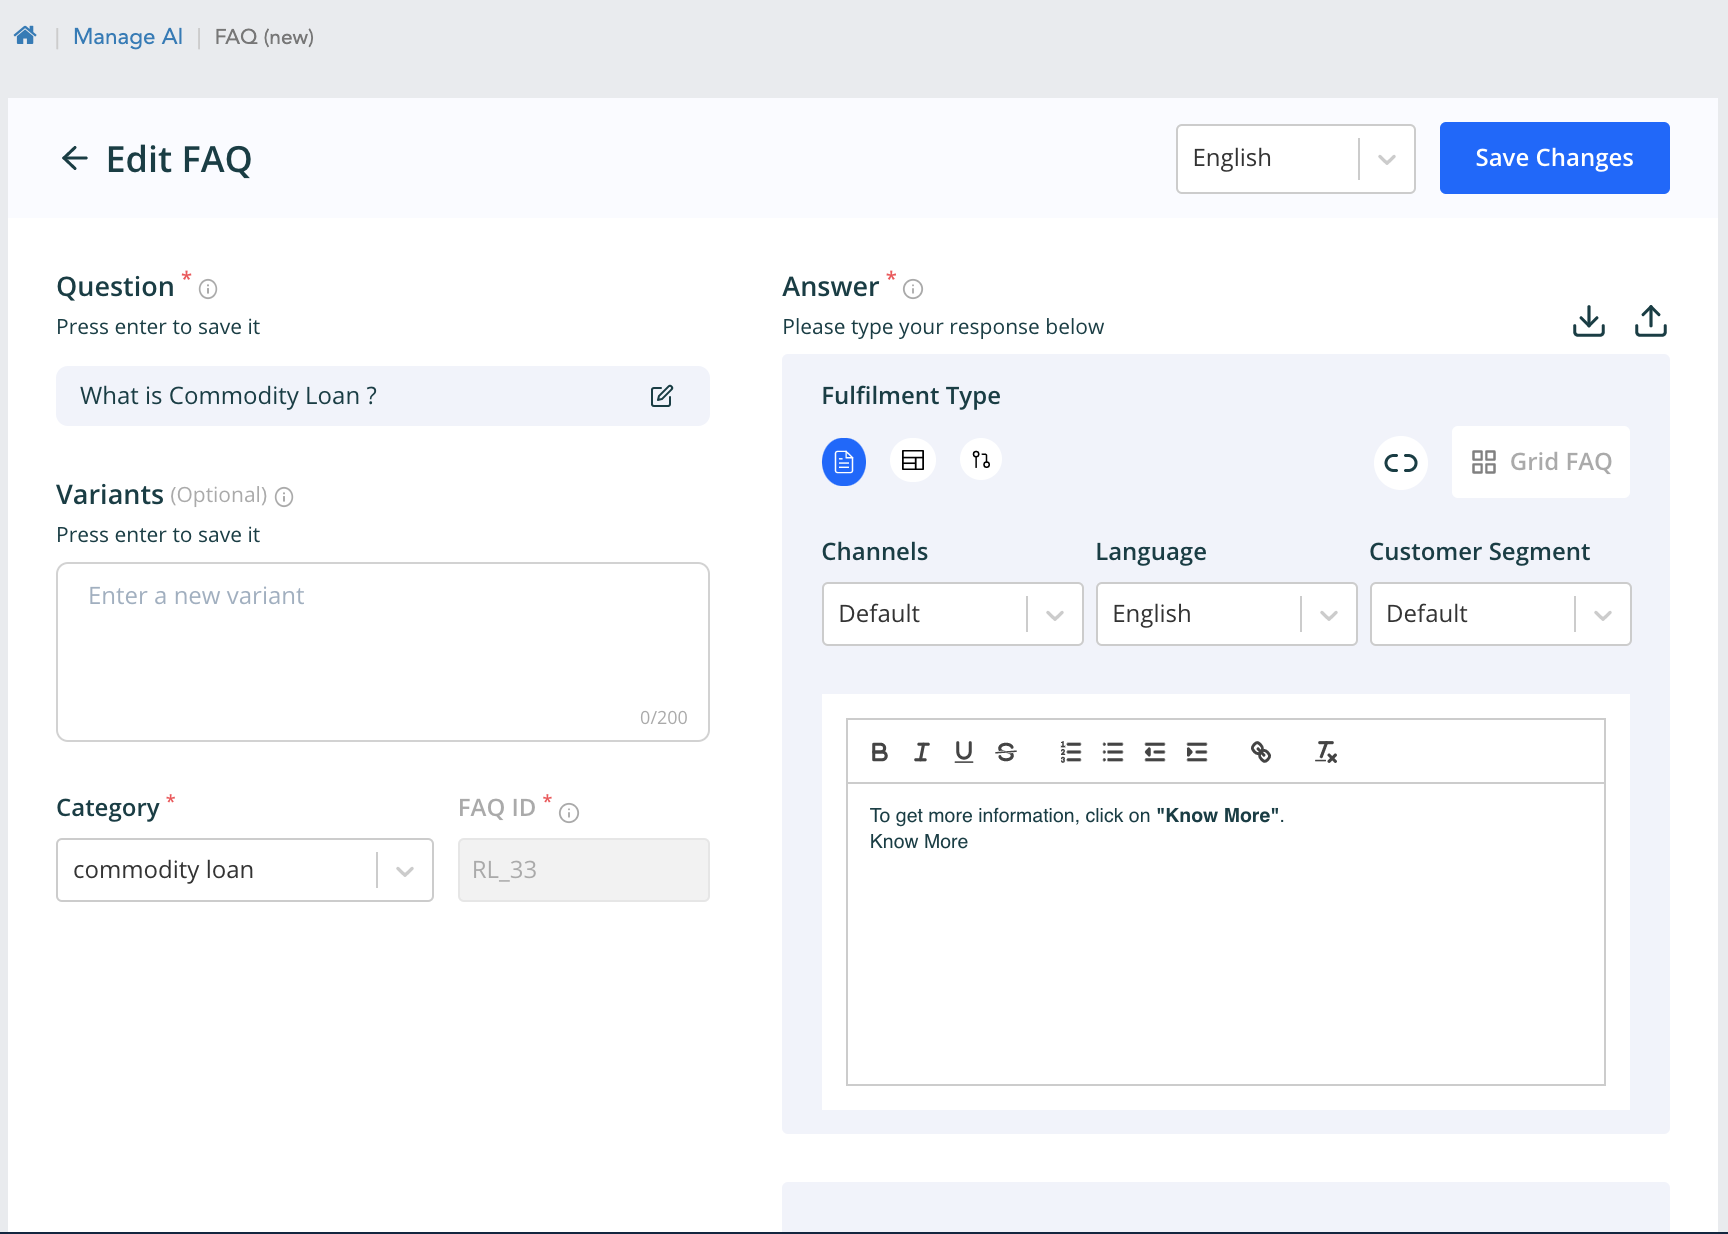
Similarly the edit faq is changed similar to above one.
Filter page
Here the category, date and modified by can be applied together as a criteria to filter. When ontology os enabled then product, product name and product type filter option comes up. This is independent of category and date.
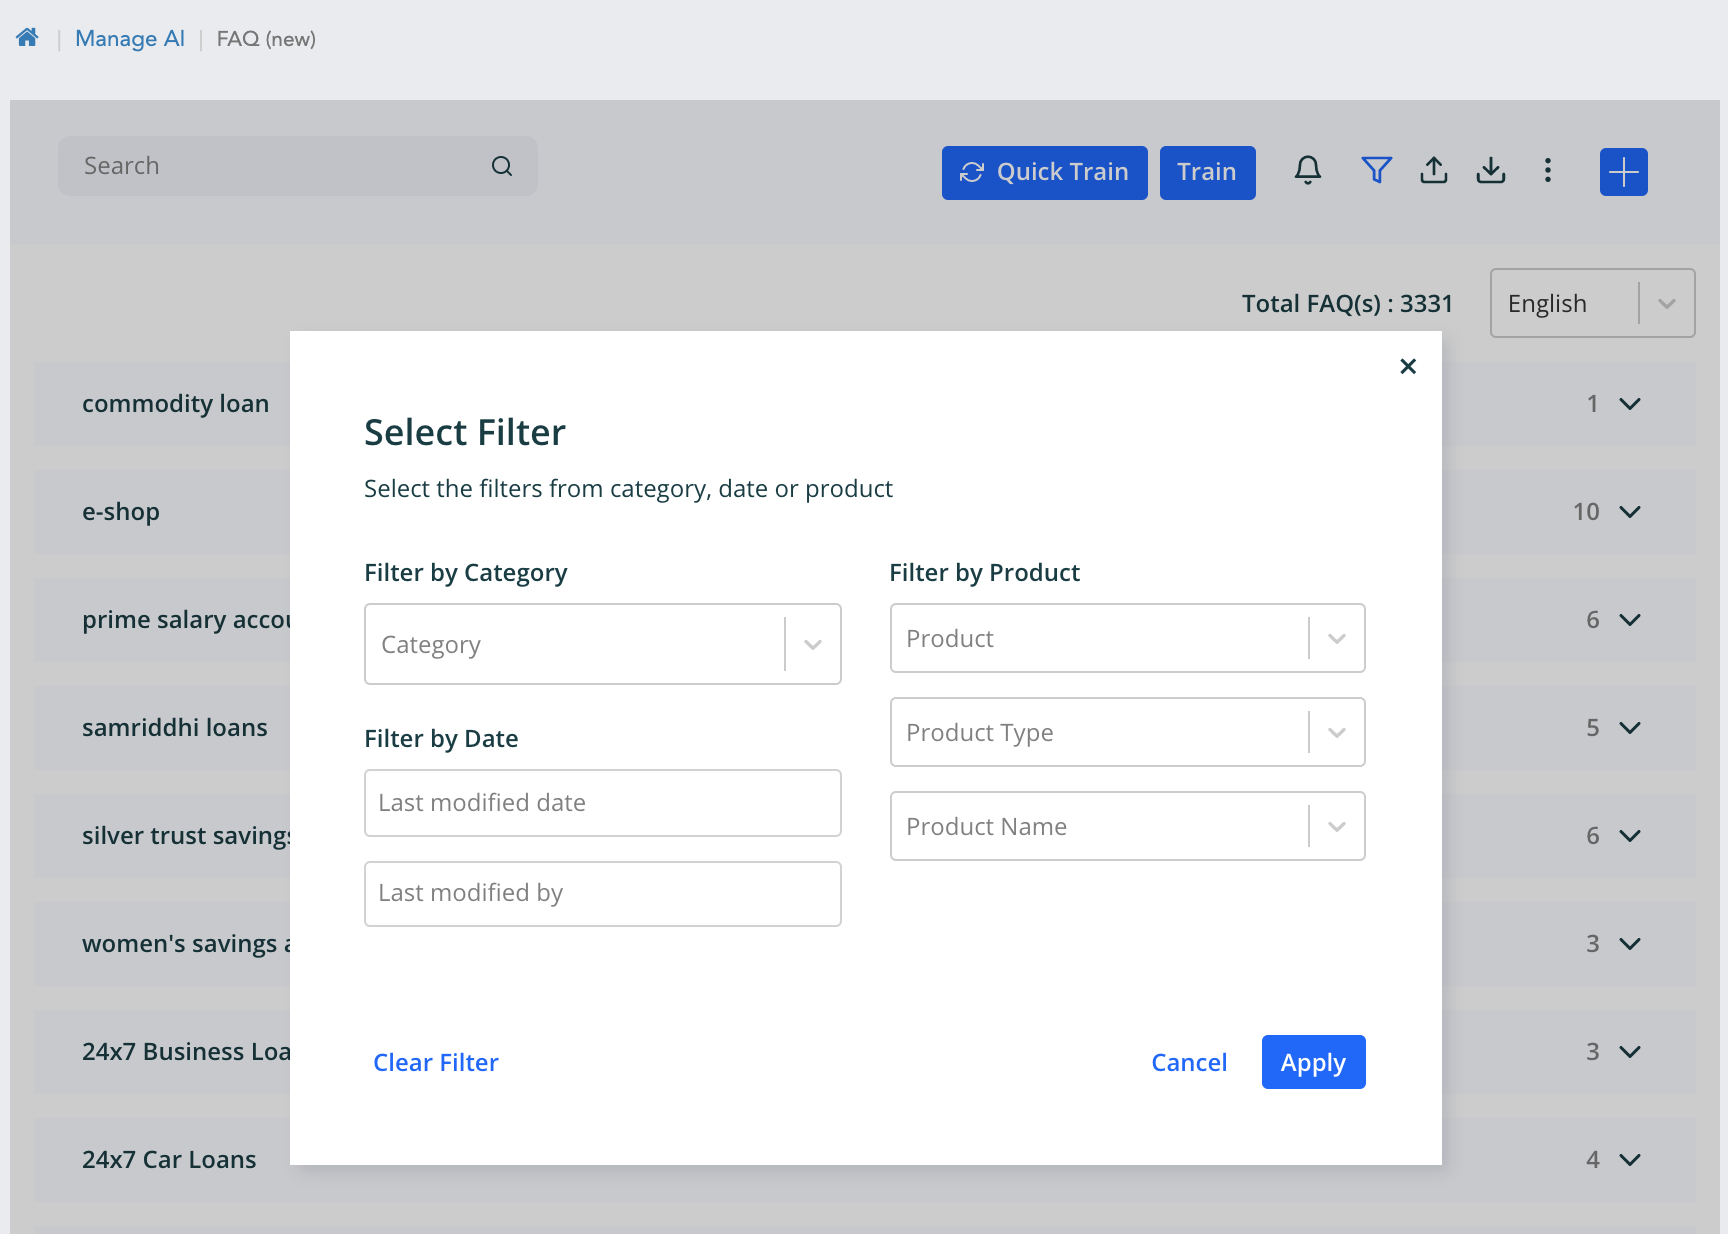
Search
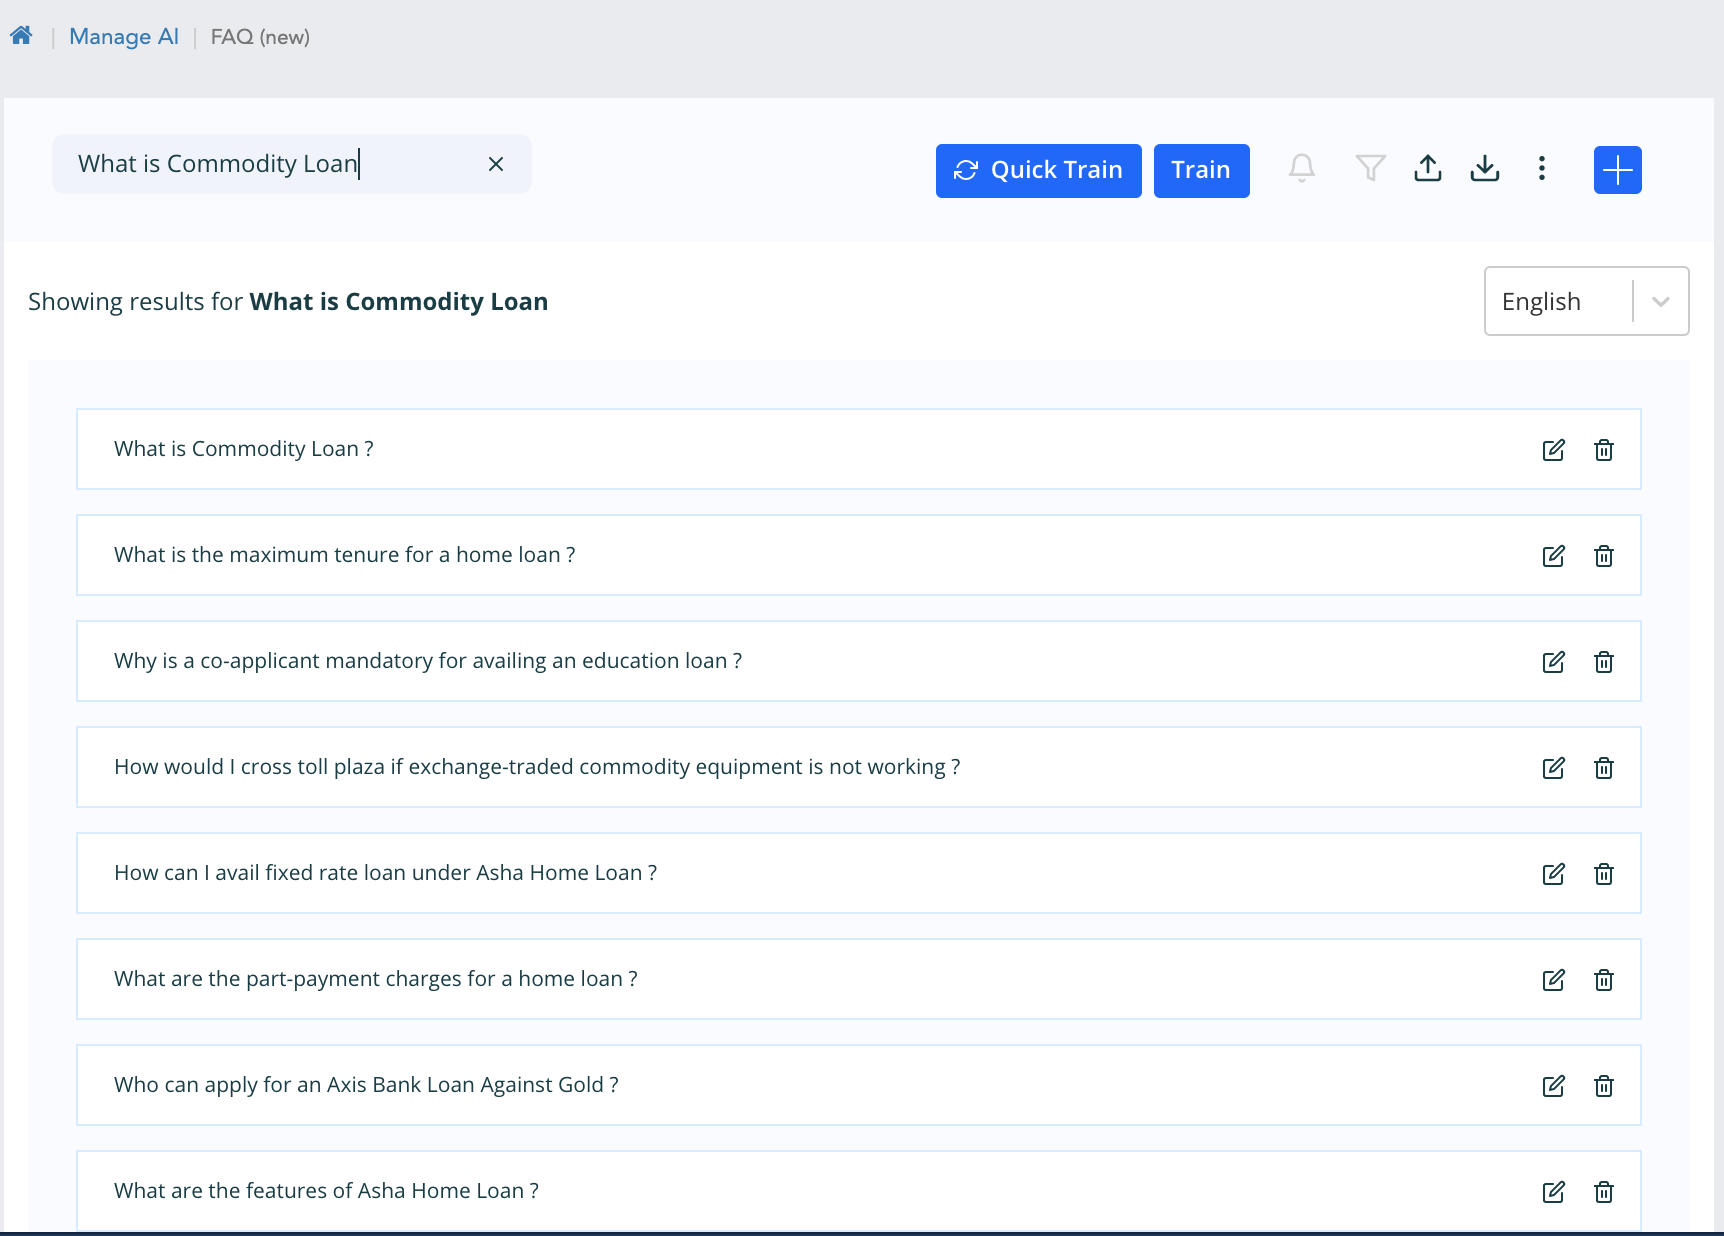
When we search any question, variant, answer or faq id, if the elastic search index is created for the workspace then the response is shown from the elastic search. It is like a suggestion for whatever text is given.
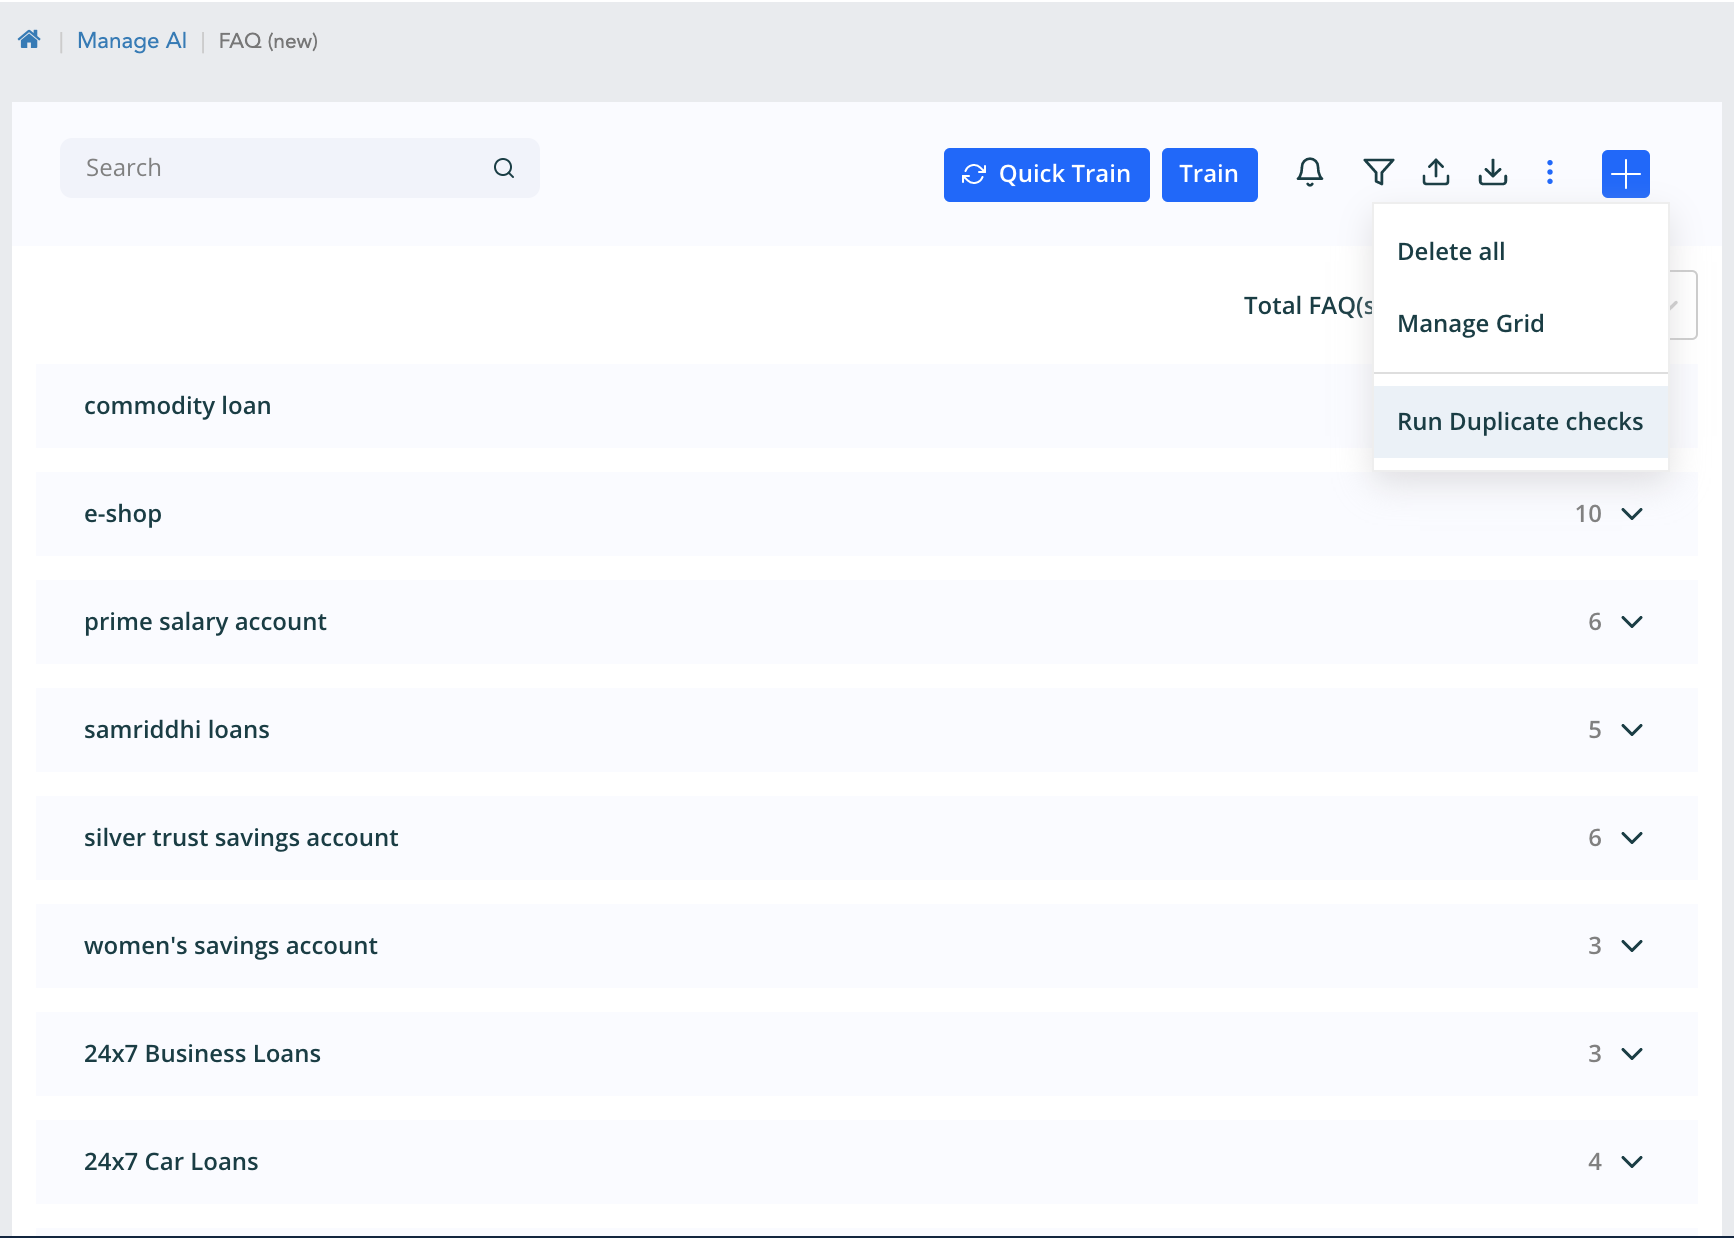
The manage grid option shown will navigate to the Manage knowledge grid. The run duplicate check triggers the duplicate check on the faqs, this is detailed later in this module.
DEDUP feature
Description
Dedup features helps to identify the duplicate faqs present in the data. This feature has the dependency of the sniper dedup api and the elastic search url. It exports all the data from the Elastic search index for the workspace. When we import or add new faqs then on “Run Duplicate Check”. It has the metic to find the duplicates that is Similarity and Variant/Non-Variant. Similarity is the percentage how much one question is similar to the existing one. Variant/Non-variant is classified as main question or variants.
Feature is explained in more detail in below steps :
- Import/add faq on Faq screen
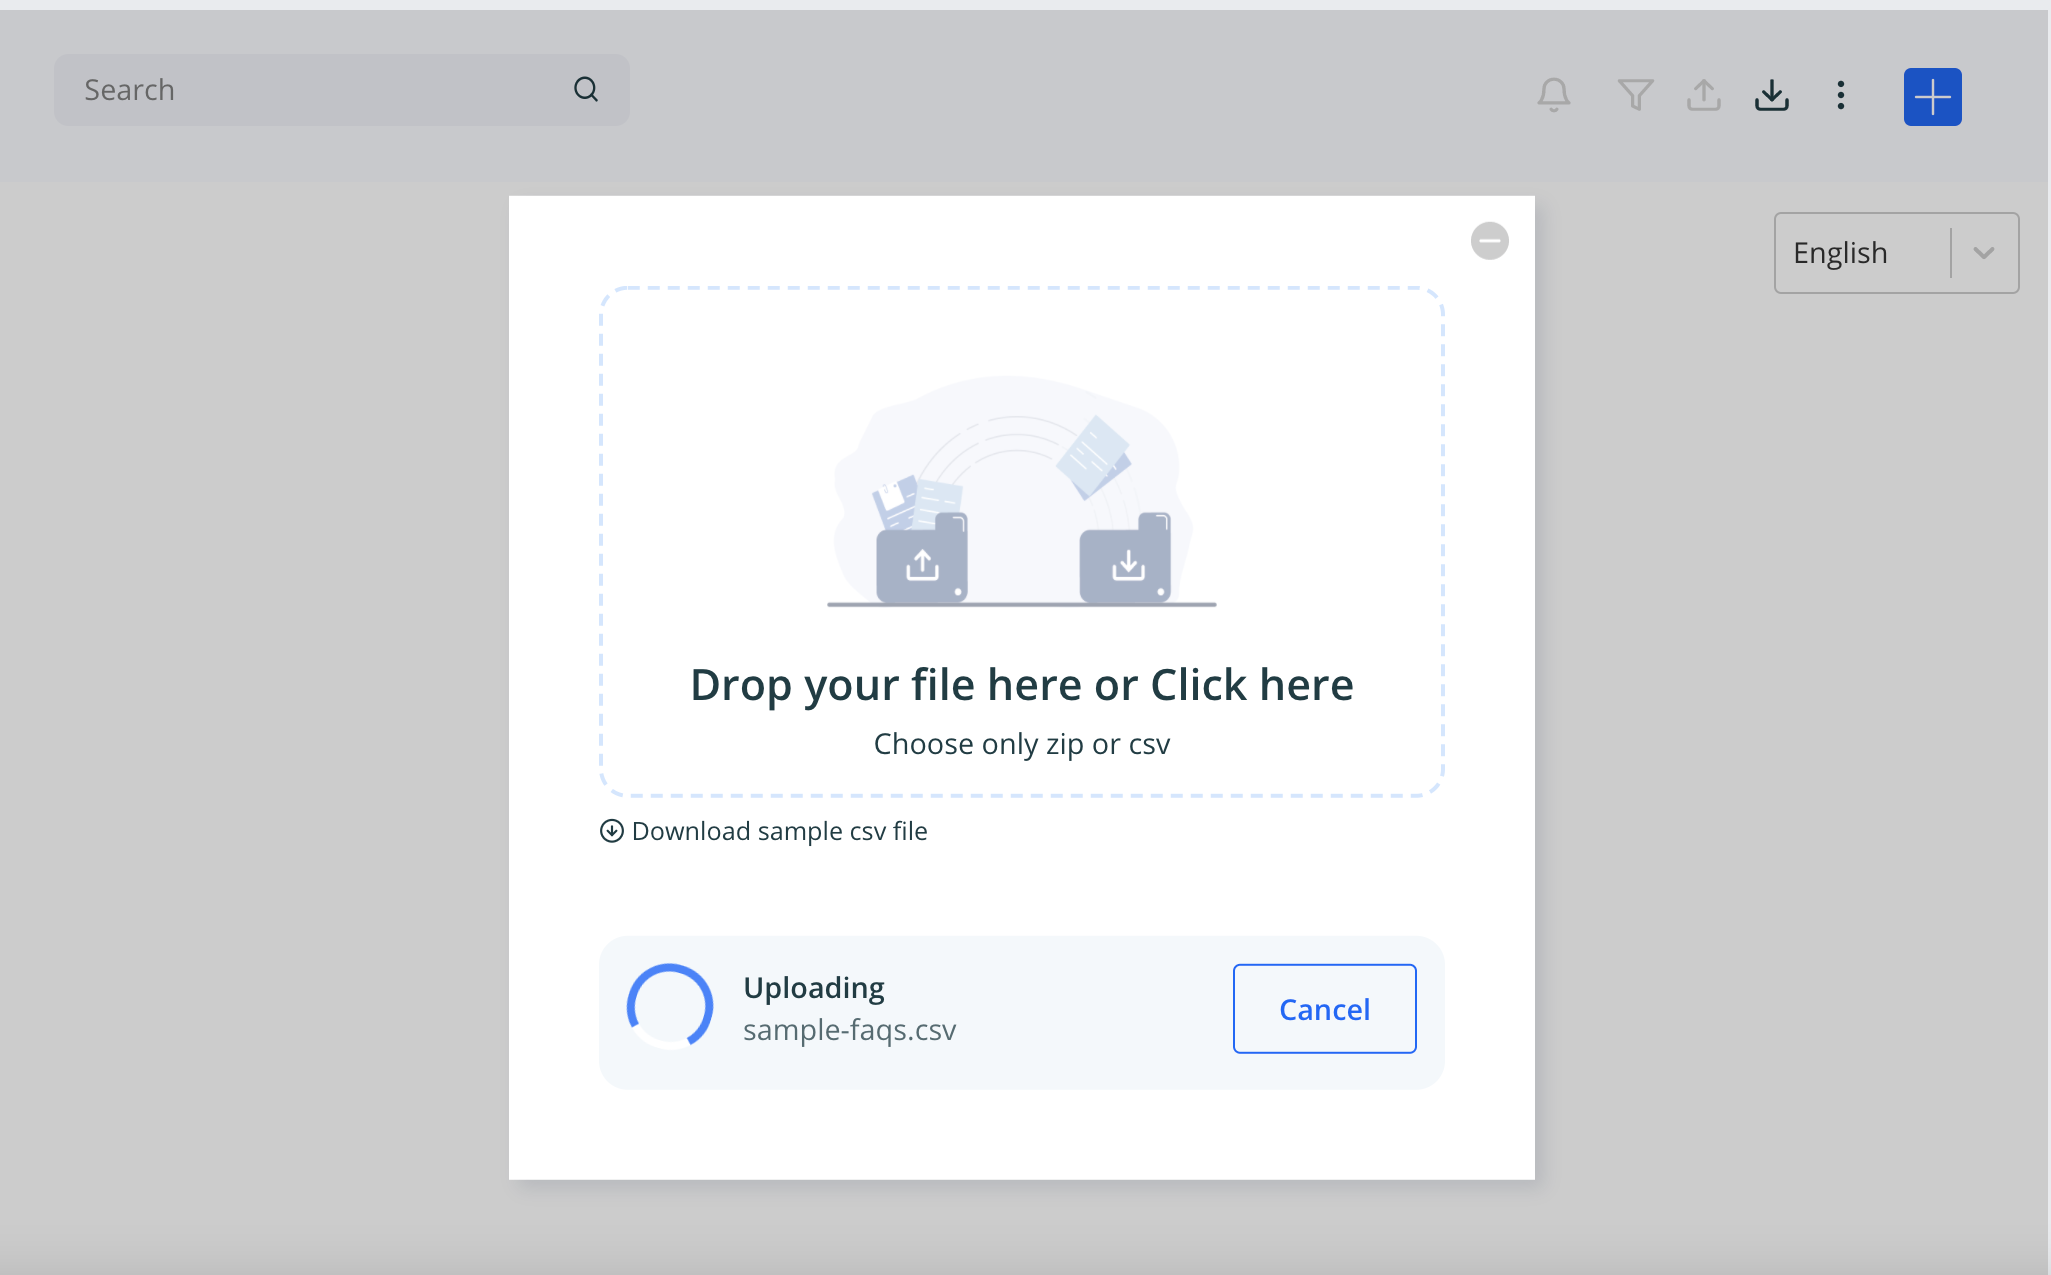
- Once import done click on Run Duplicate Check
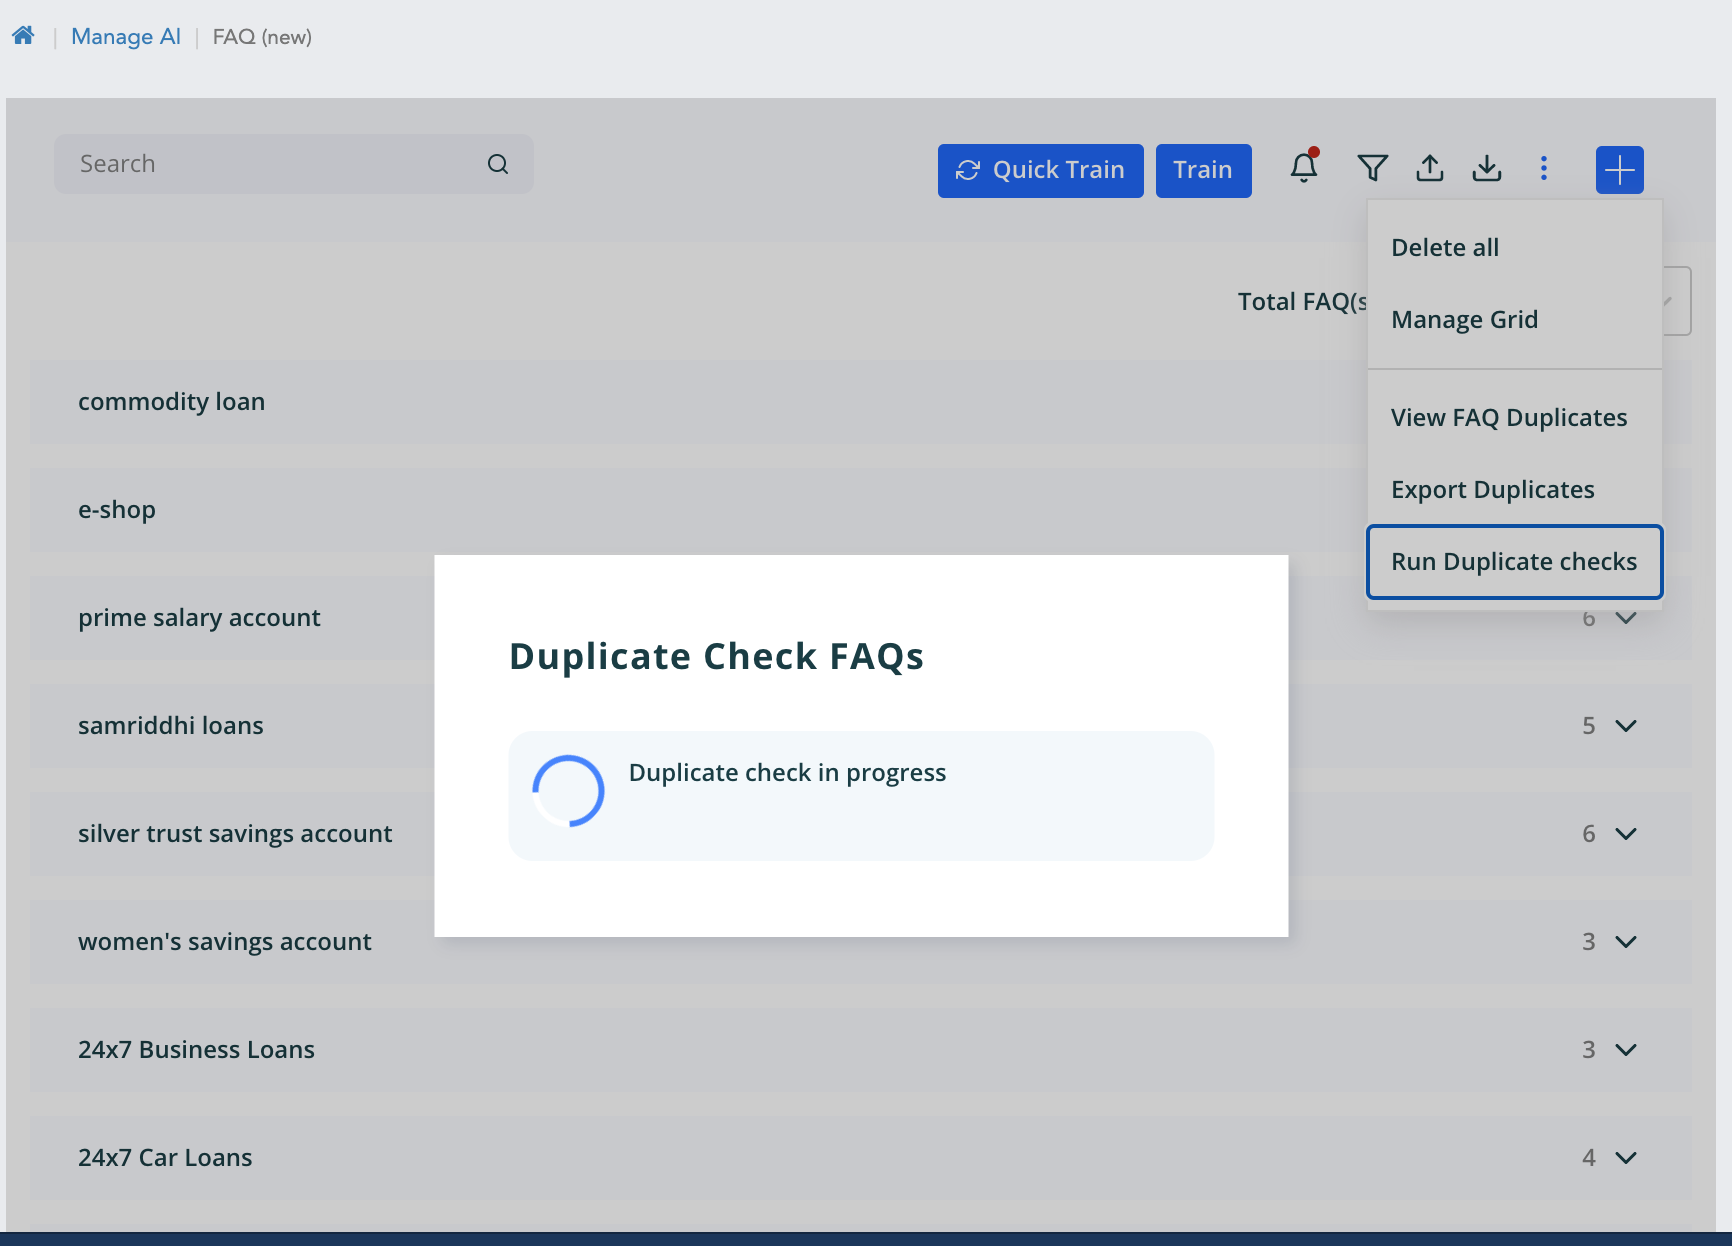
- If duplicates are present for the data then we get the below shown message
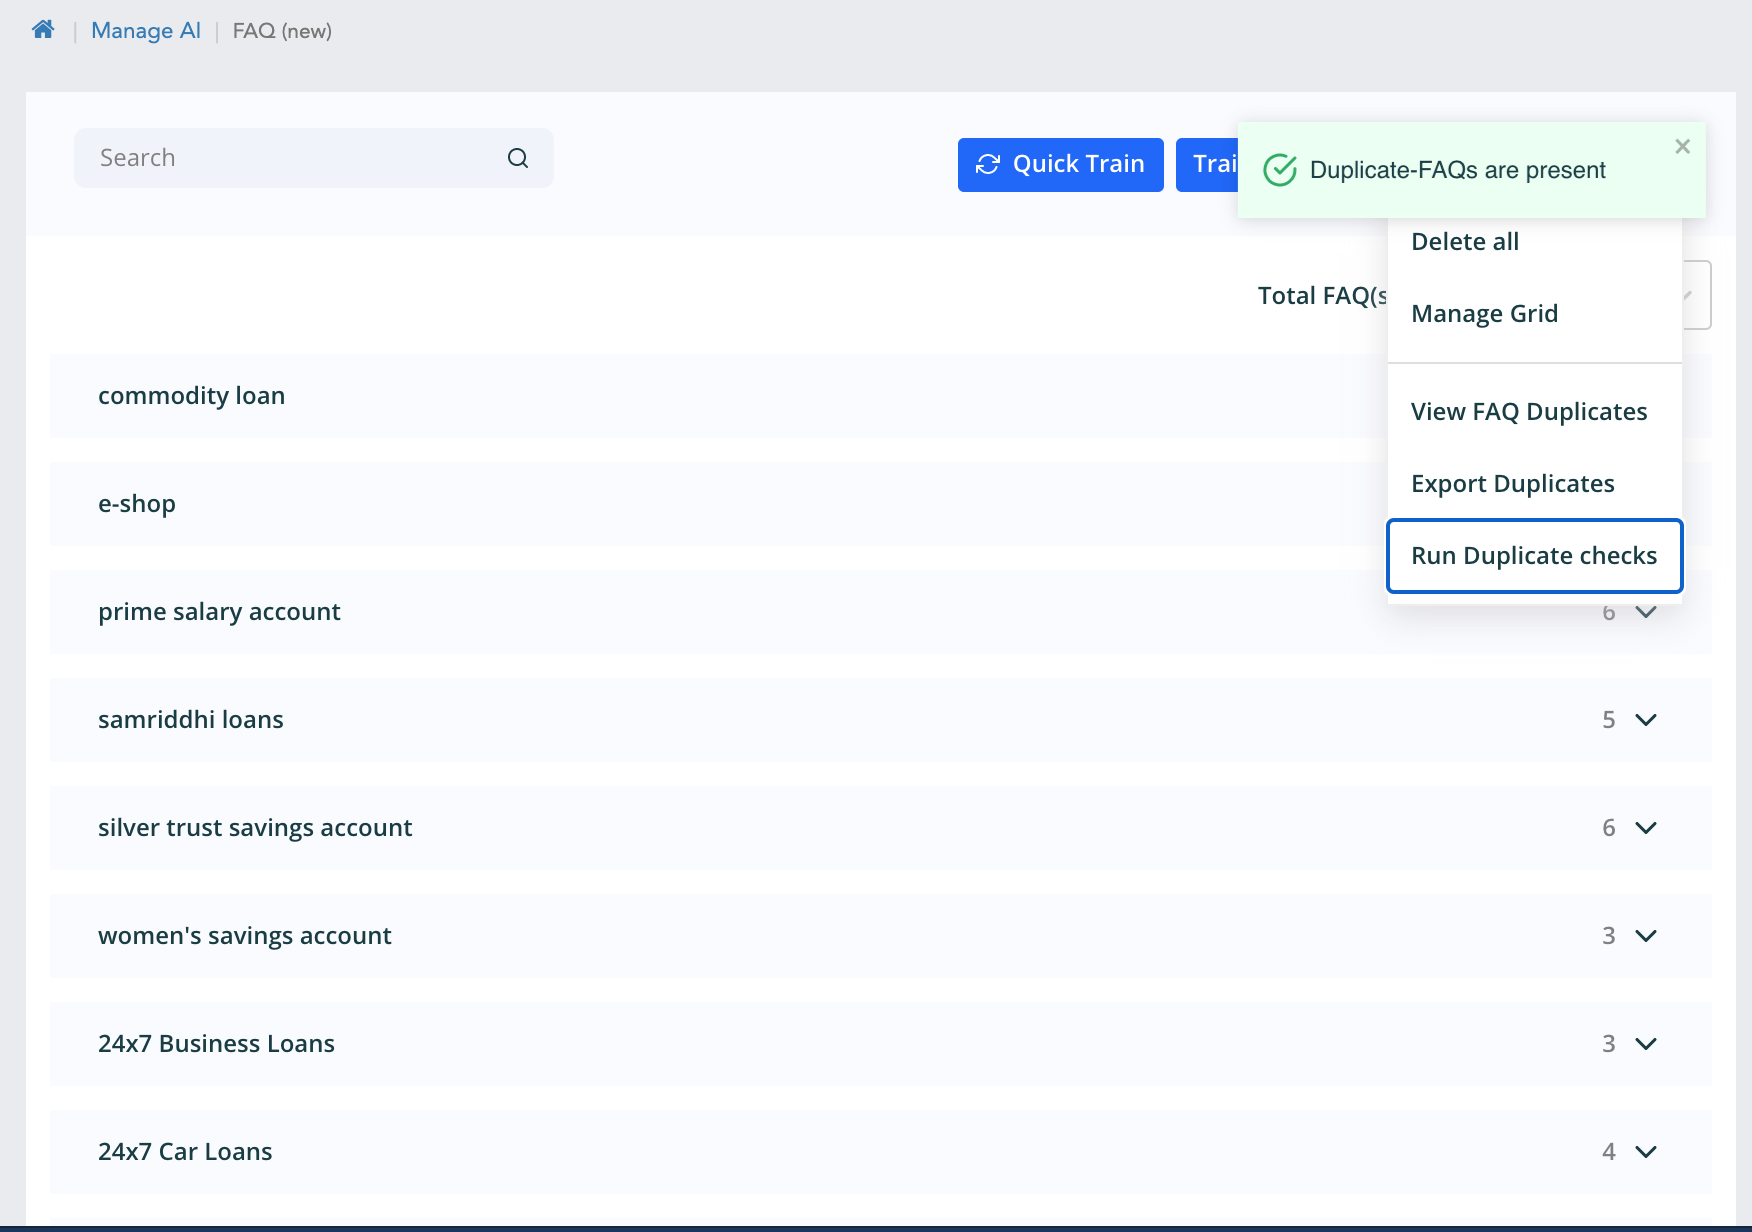
- To view duplicates click on View Duplicates inside three dots above or click on notification bell which is highlighted because the duplicates are present.
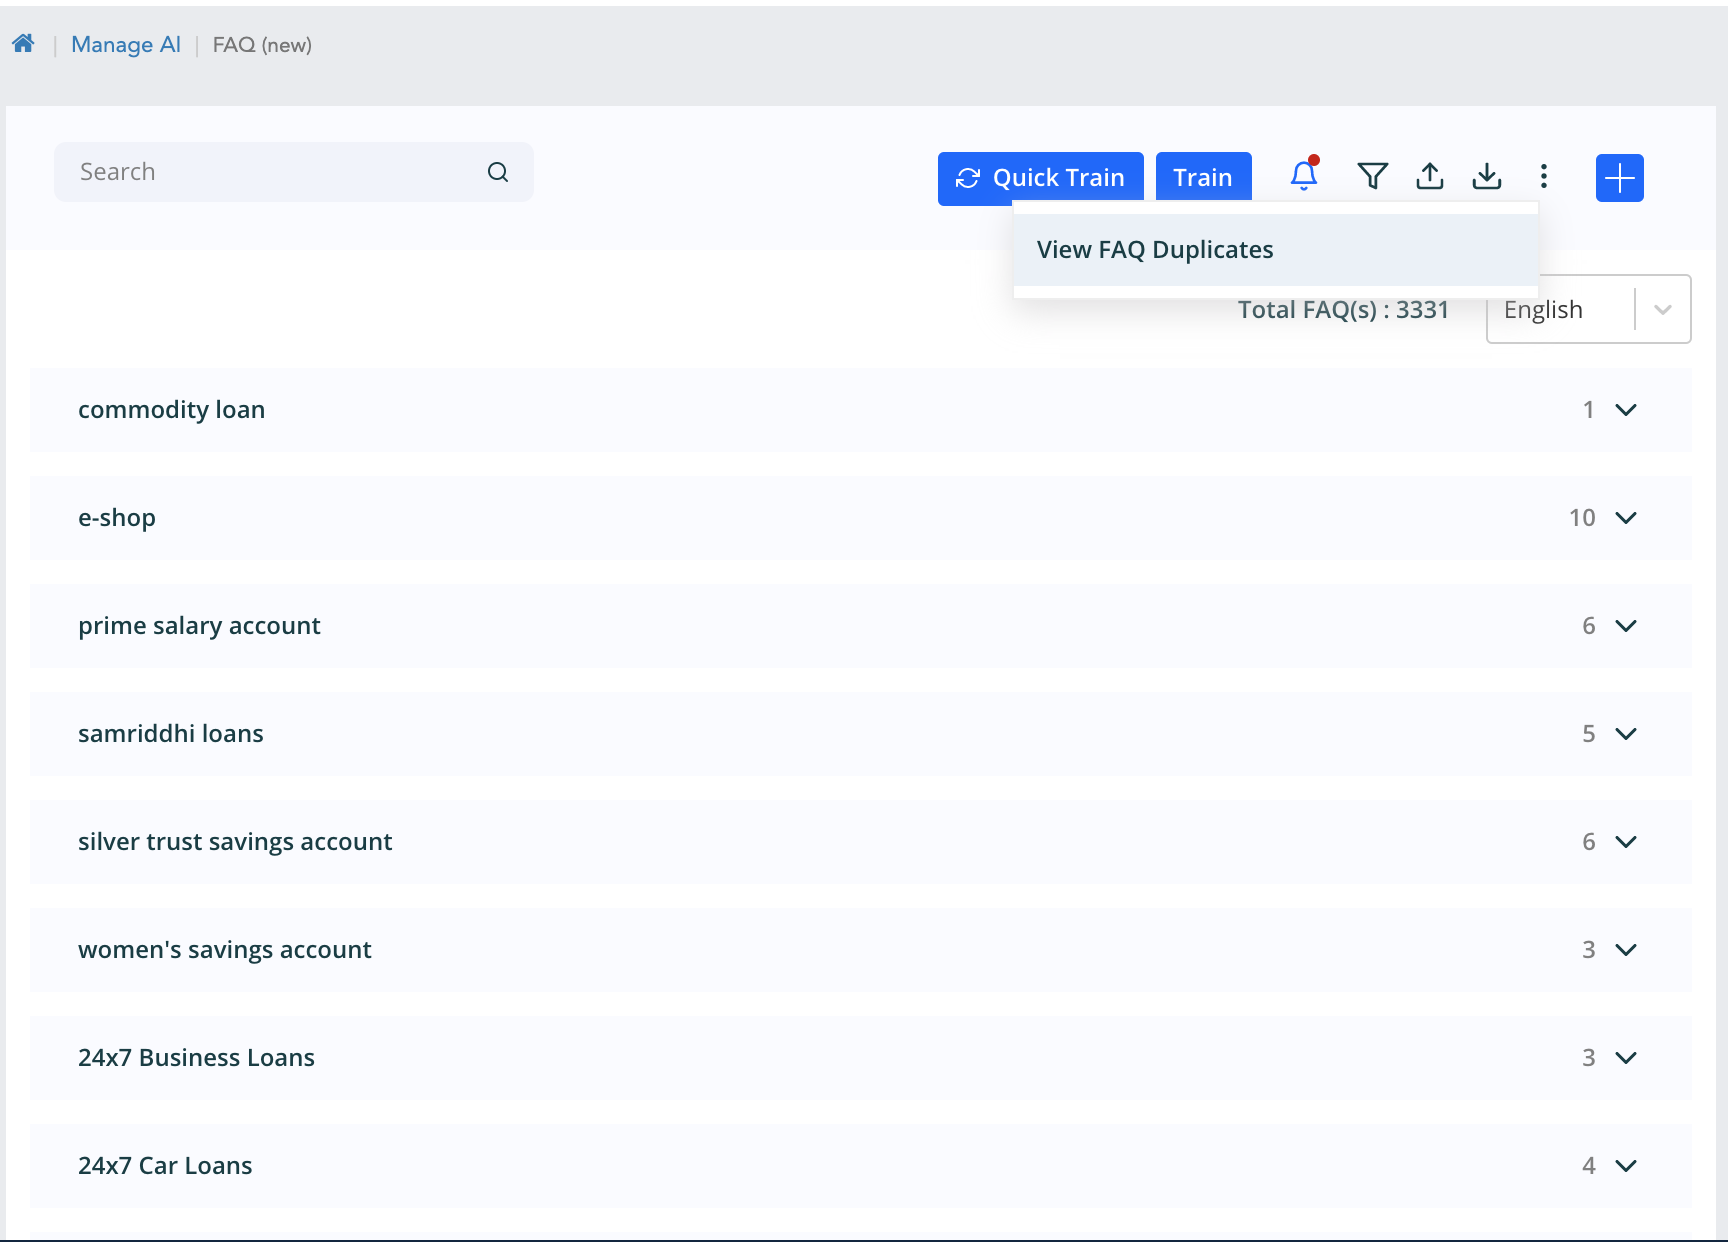

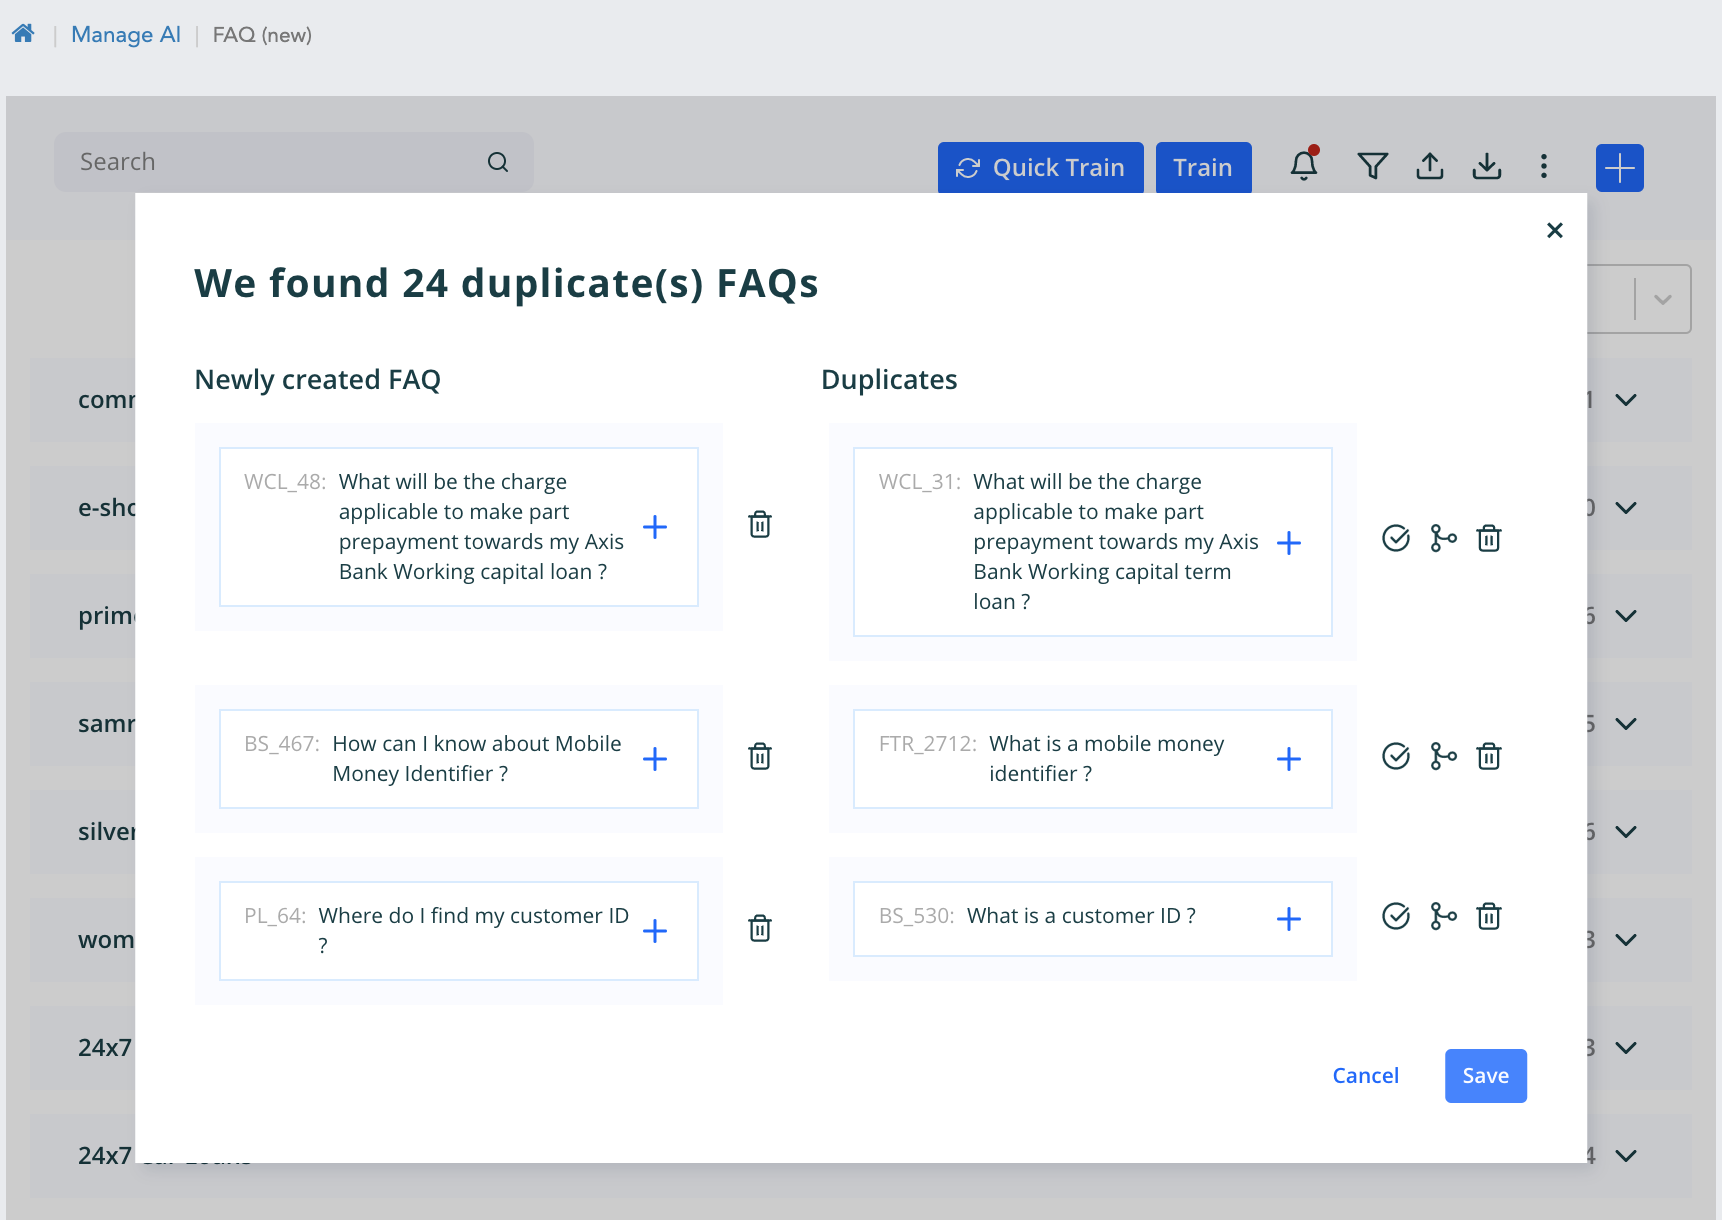
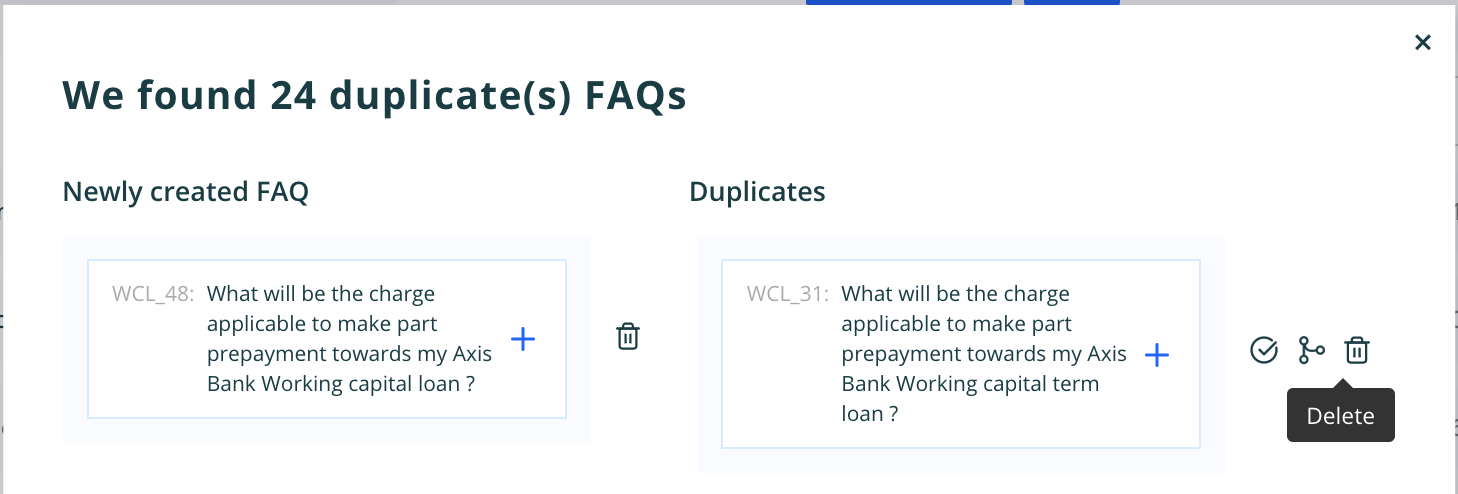
- Once we click on the view duplicates then the popup will appear with list of all the duplicates combination from the data.
On the right hand side is the question and on left is the respective duplicate. There are three user actions - Delete question - It will delete the question and retain the duplicate as the main question. Retain Duplicate - it retain the duplicate as the main question in the database and elastic search Merge Duplicate - It will merge the duplicate as the variance to the question on the left. Delete Duplicate - This will delete the duplicate question which is present in the database as an independent question
Note - All the above four actions will make changes in the database and the elastic search index for the respective workspace.


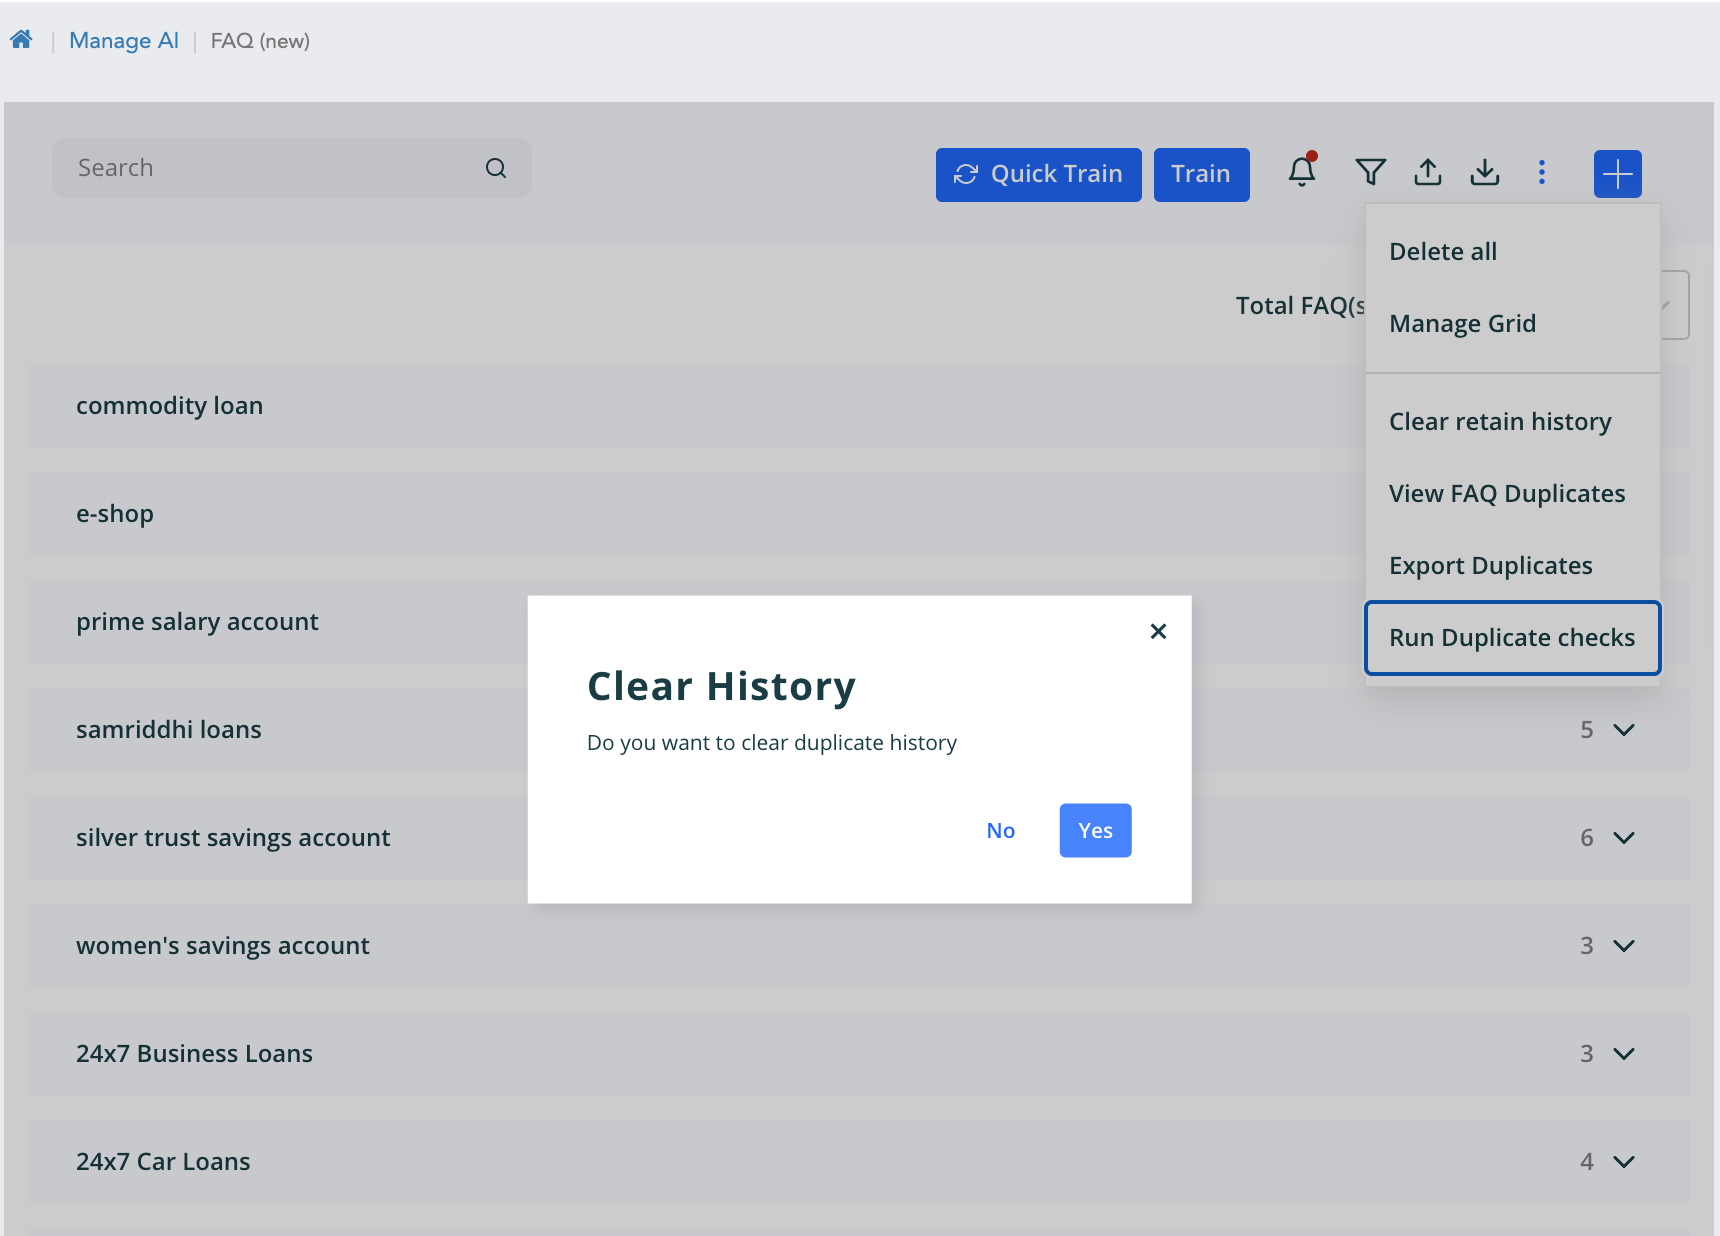
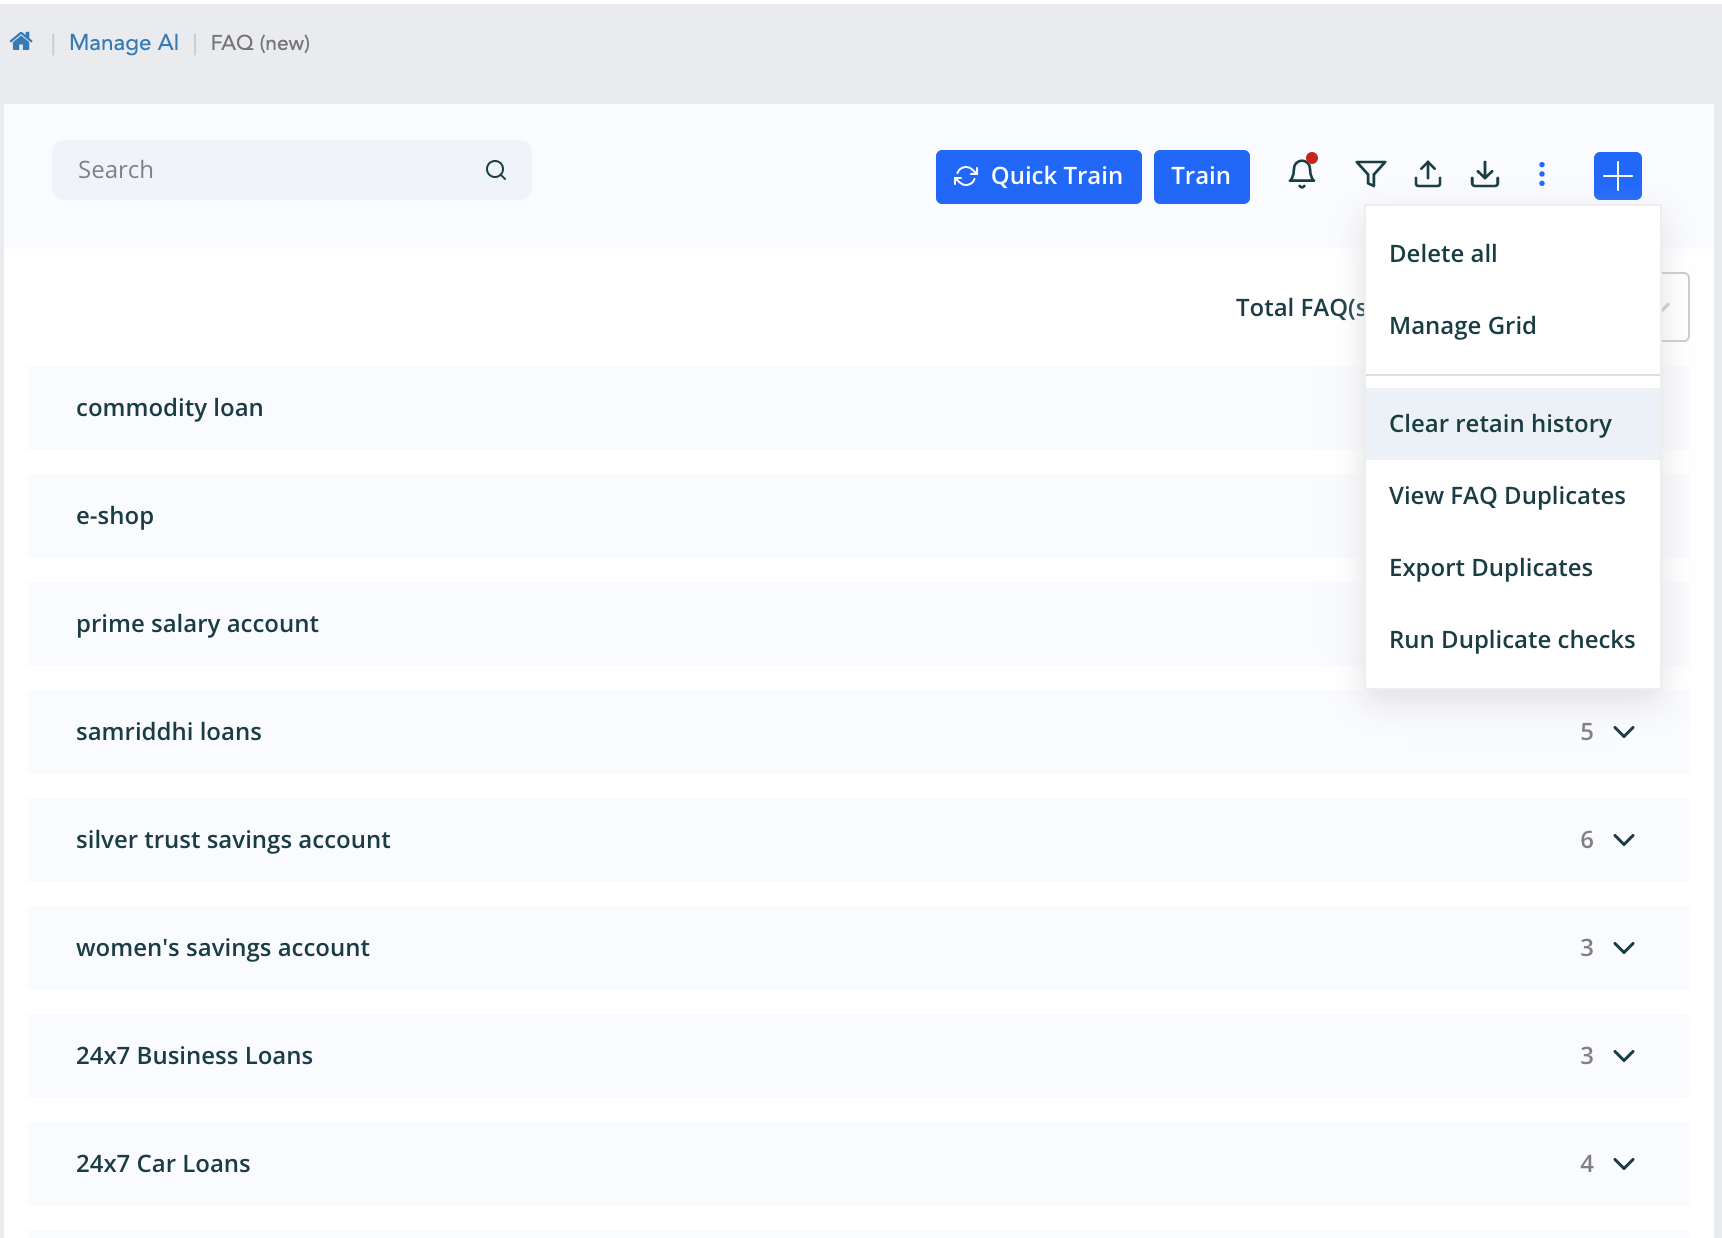
- Once we Retain the duplicate it will be store in the history. Firstly, On second check it will be asked to remove the history and proceed or proceed without clearing history. In the check the retained question will not be sent for dedup check if history is not cleared. Secondly, we have an option to clear the retained history. Note - All the above four actions will make changes in the database and the elastic search index for the respective workspace.
Note -
- When we delete all faqs, the duplicates and the history is also cleaned
- on import of data the previous history and the duplicates all are removed.
- before import, it is mandatory to update the Elastic search URL, otherwise the feature will not work.
- On dedup check if the messages are as follows:
- ES index not created yet - means the index is not created on the import or creation is in progress.
- At 20 faqs must be present for dedup check - this is the constraint on the feature to have minimum 20 faqs for the check.
- DeDup Rules not configured - It checks in the bot rules whether the sniper dedup api and similarity index rules are configured. We can customise it from admin as well. Go to Configure workspace -> manage workspace rules -> General tab -> configuration. Two rules are Similarity index for faqs and Duplication check Url.
Formatting Responses
The response will be rendered on the bot normally in a textual format. You can add a text response in your FAQs by entering the responses in the bot Response section. If you are not selecting any template so by default is Text.
Templates
Template editor supports formatting the FAQ response from the bot to render good look and feel to your bot responses so that the conversations will be more interactive & user-friendly.
You can format the responses as Text, Card, Image, Carousel, List, Button, Video & Custom by following these steps:
- Select your workspace and Click on Manage AI -> Click Setup FAQs -> Select Add FAQ.
- Enter FAQ ID, FAQ Question, select Response Type as Text
- Enter the response
- Click Add.
Following are the types of template response for FAQs
- Text Template
- Card Template
- Carousel Template
- Button Template
- List Template
- Image Template
- Video Template
- Custom Template
Workflow
Workflow helps to define step by step conversation journeys. The intents and entities derivation is mandatory to identify the correct response to user, but all the needed information may not be available all the time, during these cases workflow can be configured to prompt the user for more input that is needed to respond correctly.
Ex: If a user asks, How to apply for a debit card?, the defined workflow can ask for the various card selection like Rupay Card, Master Card, Visa Card, etc.
In a workflow, each entity is handled by a node. A node will have atleast a prompt and a connection. A prompt is to ask for user input and connection to link to another node. In a typical workflow that handles n entities, there would be n+2 nodes (One node per entity with a start and a cancel node).
In the workflow, we expect user inputs in a sequence, but by design, a workflow can handle any entities in any order or all in a single statement. Out of the box, workflow supports out of context scenarios.
You can configure a workflow by following these steps:
- Select your workspace and Click on Manage AI -> Click Setup FAQs -> Select Add FAQ.
- Enter FAQ ID, FAQ Question, select Response Type as Workflow
- Configure the desired workflow
- Click Save on the template editor
- Click Add on the FAQ popup screen.
Keyphrases
A Keyphrase is a word/phrase that must be present in the user's query to consider and predict a question as potential candidate for deriving the desired response. Example “How to pay by credit card” can have a “credit card” as the key phrase.
Since users may type the key phrase in different ways you may also want to declare “credit crd”, “CC” as variants to these Keyphrases so they are all treated equally.
Keyphrases are used to narrow down the potential candidates against which the CognitiveQnA module runs matches. Quality Key phrases are important for accurate responses of the bot.
Kephrase Guidelines
- Post adding/modifying/deleting keyphrases, Training AI data is required
- Maximum three words are permitted under keyphrases where the single space(s) should be replaced _ (underscore)
- Root value of the keyphrase should not contain the single or multiple space rather should be replaced with _ (underscore)
Adding Keyphrases
You can either add the keyphrases manually by entering the key phrase & the respective synonyms or import a CSV file of keyphrases.
Adding Keyphrases Manually
To add keyphrases, one has to follow below steps:
- Select your workspace and Click on Manage AI -> Click Setup FAQ -> Click on 3 dots -> Click on -> Manage FAQ Metadata
- Screen with two headers namely "keyphrases" and "Synonyms" will be shown
- Under header "keyphrases" within the box with navigational text "Type Keyphrase name", populate the root value of the keyphrase
- Under header "Synonym" within the box with navigational text "Add synonym", populate the synonyms of the Original keyphrase root value
- Post populating the content, click on Save .
Keyphrases CSV Import File Structure
| Column Name | Description |
|---|---|
| Keyphrase Name | Rootword of the Keyphrase |
| Status | if it is added |
| Language | Language of the Keyphrase |
| Send To Train | Keyphrase is to send for Data training or not |
| Synonym1 | First Synonym of the Rootword |
| Synonym2 | Second Synonym of the Rootword |
| ... | ... |
| SynonymN | ... |
Importing Keyphrases
You can import the list of keyphrases by following these steps:
- Select your workspace and Click on Manage AI -> Click Setup FAQ -> Click on 3 dots -> Click on -> Manage FAQ Metadata
- Select Import, Select "Do you want to delete existing Keyphrases if any?"
- Click on Choose files
- Select the CSV file of keyphrases to import.
Note: The CSV file should have a column for Keyphrases & synonyms (You can add multiple synonyms)
Exporting Keyphrases
You can also export the keyphrases by following these steps:
- Select your workspace and Click on Manage AI -> Click Setup FAQ -> Click on 3 dots -> Click on -> Manage FAQ Metadata
- Select Export
- keyphrases CSV file will be downloaded.
It will download a CSV file containing keyphrase & synonyms columns
Deleting Keyphrases
You can also delete the keyphrases which you don't want by following these steps:
- Select your workspace and Click on Manage AI -> Click Setup FAQ -> Click on 3 dots -> Click on -> Manage FAQ Metadata
- Select the keyphrases to Delete
- Click on the delete
- Or can click on Delete All (Delete All will delete keyphrases added by the customer and all the keyphrases for the bot (preloaded keyphrases) also)
- Goto your workspace
- Navigate to 'Manage AI'
- Click on 'Manage Knowledge Grid'
- Special Characters are not allowed (Except <, >, #, etc.)
- The contents of each cell should have a minimum of 2 and a maximum of 200 characters.
To get the dynamic values assigned to attribute messages at the time of fulfillment, the data must be added in the following ways:
When a single value to be placed in the attribute message it should be as
- Attributemessage - The Account Charges are
. - AttributeValue - Rs 200.
In the above scenario, the AtttributeValue entered as Rs 200 will be placed at
at runtime. We have to mention wherever the data has to be picked from the attribute value. - Attributemessage - The Account Charges are
When multiple values have to be placed in the attribute message then it must be as
- AttributMessage - The rate of interest for
on salary account is percent. - AttributeValue - 2 years#10.8
Here inside attribute value, the subsequent values have to be separated by #. So accordingly the attribute message will be formed as “The rate of interest for 2 years on salary account is 10.8 percent.
- AttributMessage - The rate of interest for
- Goto your workspace
- Navigate to 'Manage AI'
- Click on 'Manage Knowledge Grid'
- Click on 'Add Data' ( '+' icon)
- Enter 'Select Product' (Eg; Super Card)
- Enter 'Product Type' (Eg; Savings)
- Enter 'Product Name' (Eg; Credit Card)
- Enter 'Attribute' (Eg; Annual Charges)
- Click on the Arrow mark to expand
- Enter 'Attribute message' (Eg; Annual Charges is
) - Enter 'Attribute Value' (Eg; Rs. 500)
- Click on the 'Save' icon
- Product
- Sub-Product
- Product-Type
- Product-Name
- Attribute-Heading
- Attribute-Message
- Attribute-Value
- Language
- Goto your workspace
- Navigate to 'Manage AI'
- Click on 'Manage Knowledge Grid'
- Click on the import icon
- Select a CSV file (That contains all the columns specified above)
- The Grid Data will be imported and the data will be shown based on the product type
- Goto your workspace
- Navigate to 'Manage AI'
- Click on 'Manage Knowledge Grid'
- Click on the export icon
- Select 'Export as .csv'
- A CSV file will be downloaded with the columns (Product, Sub-Product, Product-Type, Product-Name, Attribute-Heading, Attribute-Message, Attribute-Value, Language, etc.)
- Goto your workspace
- Navigate to 'Manage AI'
- Click on 'Setup FAQs'
- Select any question
- Click on 'Grid FAQ'
- Select Product, SubProduct, Type, Product Name
- Select attribute(s)
- Click on 'Finish'
- Click on 'Save'
- You can arrange the order of attributes/messages by dragging them in any order to show on the bot
- You can also arrange the order of product, sub-product, type, product name by dragging them in an order
- To get the updated answer along with the grid, Training must be done before all the grid-related linking. Then after linking we have to quick train the faqs.
- Goto your workspace
- Navigate to 'Manage AI'
- Click on 'Setup FAQs'
- Select any question
- Select 'Edit or Link Faq' (from the dropdown in the Edit FAQ popup right top corner)
- Edit Product, SubProduct, Type, Product Name
- Edit attribute(s)
- Click on 'Finish'
- Click on 'Save'
- Goto your workspace
- Navigate to 'Manage AI'
- Click on 'Setup FAQs'
- Select a question for which you want to unlink the grid data
- Select 'Unlink Faq' (from the dropdown in the Edit FAQ popup right top corner)
- Click on 'Save'
- FAQs: The Question and answers will be shown in the RTL layout for those languages as shown in the following image.
- Smalltalk: The Smalltalk will be shown in the RTL layout for those languages as shown in the following image.
- Chat History: The chat history which customer had with the bot in those specific languages those chat history will be shown in RTL layout as shown in the following image.
- All the greetings, bot capability questions and bot introduction questions possibilly be asked by the users should be though of
- Customer specific Small Talks should be provided by the business user along with the appropriate neutral answers
- Small Talk works based on the lookup, thus all different variations to a query should be included and mapped with an appropriate answers
- Smilies can be used in the answer for which unicode mapping should be provided in the bot configuration.
- Select your workspace and Click on Manage AI -> Click Setup Small Talk
- Select the Language you are interested in
- Click on Add Small Talk
- Add Question/Query in 1st box (where navigational text is present as "Small Talk" in grey colour)
- Add Response in 2nd box (where navigational text is present as "Enter Response" in grey colour)
- To add Multiple response to a single Question/Query press enter after each response and add the +nth reponse
- Click on Save.
- Select your workspace and Click on Manage AI -> Click Setup Small Talk
- Click on Import
- Select CSV file adhering to the above File Structure of the Small Talk
- Click Yes on the popup (*Are you sure you want to overwrite?*)
- Click on Save.
- Post successful import of .csv file, a message Small Talk uploaded successfully will be shown
- Select your workspace and Click on Manage AI -> Click Setup Small Talk
- Click on Export
- Select your workspace and Click on Manage AI -> Click Setup Small Talk
- Select the Small Talk(s) which you want to Delete and click Delete
- Select Delete for (*Are you sure you want to delete the selected smalltalk?*)
- For clearing all Small Talks, please use Delete All
- Select your workspace and Click on Manage AI -> Click Setup Intents
- Enter the name for intent
- Click on Add Intent
- Good Intent naming practise: Start Intent name with "qry-" for enquiry intents / "txn-" for transaction intents
- Id - Name of the intent
- Description - Optional Description related to the intent.
- Category - Category of the intent is the brief two to three words about the intent.
- Click on Add. Now the Intent will be listed.
- Select the Language you are interested in
- Key in the utterance (Navigational text - Type Here...) and click on Add button on the right side of the box to add the utterance. (*Minimum 20 utterances should be added for a intent*)
- Select your workspace and Click on Manage AI -> Click Setup Intents
- Click Import CSV
- Click 'Yes' on the popup. (*Are you sure you want to overwrite?*)
- Select the CSV intents file to import
- Select your workspace and Click on Manage AI -> Click Setup Intents
- Click Export CSV
- Select your workspace and Click on Manage AI -> Click Setup Intents
- Click on menu icon of the particular intent
- Click on Delete intent, Click Delete on the popup. (*Are you sure you want to delete unsupported intent?*)
- Expected entity
- Bot says
- User says
- Select your workspace and Click on Manage AI -> Click Setup Intents
- Click on Setup Utterances of the desired intent -> Click Dialog tab -> click Add
- To prepare the dialog utterances, first key in the entity for which a bot questions the user (navigational text Add entity
- After registering the Entity and Bot Question, add sample user answers by click on Add Prompt button. (*can add multiple utterances that user might ask**)
- Click Save
- Select your workspace and Click on Manage AI -> Click Setup Intents
- Click on Setup Utterances of the desired intent -> Click Dialog tab
- Click on the delete icon for which you want to Delete
- Click 'Yes' on the popup. (*Are you sure you want to delete?*)
- Dictionary (All finite values)
- RegEx (Regular Expression Pattern)
- Train (Infinite Values)
- product_type in which card type do you list? - Visa, AMEX Master, UPOP, JCB or Rupay
- Account Type show current acc balance - Current, savings, salary are the finite account types.
- Mobile number in recharge my mobile number 8130927472 - 10 digit mobile number which is infinite in nature
- Amount in transfer 500 rupees - 1 to 8 digit amount which is infinite in nature
- Payee name transfer to jacob - payee name are regular expression which is infinite in nature.
- PrimaryClassifier data preperation - need to annotate the train entities within curly braces like; _"{<train entity name>}"_
- Dialog data preperation - need to annotate the train entities within curly braces like; _"{<train entity name>}"_
- While defining train entities, need to prepare a .samples file for AI data training
- All sample data will not be visible in the ui as the sample values are in thousands. To check the sample values one has to click on Export XML button.
- email id in send an e-statement to neo@active.ai - email if is universal which can easily be captures with a RegEx pattern
- Item Number within a transactional flow select 5th account - Item Number within the user's input can easily be extracted by using RegEx pattern.
- Select your workspace and Click on Manage AI -> Click Setup Entities
- Click on Dictionary / Annotation / Regex to load the entities.
- Select your workspace and Click on Manage AI -> Click Setup Entities
- Select Dictionary / Annotation / Regex tab for defining the Entity
- Click on Add New Entity
- Name - Name of the entity
- Code - Code of the entity
- Description - Description of the entity
- Category - Respective category Ex: sys, banking
- Class - Class of the entity can be populated here. All entity may not require or have the class
- Ontology (Knowledge Graph) Type - Here by default ontology will be set as None. If Knowledge Graph enabled for the workspace and want to enable at the entity level then can configure here with one of the types Product, type, name, attribute or Action.
- Enter a SubType : SubType is used when we need to enter different types of attribute groups for the same entity.
- banking.product-name for credit card : SubType can be populated as Credit Card
- banking.product-name for debit card : SubType can be populated as Debit Card
- Enter an entity : The root value of an attribute to be stored here
- Add a synonym : Synonym(s) should be populated where one variation should be the root value itself and rest should be actual synonym(s)
- Click on Save button located on the right top corner.
- Select your workspace and Click on Manage AI -> Click Setup Entities
- Click on Import CSV, Select the CSV entities file.
- Select your workspace and Click on Manage AI -> Click Setup Entities
- Click on Import XML, Select the XML file of entities
- Select your workspace and Click on Manage AI -> Click Setup Entities
- Click on Export XML or Click on Export CSV
- Select your workspace and Click on Manage AI -> Click Setup Entities
- Select the entities to delete by type and Click Delete
- Acronym to abbreviation = account=ac.,a/c
- Map the regular expression words with the same value to stop the auto correction = Amit=Amit
- Spell typo to correct word mapping = balance=balnc,blance
- Select your workspace and Click on Manage AI -> Click Setup SpellChecker
- Select the Language you are interested in
- Click on Add Entity
- The new empty box will prompt at the end of the Grid. Enter the Root Value (On Navigational text "enter an entity"
- Add Response in 2nd box (where navigational text is present as "Enter Response" in grey colour)
- Synonym(s) should be added in the second box (On Navigational text "Add a synonym"). Multiple entries can also be mapped to a single root value for which after each synonym one has to use the "ENTER" key and then add another synonyms
- Click Save.
- Select your workspace and Click on Manage AI -> Click Setup SpellChecker
- Click on Import CSV, CSV should comply the above mentioned File Structure
- Click 'Yes' on the popup (*Are you sure you want to overwrite?*)
- Select the CSV file of SpellChecker
- Click Save.
- Select your workspace and Click on Manage AI -> Click Setup SpellChecker
- Click on Export CSV
- Select your workspace and Click on Manage AI -> Click Setup SpellChecker
- Select SpellCheker which you want to Delete, click Delete
- Goto your workspace
- Click on 'Manage AI'
- Select 'Manage Rules'
- Click on 'Import'
- Select the file (JSON file)
- Click 'Yes' on popup. (Are you sure you want to overwrite?)
- Goto your workspace
- Click on 'Manage AI'
- Select 'Manage Rules'
- Click on 'Export'
- Goto your workspace
- Navigate to 'Manage AI'
- Click on 'Setup NER'
- Click on 'Upload'
- Click on 'Browse'
- Selct a CSV file of entities
- Click on Done
- Goto your workspace
- Click on 'Manage AI'
- Navigate to 'General'
- Select 'Unified API v2' in the following fields:
- AI Engine
- Context Change Detector
- Entity Extractor
- Primary Classifier
- Click on save
- Goto your workspace
- Click on 'Manage AI'
- Navigate to 'Triniti'
- Select Deployment Type as Cloud
- Enter Triniti Manager URL as http://dev-manager.triniti.ai/v/1
- Click on save
- Goto your workspace
- Click on 'Manage AI'
- Navigate to 'Unified API V2'
- Set Endpoint URL as https://router.triniti.ai
- Set Unified API version as 2
- Set Context Path as /v2
- Click on save
Language & Country
- Goto your workspace
- Navigate to 'Configure Workspace'
- Select Country & Language
- Click on save
- Click on save
- Click on save
Security
- Goto your workspace
- Under 'Configure Workspace', click on 'Manage Rules'
- Navigate to 'Security'
- Set Access key ID
- Set Secret Access Key
- Set Bucket Region (Based on your selected country)
- Click on save
- Goto your workspace
- Navigate to 'Deploy'
- Click on 'AI Ops'
- Click on Generate
- CLick on TRain (After finishing up the generate)
- Goto your workspace
- Click on 'Manage AI'
- Click on 'Manage Language Translation'
- Select the language for which you want to check the translation from the language dropdown
- Select the date range
- You will get the list of 'Customer Utterance' along with the respectively translated utterance and the bot response.
- If you feel that the translation is not correct, you can edit those utterances by clicking on the 'Edit' icon
- Enter the correct translation and click on the save button
- The edited utterance will be added in the Updated Translated Utterances section with the status 'untrained' utterance
- Select the language for which you want to check the translation from the language dropdown
- Select the date range
- You will get the list of 'Customer Utterance' along with the respectively 'Translated Utterance' & 'Updated Utterance'.
- If you want to edit the updated utterance you can edit by clicking on the edit icon
- And If you want to delete the updated utterance, you can delete it by clicking on the delete icon and selecting 'Yes' from the popup.
- Manage self-learning is a feature helps to trace the utterances which are ambiguous, unrelated or unclassified from all sorts of data. This classification can be traced based on Products, FAQ or Small Talk in specific date range as well.
As a human, you may speak and write in English, Spanish or Chinese. But a computer’s native language – known as machine code or machine language – is largely incomprehensible to most people. At your device’s lowest levels, communication occurs not with words but through millions of zeros and ones that produce logical actions.
As a result there will be many such uttrances that will not be classified by the Ai engine. It will be a very awful task to go through each and every unclassified uttrances and train them seperately. Self learning comes into play when you want to categorized all the uttrances under certain category. Post these categorization it becomes easy to get all the uttrances by applying various category, channel, date, Message type, and also confidence range.
For every uttrance that is being audited falls under certain category. Some of the categories are
Feedback
Ontology
Profanity
Unclassified
Unsupported
Failed
Ambiguous
Self learning reduces the manual intervation of classifying the uttrances under these categories.
- None
- Intents
- FAQs
- Smalltalk
- Feedback
- Ambiguous
- UnSupported
- UnClassified
- Ontology
- Profanity
- Unanswered
- Live Agent (Interaction with live agent eg; FreshChat, LiveChat, etc.)
- Post Back (Responses received from buttons eg; Similar Queries, Related FAQs, Button templates, etc.)
- Text (The text responses which are asked by the user by entering their input on the bot input box)
- Voice (The responses which are received from IoT devices eg; Google Assistant, Alexa, etc.)
- Goto the workspace
- Goto Manage SelfLearning
- Get the utterances based on various filters (ie; Date, Data, Type, Channels, Message type, Language, Segment, search text, etc.)
- Once we get the utterances, please click on the edit icon of that particular utterance.
- On click of the edit icon we will get the 'Add To Training' popup.
- Please select the 'Data Category' as 'FAQ'
We can choose to add the selected utterance as 'New FAQ' or 'Existing FAQ'
- Add to new FAQ:

- Add to existing FAQ:

- Add to new FAQ:
We will get the selected utterance and the 'FAQ Category' and 'FAQ list' of the selected language/utterance language.
Once we add the utterance as 'New FAQ'/'Existing FAQ' we can save the changes and train the bot.
- Add the utterance as a new FAQ => It will redirect to the FAQs Screen where we can add the selected utterance as a fresh new FAQ with a proper response.
- Add the utterance as existing FAQ => It will add the selected utterance as the variant for the selected FAQ from the dropdown list.
- Goto your workspace
- Navigate to 'Manage AI'
- Click on 'Setup Knowledge graph'
- Click on 'Add' in the Design section
- Enter all the required details (Product, synonyms, product type, etc.)
- Expand the product (which you have added in last step)
- You can add more Product types, Names & Attribute groups.
- If you have asked for cc, debit, then the bot will ask you for the actions like apply, activate, replace, etc. based on the configuration.
- If you have asked for account, then the bot will show you the product attribute like payee, biller, balance, etc.
- Goto your workspace
- Click on 'Manage Template'
- Click on 'Add Card'
- Enter the name as "ONTOLOGY_DEFAULT"
- Enter the required details (Name, Category, code, version, etc.)
- Click on 'Next'
- Configure the template as per your requirement
- Click on Save
- Click on the tempalate
- Click on the Source
- Paste the following source code
- Click on save
- Goto your workspace
- Click on 'Manage Template'
- Click on 'Add Card'
- Enter the name as "ONTOLOGY_SUGGESTION_TEMPLATE"
- Enter the required details (Name, Category, code, version, etc.)
- Click on 'Next'
- Configure the template as per your requirement
- Click on Save
- Click on the tempalate
- Click on the Source
- Paste the following source code
- Click on save
- Goto your workspace
- Navigate to 'Manage AI'
- Click on 'Setup Knowledge graph'
- Select Product in Fulfillment section
- Click on 'Add'
- Enter all the required details (Action, Type, Name, Attribute group, Attribute, Fulfillment type, fulfillment, etc.)
- Click on the save icon.
- Based on your knowledge graph the bot will show the related utterance/query to the user so that the user can easily select the appropriate answer.
- Don’t repeat the labels across product, type, name, attribute and Action
- Don’t repeat synonyms, else that will introduce ambiguity
- Product Attribute Group is only used for the ease of grouping related attributes for defining fulfillments
- Default probing will start in the following ordering
- Product -> Action
- Product -> Action -> Types
- Product -> Action -> Types -> Names
- Product -> Action -> Attributes
- Product -> Action -> Types -> Attributes
- Product -> Action -> Types -> Names -> Attributes
- Goto your workspace
- Navigate to 'Manage AI'
- Click on 'Knowledge Graph'
- Click on 'Import'
- Click 'Yes' on the popup (Are you sure you want to overwrite?)
- Select xlsx file from you system (which should contains Product, Product Type, Product Name, Product Attribute group, Product Attribute, Fulfillment Type, Fulfillment, etc. columns)
- Goto your workspace
- Navigate to 'Manage AI'
- Click on 'Knowledge Graph'
- Click on 'Export'
- Goto your workspace
- Navigate to 'Manage AI'
- Click on 'Knowledge Graph'
- Click on Delete icon
- Or click on 'Delete all' (if you want to delete all the knowledge graph)
- Goto your workspace
- Navigate to 'Manage AI'
- Click on 'Knowledge Graph'
- Click on 'Please Load'
- Go to your workspace
- Go to Manage UseCase
- Click on Add(+) icon
- In Definition tab Enter the use case name, description and toggle on the AI Enabled
- Click on Next (It will give the suggestions related to the function name which you provided or it will go to the next tab if no suggestions available)
- Select from the given suggestions (If suggestions provided)
- In Data tab Add the utterances/data related to use case (Note: Minimum 5 utterances are required, but to get the better classification & result, Minimum 20 utterances are required. We can map the word with entity on typing the utterance)
- Go to your workspace
- Go to Manage UseCase
- Click on Add(+) icon
- In Definition tab Enter the use case name, description and toggle off the AI Enabled
- Click on Next
- In Data tab Add the utterances/data related to use case (Note: Minimum 5 utterances are required, but to get the better classification & result, Minimum 20 utterances are required.)
- Click on Next
- In Fulfillment tab Select the channel & Security
- Click on Save
- Go to your workspace
- Go to Manage Use Case
- Click on any use case You will be able to see below use case menu
- Manage
- Add
- Sync
- Import(csv)
- Export(csv)
- Import Zip
- Export Zip
- On click of Manage we can see distinct Supported Products from the available data set which we managed in functions.csv file

- Based on the product selection will show supported use case as shown \ Which is categorised based on function type mentioned in CSV and shows function name to select \ which contains 2 options as explained below and one display based on fulfilment type selection as show in image (Fullfillment)
- Once we are done with the selection we save the data in functionmstr table and show only supported functions as shown in Functions landing page
- Sync button in image can be used to get latest functions added in functions.csv after initial setup
- Before testing in the bot go to \ Configure Workspace > General Rules > search for text (Enable to support managing use cases for not supported products) and enable it by default it will be disabled. So that can test in bot for managed functions accordingly
- Below are the fields to be configured while creating a function record
- Once the record added we need to configure below fields:
- Expected entity
- Bot says : Expected questions from the bot to the user
- User says : The way user replies
- Webhooks
- Workflow
- Template
- Camel Route
- Java Bean
- Goto your workspace
- Navigate to 'Manage Functions'
- Click on 'Edit' icon of the function(for which you want to add camel route)
- Navigate to 'Integration'
- Choose 'Config' will show some existing routes (If exists)
- Choose the 'Domain' under Business Application
- Choose the 'Function'
- Click on 'Load' button (It will get the API & data and will map to the parameter that will be shown on clicking load)
- Under Client API Enter the 'route id' in 'API name' field
- Choose the specification type (HTTP specification, Swagger specification, SOAP specification, etc.)
- Configure the settings of the selected specification type (*URL, HTTP method, Content type, Request class, Response class, logging message, Next route, required actions,Header parameters, property parameters, etc.)
- Click on 'Load'
- Map the Business Application parameter with the Client API parameter as per your requirement
- Click on save
- Goto your workspace
- Click on 'Manage AI'
- Select 'Manage Rules'
- Click on 'Import'
- Select the file (JSON file)
- Goto your workspace
- Click on 'Manage AI'
- Select 'Manage Rules'
- Click on 'Import'
- Select the file (JSON file)
- Click on 'Yes' on popup. (Are you sure you want to overwrite?)
- Goto your workspace
- Click on 'Manage AI'
- Select 'Manage Rules'
- Click on 'Export'
- Chat History Configuration related rules
- Cache size for chat history, Pagination mandatory for honoring
- Chunk size for chat history calls
- Enable to activate chat history
- Enable to activate pagination of chat history
- Enable/ Disable inclusion of single init response in Chat History
- Extension of expiry timer for history cache in minutes
- Select the mode of chat history
- Self destruct timer for history cache in minutes
- Configuration related rules
- Audit Anonymous Users
- Channel Based Product Rules
- Db update for the only login
- Developer Mode
- Display Welcome Message
- Domain name of One Portal
- Enable IP address audit for request
- IP Address Header name
- Languages
- Limit Audit Size In Database
- Mail Account Password
- Mail Account Username
- Mail Server Host
- Mail Server Port
- Post Login Custom Header
- Remote IP Address Header name
- Reports Export Path
- Support post login action
- User Social Profile Refresh Frequency
- Elastic Search Configuration related rules
- Cluster support for Elastic Search
- Elastic Search URL
- Password For Elastic Search
- Username For Elastic Search
- Image related rules
- Image View Height
- Image View Width
- Multilingual Configuration related rules
- Enable/ Disable multilingual data management
- OAuth Config related rules
- Login form URL for IOT channels v1
- Success form URL for IOT channels v1
- OAuth2 Proxy Config related rules
- Morfeus Domain with Context
- Post Login Configuration related rules
- Select the mode to honor post login response with INIT response
- Select to display last login time information
- Security related rules
- Expiry for the partial states of a user's application (days)
- Login modes supported for the bot users
- AWS related rules
- Access Key ID
- AWS Credentials Source
- Bucket Name
- Bucket Region
- Expiration Offset
- Expiration Offset
- Kibana URL for viewing managed EC2 Instance logs
- Live Log URL for viewing managed EC2 Instance logs
- Morfeus API Key
- Morfeus API Key Secret
- Morfeus API Key Secret
- Secret Access Key
- Configuration related rules
- Secret Access Key
- Authentication Credentials Refresh Frequency
- Domain name of the platform
- Link Customer Social Accounts to Login Credentials
- Login Policy
- Max. requests per session
- Maximum Failed Attempts for 2FA Policy
- Maximum Message Length
- Morfeus Secret Key
- Social 1FA Authentication Mode
- Social 2FA Authentication Mode
- Social Authentication Policy
- The URL Path to be used in the Cookie
- User 2FA Pending Timeout (secs)
- User Session Timeout (secs)
- WebSdk Request timeout (secs)
- Chat Agent Provider
- Manual Chat Agent Provider API Key
- Mode of Manual Chat Agents request to morfeus
- Select the agent provider for manual chat fallback
- Fallback Manual Chat related rules
- Agent chat fallback URL
- Agent Chat License Key
- Agents client id
- Agents refresh token
- Download Transcript Feature
- Enable fallback on failed AI conversations
- Enable fallback on sentimental analysis
- Enable fallback on user prompt
- Enable/disable Customer Support Fallback
- Return to bot when manual chat is inactive for a given period of time in seconds
- Text inputted by user or agent to end chat
- Text seen by agent when invalid response is sent
- Text seen by agent when user closes the chat session
- Text seen by user when agent closes the chat session
- Text seen by user when starts the manual chat session
- Zendesk domain URL
- Configuration related rules
- Amazon Alexa is literal enabled
- Enable to pass OTP successfully while on-boarding
- Configuration related rules
- CRM Interaction Route
- CRM Interaction Route Get Status
- LMS Route
- Configuration related rules
- Enable bizapp response auditing
- Enable campaigns
- Enable NER call for FAQs for data enrichment
- Configuration
- PUSH BOT DOMAIN
- FCM SERVER API KEY
- iOS/Android package name for FCM
- Configuration related rules
- AWS KMS Key
- Oauth Encryption Type
- Configuration related rules
- Fulfillment webhook url
- Secret key the Fulfillment webhook url
- Triniti Cloud Basic Auth
- Triniti Cloud Domain Name
- Goto your workspace
- Click on 'Manage Rules'
- Click on 'Import'
- Click on 'Yes' on popup. (Are you sure you want to overwrite?)
- Goto your workspace
- Click on 'Manage Rules'
- Click on 'Export'
- Goto your workspace
- Click on 'Manage Products'
- Click on 'Messages'
- Click on 'Add'
- Enter all the required details (Name, Value, description, category, etc)
- Click on Add
- Goto your workspace
- Click on 'Manage Products'
- Click on 'Messages'
- Click on 'Import' or 'Import CSV'
- Select a JSON file or CSV file from your system
- Click 'Yes' on popup. (Are you sure you want to overwrite?)
- If you are uploading a CSV file it should contain Message Code, Message Category Message Value, Message Description, Customer Segment, Code, Language, etc columns.
- If you are uploading a JSON file, it should have all the configured messages in JSON format.
- Goto your workspace
- Click on 'Manage Products'
- Click on 'Messages'
- Click on 'Export' or 'Export CSV'
- Go to your workspace
- Click on 'Manage Templates'
- Click on 'Add Card'
- Enter the required details (Name, category, code, version, etc.)
- Click on 'Next'
- Configure your template
- Click on save
- Text Template: How to configure this template? Please refer Configure Text Template
- Card Template: How to configure this template? Please refer Configure Card Template
- Image Template: How to configure this template? Please refer Configure Image Template
- List Template: How to configure this template? Please refer Configure List Template
- Button Template: How to configure this template? Please refer Configure Button Template
- Carousel Template: How to configure this template? Please refer Configure Carousel Template
- Video Template: How to configure this template? Please refer Configure Video Template
- Custom Template: How to configure this template? Please refer Configure Custom Template
- Go to your workspace
- Click on 'Manage Templates'
- Click on 'Import'
- Click 'yes' on the popup (Are you sure you want to overwrite?)
- Select a JSON file from your system containing template configuration in JSON format.
- Go to your workspace
- Click on 'Manage Templates'
- Click on 'Export'
- Social Channels
- Application-based Channels
- IoT based Channels
- Goto your workspace
- Click on 'Manage Channels'
- Navigate to 'Enabled'
- Click on the menu icon (On the channel which you want to configure)
- Click on 'Edit Channel'
- General Configuration:
- Media:
- Emoji:
- Goto your workspace
- Click on 'Manage Channels'
- Navigate to 'Enabled'
- Click on the menu icon (On the channel which you want to configure)
- Click on 'Edit Channel'
- Navigate to 'Emojis'
- Click on 'Add'
- Enter all the required details(emojis(unicode characters), alias, description, intent(that you want to show on the particular emojis), etc.)
- Click on 'Save'
- Goto your workspace
- Click on 'Manage Channels'
- Navigate to 'Enabled'
- Click on the menu icon (On the channel which you want to configure)
- Click on 'Edit Channel'
- Navigate to 'Emojis'
- Click on 'Load Dedaults'
- Goto your workspace
- Click on 'Manage Channels'
- Navigate to 'Enabled'
- Click on the menu icon (On the channel which you want to configure)
- Click on 'Edit Channel'
- Navigate to 'Emojis'
- Click on Edit icon
- Select 'Data Category' as 'FAQ'
- Select 'FAQ Category'
- Select 'FAQ ID'
- Click on save
- Click on Edit icon
- Select 'Data Category' as 'Intent'
- Select 'Intent Category'
- Select 'Intent Name'
- Click on save
- Goto your workspace
- Click on 'Manage Channels'
- Navigate to 'Enabled'
- Click on the menu icon (On the channel which you want to configure)
- Click on 'Edit Channel'
- Navigate to 'Emojis'
- Click on 'Import'
- Select a CSV file (Which contains Aliases, Description, Emoji, Intent Name, etc. columns)
- Goto your workspace
- Click on 'Manage Channels'
- Navigate to 'Enabled'
- Click on the menu icon (On the channel which you want to configure)
- Click on 'Edit Channel'
- Navigate to 'Emojis'
Click on 'Export' (A CSV file will be downloaded with Aliases, Description, Emoji, Intent Name, etc. columns)
Stickers:
- Goto your workspace
- Click on 'Manage Channels'
- Navigate to 'Enabled'
- Click on the menu icon (On the channel which you want to configure)
- Click on 'Edit Channel'
- Navigate to 'Stickers'
- Click on 'Add'
- Enter all the required details(sticker, alias, description, intent(that you want to show on the particular sticker), etc.)
- Click on 'Save'
- OAuth Configuration:
- Goto your workspace
- Click on 'Manage Channels'
- Navigate to 'Social'
- Toggle on the 'Facebook'
- Click on 'Add'
- Goto your workspace
- Click on 'Manage Channels'
- Navigate to 'Social'
- Toggle on the 'Skype'
- Click on 'Add'
- Goto your workspace
- Click on 'Manage Channels'
- Navigate to 'Social'
- Toggle on the 'Slack'
- Click on 'Add'
- Goto your workspace
- Click on 'Manage Channels'
- Navigate to 'Social'
- Toggle on the 'Line'
- Click on 'Add'
- Goto your workspace
- Click on 'Manage Channels'
- Navigate to 'Social'
- Toggle on the 'Viber'
- Click on 'Add'
- Goto your workspace
- Click on 'Manage Channels'
- Navigate to 'Social'
- Toggle on the 'Webex'
- Click on 'Add'
- Goto your workspace
- Click on 'Manage Channels'
- Navigate to 'Social'
- Toggle on the 'Whatsapp by Gupshup'
- Click on 'Add'
- Goto your workspace
- Click on 'Manage Channels'
- Navigate to 'Social'
- Toggle on the 'Telegram'
- Click on 'Add'
- Goto your workspace
- Click on 'Manage Channels'
- Navigate to 'App'
- Toggle on the 'Webapp'
- Click on 'Add'
- Goto your workspace
- Click on 'Manage Channels'
- Navigate to 'App'
- Toggle on the 'Hybrid Android SDK'
- Click on 'Add'
- Goto your workspace
- Click on 'Manage Channels'
- Navigate to 'App'
- Toggle on the 'Hybrid Android SDK'
- Click on 'Add'
- Goto your workspace
- Click on 'Manage Channels'
- Navigate to 'App'
- Toggle on the 'iOS SDK'
- Click on 'Add'
- Goto your workspace
- Click on 'Manage Channels'
- Navigate to 'App'
- Toggle on the 'Hybrid iOS SDK'
- Click on 'Add'
- Goto your workspace
- Click on 'Manage Channels'
- Navigate to 'IoT'
- Toggle on the 'Amazon Alexa'
- Click on 'Add'
- Goto your workspace
- Click on 'Manage Channels'
- Navigate to 'IoT'
- Toggle on the 'Google Assistant'
- Click on 'Add'
- Goto your workspace
- Click on 'Manage Hooks'
- Click on 'Add'
- Enter all the required details
- Click on Add
- Below are the fields to be configured while creating a record
- If there are many intents and fulfillments it easy to configure using Function module has it provides consolidation of all its modules (messages, rules, templates and data) Configure Functions
- Goto your workspace
- Click on 'Manage Hooks'
- Click on delete icon of the particular hook(Which you want to delete)
- Goto your workspace
- Click on 'Manage Hooks'
- Click on 'Import'
- Click 'Yes' on the pop-up (Are you sure you want to overwrite?)
- Select a JSON file from your system which contains configuration of hooks in JSON format.
- Goto your workspace
- Click on 'Manage Hooks'
- Click on 'Export'
- Goto your workspace
- Click on 'Manage Campaign'
- Click on 'Add'
- Enter all the required details in 'Definition section'
- Enter all the required details in 'Rules section'
- Click on 'Add Campaign'
- Type of campaign: Campaign could be of two types -Internal -External
Start & End Date: This indicates the date from which campaign will start and campaign will end.
Supported Channels: Morfeus is a omnichannel platform, it supports a variety of channels. This toggle provides right to user to push campaign against various channels that are setup in particular workspace.
State- State defines wether a campaign is enabled or disabled.
Converstation Type- Conversation type for a campaign can be of Faq or Transaction. It defines when will the campaign be triggered, wether in Faqs or in Transaction.
Engagement Type - Engagement type decides wether the campaign to be fulfilled by a Hook or a Template.
Engagement Value - Depending on the engagement type you could select the engagemnet value for the campaing from the drop down. It could be either template value or Hook name.
Display when a Customer : This rules provides the ablity to display campaign to customer when customer either starts interacting with bot or when he has finised his interation.
Campaign managament consists of three set of rules
- Context Rules
- Historical Rules
- Derived Rules
- Goto your workspace
- Navigate to 'Manage Scheduler'
- Click on 'Schedule'
- Enter the all the required details(Name, trigger, Start At(date), Class, Description, Interval, etc.)
- Click on Schedule
- Name: The job name which you want to trigger.
- Class: A java class that will be triggered on the schedule. For that create a java class that extends our interface and implements the methods.
- Trigger: It will be a job id for that job you are scheduling.
- Description: The description of the Job.
- Starts At: The date on which you want your job to be triggered.
- Interval: For which interval you want to trigger the scheduled job. like every 2 days, weeks, months, etc. You can configure.
- Goto your workspace
- Navigate to 'Manage Scheduler'
- Select the Scheduler (Which you want to edit)
- Click on the 'Edit' icon under 'Action'
- Edit the scheduler
- Click on Schedule
- Goto your workspace
- Navigate to 'Manage Scheduler'
- Select the Scheduler (Which you want to stop)
- Click on the 'PAUSE' icon under 'Action'
- Click on 'Stop' (on popup)
- Goto your workspace
- Navigate to 'Manage Scheduler'
- Select the Scheduler (Which you want to delete)
- Click on the 'DELETE' icon under 'Action'
- Click on 'Delete' (on popup)
- Goto your workspace
- Click on 'Manage Products'
- Click on 'Functions'
- Click on 'Add Function'
- Enter all the required details
- Click on 'Create & Proceed'
- Configure your function (please refer Configure Function)
- Click on save
- Goto your workspace
- Click on 'Manage Products'
- Click on 'Rules'
- Configure the rules as per your requirements
- Click on Save
- Context Path
- Webview Domain
- Over All daily limit
- RB Configurations
- Encrypt User Password
- Exponent Value for password Encryption
- Modulus Value for password Encryption
- Daily Transaction Count
- Daily Transaction Limit (Amount)
- Maximum Transaction Limit (Amount)
- Minimum Interval between Transactions (mins)
- Minimum Transaction Limit (Amount)
- Biller Type
- Consumer Number Validation Pattern
- Maximum Consumer Reference Number Length
- Minimum Consumer Reference Number Length
- Daily Transaction Count
- Daily Transaction Limit (Amount)
- Maximum Transaction Limit (Amount)
- Minimum Interval between Transactions (mins)
- Minimum Transaction Limit (Amount)
- Daily Transaction Count
- Daily Transaction Limit (Amount)
- Maximum Transaction Limit (Amount)
- Minimum Transaction Limit (Amount)
- Daily DTH Transaction Limit ( Amount )
- Daily Transaction Limit ( Count )
- Minimum Interval between Transactions (mins)
- Minimum Transaction Limit (Amount)
- Per Transaction Limit (Amount)
- Daily Datacard Transaction Limit ( Count )
- Daily Transaction Limit ( Amount )
- Minimum Interval between Transactions (mins)
- Minimum Transaction Limit (Amount)
- Per Transaction Datacard Limit (Amount)
- Daily Transaction Limit ( Amount )
- Daily Transaction Limit ( Count )
- DATA CARD Number Validation Group
- DATA CARD Number Validation Pattern
- DTH Number Validation Group
- DTH Number Validation Pattern
- Minimum Interval between Transactions (mins)
- Minimum Transaction Limit (Amount)
- Mobile Number Validation Group
- Mobile Number Validation Pattern
- Per Transaction Limit (Amount)
- Amount validation for self bank credit card
- Time zone for NEFT timing
- Daily Transaction Count
- Daily Transaction Limit (Amount)
- Daily Transaction Limit (Amount) for IMPS
- IMPS Maximum Transaction Limit (Amount)
- IMPS Minimum Transaction Limit (Amount)
- Minimum Interval between Transactions (mins)
- NEFT Maximum Transaction Limit (Amount)
- NEFT Minimum Transaction Limit (Amount)
- RTGS Maximum Transaction Limit (Amount)
- RTGS Minimum Transaction Limit (Amount)
- Daily Transaction Count
- Daily Transaction Limit (Amount)
- Maximum Transaction Limit (Amount)
- Minimum Interval between Transactions (mins)
- Minimum Transaction Limit (Amount)
- Per Transaction Max Amount
- Per Transaction Min Amount
- Transaction amount per day limit
- Transaction count per day limit
- Transaction frequency
- Per Transaction Max Amount
- Per Transaction Min Amount
- Transaction amount per day limit
- Transaction count per day limit
- Transaction frequency
- Daily Transaction Count
- Daily Transaction Limit (Amount)
- Maximum Transaction Limit (Amount)
- Minimum Interval between Transactions (mins)
- Minimum Transaction Limit (Amount)
- NEFT Saturday Transaction Timings
- NEFT Transaction Timings from Monday to Friday
- RTGS Saturday Transaction Timings
- RTGS Transaction Timings from Monday to Friday
- Per Transaction Max Amount
- Per Transaction Min Amount
- Transaction amount per day limit
- Transaction count per day limit
- Transaction frequency
- Alexa Push Notification title
- Alexa Push Notification title
- Alexa Repeat
- Goto your workspace
- Click on 'Manage Products'
- Click on 'Products'
- Click on 'Add Product'
- Enter all the required details
- Click on Add
- Goto your workspace
- Click on 'Manage Products'
- Click on 'Billing'
- Add biller category or choose from an existing one
- Click on 'Add Biller'
- Enter all the required details (Name, Biller Id, Biller Presence, Late Payment, Customer surcharge, Partial pay, etc.)
- Click on Add
- Goto your workspace
- Click on 'Manage Products'
- Click on 'Recharge'
- Click on 'Add Operator'
- Enter all the required details
- Click on Add
- Goto your workspace
- Click on 'Manage Products'
- Click on 'IFSC Codes'
- Click on 'Add IFSC'
- Enter all the required details
- Click on Add
- Goto your workspace
- Click on 'Manage Products'
- Click on 'Holiday'
- Click on 'Add Holiday'
- Enter all the required details (Holiday date, transaction type, start time, end time, etc.)
- Click on Add
- Goto your workspace
- Click on 'Manage Products'
- Click on 'Customer Segments'
- Click on 'Add Customer Segment'
- Enter all the required details
- Click on Add
- Goto your workspace
- Click on 'Exigency Management'
- Click on 'Add'
- Enter all the required details (Start time, End Time, Notification, Notify by, Title, message, notify channels, etc.)
- Click on Add.
- Goto your workspace
- Enable/Disable bot under 'Configure Workspace' section
- Registered - Total no. of registered users from inception to till today. If data range is selected, then it is from inception to To-Date.
- Anonymous - Total no. of anonymous users from inception to till today. If data range is selected, then it is from inception to To-Date.
- Active - No. of unique registered user who had interacted with the VA within the filtered date range is considered active
- Returning - No. of unique registered user who had registered in the system earlier to filter date range but interacted with the VA within the filter date range is considered Returning
- Logged in - No. of unique registered logged-in user who had interacted with the VA within the filter date range is considered Logged-in
- Launched - No. of users who just launched the VA (includes post login)
- Interacted - No. of users who just launched & sent messages in VA (includes post login)
- Launched - No. of users who just launched the VA (includes pre login)
- Interacted - No. of users who just launched & sent messages in VA (includes pre login)
- Online - Total number of live chat redirection to agent and connection to live agent established
- Offline - Total number of live chat redirection offline i.e. redirection to live agent triggered but connection to live agent was not established, agent is offline.
- How users interaction and AI is performing
- No. of logins
- New Users
- AI Accuracy
- Users(till date)
- Registered users
- Unique users
- How are the conversations performing?
- Messages
- Sessions
- Transaction Amount
- Transaction count
- Service Requests
- Enquiry
- Origination
- Avg. Session Time
- Channels
- Conversations categorised
- How are the users interacting?
- Feedback
- Sentiment
- LiveChat Redirections
- Anonymous users
- Goto your workspace
- Navigate to 'Analyse'
- Click on 'Users'
- Registered users
- Goto your workspace
- Navigate to 'Analyse'
- Click on 'Users'
- Select 'Registered in the dropdown'
- We can search with customer ID
- Registration Date - Date filter based on user registration date
- Last Access Date - Date filter based on user last access date
- Active Date - Filter all user active in given date range
- Login Date - Filter all user logged in given date range
- Email Id - Filter based on email Id
- Customer Id - Filter based on customer id
- First Name - Filter user based on their first name
- Last Name - Filter user based on their last name
- Mobile Number - Filter based on mobile number
- User Type - Filter user based on type i.e. registered or anonymous
- Channels - Filter user based on channels
- Status - Filters user based on their status like active, blocked, inactive, unblocked.
- Not Logged In Date - Filters user who didn't login in a given date range.
- Onboard Date - Date filter based on user onboarding date
- Overview
- Overall Message - Show message i.e messages for current date range/ total messages
- Accuracy - Overall accuracy for all messages from AI
- Avg Session - Avg session time spent by the user
- Login - Show login i.e login for current date range/ total login
- Transaction - Transaction done by customer i.e. total, success, failed
- Transaction Amount - Transaction amount for the customers
- Chat - Here we can see all the interactions happened between user and chat bot.
- Filters:
- Date
- Channel
- Export chat
- Reset - Resets applied filters
- Transaction - Lists down all the transactions perfromed by user.
- Filters:
- Date
- Channel
- Category - Transaction category
- Service Request - Lists down all the service requests raised by users.
- Filters:
- Date
- Channel
- Category - Service Request category
Origination
- Filters:
- Date
- Channel
- Category - Origination category
Operation - Here you can perform operation like block/unblock user, block/unblock channels
- Goto your workspace
- Navigate to 'Analyse'
- Click on 'Transactions'
- Transaction Category - Search transaction with different transaction category
- Search by transaction Id
- Language - Search transaction with language
- Customer segment - Search transaction with customer segment
- Customer Id - Search transaction with customer id
- EmailId - Search transaction by user email id
- Payment RefNo - Search transaction with payment reference number.
- Date - Search with transaction date.
- Mobile Number - Search transaction with mobile number
- Channels - Search transaction with channels
- Status - Search transaction with status i.e. success, pending failed etc.
- Goto your workspace
- Navigate to 'Analyse'
- Click on 'Service Requests'
- Service Request Category - Search transaction with different transaction category
- Customer Id - Search Service Request with customer id
- Language - Search Service Request with language
- Customer segment - Search Service Request with customer segment
- EmailId - Search Service Request by user email id
- Reference No - Search Service Request with payment reference number.
- Request Date - Search with Service Request date.
- Channels - Search Service Request with channels
- Status - Search Service Request with status i.e. success, pending failed etc.
- Goto your workspace
- Navigate to 'Analyse'
- Click on 'Origination'
- Goto your workspace
- Navigate to 'Analyse'
- Click on 'AI'
- Add Functionality using Manage Function
- Create Functionality(Use case) in manage hooks using workflow editor or can add function using manage functions, make sure service id is same as function code
- Can choose category we need to analyse, in above (Home Page) apart from highlighted one, rest were static(Pre defined and managed in json file) for RB supported existing Functionalities.
- If u add new functionality can search based on function type(Transaction/Service Request)
- Now can click on Sub type u’ll be landed with Functionality Selection page as shown below
 Functionality Selection
 - Here you can choose functionality required to analyse and click on view to get functionality journey as shown
 Functionality Journey
 - Functionality journey provides us following data, with these data will help us to identify how we can improve conversation more
- How exactly user went with functionality
- How many times particular step get executed
- Who(User) and all were visited that step with time stamp on click of i as shown below
 Customer Info Tab
- Channels
- Language
- Date
- Local deployments (On-Prem)
- Cloud Deployments
- Manager should be configured with the Masters configurations (Triniti, Spotter master server configuration)
- Train AI data from admin & loading is supported by 2 ways (Automatic & Manual)
- Automatic loading: Successful train will automatically trigger a load
- Manual loading: Select Data Id in Deploy → Deployments → Select Data Id → Deploy Button
- If loading is not complete with 10-15 minutes, then there is a possible issue
- Admin didn't receive any callback from manager about the loading
- Possible network error (Manager ↔ Process or Admin ↔ Manager)
- Clear the Redis key (Key: ONPREM:
retry loading
- Manual intervention needed when there is connectivity issues between admin and worker processes
- Manual intervention needed when the process struck in loading state for more that 10 minutes (especially Triniti)
- In above cases, connect to Redis temporary store and delete the key (ONPREM:
) to reload the process - Select Workspace, Navigate to Configure Workspace → Manage Rules
- Navigate to Security tab and set Access Key ID & Secret Access Key
- Navigate to Configure Workspace and set preferred Language and Country
- Click Save
- Select Workspace, Navigate to Deploy → Infrastructure-> click Morfeus tab
- click Add Morfeus Instance
- Select Base OS, Server Type and JAR Artifactory folder path
- The content in the JAR Artifactory Path will be loaded in the class path of the Application container (Tomcat/JBoss)
- Upload the morfeuswebsdk and web view wars in the artifactory URL
- All integration jars will be placed in the container's class path and WARs will be uploaded in the deployment path (ex: Tomcat - webapps / JBoss - deployment)
- All other files (Ex: .properties, .json, .txt etc will be placed in /opt/deploy/properties folder in the container
- ApiKey for the Morfeus container need to be updated in js/index.js of the Morfeuswebsdk.war
- For xAPIKey reference check Customisable features in Web-sdk.
- Select Workspace, Navigate to Deploy → Infrastructure-> click Triniti tab
- click Add Triniti Instance
- Select Base OS, Data ID and Language
- Data Id will be the reference of the training done through AI Ops
- Select Workspace, Navigate to Deploy → Infrastructure
- Select desired server Morfeus tab (or) Triniti tab to update the Time-To-Live
- Default Time-To-Live for any Instance created will be 120 Minutes (2 Hours)
- Maximum Time-To-Live can be 24 hours (1440 Mins)
- Triniti trained data models can be updated by selecting the new Data ID while updating instance
- click Update
- Select Workspace, Navigate to Deploy → Infrastructure
- Navigate to the instance Morfeus or Triniti
- Click Delete Instance
- Select Workspace, Navigate to Deploy → Infrastructure
- Navigate to the instance Morfeus or Triniti
- Click Restart Instance
- A workspace can have only a single type of Instance (Either Triniti / CognitiveQnA / Both)
- Default Time-To-Live for any Instance created will be 120 Minutes (2 Hours)
- The Instance will get deactivated after 2 hours of non usage
- To start up the instance go to Deploy → Infrastructure section - Start Morfeus / Triniti
- Kibana URL provided in the instances information used for viewing log information
- Log Time period can be changed in Kibana UI for desired log time range
- Contact Admin in case of any issues when creating instances
- Goto your workspace
- Navigate to 'Deploy'
- Click on 'Deployment'
- Select the data Id for which you want to train
- Click on 'Train'
- Click on 'Yes' on the popup (Do you want to train your AI Model?)
- Goto your workspace
- Navigate to 'Deploy'
- Click on 'Deployment'
- Select the data Id for which you want to stop the train
- Click on Stop train
- Goto your workspace
- Navigate to 'Deploy'
- Click on 'Deployment'
- Click on 'Import'
- Select a ZIP file from your system (Which contains FAQs, smalltalks, spellcheckers, dialogs, etc.)
- Goto your workspace
- Navigate to 'Deploy'
- Click on 'Deployment'
- Select the data Id for which you want to export the data
- Click on 'Export ZIP'
- Select 'Generated'
- Select 'Version'
- Click on 'Export'
- smalltalk - Manage ai → Setup SmallTalk
- faqs - manager ai → setup faqs
- spellcheck - manage ai → setup spellchecker
- primary classifier - manage products → functions → select any one function → navigate to DATA
- entities - manage ai → setup entites.
- Error message will be shown if the wrong manager url is configured.
- When the task api is not called after creation of workspace and when we click on training.
- when we click on train without generating the data
- If minimum 15 faqs are not present then generation will fail with respective error message
- If any small talk is added, then minimum 5 must be present or else no small talk must be there.
- Incase the translation if faqs or smalltalk fail when data generation is in progress, then generation will stop.
- If native language rule is enabled and there is no data for non-english language then warning will be displayed to disable it, but the generation will proceed.
- If spellchecker data is missing then generation will fail.
- if dictionary type entity is missing, then generation will fail with error message.
- when no intents are not present, then generation will fail giving the respective message. Here minimum 2 intents are required.
- If no faq are present, then minimum 15 faqs required message is shown and generation is failed.
- if any small talk is added, then minimum 5 must be present or else no small talk must be there.
- Incase the translation if faqs or smalltalk fail when data generation is in progress, then generation will stop.
- If native language rule is enabled and there is no data for non-english language then warning will be displayed to disable it, but the generation will proceed.
- This change is available for rbfaq workspace type only, since modular training is present for it only.
- There are five modules whose recent update will be kept in check, those are :- smalltalk, faqs, ner, primary classifier and spellchecker.
- Once on click of Train, if there is any changes done in the above module then the respective screen will be shown to user to select the training of the modules.
- Select your workspace and Click on Deploy -> Click AI Ops(tab)
- Click Import (*Select the Zip file to be imported*)
- Select your workspace and Click on Deploy -> Click AI Ops(tab)
- Click Export
- Primary Classifier
- CognitiveQnA (FAQs)
- NLP
- Pre Classification
- Rule Validators
- Small Talk
- Spell Checker
- Dialog (Conversational Processor)
- Enable/Disable the native language support rule on clicking on Manage AI -> Manage AI Rules.
- Enable the rule value for sniper version 4.01 and above.
- If the rule value is enabled the data generation files will contain respective language data and the same will be send to train.
- The data generated files are suffixed with respective LANG code.
- Select your workspace and Click on Deploy -> Click AI Ops(tab)
- Click Train
- Select Generated Version
- Select type of trainFull/Modular/Custom
- If Modular/Custom selected, then select the appropriate modules to train
- Select AI Version to train
- Click Train
- Select your workspace and Click on Manage AI -> Click Manage Rules - Git(Tab)
- Please configure the below rules for Git Sync
- Navigate to Manage AI -> Click Data Sync button.
- Select your workspace and Click on Manage AI -> Click Manage Rules -> Git(tab)
- Please configure the below rules for Zip Sync
- Navigate to Manage AI -> Click Data Sync button.
- Select your workspace and Click on Deploy -> Click AI Ops(tab)
- Click Clear Cache
- Select your workspace and Click on Deploy -> Click AI Ops(tab)
- Click Reload Cache
- Select your workspace and Click on Deploy -> Click AI Ops(tab)
- Click Quick Train (CognitiveQnA)
- Select your workspace and Click on Deploy -> Click AI Ops(tab)
- Click In-Memory Classifier
- Goto your Workflow
- Navigate to 'Deploy'
- Click on 'AI Configuration'
- Click on 'Bot Ops'
- Click on Import on 'Messages' card Select a JSON file or CSV file from your system
- If you are uploading a CSV file it should contain Message Code, Message Category Message Value, Message Description, Customer Segment, Code, Language, etc columns.
- If you are uploading a JSON file, it should have all the configured messages in JSON format.
- Goto your Workflow
- Navigate to 'Deploy'
- Click on 'AI Configuration'
- Click on 'Bot Ops'
- Click on Export on 'Messages' card
- Navigate to 'Deploy'
- Click on 'AI Configuration'
- Click on 'Bot Ops'
- Click on Import on 'Templates' card
- Select a JSON file from your system containing template configuration in JSON format.
- Navigate to 'Deploy'
- Click on 'AI Configuration'
- Click on 'Bot Ops'
- Click on Export on 'Templates' card
- Goto your Workflow
- Navigate to 'Deploy'
- Click on 'AI Configuration'
- Click on 'Bot Ops'
- Click on Import on 'Hooks' card
- Select a JSON file from your system which contains the configuration of hooks in JSON format.
- Goto your Workflow
- Navigate to 'Deploy'
- Click on 'AI Configuration'
- Click on 'Bot Ops'
- Click on Export on 'Messages' card
- Goto your Workflow
- Navigate to 'Deploy'
- Click on 'AI Configuration'
- Click on 'Bot Ops'
- Click on Import on 'Workflow' card
- Select a JSON file from your system which contains configuration of workflows in JSON format.
- Goto your Workflow
- Navigate to 'Deploy'
- Click on 'AI Configuration'
- Click on 'Bot Ops'
- Click on Export on 'Workflow' card
- Goto your Workflow
- Navigate to 'Deploy'
- Click on 'AI Configuration'
- Click on 'Bot Ops'
- Click on Migrate on 'Selflearning Index' card
- Goto your Workflow
- Navigate to 'Deploy'
- Click on 'AI Configuration'
- Click on 'Bot Ops'
- Click on Create on 'Data Lake Indices' card
Note: Keyphrases can be added for all the supported language data. For eg: Arabic keyphrases.
Actions
Any action present in the user's query can be added as actions. Example: for a FAQ 'How to open an account', the action in this is 'Open' and the same can be added in Actions. Other features set in this page like Add, Update, Import and Export operations will remain same as described under the Keyphrases module.
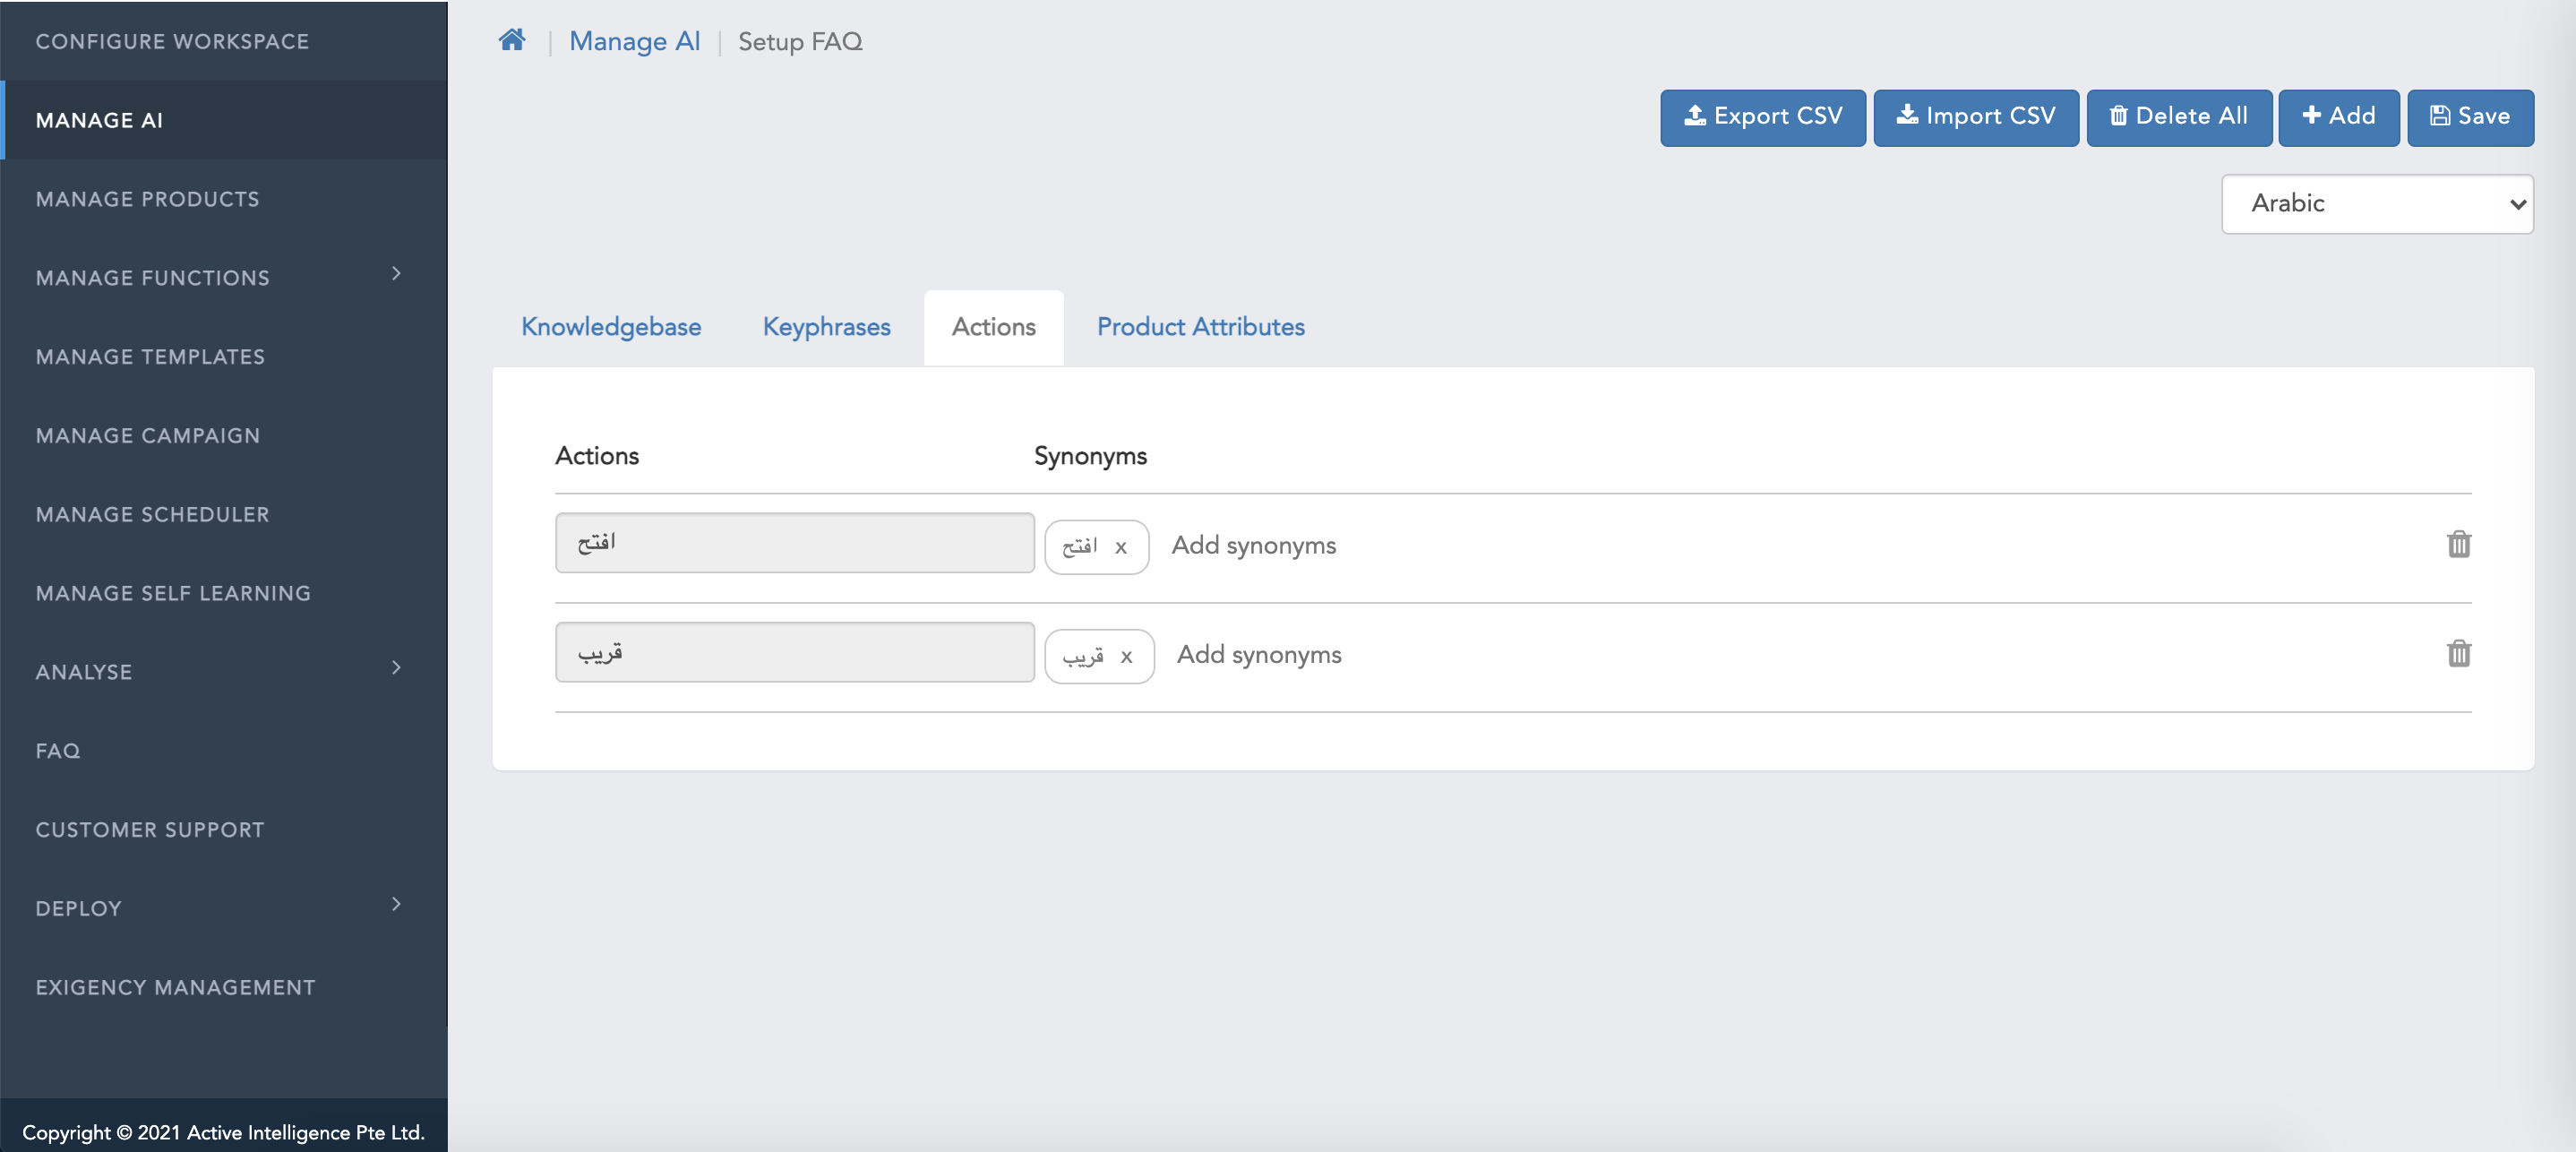
Note: Actions can be added for all the supported language data. For eg: English Actions -
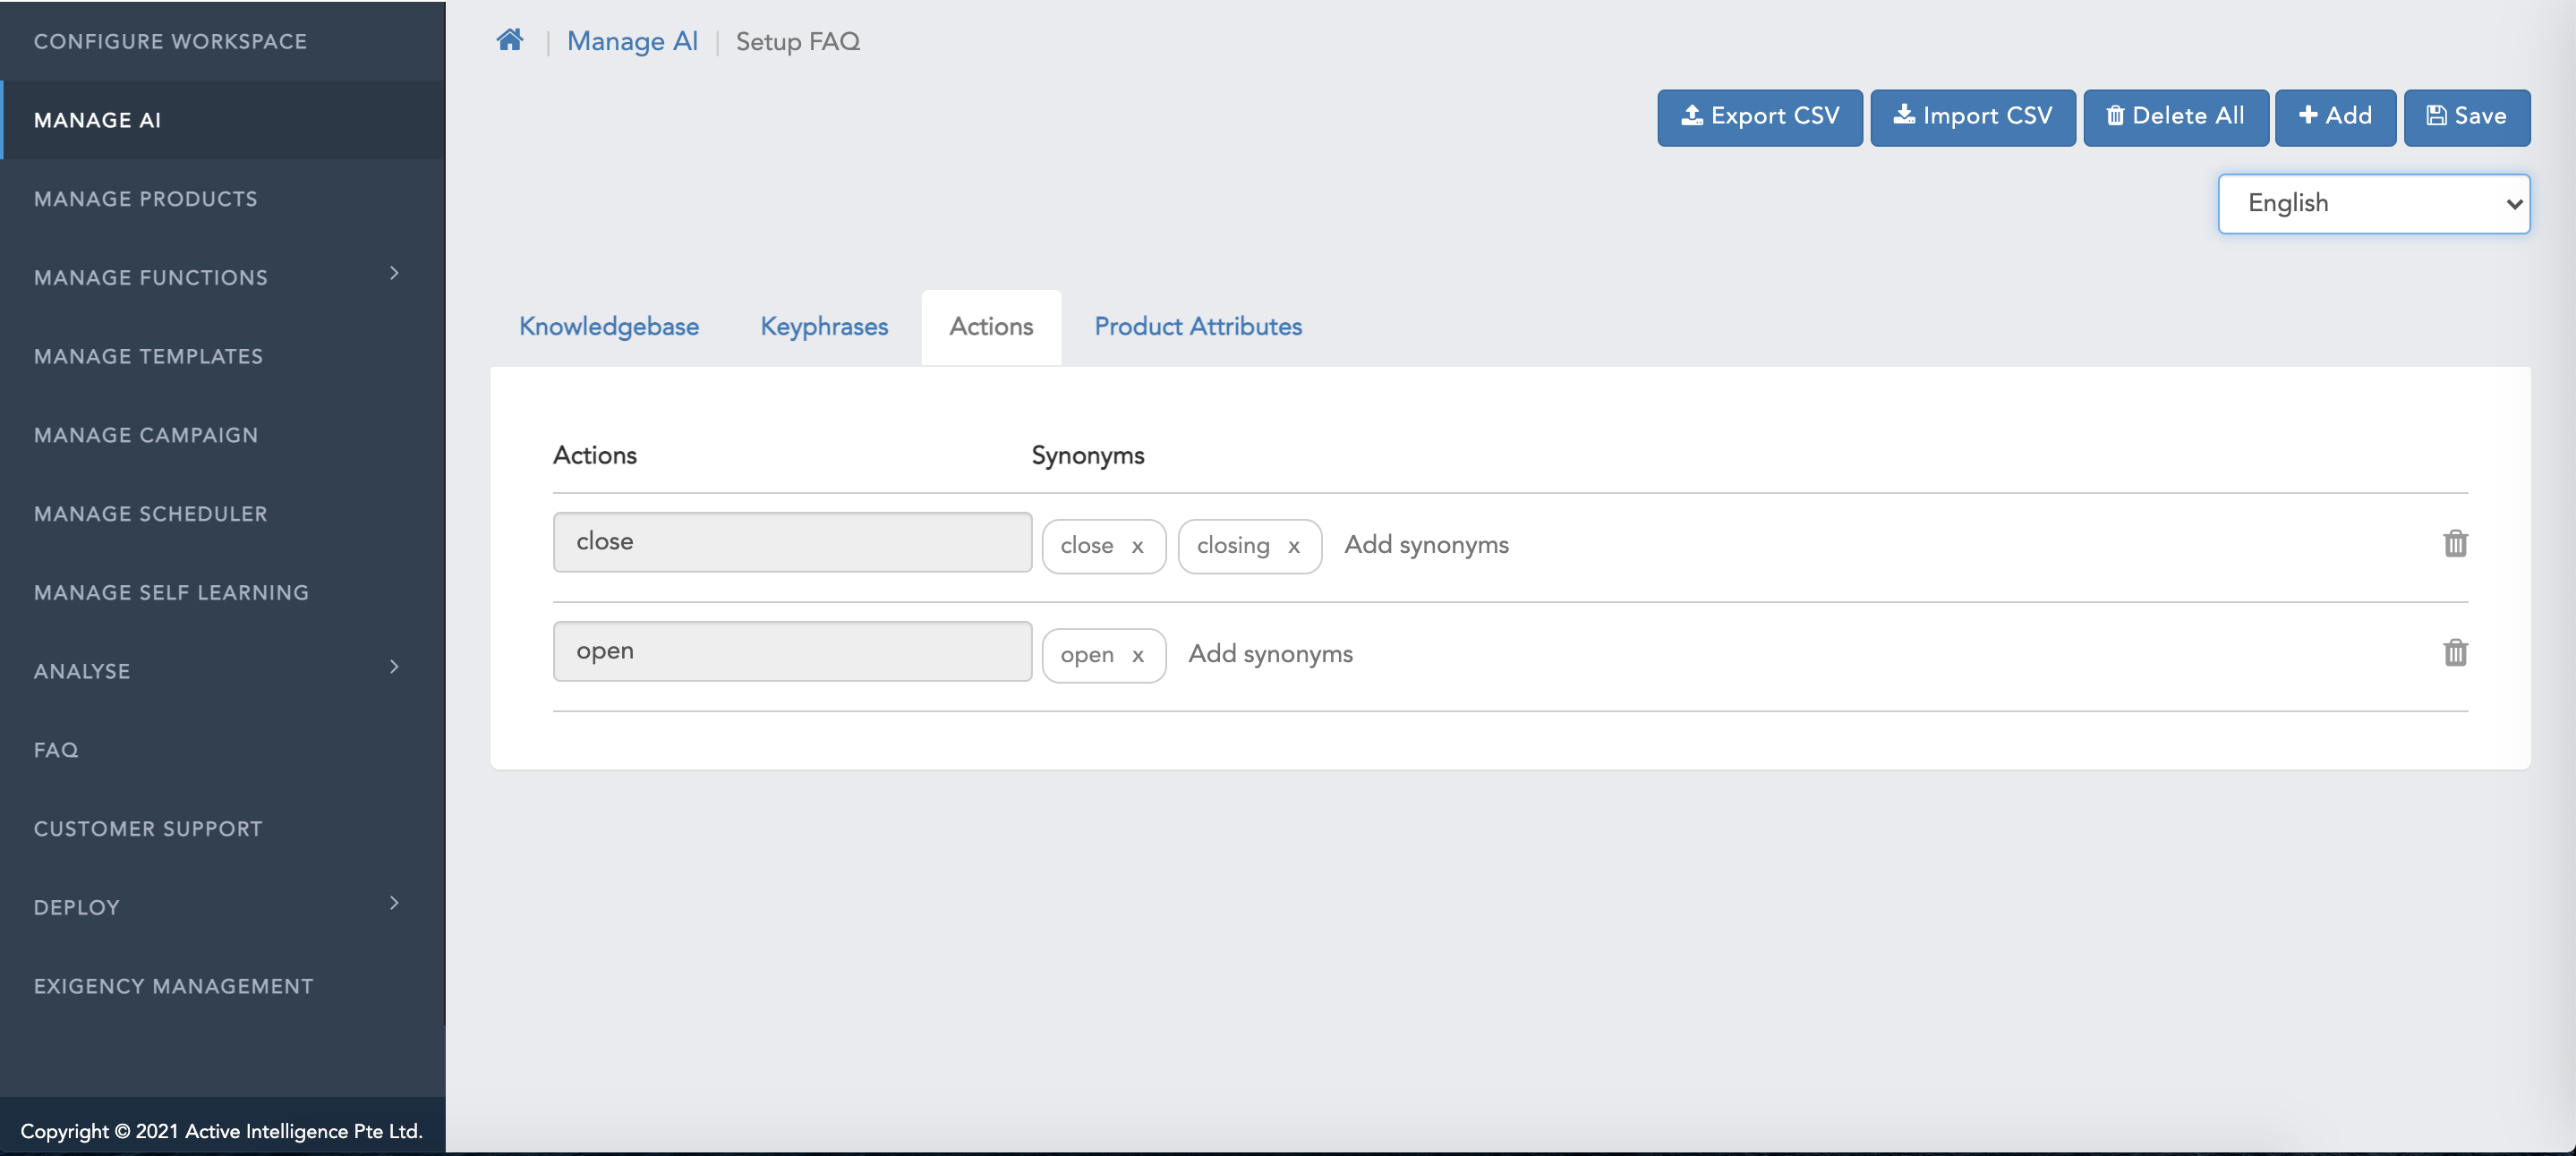
Product Attributes
Product attribute is a word that can be present in the user's query to categorise the attributes of a product. Example “How to pay bill of visa credit card” can have a “visa” as a product attribute. Other features set in this page like Add, Update, Import and Export operations will remain same as described under the Keyphrases module.
Note: Product Attributes can be added for all the supported language data. For eg: Arabic Attributes -
Grid FAQs
Grid faqs help to add more product-related answers to the faqs. It helps to add more dimension by adding an answer to the generic faq response with details of products having the latest updates.
You can manage Grid FAQs by following these steps:
In the opened screen there are Add, Edit, Search, Export & Import options available. The data will be shown based on the selected products.

There are certain rules to be followed while adding, updating, or importing the data in a grid as follows:
Rules:
Add Grid Data:
You can add grid data manually by following these steps:

Import Grid Data:
You can import the Grid FAQ CSV file, the file should contain the following columns:
To import Grid data you can follow these steps:
Export Grid Data:
You can export the Grid data file by following these steps:

Link Grid Data to a FAQ:
You can link the added/imported grid data to your existing/new FAQs to get the response based on grid data by following these steps:
Note:
Edit Grid Data to a FAQ:
To edit the linked Grid Data in a FAQ you can refer to these steps:

Unlink Grid Data from a FAQ:
If you want to remove linked grid data from the FAQ, so you can unlink those grid data by following these steps:

Handling RTL
Many human languages support the Right to the left layout of the writing of the sentences, so as we are supporting multi-lingual bots we have provision for RTL layout for those kinds of languages (Eg; Urdu, Arabic, Persian, etc.)
The RTL is handled in the various places on the bot as follows:
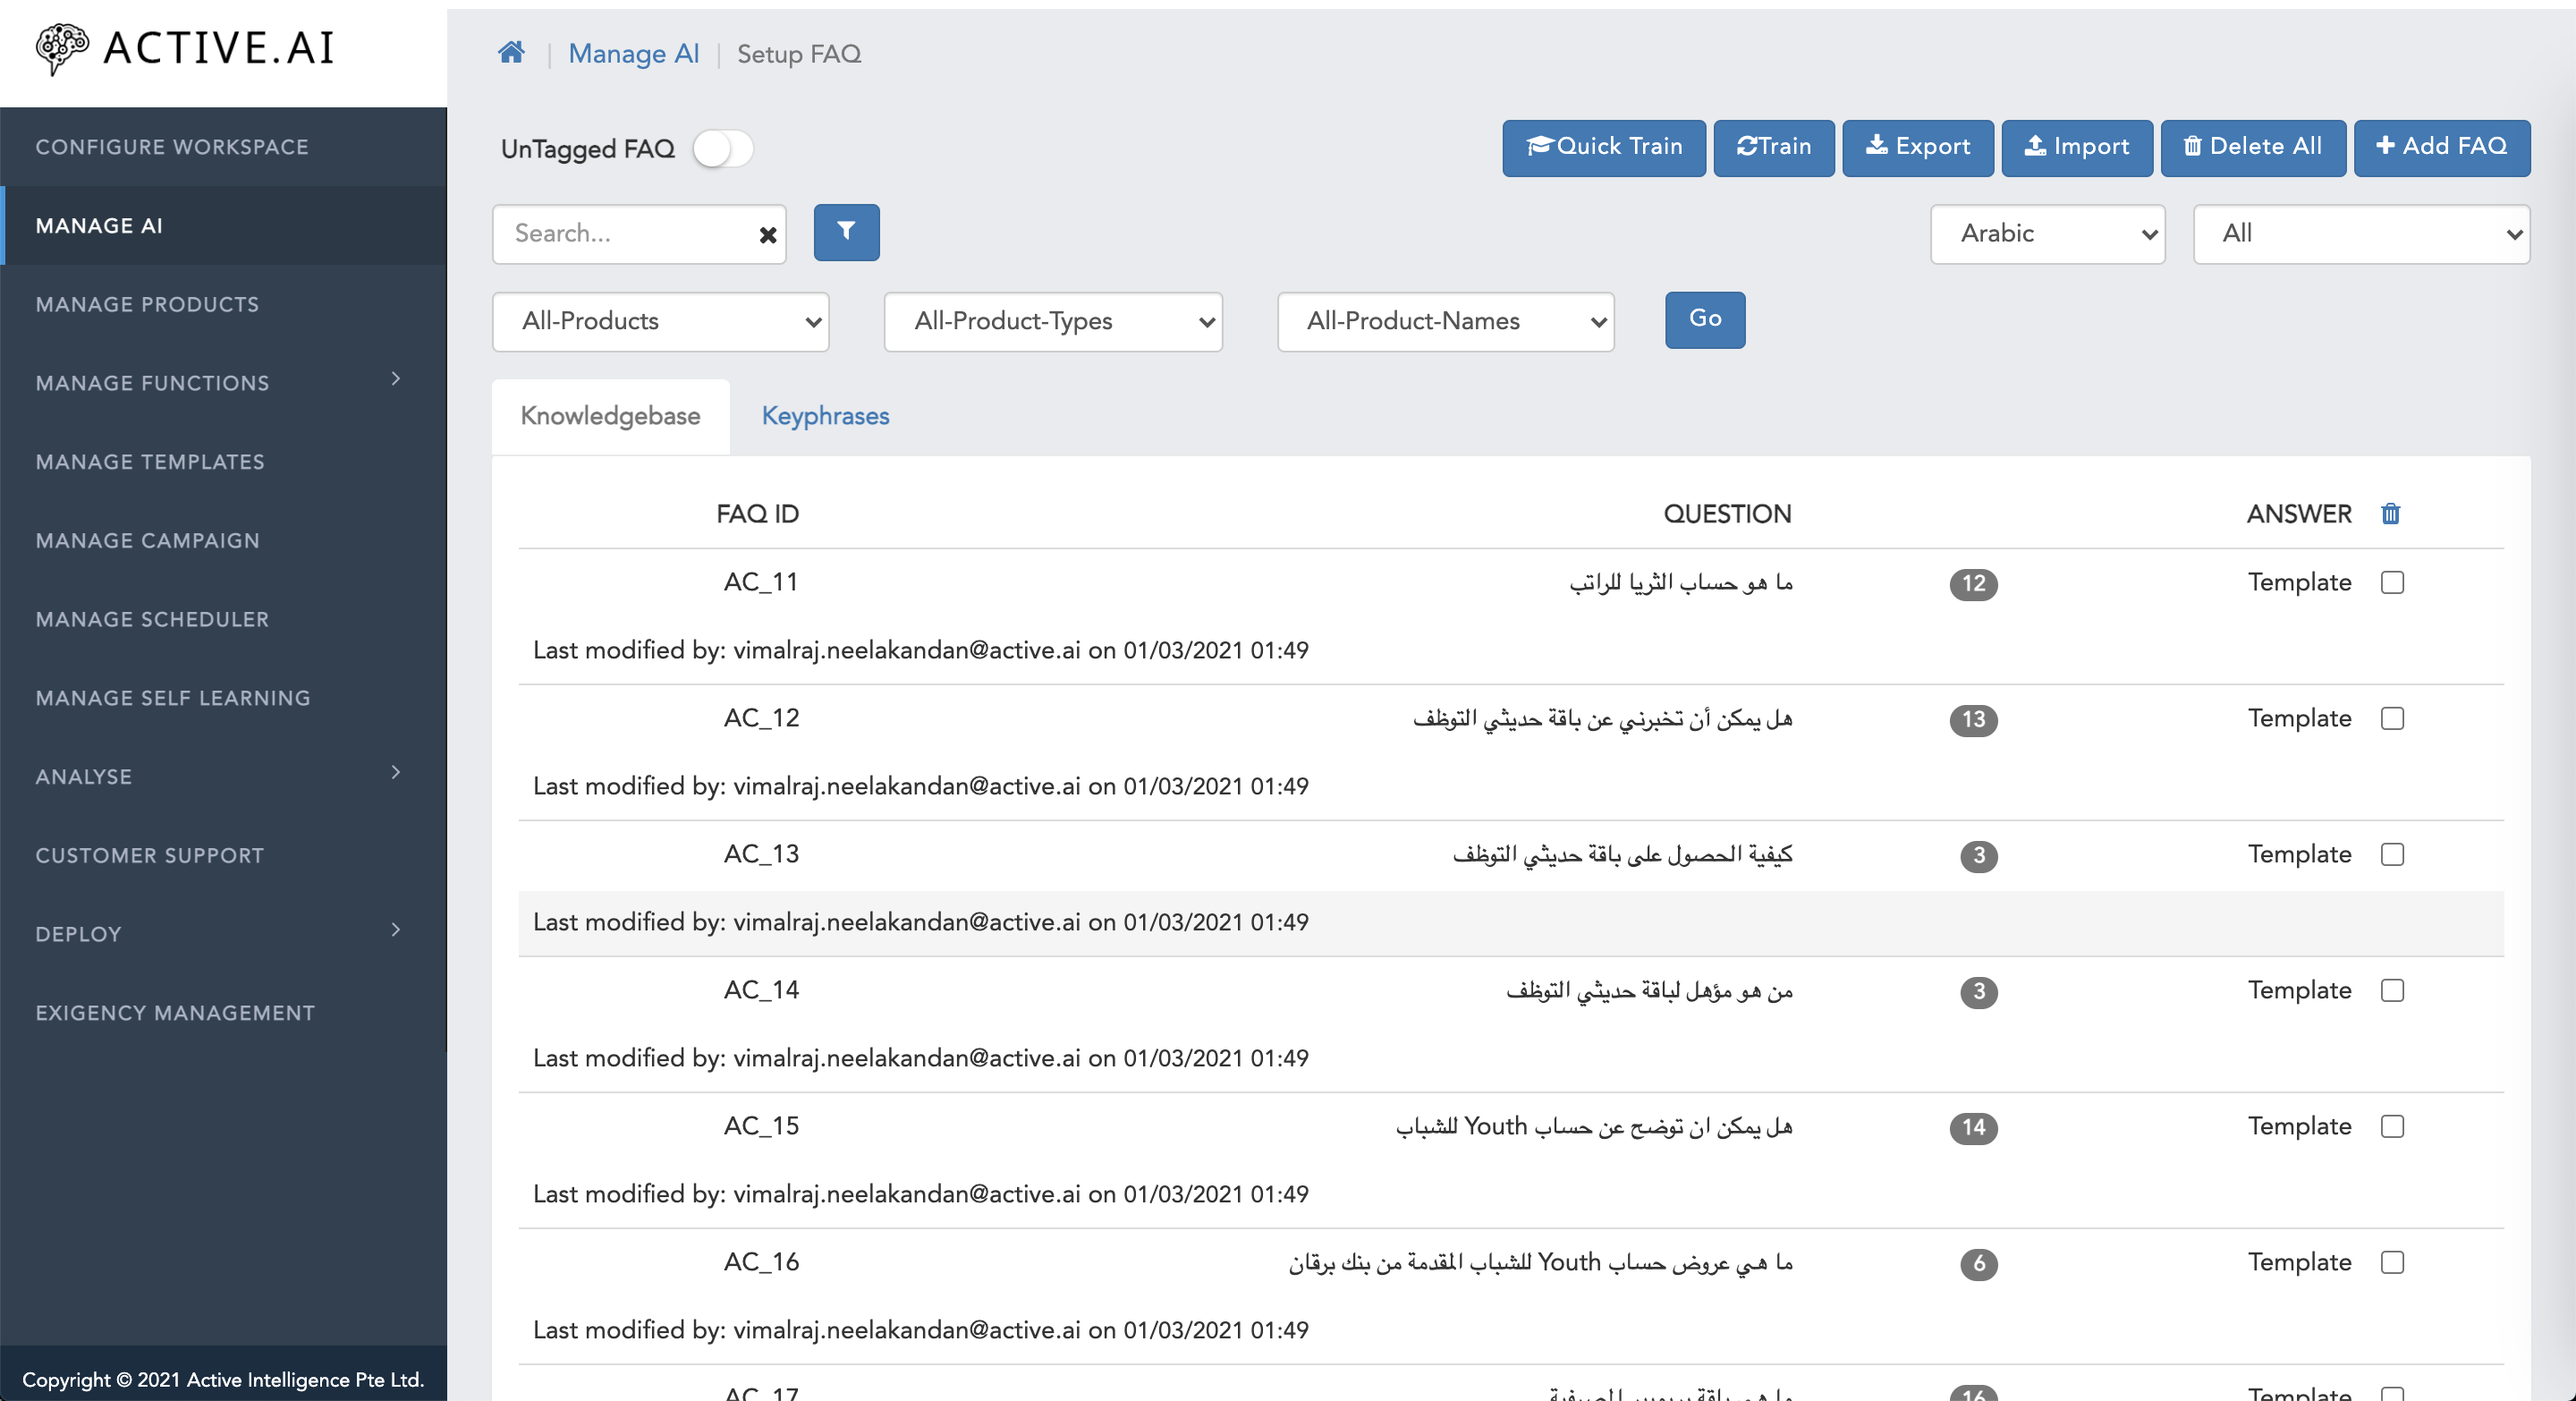
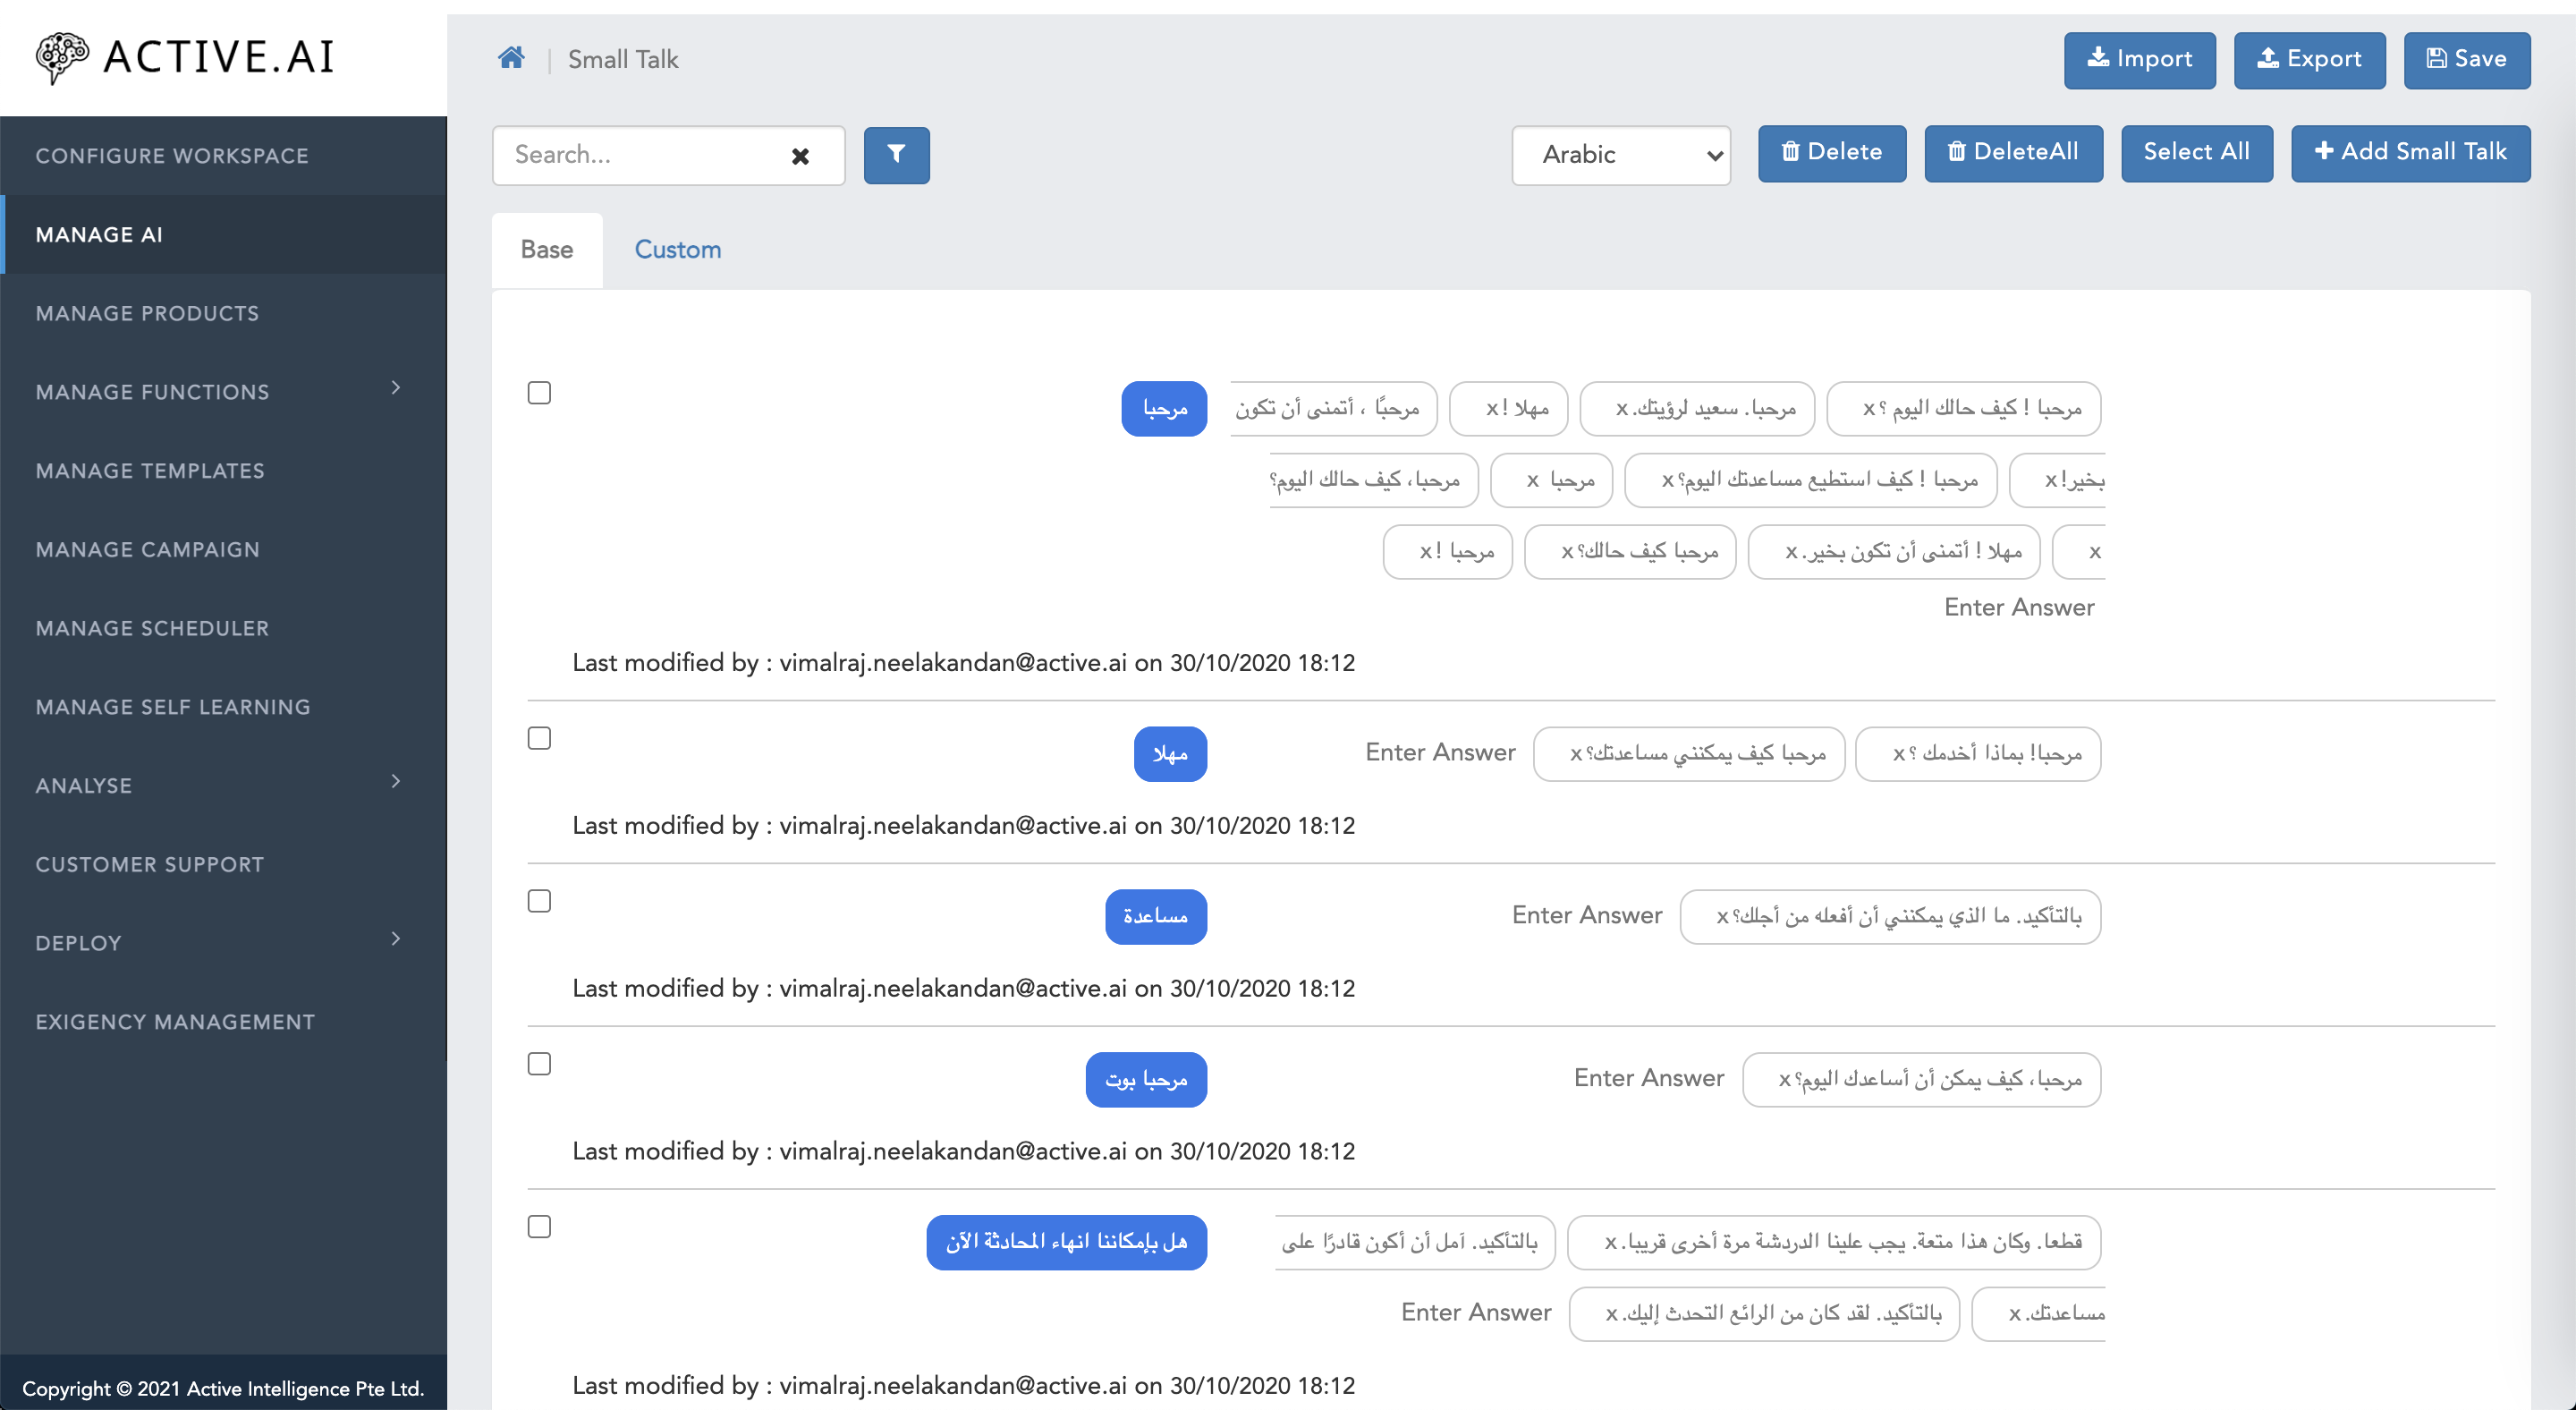
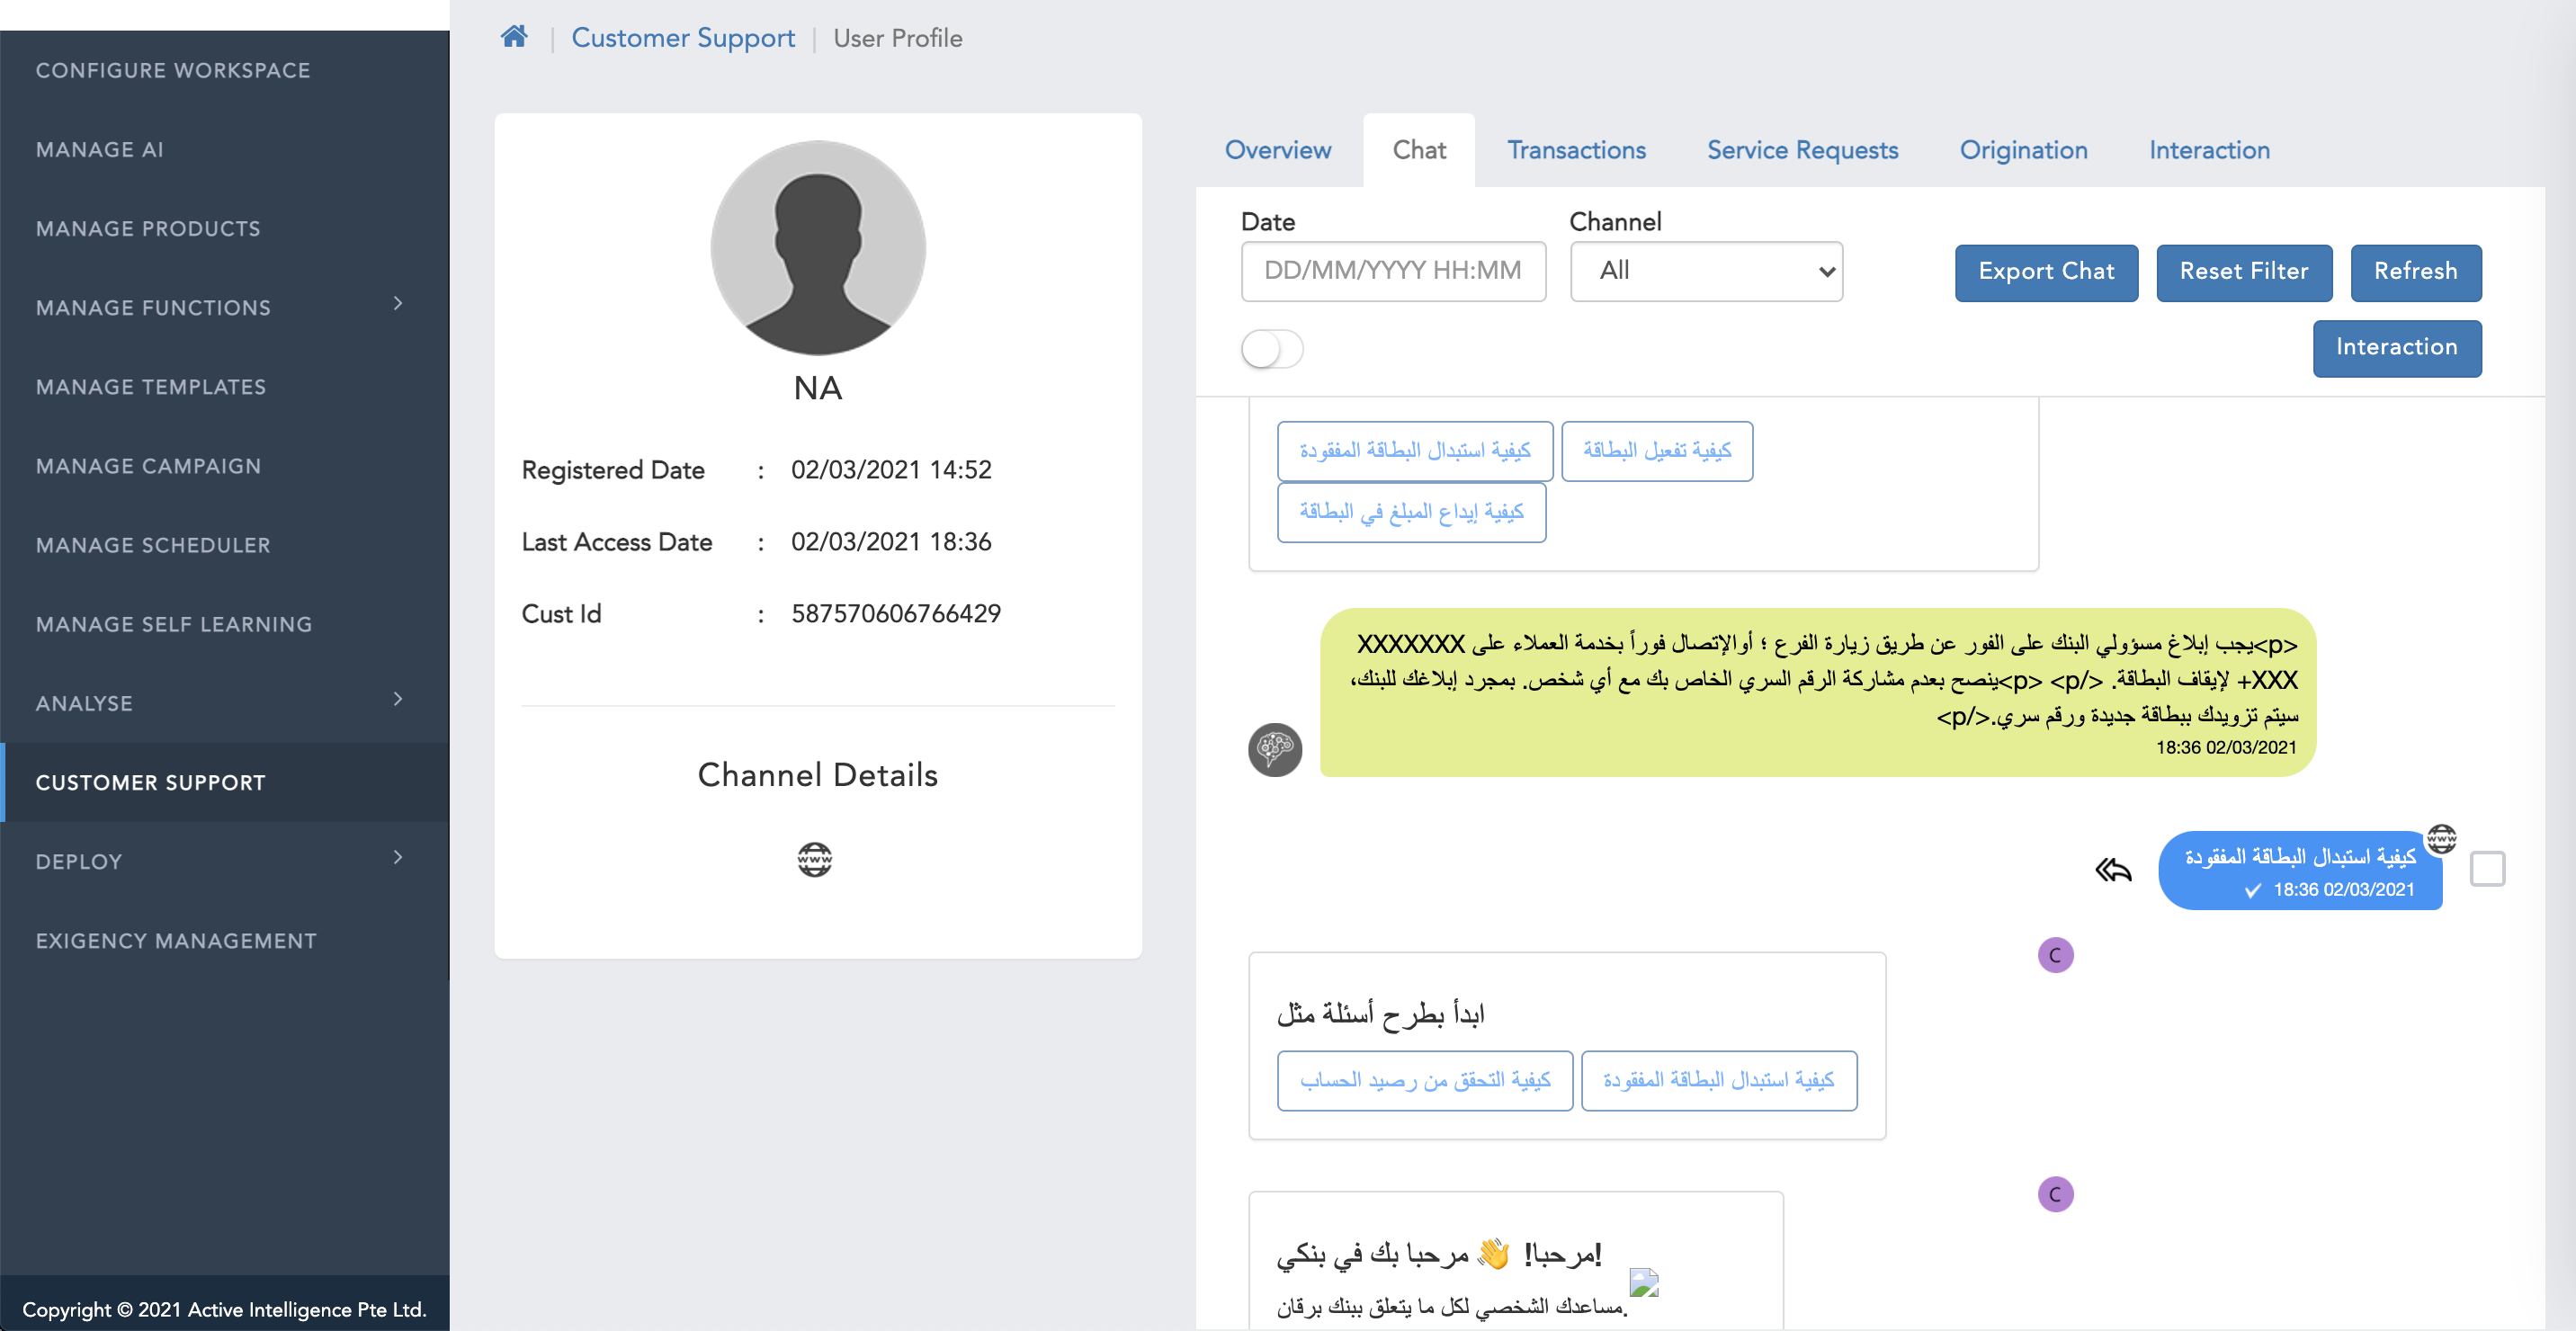
Managing AI
Small Talk
Small talks are the friendly conversations and informal type of discourse that does not cover any functional topics of conversation or any transactions. SmallTalk data can include questions like "Hi", "Who are you" and "What is your name".
Small Talk is stored in two separate categories namely; Base and Custom. Base Small Talks are provided as part of System. Custom Small Talks are those which are created by the business users for enriching the customer experience based on the self learning reports.
Small Talk Guidelines
Adding Small Talk
You can add the Smalltalk manually by entering Small Talk & the response for that Smalltalk or import a CSV file of Small Talk that should have Id, Question, Answer, category columns.
You can add the Small Talks manually by following these steps:

** Import File Structure**
| Column Name | Description |
|---|---|
| ID | Identification number / serial number |
| Question | Users smalltalk query |
| Answer | SmallTalk Answer/response |
| Category | all the category should be by default marked with "greetings" |
| Type | Type should be always marked as "B" |
| Language | Desired Language code should be populated. Ex: en for English, es for Spanish |
Importing Small Talk
You can add Small Talk to your workspaces using import feature by following these steps:

Exporting Small Talk
You can export the Small Talks as a CSV file by following these steps:
It will download a CSV file containing Id, Question, Answer, Category, Type, Language columns.

Deleting Small Talk
You can delete the Small Talks using Delete and Delete All features by following these steps:

Intents
Users's conversations or utterances from the bot will be tried to match with the best intents. Intents are the high level grouping of user's intentions which will give a clear direction for the subsequent action to be executed. Certain user requests/utterances may span multiple intents to fulfil the user's requests based on the total conversation.
Intents (PrimaryClassifier) classifies the user's input into broader categories based on the action and attribute-based use case utterances.
The intents are the purpose or influence about a subject in a particular situation. The translation from the user's request to the response starts with matching it to a particular intent. The matched intent then goes through a workflow based on the use cases.
| Sample Utterance | Best Possible Intent |
|---|---|
| Wish to pay my mobile bill | Money Movement |
| Want to do funds transfer | Money Movement) |
| Recharge my mobile number 8347423748 | Recharge |
Adding Intents
You can add intents manually by following these steps:
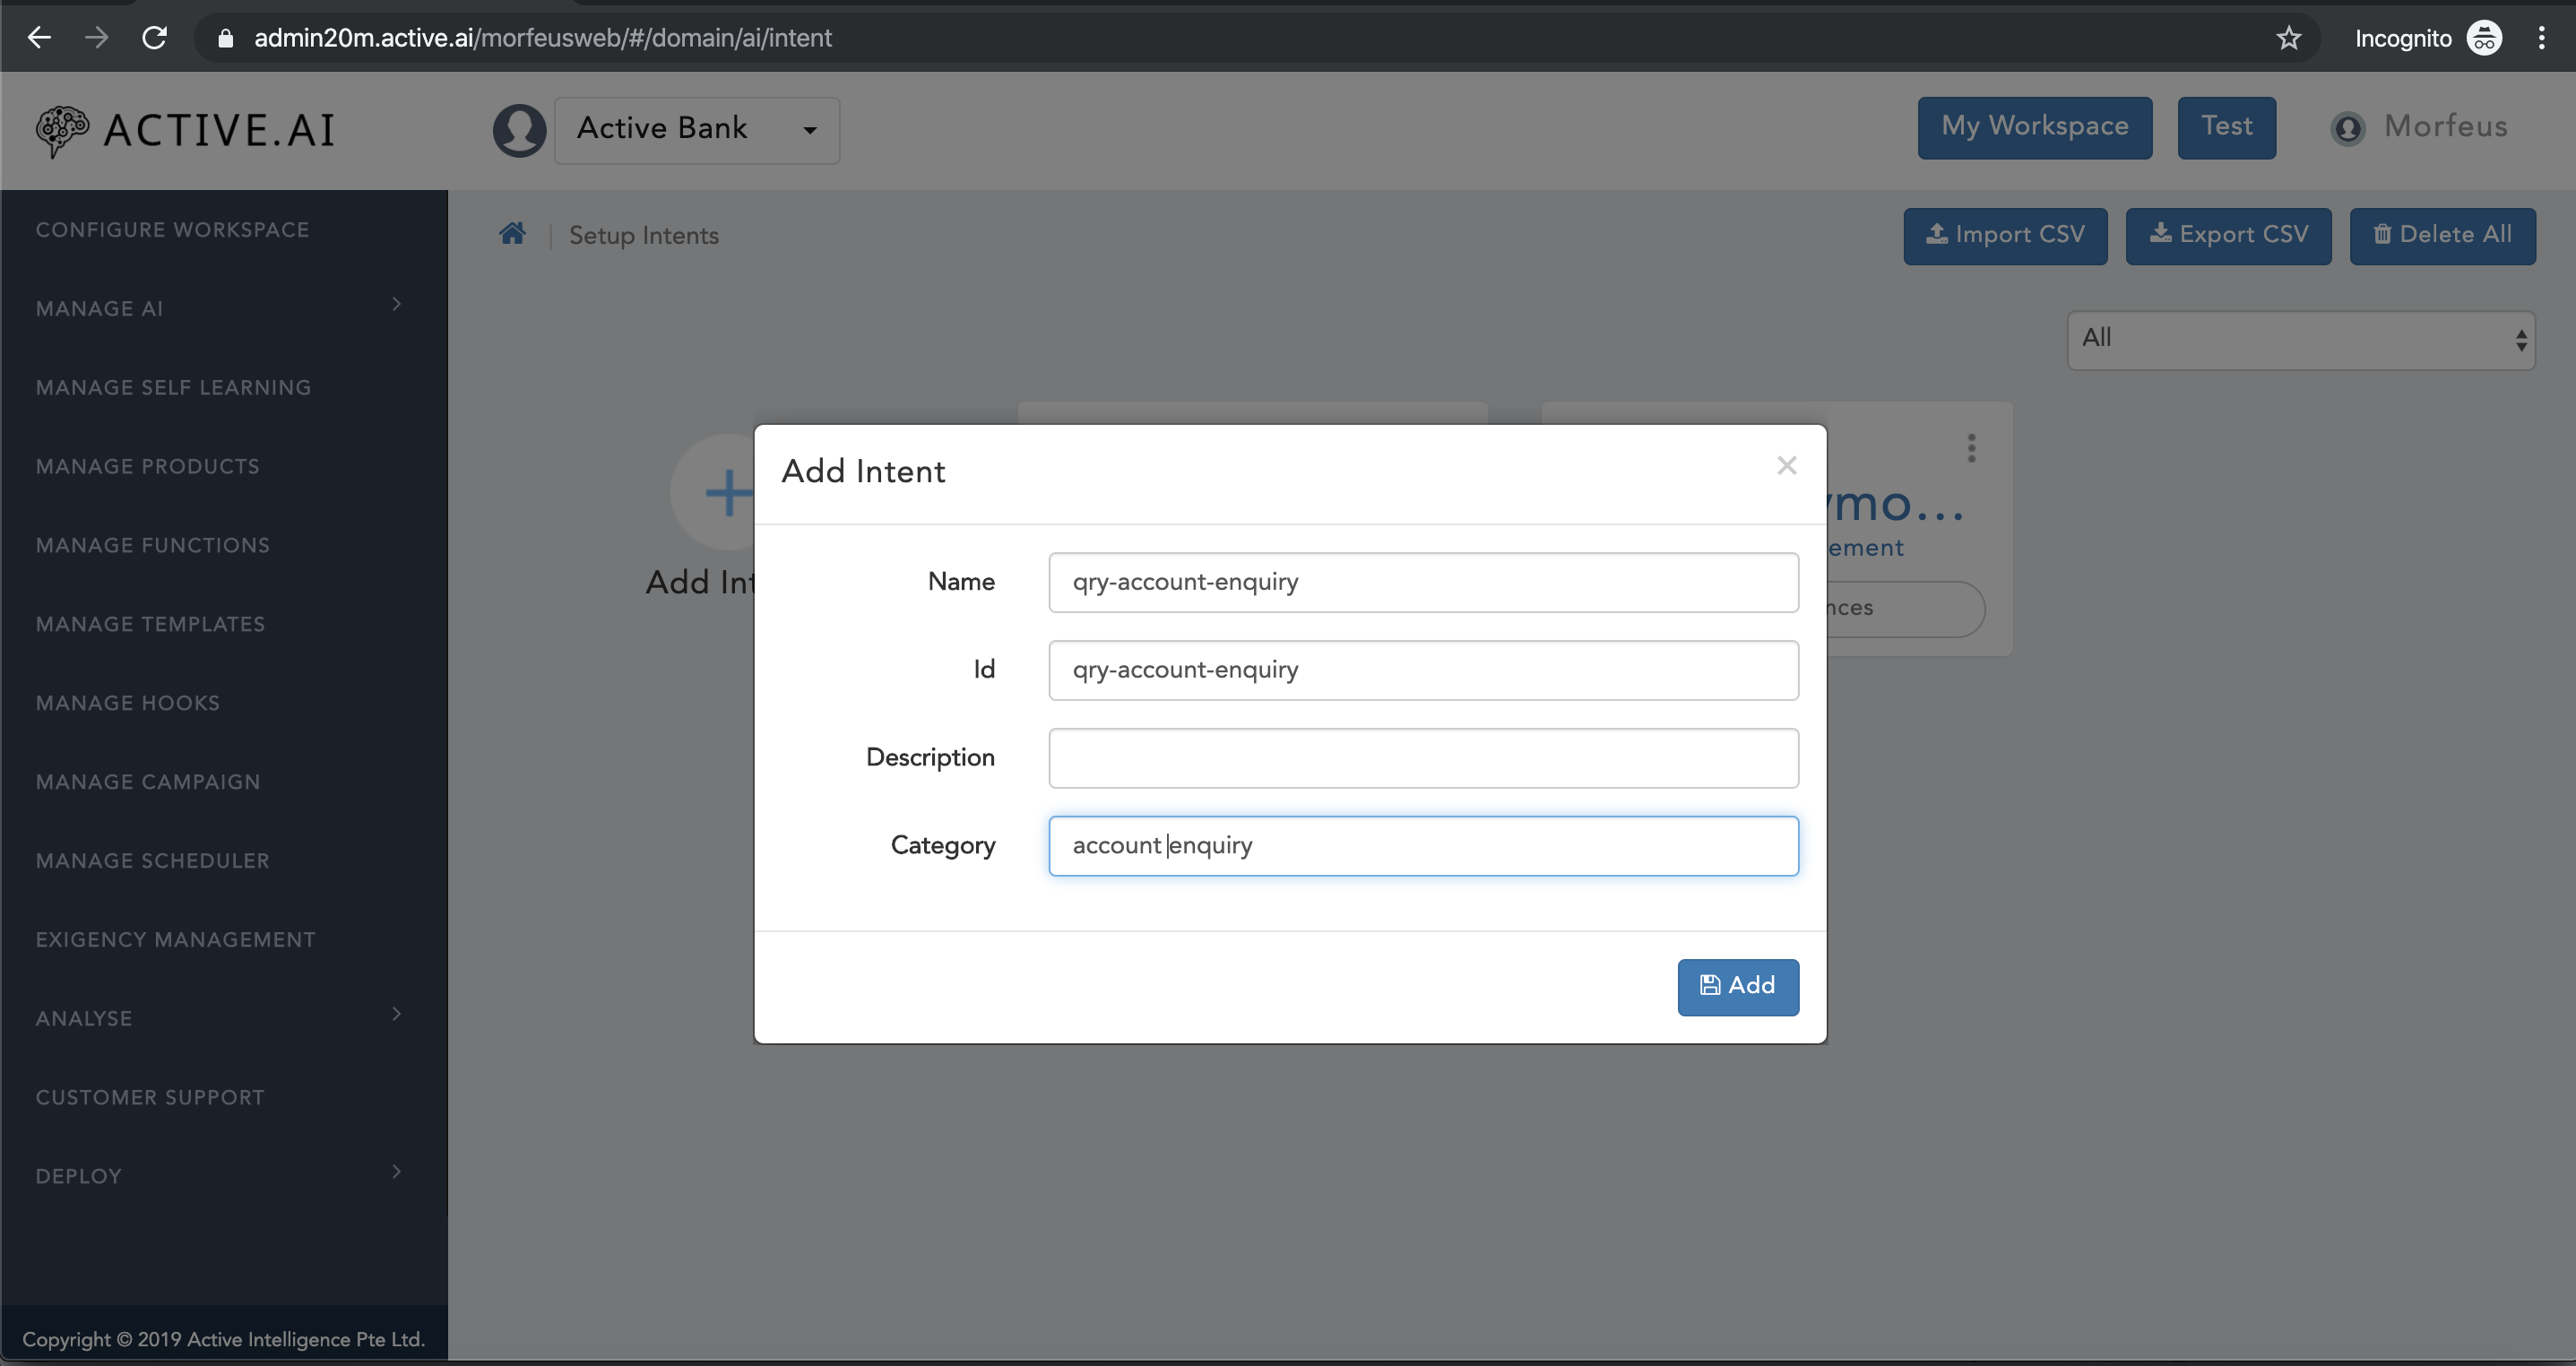
Adding Utterances
To add incremental data for existing intent or populate the data for new intent, Click on Setup Utterances located just below the desired intent name.
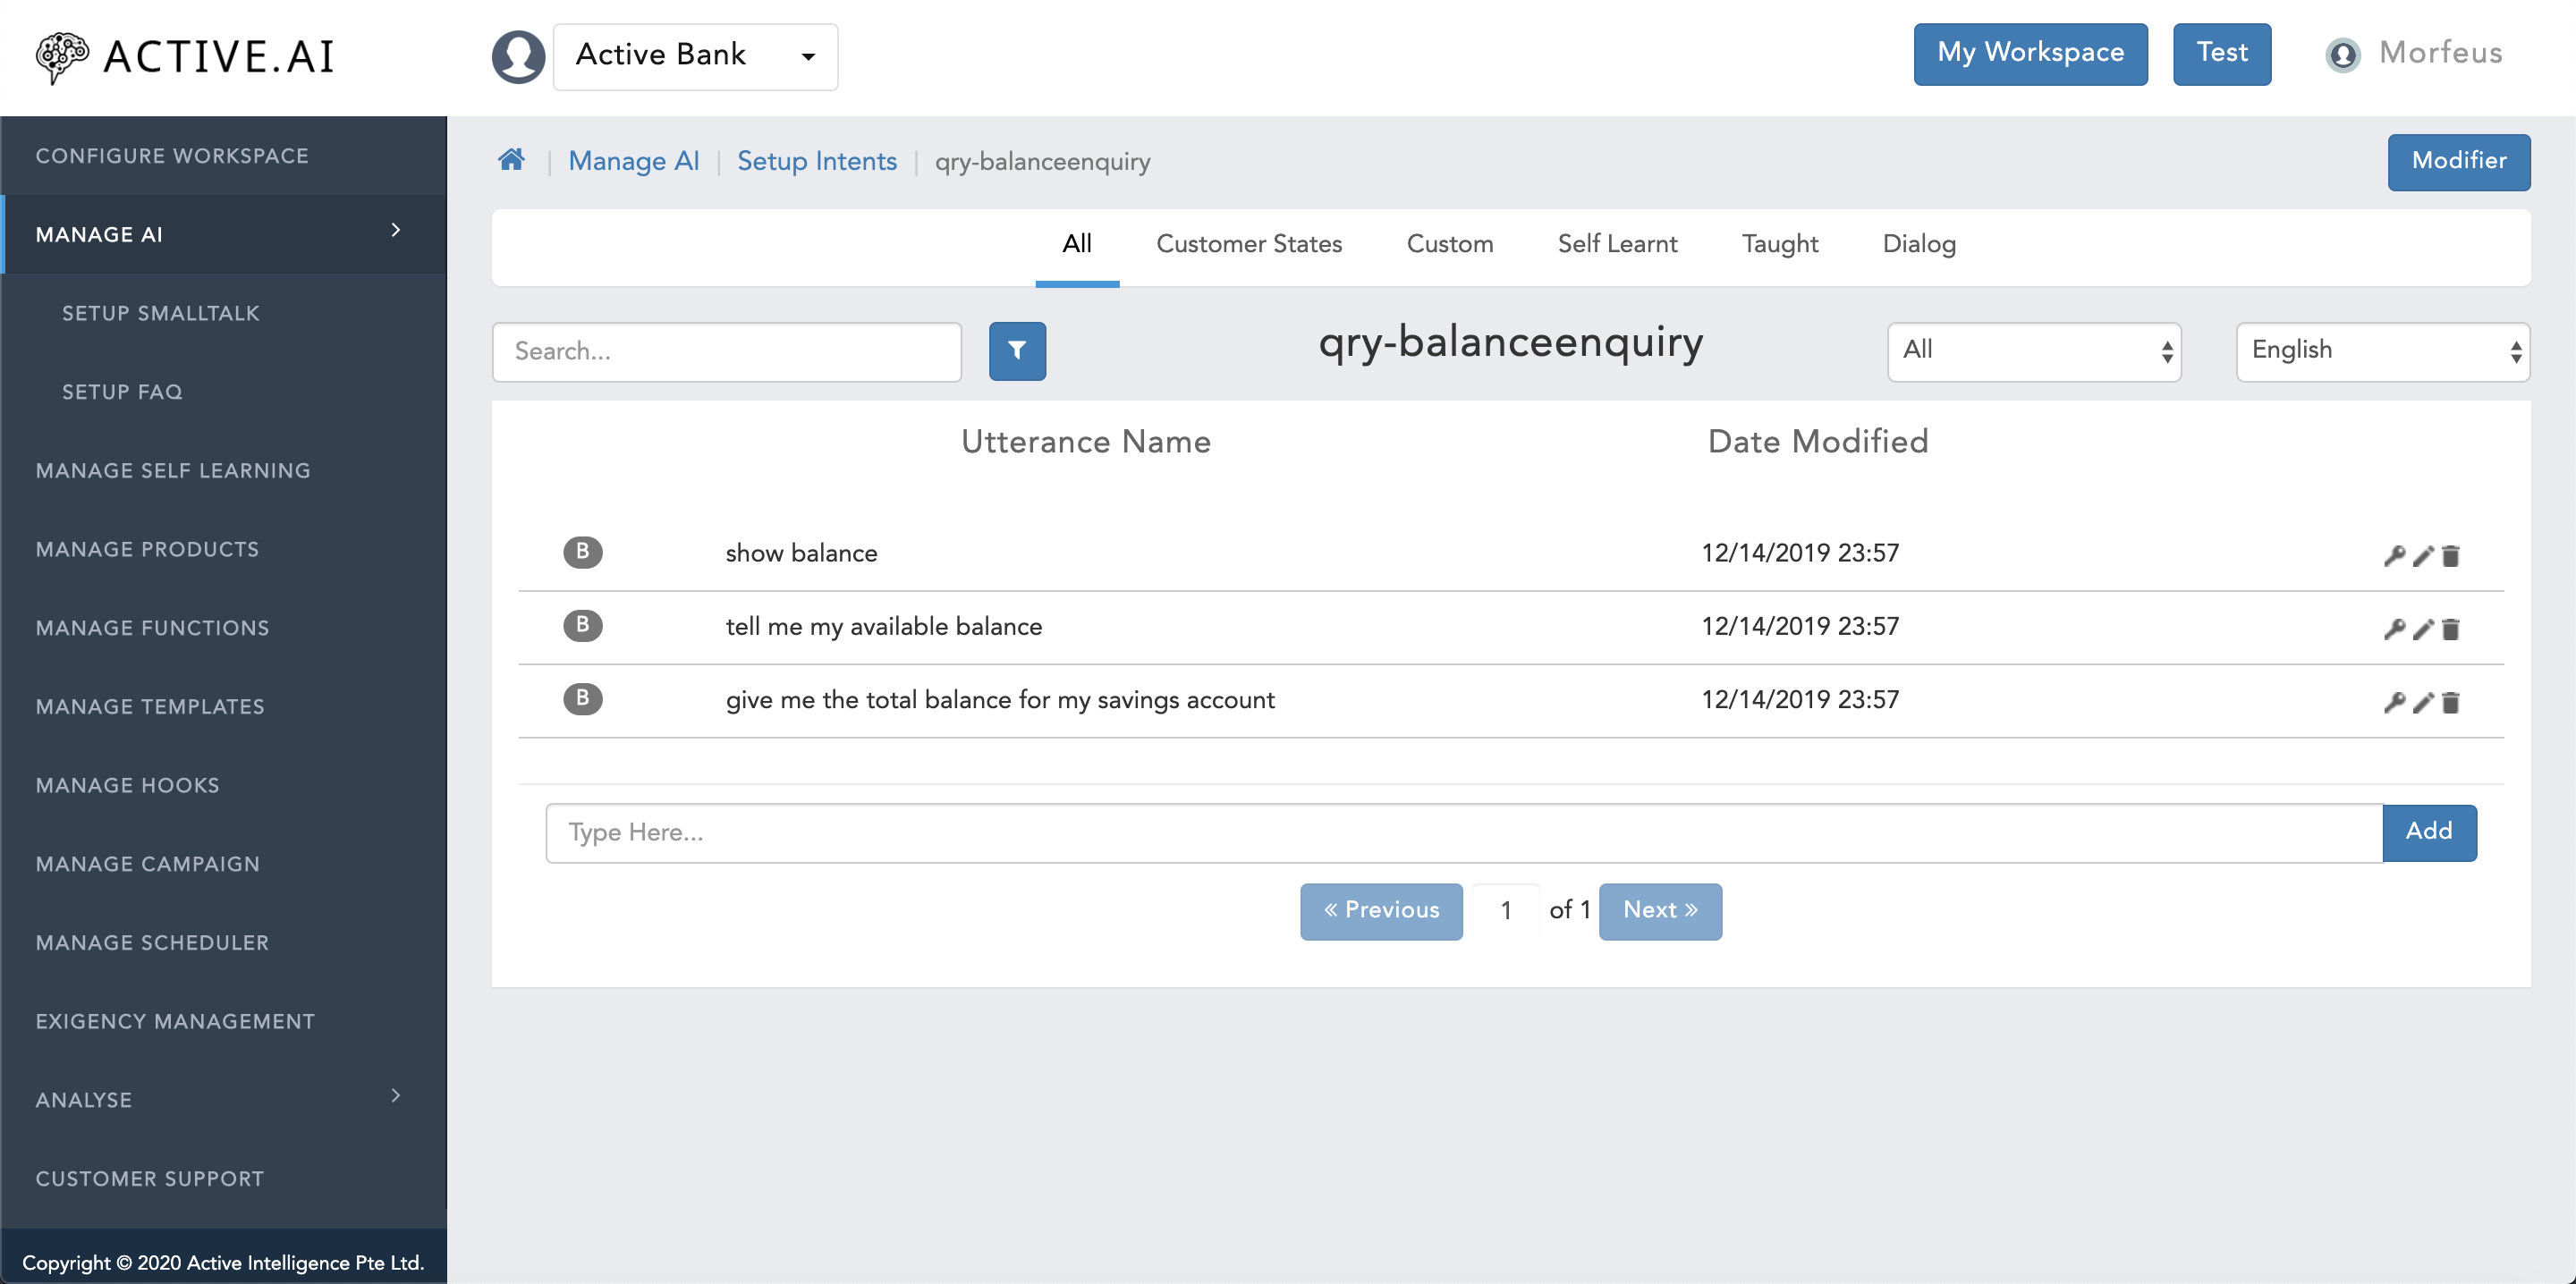

Intent CSV Import File Structure
| Column Name | Description |
|---|---|
| Intent Id | Intent name |
| Intent Name | Intent name |
| Intent Category | Brief 2-3 words about the intent |
| Utterance Name | Enter Actual utterances of the respective intent |
| Annotated Utterance | Utterance annoatated with Entity name like {sys.date} |
| Utterance Type | Should always be populated with "p" (i.e. "p" in LOWER case only) for all primary utterances or user's first utterances which will trigger the flow |
| Language | Two letter language code should be populated in LOWER case |
| Main Utterance | This should be always populated with UPPER case letter "N" |
| Learning Type | Learning type should be always populated with UPPER case letter "C" |
| Training Type | Training type should always be populated with UPPER case letter "B" |
| Answers | Reserved |
| Tags | Reserved |
| Product Type | Reserved |
| Short Question | Reserved |
| Expected Entity | Reserved |
| Prompt | Reserved |
save the file as ".csv"
Importing Intents
You can import the intents by following these steps:
Note: The CSV file should have at least Intent Id, Intent Name, Intent Category, Utterance Name, Annotated, Utterance, Utterance Type, Language, Main Utterance, Learning Type, Training Type, Answers, Tags, Product Type, Short Question, Expected Entity, Prompt columns.
Exporting Intents
You can also export those intents by following these steps:
It will download a CSV file containing Intent Id, Intent Name, Intent Category, Utterance Name, Annotated, Utterance, Utterance Type, Language, Main Utterance, Learning Type, Training Type, Answers, Tags, Product Type, Short Question, Expected Entity, Prompt columns.

Deleting Intent
If you don't want some the intents that are added then you can delete those intents by following these steps:

Dialog
Queries or transaction intent can have more than one dialog turn to complete the user's request. Any intent can have multiple dialogs turns to complete the information accumulation.
Dialog utterances are viable and possible responses which can be keyed in by user to answer bot's question for fulfillment execution. Bot question is always linked with an entity (dictionary/train/regex). User has to populate the ```Bot question``` under ```Bot says``` box and user responses to the bot question with all possible variations based on the defined parameters under "Dialog".
One dialog turn involves providing the following three information
Adding Dialog
You can add the dialogs for you intents by following these steps:
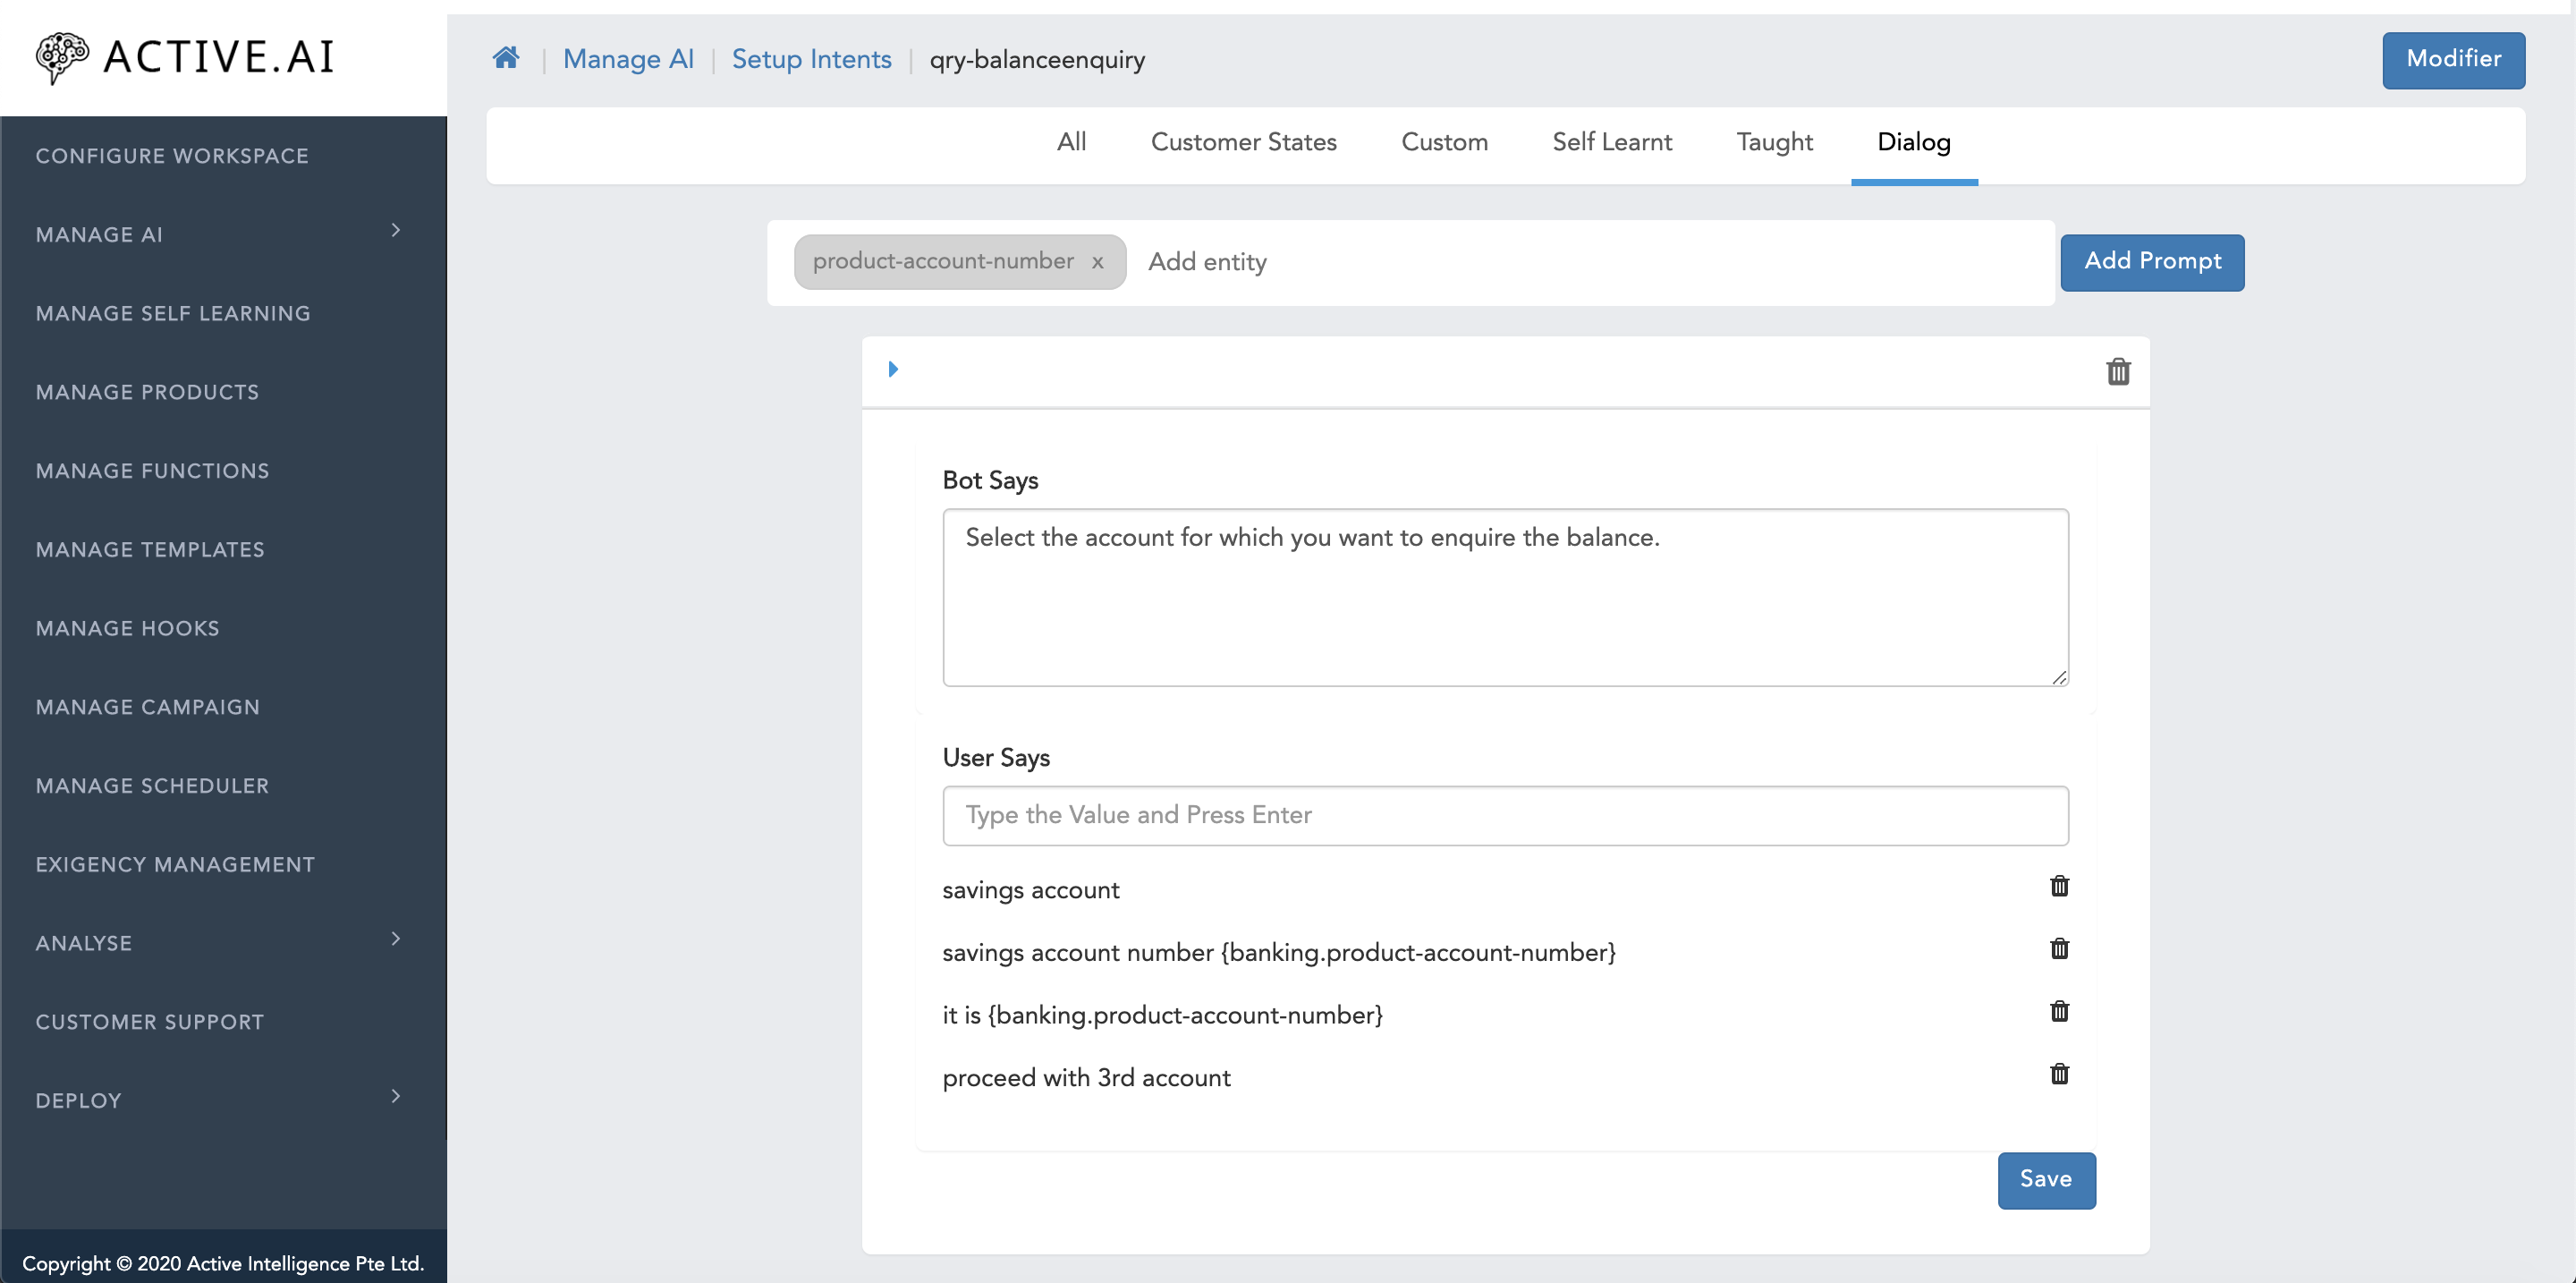

Delete Dialog
You can delete the dialogs which you don't want to keep by following these steps:

Entities
Entities are a mechanism for identifying and extracting useful data from natural language inputs and user's generated content (UGC). Named Entity Recognition (NER) aids to this processing and helps in deriving the entities, which are the basic building blocks for executing the flows. Named Entity Recognition (NER) is used to extract / capture noun / noun phrases / attributes from the user's input.
While intents allow your workspace to understand the motivation behind a particular user input, entities are used to pick out specific pieces of information that your users mention — anything from personal names to product names or amounts with units. Any important data you want to get from a user's request will have a corresponding entity.
If a user is asking for their account status then the intent will be account inquiry. And the user will enter their account number that will be one of the entity of that ***intent***.
Lets take an example, Transfer 500 to Charu from my account
From the above statement, we require three information namely 500, charu, and account. These values will be extracted from the utterance and will be used to execute the client's API.
Entity Types
Dictionary Entity
Dictionary entities will take finite set of attributes.
Ex:banking.product-type, banking.product-account-type, banking.product-name
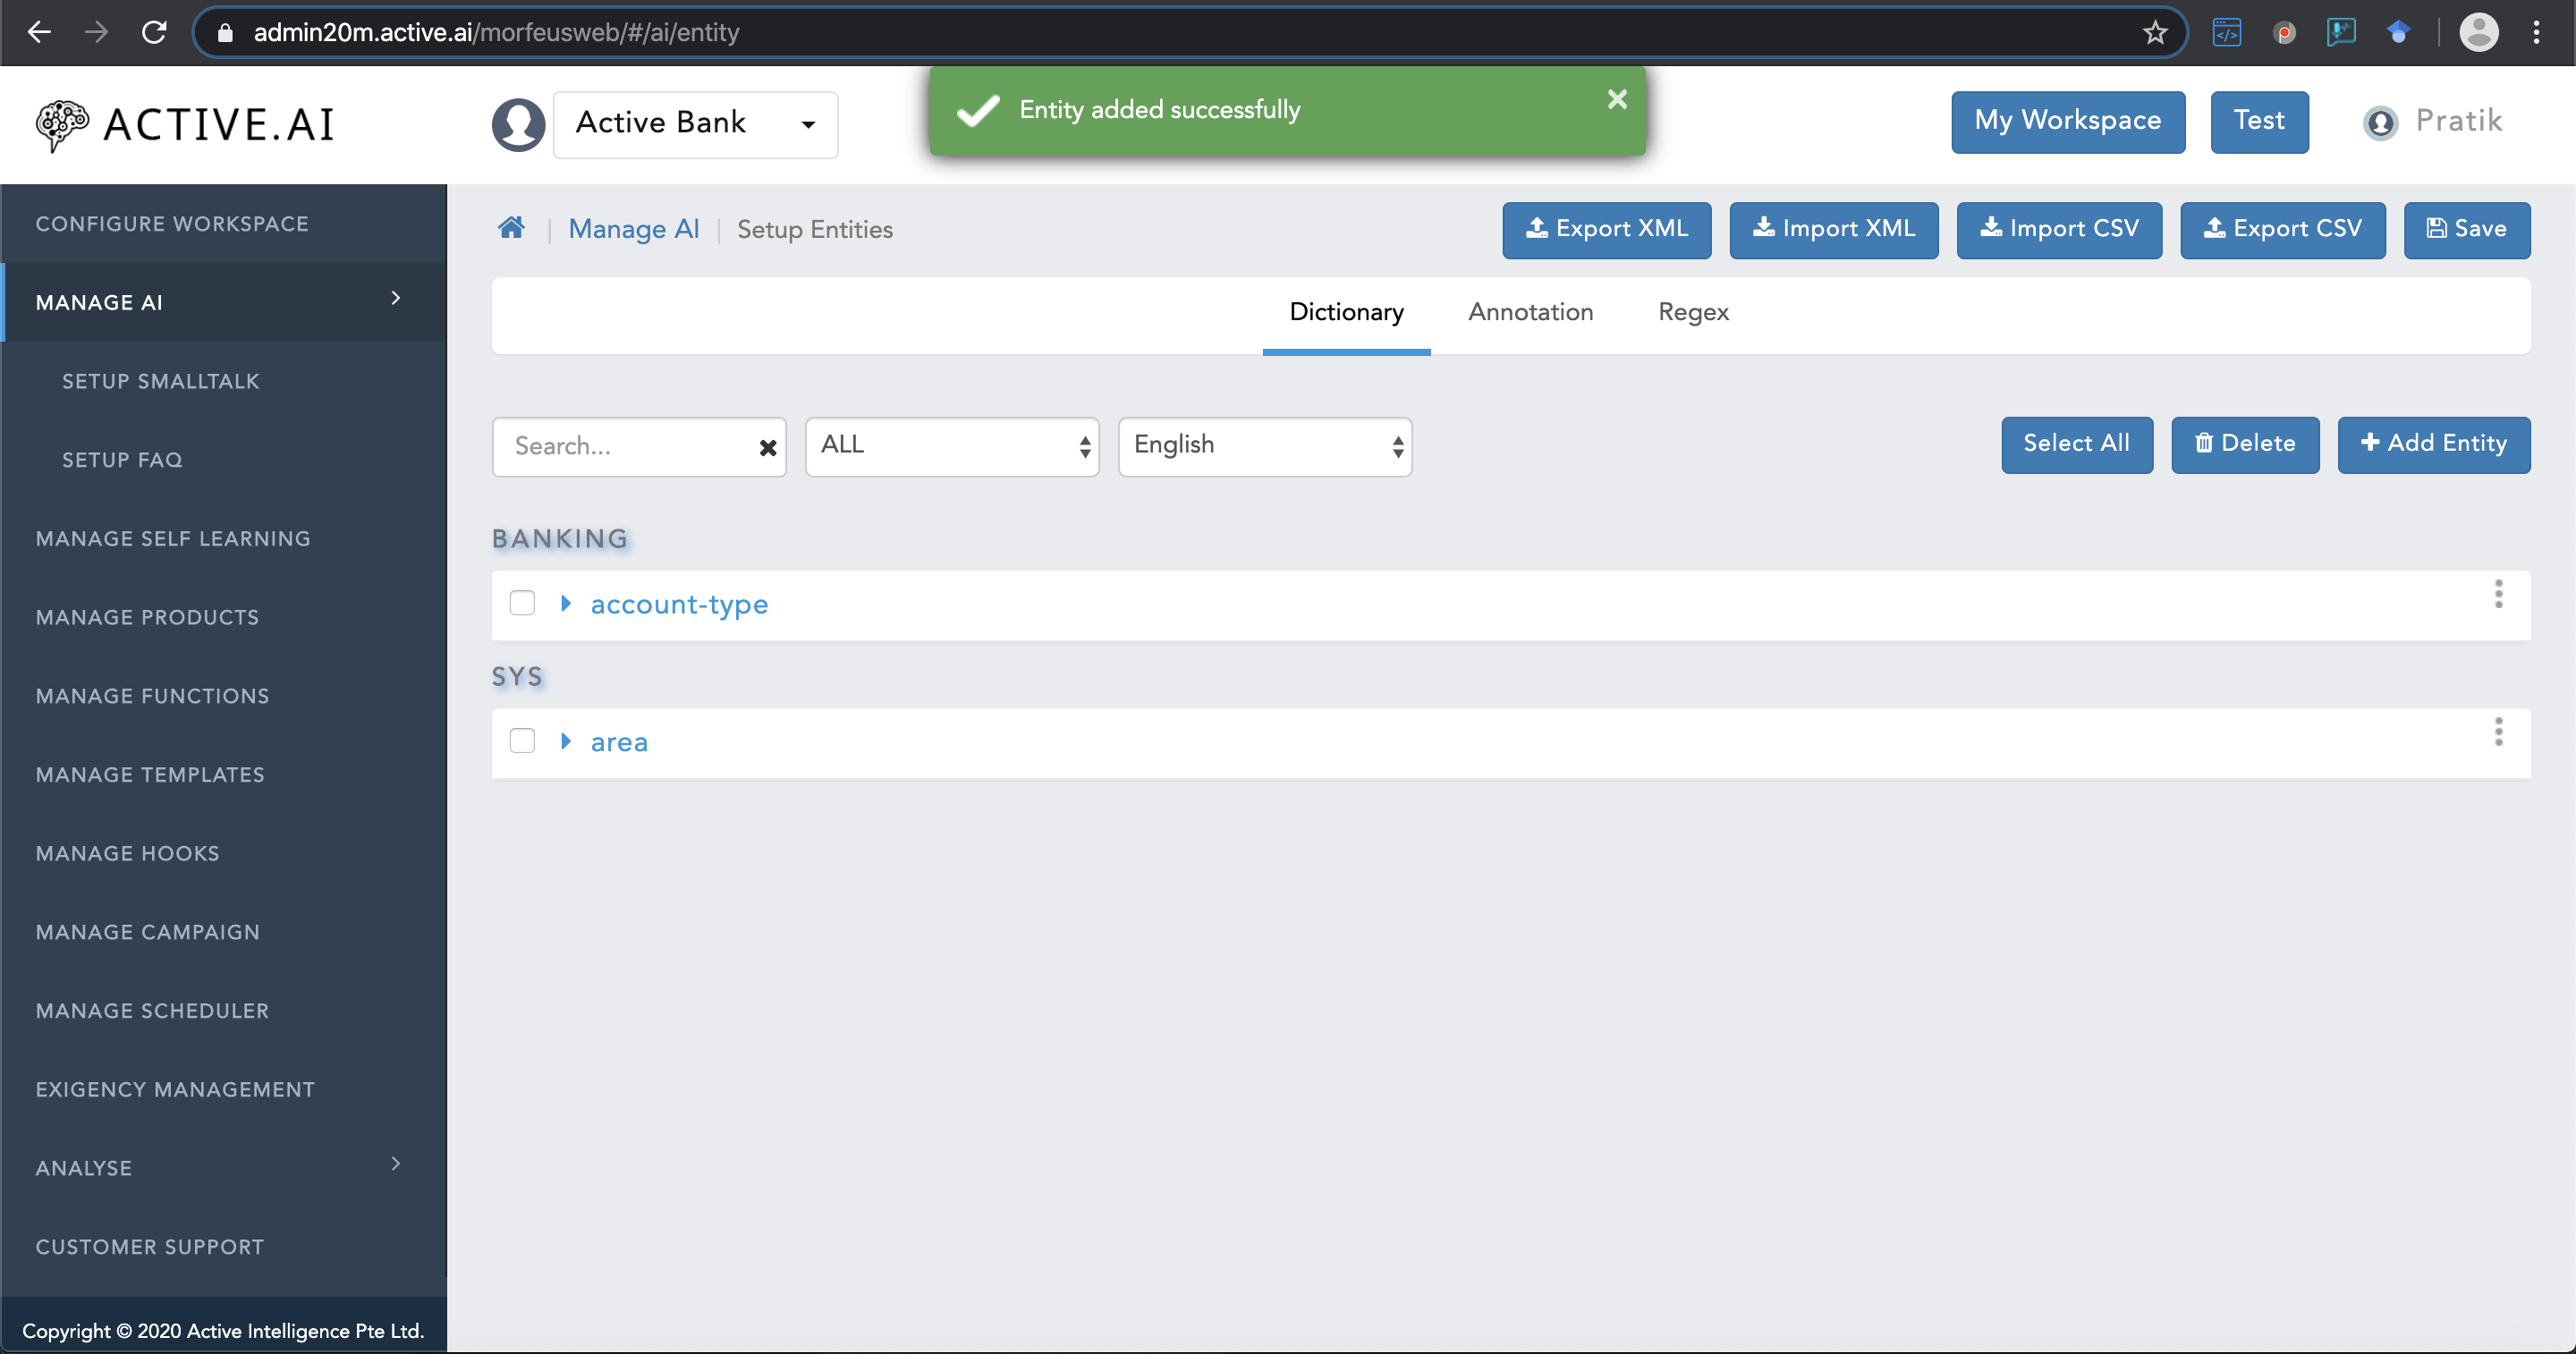
Train Entity
Trained/Train Entity takes of entity extraction for dynamic infinite values from the user's input.
Ex: banking.product-account-number, banking.product-card-number, sys.person-phone-number, sys.amount
Train Entity Guidelines
Train entity name and data preperation involves the below procedures:
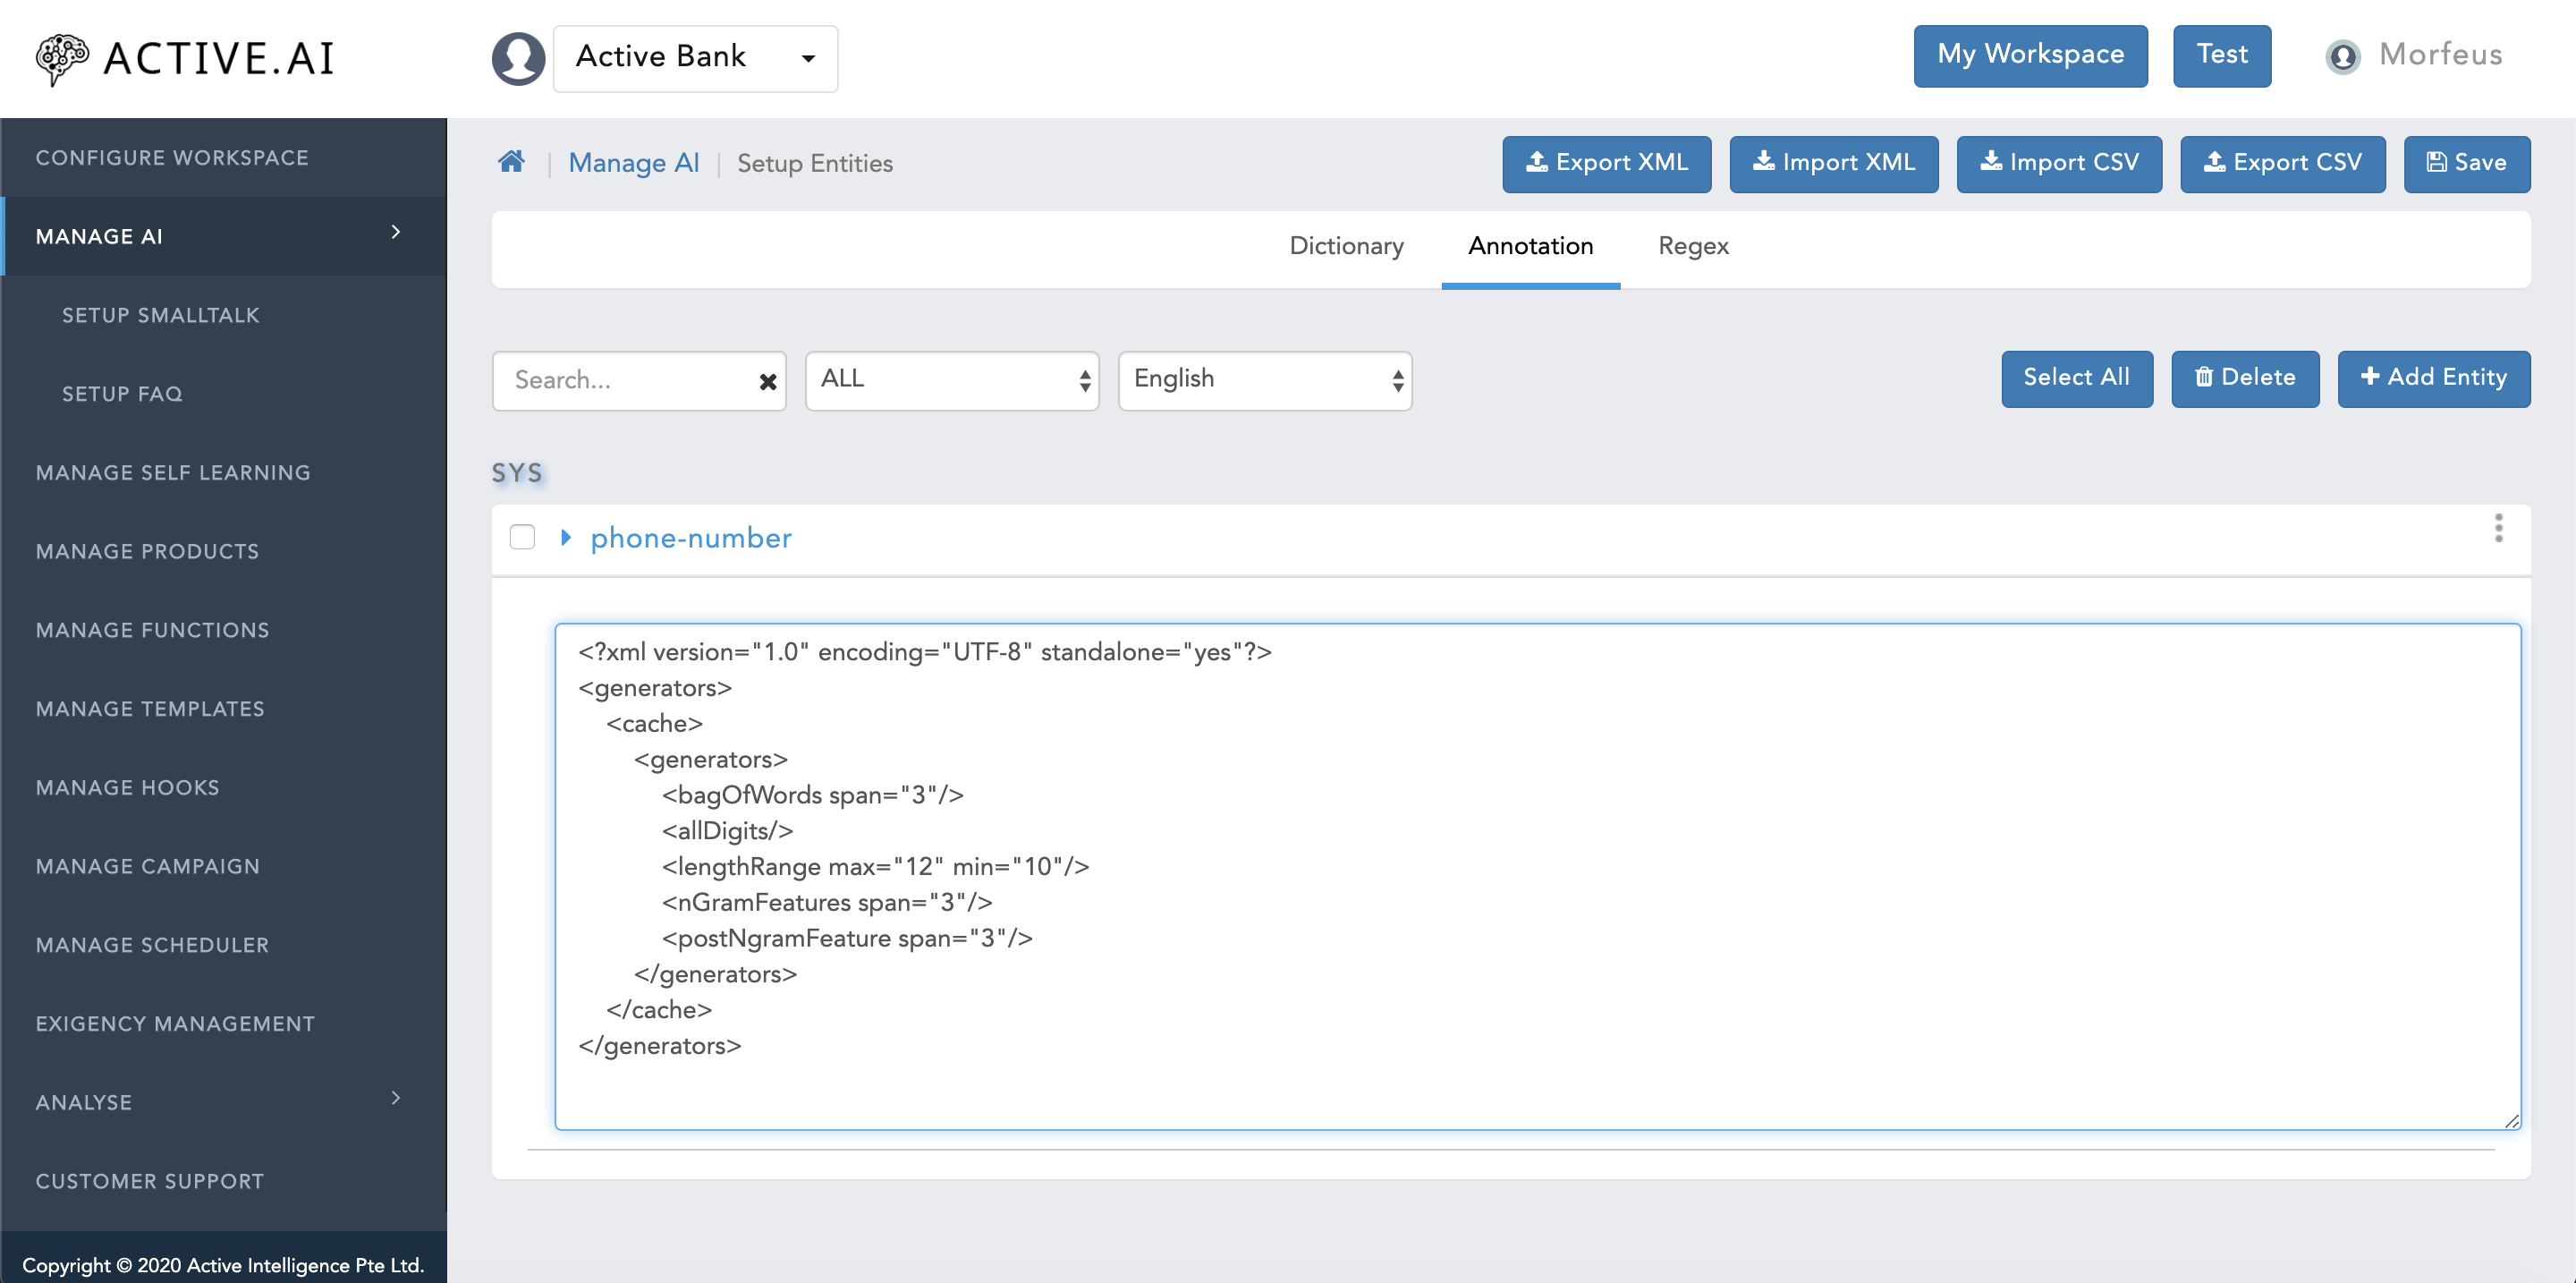
Regex Entity
RegEx (regular expressions) entity is mainly used for details which can be captured by recognizing the pattern. The pattern should be universal or atleast universal within a specific geographical area.
Ex: sys.email, banking.otp, banking.pin, sys.itemNumber
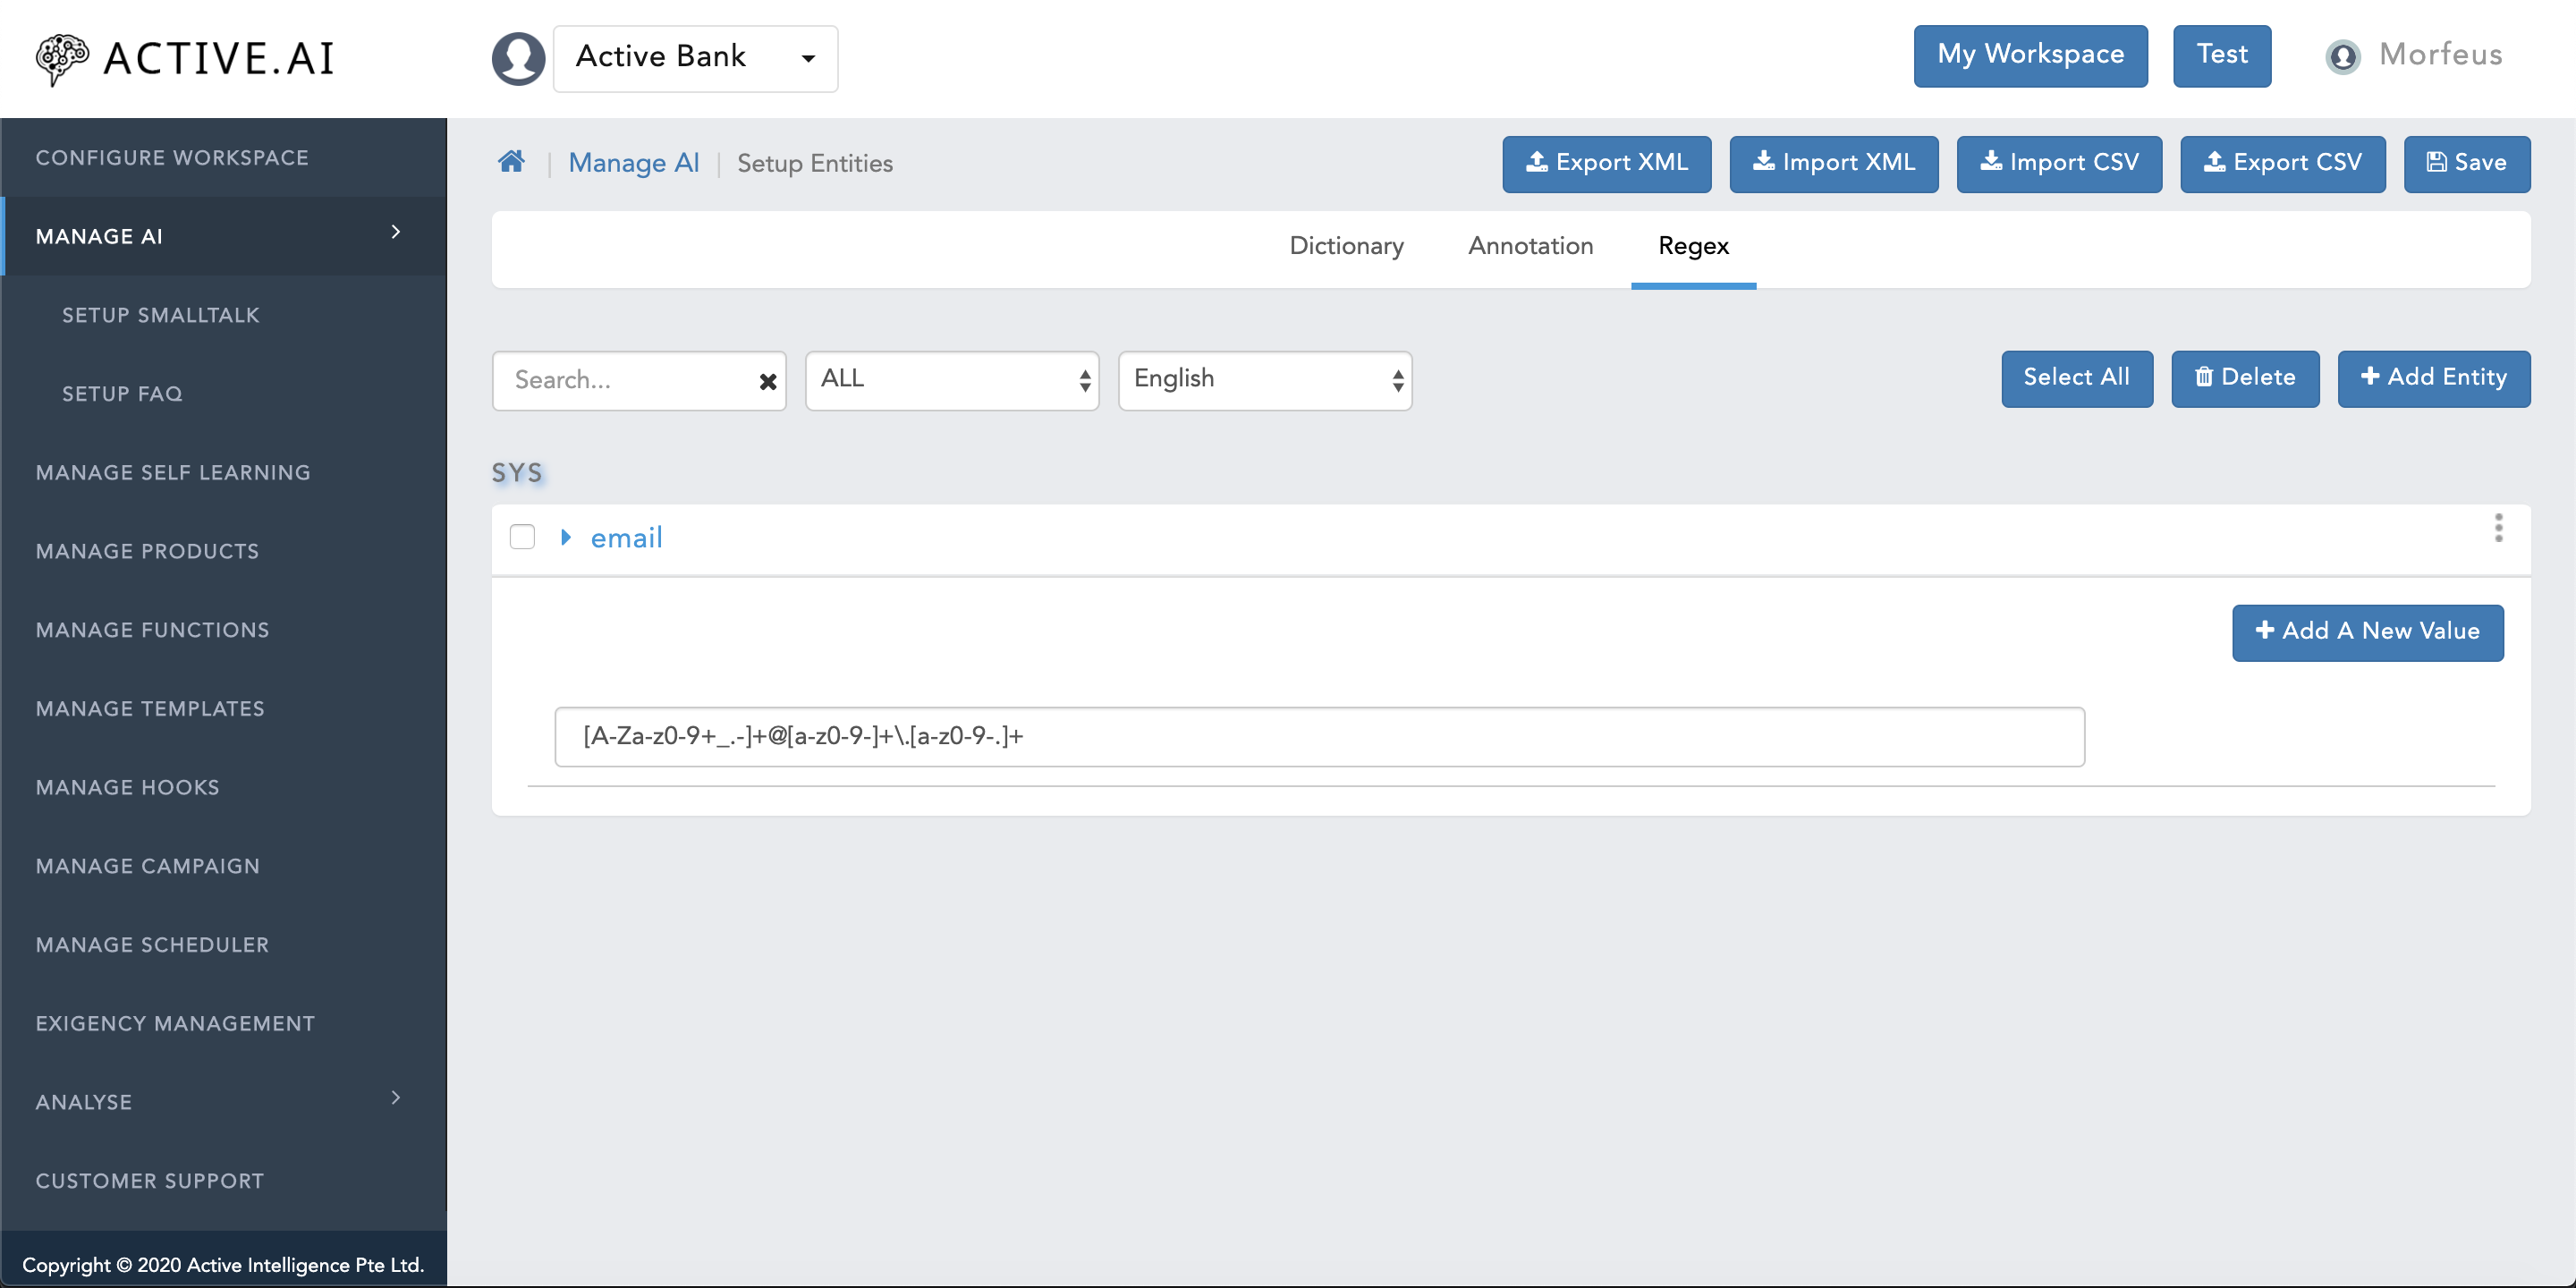
Selecting Entities
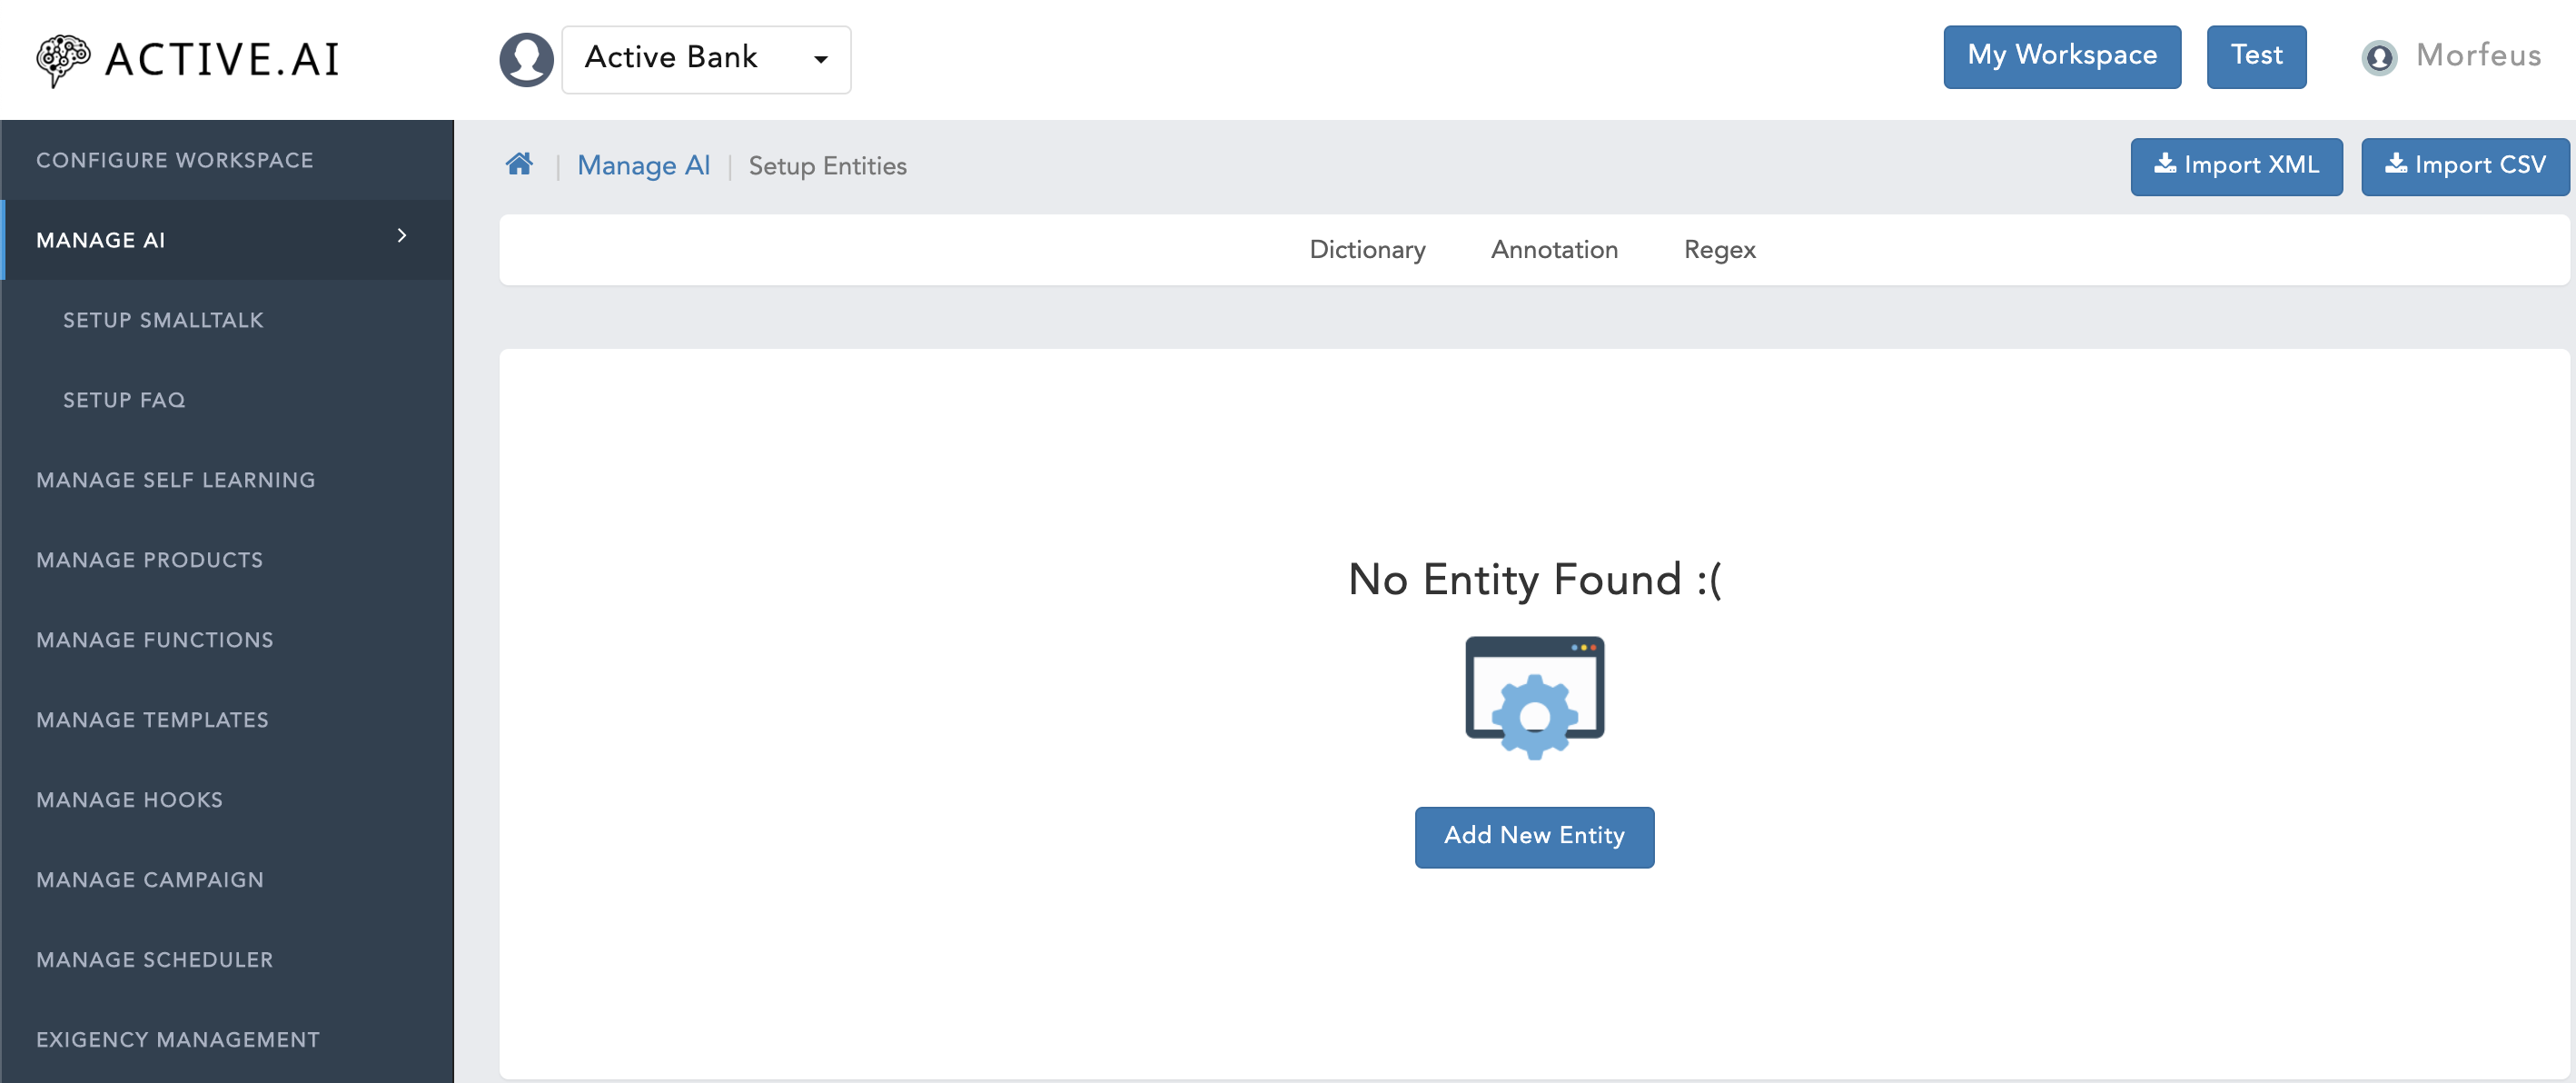
To select/see an entity, follow below Steps:
Adding Entities
You can add the entities by following these steps:
Now, to see the entity, click on the entit(ies) and expand. The expanded entity window will look as shown below.
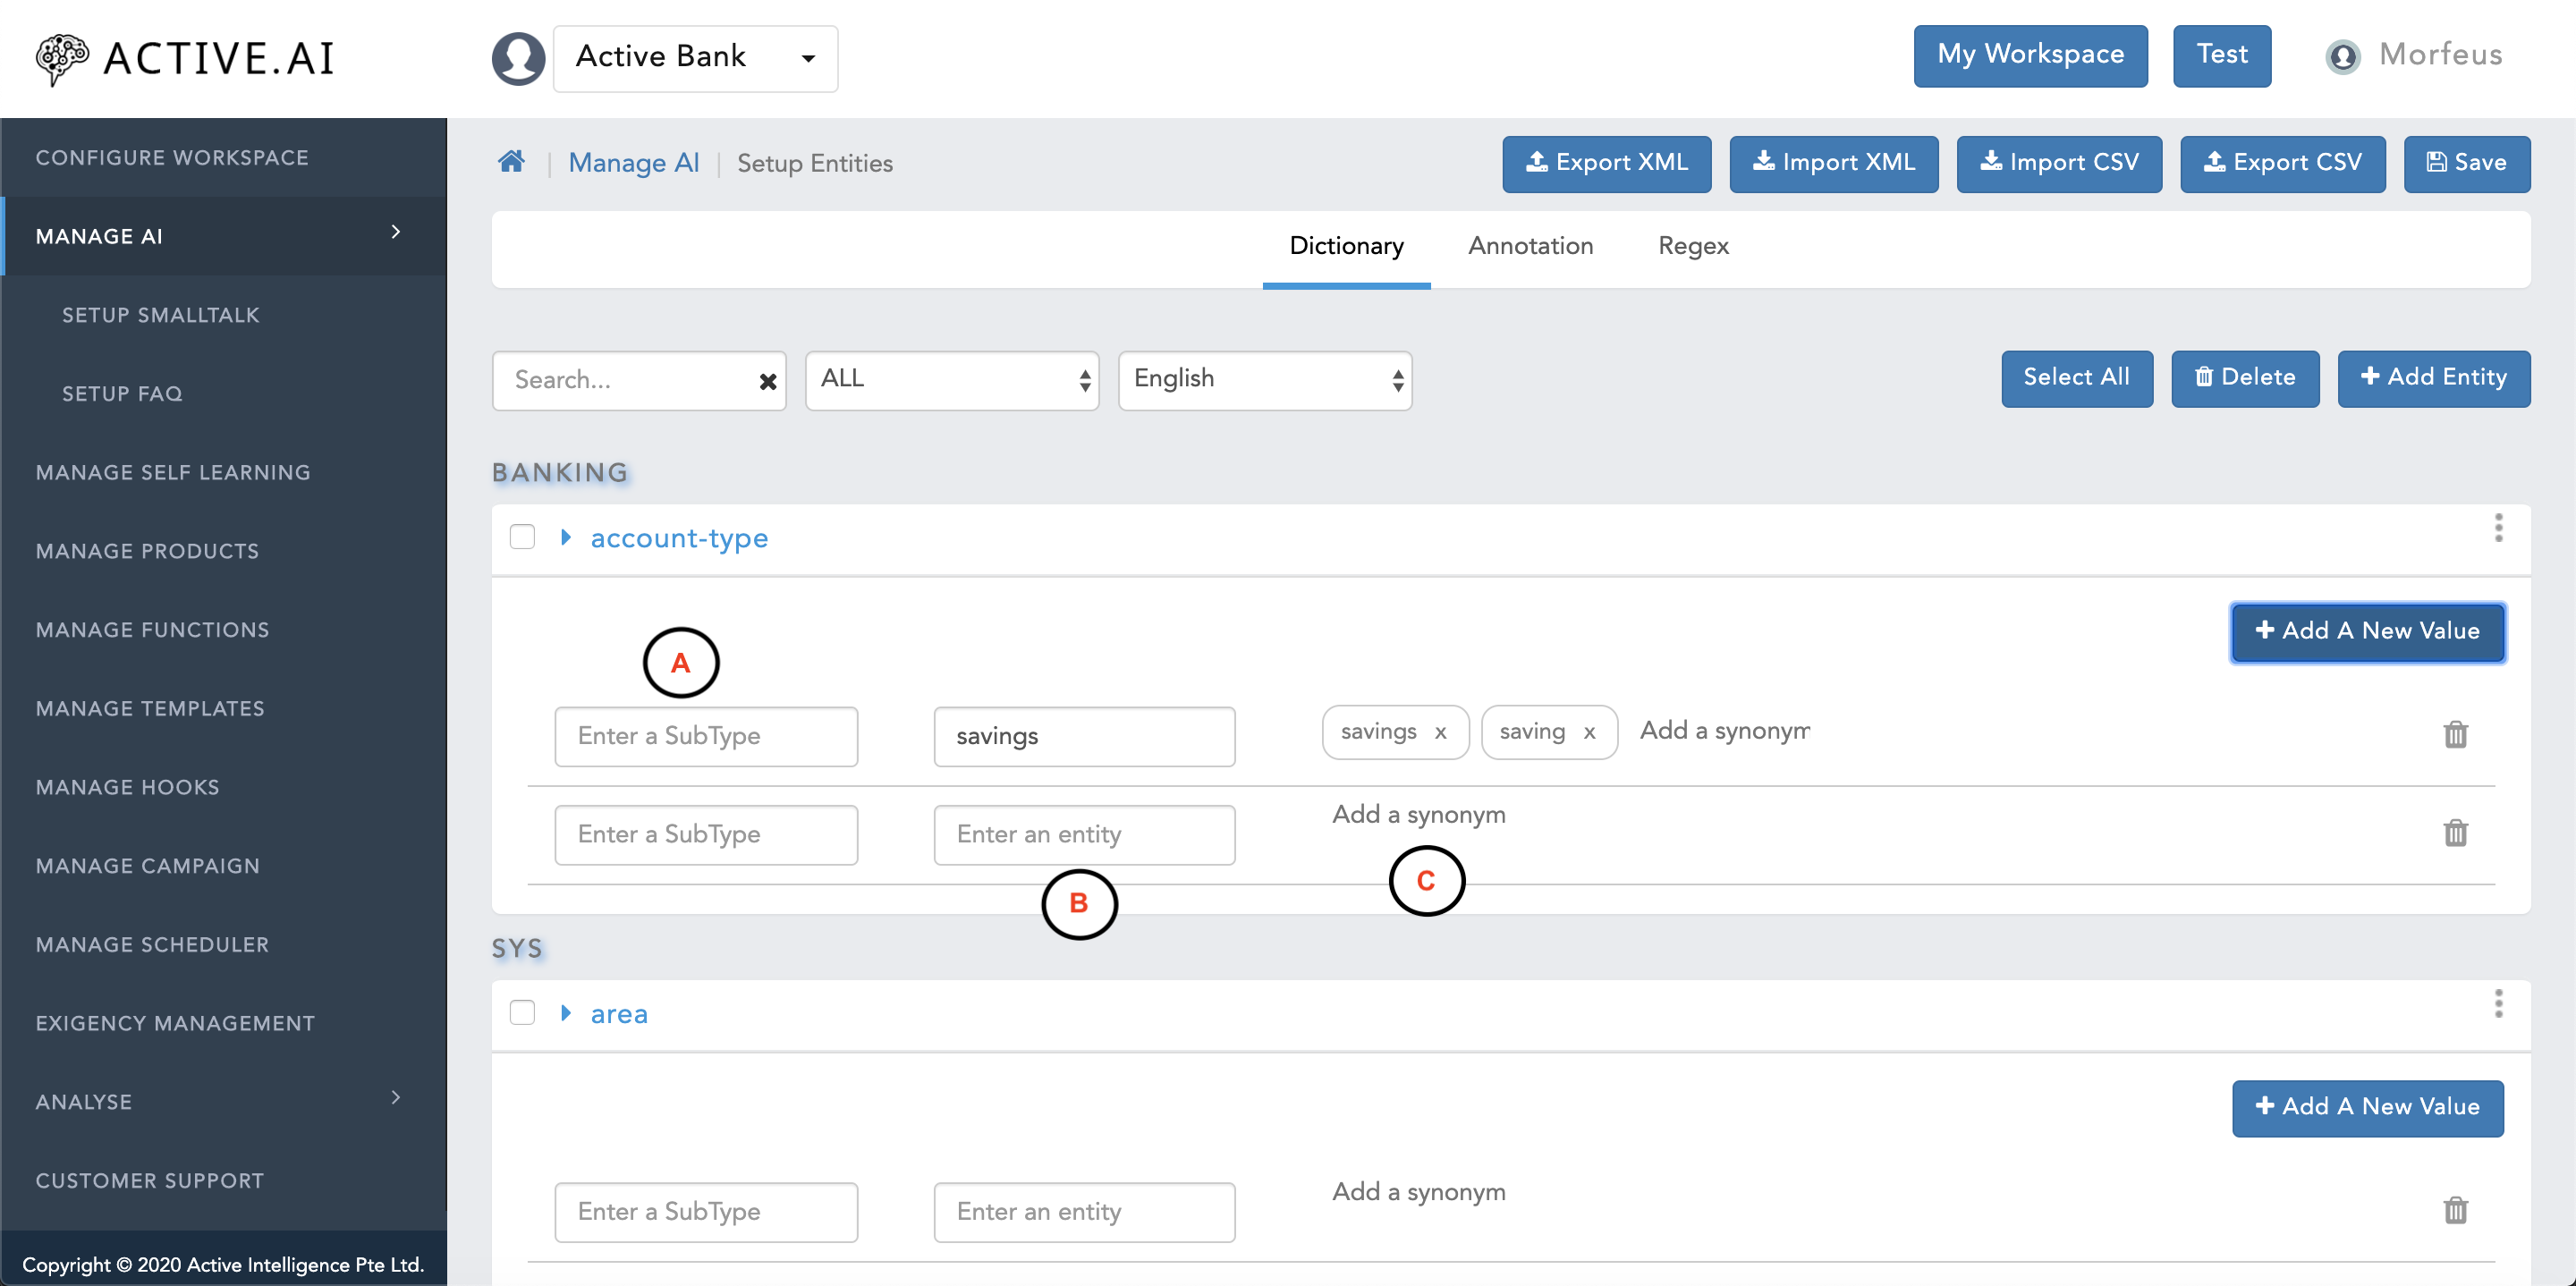
Enter the below information for adding entity details.


Importing Entities
You can import the entities in CSV or XML format.
Import Entities by CSV
You can import a CSV file of entities by following these steps:
CSV file format should contain EntityName, EntityCode, EntityCategory,EntityType, ProductType, OntologyType, Language, SubType, EntityValue, Synonyms columns.

Import Entities by XML

Export Entities
You can export the entities in Either CSV file or XML file.
If Export XML is used, then downloaded XML file will contain all the entities configuration with samples data.
If Export CSV is used, then downloaded CSV file will contain data with EntityName, EntityCode, EntityCategory, EntityType, ProductType, OntologyType, Language, SubType, EntityValue, Synonyms columns.

Delete Entities
If you don't want some the entities then you can simply delete those entities by following these steps:

SpellChecker
SpellChecker maintains Acronym to Abbreviation Mapping for functional domain data maintained in your workspaces. We provision spell checking for Finance / Banking / Trading / Insurance (FBTI) domains.
In general the "WHO" can signify multiple meanings like World Health Organization or can be a question oriented who? word. Spell Checker comes into play to resolve these ambiguity.
We support 1-word based rootwords for correction. The rootword who will be substituted as World Health Organisation and mutliple word based rootwords are not supported. Our SpellChecker engines would not support changing variations from World Health Organization to WHO.
We can add three different types of mapping as mentioned below:
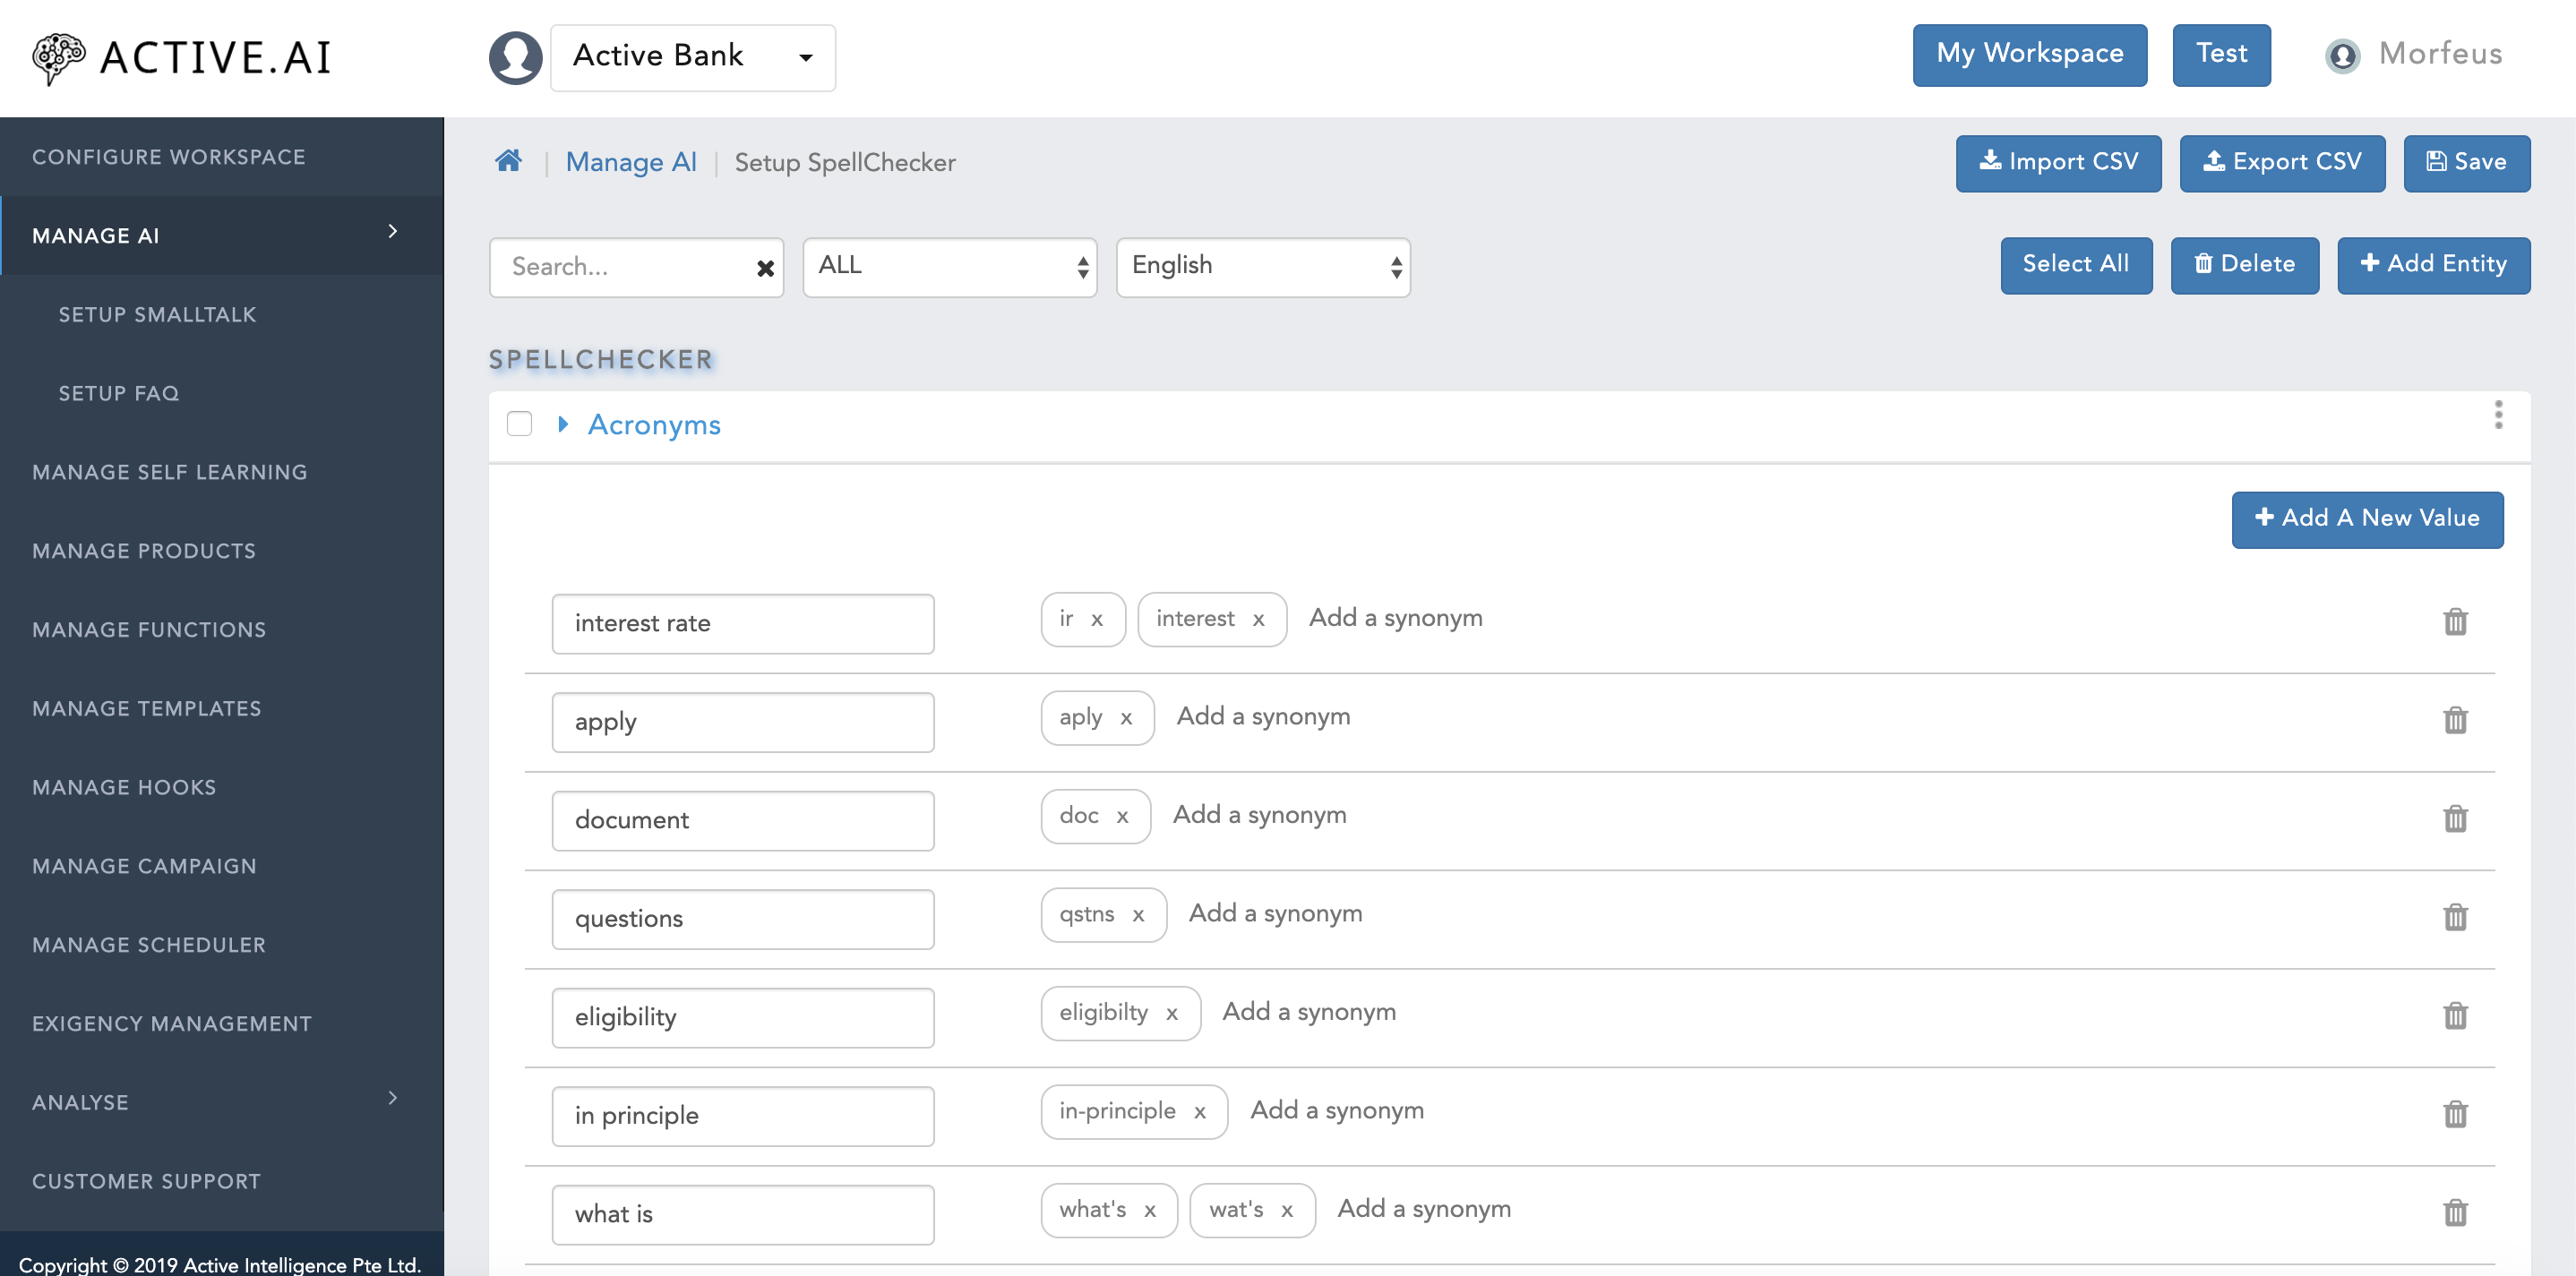
You can do the setup for SpellChecker by following these steps:

Import SpellChecker CSV File Structure
| Column Name | Description |
|---|---|
| EntityName | This column values should always be populated with "Acronyms" (attribute is a case sensitive) |
| EntityCode | This column values should always be populated with "spellchecker_acronyms" (attribute is a case sensitive) |
| EntityCategory | This column values should always be populated with "SpellChecker" (attribute is a case sensitive) |
| EntityType | This column values should always be populated with "SpellChecker" (attribute is a case sensitive) |
| Language | Two letter language code always in lower case |
| EntityValue | Root value in which a input word should be converted can be captured |
| Synonyms | Synonym(s) can be stored here under "Synonyms" column. Multiple Synonyms can be stored using "comma" (",") as a separator |
should be saved as ".csv"
Import SpellChecker
You can also import the SpellChecker using CSV file by following these steps:
The CSV file should contain EntityName, EntityCode, EntityCategory, EntityType, ProductType, OntologyType, Language, SubType, EntityValue, Synonyms columns.

Export SpellChecker
You can export the SpellChecker by following these steps:
SpellChecker CSV file containing EntityName, EntityCode, EntityCategory, EntityType, ProductType, OntologyType, Language, SubType, EntityValue, Synonyms columns will be downloaded

Delete SpellChecker
If you want to remove SpellChecker, please follow these steps:

AI Rules
AI rules are the settings of your workspace, based on these settings your bot will respond to the queries. You can manage your AI rules as per your requirement.
Manage your workspace’s functionality by configuring business rules.
A. General Rules
1. AI Engines related rules
Rules |
Description |
|---|---|
| Ai Engine | It specifies the type of message processor. |
| Auto Suggest Corpus Variants | It specifies whether all or main variants to be added to the corpus. |
| Context Change Detector | It specifies the AI engine to be used to detect Context Change. |
| Elastic Search Index | You can set the Elastic Search Index for auto-complete. |
| Enable Confirmation Entities Handling | It specifies if the Confirmation Entities Handling is to be enabled. |
| Enable Elastic Search as Fallback | It specifies if the Elastic Search API call to be enabled. |
| Enable External FAQ Fallback | It specifies if the external FAQ fallback to be enabled. |
| Enable FAQ response local lookup | It specifies if to check FAQ response locally before hitting KBS. |
| Enable fuzzy search | It enables postback handling as text input. |
| Enable Local Lookup for Classification | It specifies if the local lookup of classification is enabled. |
| Enable logging for Fallback | It enables/disables logging for Fallback. |
| Enable message translation from other languages to English before processing | To support other languages, use the translator to translate the message to English and respond to other languages. To enable this also set Language Detector. |
| Enable Preprocessor | It specifies if the PrePreprocessor algorithm is to be enabled |
| Enable Query Parser | It specifies if the Query Parser algorithm is to be enabled |
| Enable response translation from English to other languages after processing | It translates response back to original language from English. Will require Message translation also to be enabled. |
| Enable Sentiment Analysis | It specifies if the Sentiment analysis is to be enabled. |
| Enable Split Query | It specifies if the Split Query algorithm is to be enabled to handle compound queries. |
| Enable Split Query For FAQs | It specifies if the Split Query algorithm is to be enabled to handle compound queries for FAQs. |
| Enable tagged FAQ lookup | It specifies if the Tagged FAQ lookup to be enabled. |
| Enable Triniti FAQ Web Search | It specifies if the Triniti FAQ web search API call to be enabled. |
| Enable Web Content Elastic Search as Fallback | It specifies if the Elastic Search API call to be enabled for the fallback based on web content. |
| Enable/Disable FAQ response lookup from Morfeus database | If enabled, FAQ response will be picked from the controller database, instead directly using AI Engine FAQ Answer. |
| Entity Extractor | It specifies the NLP engine to be used. |
| Fuzzy search for FAQ web search cutoff | It returns answer directly if web search question fuzzy matches user utterance. |
| If ES API calls should use system proxy | It specifies if ES API calls should use system proxy. |
| KBS MLT Cards Display Limit | It specifies the number of KBS MLT cards to be displayed when enabled. |
| KBS MLT Cards Fuzzy Search Score Minimum Threshold | It specifies the minimum threshold of Fuzzy Search Score for KBS MLT Cards. |
| Language Detector | It specifies the AI engine to be used to detect language. |
| Language Translator | It specifies the AI engine to be used to translate the message. |
| Message Converter | It specifies whether to translate or transliterate. |
| Mode to handle manual chat | It defines how to handle or reply manual chat |
| Number of suggestions to show in auto-complete | It will show the number of suggestions that are set here. |
| Primary Classifier | It specifies the Primary Classifier engine to be used. |
| Secondary Classifier | It specifies the Secondary Classifier engine to be used. |
| Show KBS MLT Cards | It shows cards in case of an ambiguous response from KBS. |
| Show Related FAQ Queries | It shows Related FAQ Queries if the FAQ answer is found. |
| Show Related FAQ Queries after Fallback | It shows Related FAQ Queries if the FAQ answer is found using any fallback. |
| Show Related FAQ Queries After FAQs with CTA | It shows related queries also for the FAQs which got click to action buttons. |
| Smalltalk/FAQ Handler | It specifies the AI engine to be used to handle Smalltalk and FAQs. |
| Smart FAQ ambiguity handling | It Uses a product from context to handle the ambiguity of KBS response. |
| Solution to use for suggestions | It specifies the solution to be used to suggest FAQs. |
| Web Search Elastic Search Index | Elastic Search Index for Web Search. |
2. Configuration related rules
Rules |
Description |
|---|---|
| Base Data Version | It specifies the version of the base data. |
| FAQ/Non-FAQ ES Index | It specifies the elastic search index for Faq/Non-Faq. |
| Handle Unmapped/Unsupported Intents as a FAQs | If enabled fulfill intent whose fulfillments are not configured as a FAQ. |
| Secondary Language Bot | Bot id of the Secondary Language Bot. |
| Smalltalk Paraphrasing Support | If enabled, Smalltalk paraphrasing support will be associated. |
| Synonyms support for AutoSuggest FAQ | If enabled, Keyphrases and Acronyms will be added as Synonyms for AutoSuggest Elasticsearch index. |
3. Elastic Search Index related rules
Rules |
Description |
|---|---|
| Enable Customer Segment to filter FAQs in ElasticSearch | If enabled, FAQs are filtered for a customer segment. |
4. Placeholders related rules
Rules |
Description |
|---|---|
| Break row placeholder | Placeholder for break row in FAQ response. |
5. Threshold related rules
Rules |
Description |
|---|---|
| Alternative Matches | It specifies the number of similar actions to be shown to the user in case his primary question was not confidently identified by the classifier. |
| Customer Support Fallback Threshold | It specifies the number of failed AI conversations before the system falls back to a customer support agent. |
| Customer Support Fallback Time Interval (in minutes) | It specifies the time interval in which the fallback threshold is measured e.g 2 failed attempts in 5 mins. |
| Enable Grain Type Verification | It enables verification of grain type for FAQs. The top candidate's grain type would be compared with the user query's grain type. |
| FAQ Core Labels | Core Labels included bouncing the request to intent. |
| Max Adversity Score For FAQ Web Search | It specifies the adversity score above which FAQ web search will not happen. |
| Max Adversity Score For Five And Above Word Message | It specifies the adversity score above which intent classified is invalid. |
| Max Adversity Score For Four Word Message | It specifies the adversity score above which intent classified is invalid. |
| Max Adversity Score For One Word Message | It specifies the adversity score above which intent classified is invalid. |
| Max Adversity Score For Three Word Message | It specifies the adversity score above which intent classified is invalid. |
| Max Adversity Score For TWO Word Message | It specifies the adversity score above which intent classified is invalid. |
| Max Confidence | It specifies the confidence percentage which defines an unambiguous (confident) intent detection of an input conversation |
| Min Confidence | It specifies the confidence percentage threshold which defines the lower boundary below which the classifier cant confidently predict the intent of a conversational input. For conversations with intent confidence levels between max and min levels are considered as ambiguous and the top 3 intents are displayed back to the user for selection. |
| Min FAQ Confidence | It specifies the confidence percentage threshold which defines the lower boundary below which the FAQ answer will be considered invalid. |
| Min Smalltalk Confidence | It specifies the confidence percentage threshold which defines the lower boundary below which the Smalltalk answer will be considered invalid. |
| Minimum Threshold to consider Elastic Search result | Minimum Threshold to consider Elastic Search result for FAQs. |
| Minimum Threshold to consider Elastic Search result for Web Search | Minimum Threshold to consider Elastic Search result for Web Search Fallback. |
| Minimum Threshold to consider Triniti FAQ Web Search result | Minimum Threshold to consider Triniti FAQ Web Search result for FAQs. |
| Minimum Threshold to Show Suggestion | Minimum threshold to include the question in suggestion. |
| Negative sentiment threshold | Score above this threshold will consider the message as negative. |
| Postback fuzzy search cutoff | Adjusting the score for postback search as text input. |
| Retry FAQ | It Retries answering FAQ if confidence is low. |
| Retry Smalltalk | It Retries answering Smalltalk if confidence is low. |
| Stop Words | It Stops words to exclude counting number of tokens in the message. |
| Web search for FAQ | Fallback to web search if FAQ is not able to answer. |
| Web search for unclassified utterances | Web search for unclassified utterances if the product exists. |
6. Translation related rules
Rules |
Description |
|---|---|
| Enable message translation for NER from other languages to English before processing | To support other languages, use translator to translate the message to English and respond to other languages. To enable this also set Language Detector. |
| Enable message translation for Primary Classifier from other languages to English before processing | To support other languages, use translator to translate the message to English and respond to other languages. To enable this also set Language Detector. |

B. Triniti Rules
1. Configuration related rules
Rules |
Description |
|---|---|
| API Key | It specifies the API key for Triniti. |
| Domains | It specifies the domains of the Triniti AI Engines (specified in a comma-separated format for clustered deployments). |
| Enable Cache | It specifies if Triniti API calls are to be cached. |
| If Triniti API calls should use system proxy | It specifies if Triniti API calls should use system proxy. |
| NER API Key | It specifies the API key for Triniti NER. |
| NER Domain | It specifies the domain of the Triniti NER. |
| Relative URL Context Path | It specifies the relative context path. |
| Triniti Paraphrase URL | It specifies the URL for paraphrasing. |
| Triniti Translate API Key | It specifies the API key for Triniti Translate. |
| Triniti Translate API URL | It specifies the domain of the Triniti Translate API. |
| Triniti Transliterate API Key | It specifies the API key for Triniti Transliterate. |
| Triniti Transliterate API URL | It specifies the domain of the Triniti Transliterate API. |
| Triniti worker process used only when loading after successful data training |
2. Deployment related rules
Rules |
Description |
|---|---|
| Deployment Mode | It specifies the deployment mode of Triniti. |
| Deployment Type | It specifies if Triniti API calls are to be cached. |
| Elastic Search Index used for loading Primary Classifier configuration for Quick Training | It Quick Train Elastic Search index used for Intent classification. |
| Trainer URL | It specifies the Triniti instance URL which is used for training in a cluster deployment. |
| Training Data Format | It specifies the data format used to train the instance for Triniti version greater than 1.x |
| Triniti API Key | It specifies the X-API-KEY value to be embedded in all cloud Triniti calls. |
| Triniti Manager URL | It Specifies the URL of the Triniti manager for cloud deployment. |

C. Translation Rules
1. AI Engine related rules
Rules |
Description |
|---|---|
| Enable message translation for NER from other languages to English before processing | To support other languages, use translator to translate the message to English and respond to other languages. To enable this also set Language Detector. |
| Enable message translation for Primary Classifier from other languages to English before processing | To support other languages, use translator to translate the message to English and respond to other languages. To enable this also set Language Detector. |
2. Configuration related rules
Rules |
Description |
|---|---|
| Enable message translation from other language to English before processing | To support other language, use translator to translate message to English and response back to other language. To enable this also set Language Detector. |
| Enable response translation from English to other language after processing | It translates the response back to original language from English. Will require Message translation also to be enabled. |
| Google Service Account Credentials | It specifies the Service Account JSON Credentials of Google Cloud API for translation. |
| Language Detector | It specifies the AI engine to be used to detect language. |
| Language Translator | It specifies the AI engine to be used to translate message. |
| Message Converter | It specifies whether to translate or transliterate. |
| Secondary Language Bot | Bot id of the Secondary Language Bot |
| Translate API Max utterances | It specifies the Max Number of utterances to be translated by configured Translate API. |
| Yandex API Key | It specifies the API key for Yandex |
3. Triniti related rules
Rules |
Description |
|---|---|
| Triniti Translate API Key | It specifies the API key for Triniti Translate |
| Triniti Translate API URL | http:// |
| Triniti Transliterate API Key | It specifies the API key for Triniti Transliterate |
| Triniti Transliterate API URL | It specifies the domain of the Triniti Transliterate API |

D. Git Rules
1. Configuration related rules
Rules |
Description |
|---|---|
| AI Data Sync source (Git or Zip) | It pecifies the Sync source for AI data |
2. Data related rules
Rules |
Description |
|---|---|
| Branch | It specifies the branch for triniti data parser. |
| Password | It specifies the password for triniti data parser. |
| URL | It specifies the URL for triniti data parser. |
| Username | It specifies the username for triniti data parser. |
| Workspace | It specifies the workspace for triniti data parser. |
3. ZIP related rules
Rules |
Description |
|---|---|
| Zip Password | It specifies the password for triniti data parser zip file. |
| Zip URL for Triniti Data import | It specifies the Zip URL for Triniti Data import. |
| Zip Username | It specifies the username for triniti data parser zip file. |

E. Knowledge Graph Rules
1. Configuration related rules
Rules |
Description |
|---|---|
| Elastic Search Index for Knowledge Graph | It shows Elastic Search Index for Knowledge Graph. |
| Enable Knowledge Graph | It specifies whether the Knowledge Graph lookup is enabled. |
| Enable Knowledge Graph Lookup for FAQ Fallback | It specifies if the Knowledge Graph lookup to be used as FAQ fallback. |
| Enable Query Parser using Knowledge Graph | It specifies if the Query Parser using Knowledge Graph is to be enabled. |
| Knowledge Graph Beautification phrases | You can add the knowledge graph beautification phrases in this field. |
| Knowledge Graph Beautification phrases for Attributes | You can add the knowledge graph beautification phrases for the attribute in this field. |
| Knowledge Graph Response Beautification | If enabled, Knowledge Graph suggestions will be phrased as near meaningful Questions. |
| Maximum Knowledge Graph suggestions | It specifies the maximum number of Knowledge Graph suggestions in the display. |
| Maximum number of words for Knowledge Graph | Maximum number of words for Knowledge Graph |
| Strict Search Knowledge Graph Threshold | Specifies threshold for matching irrelevant results. Higher the value stricter the search. 0 to switch off this check. |
| Time in seconds to keep Suggestion and Offset in cache | Time in seconds to keep Suggestion and Offset in the cache, This is for Show More functionality. |

F. Self Learning Rules
1. Self Learning Configuration related rules
Rules |
Description |
|---|---|
| Enable Self Learning 2.0 | It will enable/disable the advance self-learning |
| Number of rows to be created per XLSX workbook | It specifies the number of rows to be created per XLSX workbook based on heap size, maximum being 1048576. |
| Scroll search page size | It will specify the scroll search page size. |

G. Spotter Rules
1. Spotter Configuration related rules
Rules |
Description |
|---|---|
| API Key | It specifies the API key for Spotter. |
| Enable masking of numeric values | The Spotter will mask the numbers in the responses if you enable this rule. |
| Enable Spotter derived KeyPhrases | If enabled, Spotter derived KeyPhrases will be updated. |
| Spotter Context Path | It specifies the relative context path for the spotter. |
| Spotter URL | It specifies the endpoint of Spotter. |
| Spotter worker process used only when loading after successful data training | --- |
| Use Spotter Bounce-To Response as Intent | If enabled, Spotter Bounce-To intent will be used as the main Intent. |
| User ID | It specifies the USER ID for Spotter. |

H. Triniti Unified API v2 rules
1. Unified API related rules
Rules |
Description |
|---|---|
| API Key | It specifies the API key to access Unified API. |
| API Secret | It specifies the secret key to access Unified API. |
| Context Path | It specifies the Context Path of Unified API. |
| Enable Context Handling For Products | Prerequisite Context handling is enabled. Only for specified products context handling will work. Set value to ALL to enable for all products |
| Enable/Disable Compression | It specifies if compression is enabled. |
| Enable/Disable Context Handling | It specifies if Context handling is enabled. Previous inputs will be passed to Triniti to provide context information |
| Enable/Disable Debug | It specifies if debug is enabled. |
| Enable/Disable Discourse | It specifies if the discourse is enabled. |
| Enable/Disable Fragments | It specifies if fragments are enabled. |
| Enable/Disable Pragmatics | It specifies if pragmatics are enabled. |
| Enable/Disable Semantic Rules | It specifies if semantic rules are enabled. |
| Enable/Disable Similar Queries | It specifies if similar queries are enabled. |
| Endpoint URL | It specifies the Unified API endpoint URL. |
| Triniti Cloud Backend Domain URL | --- |
| Triniti Cloud Basic Auth Encoded Credential | --- |
| Unified API v2 process used only when loading after successful data training | --- |
| Unified API Version | It specifies the version of Unified API. |
| X-SESSION-ID | It specifies X-SESSION-ID for Triniti. |
| X-USER-ID | It specifies X-USER-ID for Triniti. |

Import AI Rules
You can even import the AI rules as per your requirement by following these steps:

Export AI Rules
You can also export the AI rules by going through these steps:
A JSON file will be downloaded for AI rules containing all the AI rules configuration

NER
NER is used to map the entities. You can upload a CSV file of entities by following these steps:
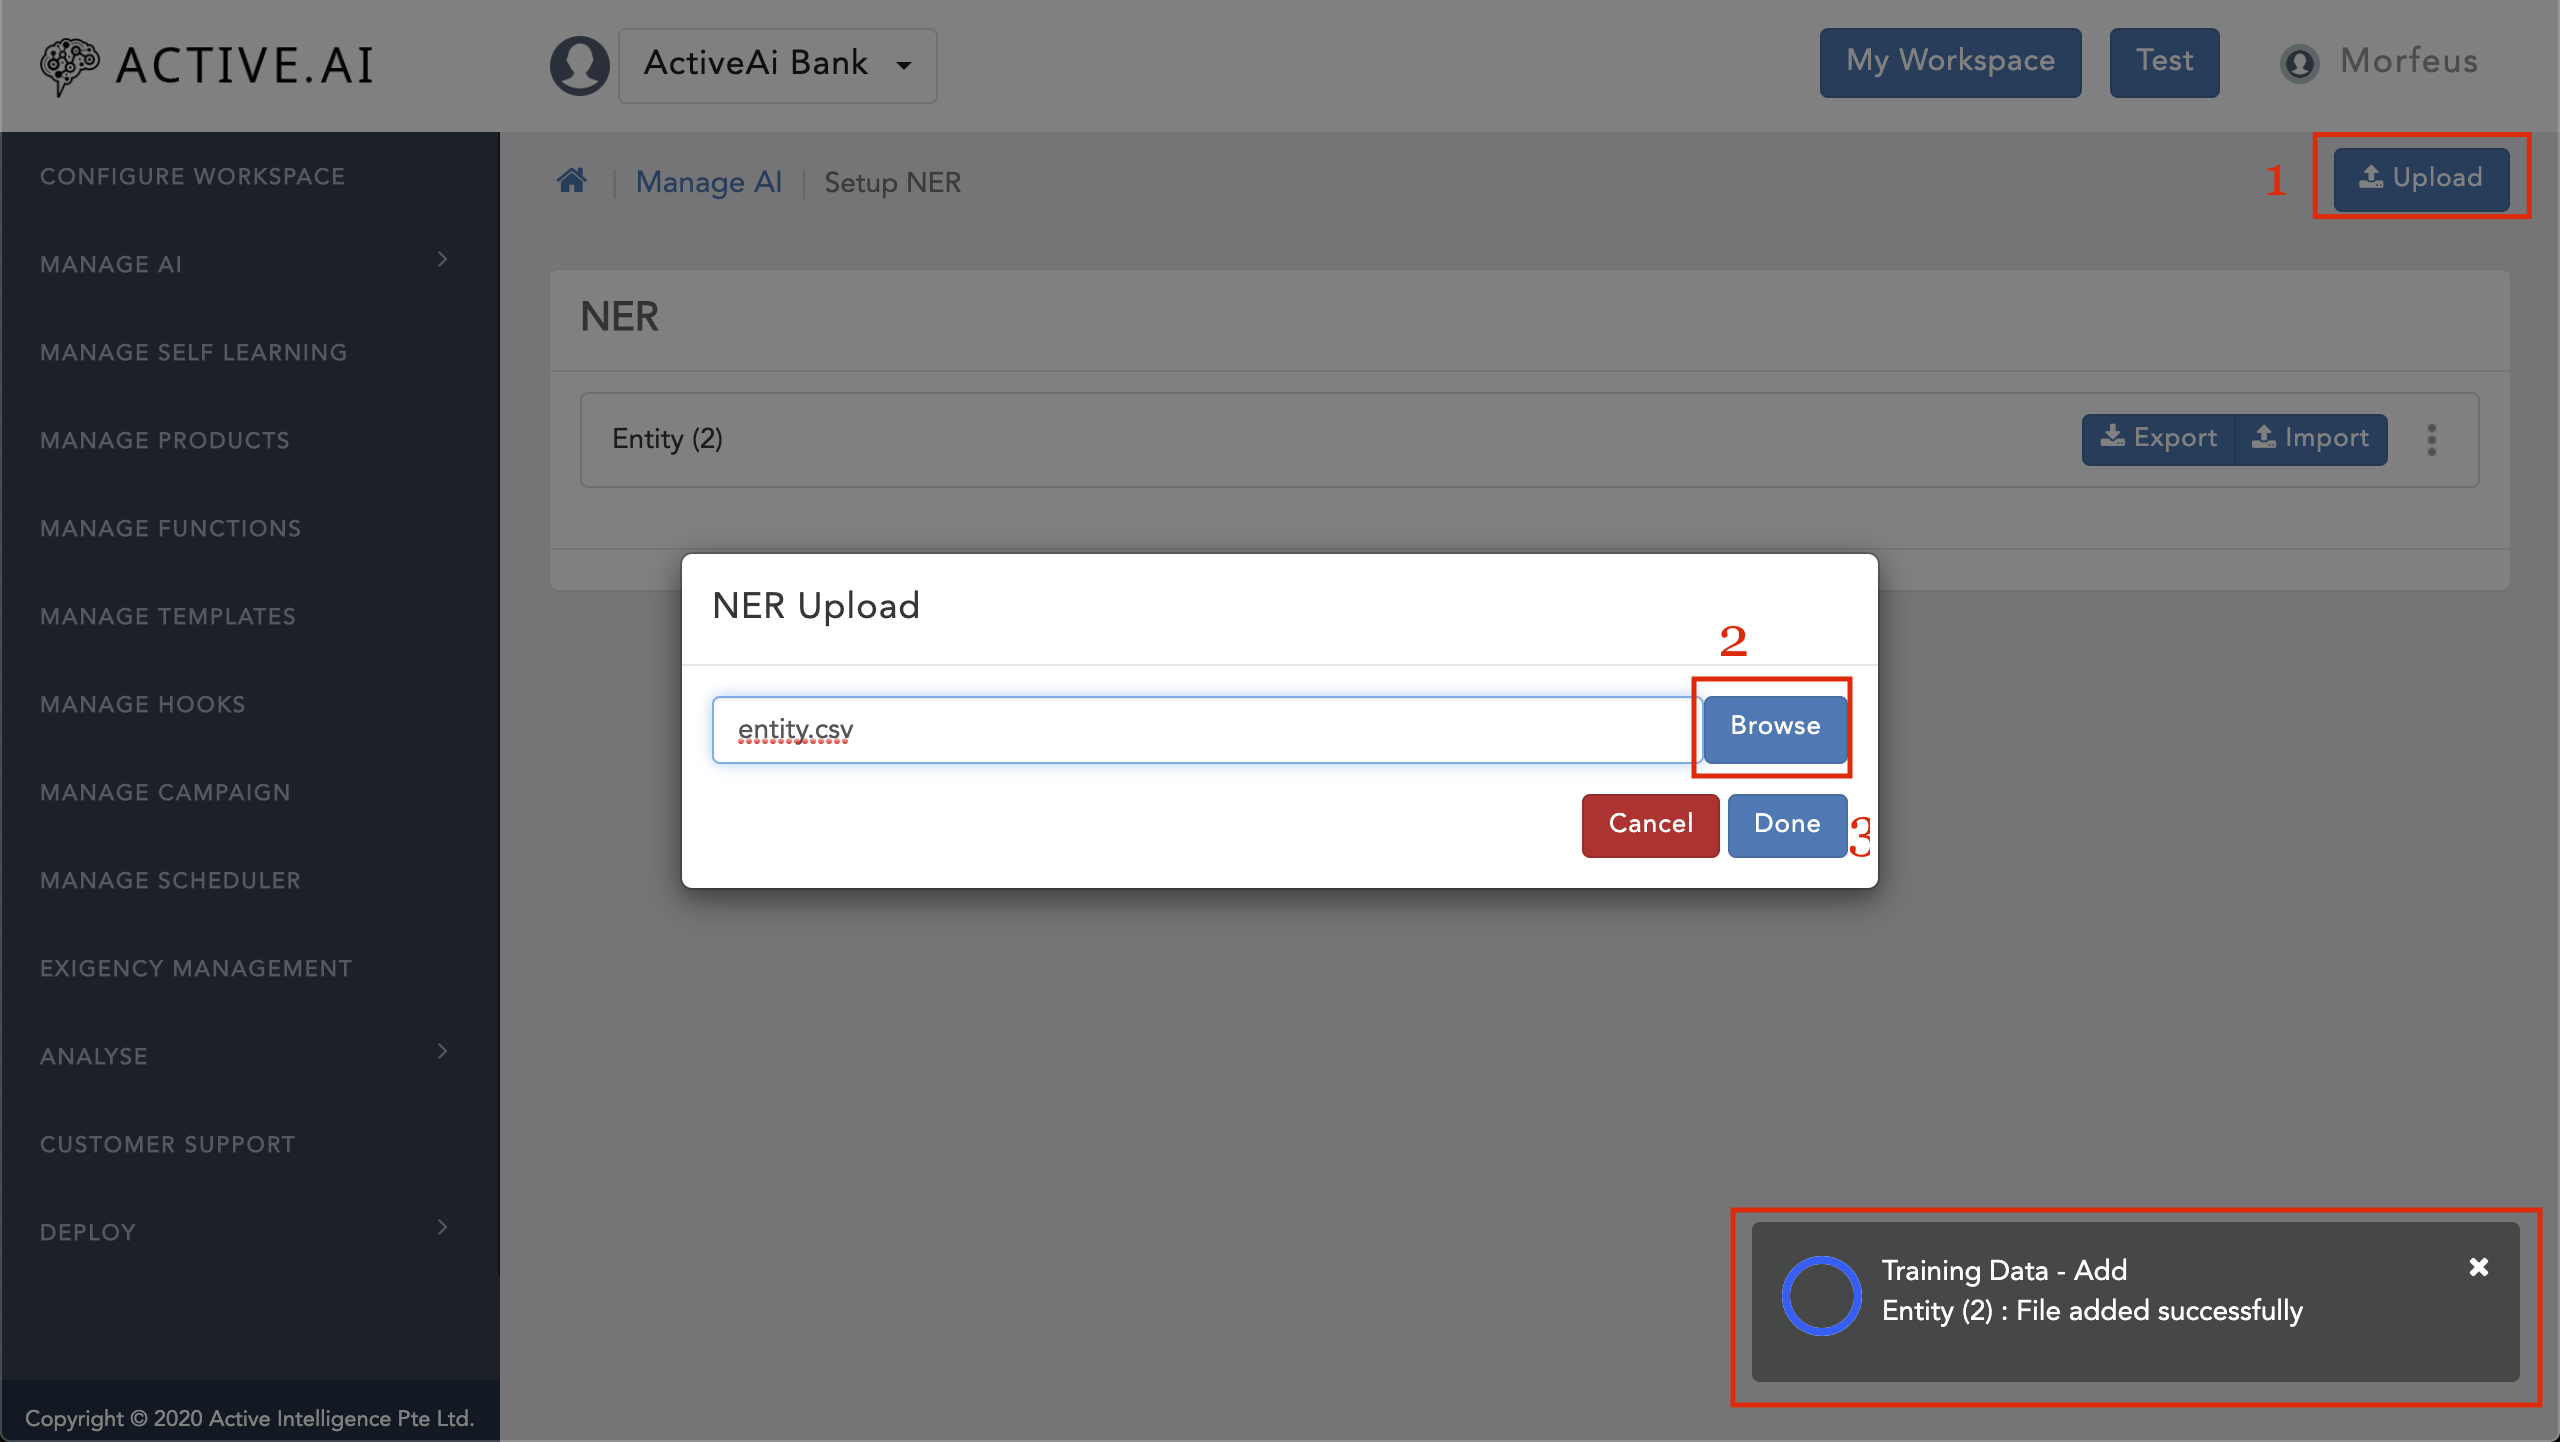
Training & Deployment
To get the proper response from your bot you will have to perform Train & Deploy. Before train make sure that you have done all the following settings in your workspace rules:
Set AI Rules
1. General

2. Triniti

3. Unified API V2

4. Configure Workspace Rules

Generate & Train
After setting all the rules mentioned above to follow these steps:

Manage Language Translation
Morfeus supports internalization (i18n) ie; it handles languages like Hindi, French, Chinese, etc. other than English. The bot can answer in any language rather than replying in English only. You can check and manage the translation if the translation is correct and the user is getting the proper response in their language by following these steps:
Note: The Manage Language Translation will be enabled only for multilingual bots.
Translated Utterances: (In this section, you will get all the translated utterances that bot translated and given the response)
Note: The updated utterances will be marked as Untrained, you will have to train those utterances after updating them to get the updated response.

Updated Translated Utterances: (In this section you will get all the translated utterances which you updated by clicking on the edit icon from the 'Translated Utterances' section)

Managing Self Learning
What is self learning
Why Self learning
| Category | Description |
|---|---|
| Feedback | After every answer by the bot user gets an option to give Feedback to the answer given by the bot. Feedback can be thumbs up or thumbs down. ie positive or negative. All the feedback utterances given by user will fall under this filter in self-learning |
| Ontology | Ontology is a hierarchical mapping (Tree Structure) of the products and services an enterprise has to offer for customers. As AI classifiers are probabilistic by nature so they may not be suited for 2-3 words utterances. For all such utterances, you will get suggestions based on a knowledge graph. All the utterances which are classified by ontology graph will be filtered in ontology category. |
| Profanity | User conversations sometimes quickly derail and become inappropriate such as hurling abuses, passing rude and discourteous comments on individuals or bots. Inappropriate messages or comments are turning into an online menace slowly degrading the effectiveness of user experiences. |
| Unclassified | With all the power of machine learning and natural language processing, there will be some utterances that will not be classified by the bot due to various reasons such as data training, etc. All the utterances that are not classified by the bot will fall under Unclassified filter. |
| Unsupported | There may be some scenarios where users can send some unsupported files or unsupported media. All such utterances with unsupported data will fall under Unsupported category. |
| Failed | All the Faqs or transactions that may be failed due to various reasons such as wrong pin, shortage of fund in the users account, etc transaction may be failed in such scenarios. All these utterances will be categorized under failed category. |
| Ambiguous | When utterances being classified by the Ai engine, certain confidence is set for the classified result. This rating is given out of 100. If some utterances with low confidence levels will be classified under Ambiguous category. |
A. Search By Data
Search by data is nothing but checking the utterances of:
B. Search By Type
You can check the type of utterances like:
C. Search By Channels
You can search the data based on channels, that will show the utterances that are asked on the particular channel. Eg; WebApp, Facebook, Skype, WhatsApp, etc.
D. Search By MessageType
Using this filter you can filter out the responses based on the following message types
E. Search By Languages
You can also filter out the utterance which is asked in different languages Eg; French, Arabic, Chinese, etc.
F. Search By EventCodes
The utterances could be filtered out based on event codes eg; Cognitive QnA, Fallback answered, Default messages, etc.
G. Search By Utterance
You can find out the utterances by entering the utterance in the search box.
H. Search By Date
Search by Statement is a combination of selecting the utterances of FAQs, Small Talk, Banking with respective to Channels or Type of Answers using key statements provided in the input field.

I. Search By Sentiments
The utterances could be filtered out based on sentiments eg; Positive, Negative or Neutral.


Add To Training
In the manage self-learning, we do show all the utterances which user has asked on the bot. Though if we feel that the bot has not responded with the correct answer or if we have any unanswered utterances then we can send those utterances back for the training using this feature.
To train the failed utterances/data we will have to follow these steps:


Note:
Managing Knowledge graph
Overview
A knowledge graph is a hierarchical mapping (Tree Structure) of the products and services an enterprise has to offer for customers.
AI Classifiers are probabilistic by nature, so they may not be best suited for short 2-3 word utterances. Knowledge Graph provides a deterministic alternative with configurable probing in case of ambiguity.
This is a keyword-based user journey. Here user input is analyzed based on a pre-defined graph and the user is taken to a fulfillment.
Design
Knowledge Graph design constitutes of the below basic building blocks.
Design Factor |
Description |
|---|---|
| Products | Defines unique business offering like products, goods or services Ex: Account. |
| Product Types | Defines the base classification for the defined business products. Ex: Savings, Current, Salary. |
| Product Names | Specifies the marketed name for the business offering. Ex: DBS Multiplier, OCBC 360 |
| Product Attribute Groups | Association of prominent feature grouping of a product. Ex: Statements, Balances |
| Product Attributes | Features or characteristics to be associated for the defined products, types and names Ex: e-Statement, Eligibility, Benefits, Nominee |
| Action | Action is the effect which has to be executed on the configured Product/Service Ex: view, download, transfer, activate |
Retail Banking Knowledge Graph Design

You can design a knowledge graph by following these steps:

Importable Design Workbook
Sample Knowledge Graph xlsx for domain Retail Banking. This can be imported from the Knowledge graph UI using the import function.
Sample KnowledgeGraph Workbook
File Structure
Sheet Name |
Description |
|---|---|
| Product | Constitudes definition of Products, Types, Names and Attributes |
| Product Fullfillment | Defines the desired result business user want to take the customer to. Default, Messages, Templates, Intent, FAQs, Worflow |
| Product Synonyms | Defines the stand-in replacement when customer types a word in the bot. Ex: Credit card product is synonymous to CC, visa, master, credit |
| Action Synonyms | Defines the stand-in replacement work to be done on the defined product or serivce. Ex: view Action is synonymous to show, get |
Probing
Probing is the process where the user-provided phrases or information will be analyzed and appropriate suggestive listings will be provided by Knowledge Graph based on the business user-provided product/service configurations and fulfillments. The result of probing will be the next steps that will guide the users with the possible upcoming suggestions. The probing will be done for the enabled products only.

1. Action & Product Attributes Probing:
Assume that the business user has configured the Knowledge Graph for retail banking products like Credit card, debit card, account. So, if the user asks for synonym "cc" for Credit card, the bot suggests linked actions and attributes.
Ex:

2. Product Probing:
When user asks for any action and if that action is linked to multiple products, then bot will suggests the multiple linked products. Then based on the suggestion selected by the user further probing or fulfillment will be carried out.
Ex: If you ask the bot to show, then the bot will give you the option to select like view your loan, view your card, view your account, etc.

3. Product Type & Product Name Probing:
When fulfillment is defined for the Action -> Product -> Type -> Name, user have provided either action/product then bot will probe for the linked types followed by associated names. Eg; If you have asked the bot for acc, then the bot will ask you to select from like transfer account, apply for an account, view your account, etc.

Rules
These rules will help you to configure your workspace's knowledge graph, and also helps the user to interact with the bot and get proper & appropriate response for the respected query.
Rules |
Description |
|---|---|
| Elastic Search Index for Knowledge Graph | This index stores basic definition information which will aid for the discovery of the design blocks and helps in stemming/identifying the proper linguistics. |
| Enable Knowledge Graph | Enable/Disable Knowledge Graph for the bot |
| Enable Knowledge Graph Lookup for FAQ Fallback | Knowledge Graph lookup will be used as when no response for utterances classified as FAQ. |
| Enable Query Parser using Knowledge Graph | It specifies if the Query Parser using Knowledge Graph is to be enabled. |
| Knowledge Graph Beautification phrases | Suggestions will be beautified with the phrases configured. Ex: Do you want to view the, would you like to view the |
| Knowledge Graph Beautification phrases for Attributes | Suggestions will be beautified with the phrases configured for attributes Would you like to, Do you want to, Do you like to, Do you wish to |
| Knowledge Graph Response Beautification | Enable/Disable question phrase creation for suggestions |
| Maximum Knowledge Graph suggestions | It specifies the maximum number of Knowledge Graph suggestions shown in the bot. |
| Maximum number of words for Knowledge Graph | Specifies the maximum number of words for which Knowledge graph should be triggered by the bot. |
| Strict Search Knowledge Graph Threshold | Specifies threshold for matching irrelevant results. Higher the value stricter the search. 0 to switch off this check. |
| Time in seconds to keep Suggestion and Offset in cache | Time in seconds to keep Suggestion and Offset in the cache, This is for Show More functionality. |

Templates
1. Knowledge Graph Default Template
You can add an ontology default template by following these steps:
{{#if state.slots.ATTR}}
<div class="panel panel-default button-div border-radius-top-20" data-element="true" data-title="You can find more information about{{#if state.slots.ATTR}} {{state.slots.ATTR}} for{{/if}}{{#if state.slots.PN}} {{state.slots.PN}}{{/if}}{{#if state.slots.PT}} {{state.slots.PT}}{{/if}}{{#if state.slots.P}} {{state.slots.P}}{{/if}} at Axisbank.com" data-subTitle="{{{subTitle}}}" data-image="{{image}}">
  {{else if state.slots.PTATTR}}
  <div class="panel panel-default button-div border-radius-top-20" data-element="true" data-title="You can find more information about{{#if state.slots.PTATTR}} {{state.slots.PTATTR}} for{{/if}}{{#if state.slots.PN}} {{state.slots.PN}}{{/if}}{{#if state.slots.PT}} {{state.slots.PT}}{{/if}}{{#if state.slots.P}} {{state.slots.P}}{{/if}} at Axisbank.com" data-subTitle="{{{subTitle}}}" data-image="{{image}}">
    {{else}}
    <div class="panel panel-default button-div border-radius-top-20" data-element="true" data-title="You can find more information about{{#if state.slots.PNATTR}} {{state.slots.PNATTR}} for{{/if}}{{#if state.slots.PN}} {{state.slots.PN}}{{/if}}{{#if state.slots.PT}} {{state.slots.PT}}{{/if}}{{#if state.slots.P}} {{state.slots.P}}{{/if}} at Axisbank.com" data-subTitle="{{{subTitle}}}" data-image="{{image}}">
      {{/if}}
      <div class="panel-heading card-image">
        <img src="{{image}}" class="img-responsive">
      </div>
      <div class="panel-body">
        <div class="row">
          <div class="col-xs-12 buttondesign">
            <h5 class="uob-amex card-title" style="font-weight: bold;">{{title}}
            </h5>
            <p class="account-number">{{subTitle}}
            </p> {{#if link}}
            <p class="account-number">{{link}}
            </p>{{/if}}
          </div>
        </div>
      </div>
      {{#if state.slots.ATTR}}
      <button type="button" class="btn btn-primary btn-sm btn-block" id="button1" data-button="true" data-title="Click Here" data-type="externalUrl" data-payload="https://www.axisbank.com/search-results?indexCatalogue=axissearch&searchQuery={{state.slots.A}} {{state.slots.ATTR}} {{state.slots.PN}} {{state.slots.PT}} {{state.slots.P}}">{{this}}
      </button>
      {{else if state.slots.PTATTR}}
      <button type="button" class="btn btn-primary btn-sm btn-block" id="button1" data-button="true" data-title="Click Here" data-type="externalUrl" data-payload="https://www.axisbank.com/search-results?indexCatalogue=axissearch&searchQuery={{state.slots.A}} {{state.slots.PTATTR}} {{state.slots.PN}} {{state.slots.PT}} {{state.slots.P}}">{{this}}
      </button>
      {{else}}
      <button type="button" class="btn btn-primary btn-sm btn-block" id="button1" data-button="true" data-title="Click Here" data-type="externalUrl" data-payload="https://www.axisbank.com/search-results?indexCatalogue=axissearch&searchQuery={{state.slots.A}} {{state.slots.PNATTR}} {{state.slots.PN}} {{state.slots.PT}} {{state.slots.P}}">{{this}}
      </button>
      {{/if}}
    </div>

2. Knowledge Graph Suggestion Template:
The ontology suggestion template will show the related suggestions to the user on the bot based on your configured template. You can add an ontology suggestion template by following these steps:
<div class="panel panel-default button-div border-radius-top-20" data-element="true" data-title="Did you mean?" data-subTitle="{{{subTitle}}}" data-image="{{image}}">
  <div class="panel-body">
    <div class="row">
      <div class="col-xs-12 buttondesign">
        <h5 class="uob-amex card-title" style="font-weight: bold;">Did you mean?
        </h5>
      </div>
    </div>
  </div>
  {{#each this.suggestionTextBody}}
  <button type="button" class="btn btn-primary btn-sm btn-block" id="button1" data-button="true" data-title="{{suggestionText}}?" data-button-life="OLO" data-type="postback" data-payload='{"type":"ONTOLOGY","data":{"MESSAGE":"{{MESSAGE}}","suggestion":"{{suggestion}}","type":"{{type}}", "INTENT":"{{INTENT}}" }}'>{{this}} {{MESSAGE}}
  </button>
  {{/each}}
  {{#if this.showmore}}
  <button type="button" class="btn btn-primary btn-sm btn-block" id="button1" data-button="true" data-button-life="OLO" data-title="Show More" data-type="postback" data-payload='{"type":"ONTOLOGY","data":{"MESSAGE":"{{MESSAGE}}","suggestion":"showmore","type":"{{type}}","allowMultipleClicks":false }}'>Show More
  </button>
  {{/if}}
</div>

Fulfillment
Fulfillment is the process of completing the user's request with an execution. Fulfillment is the end result configured by the business user for the below combinations. Fulfillments are generally defined per product.
| Fulfillment Combinations |
|---|
| Action -> Product Type |
| Action -> Product Type -> Product Name |
| Action -> Product Type -> Product Attribute |
| Action -> Product Type -> Product Name -> Product Attribute |
If no fulfillment configured as paths mentioned above, then default fulfillment will be triggered. The definition of natural ordering will be used when listing the details for the customer in the bot.

You can add a fulfillment by following these steps:
Fulfillment Types
1. Default Fulfillment Type
If no fulfillment configured as paths for the product definition, then default fulfillment will be triggered.
The need for default fulfillment being, the business user has provisioned all the product/services hierarchy and expecting the bot to point to the business website based on the user's input. In this case, DEFAULT fulfillment will come in handy and direct the user to the search results from the business website and redirects the user by providing the link to the business website.

2. Messages Fulfillment Type
If we want to show Message/Error Message to the user when they select unsupported products then business users can set an error message in the flow.
How to configure messages? please refer Configure Messages

3. FAQ_ID Fulfillment Type
We can set FAQ_ID as fulfillment, so that if the user selects that option then the bot will give the response respected to that FAQ_ID.

4. Intent Fulfillment Type
We can trigger an Intent for the action as a fulfillment.
How to configure intent? please refer Configure Intents

5.Templates Fulfillment Type
In some cases, if we want to show a template to the user for action then you can select a template as a fulfillment type & configure the template or if you can any predefined template then you can use that one also.
Eg; If a user asks for 'Apply for debit card' then you can configure a carousel/list template to show user various cards like Rupay card, Master Card, Visa card, etc.

6. Workflow Fulfillment Type
Workflow helps to define conversation journeys. The intent and entity might be enough information to identify the correct response, or the workflow might ask the user for more input that is needed to respond correctly.
How to configure workflow? please refer Configure workflow

Action Synonyms
The actions added in the Fulfillment sections are listed for which synonyms can be added. We can't define an action here.


General Guidelines
Import / Export
If you want to move the same knowledge graph in another environment, so you can export the knowledge graph or if you have any configured knowledgegarph that you want to configure in your workspace, you can import that knowledgegraph.
You can download a sample knowledge graph from the Manage AI -> Knowledge Graph -> Download Sample Knowledge Graph to understand more about fields and values of knowlegraph to import.

Importing Knowledge Graph
You can import a knowledge graph by following these steps:
Exporting Knowledge Graph
You can export a knowledge graph by following these steps:
It will download a xlxs file containing Product, Product Type, Product Name, Product Attribute group, Product Attribute, Fulfillment type, Fulfillment etc. columns

Deleting Knowledge Graph
If you don't want any knowledge graph then you can delete those knowledge graph by following these steps:

Loading Knowledge Graph
If you have configured the knowledge graph & for some reason if it's not loading the graph then you can load the configured knowledge graph by following these steps:
It will load the knowledge graph based on the configuration.

Partial Search
Scenarios
1 - When user utters a more than one word utterance, and if any of the word is not present in ontology sheet then a message will be shown for matched words as shown below.

There is a rule to make that message configurable.

2 - If the user utters a single word utterance, then will search for exact match if there is no exact match found then will look for partial match.
Example : If the user utters for charges, If there is no exact match for charges, then we will fetch results of interest charges, loan charges and goes on.
3 - If the user utters multiple words then will look for the exact match by putting AND condition between the words if the results are null then will go for split search by searching two words individually with OR case.
Beautification
Implementation : Beautification of suggestions will be shown as
Action + ProductName + ProductType + Product +Attribute

Multiple templates
Different templates can be assigned for different level of probing.
For ex : If we utter the product name then the product level actions should be shown as suggestions in that case action specific template will be rendered.
If the suggestion specific template does not exists then default ontology templates will be rendered as in previous versions.
Template codes for different set of suggestions :
Attributes : ONTOLOGY_SUGGESTION_TEMPLATE_ATTR
Product type : ONTOLOGY_SUGGESTION_TEMPLATE_PT
Product name: ONTOLOGY_SUGGESTION_TEMPLATE_PN
Action : ONTOLOGY_SUGGESTION_TEMPLATE_A
Default : ONTOLOGY_SUGGESTION_TEMPLATE
Manage Use Case
In Manage use case we can add an AI/Non-AI use case based on the requirement. AI Use Case : In AI use case we use AI Engine to classify the use case, intents, data & fulfillment, etc to get the response. Non-AI Use Case : In Non-AI use case AI Engine doesn't come into a picture to classify the things or to get the response, We get the response based on certain non-ai-usecase-rule which is generated at the time of creating an Non-AI use case.
Add Use Case:
We can Add a use case by following these steps:
AI Use Case:


 - Click on Next
- In Fulfillment tab Select the properties (ie; Channel & Security)
 - Click on Save
Non-AI Use Case:


The Use Case will be created with the above function name, data and properties and it will be redirected to the Manage Use Case page.

Post adding the use case you can generate & train the added data and test on the bot.
Manage Use Case :
Post creating the Use Case we can go to the particular use case to edit/update by following these steps:
Definition
In the use case definition, you will configure a use case that will handle all the related queries for the intent is set in the use case definition and also provide the provision to handle unsupported functionalities.

Supported Functionalities :

Manage

1. Supported : On click of this we enable the use case availability in conversation
2. Fulfilment Type : contains 3 options
1. Messages : By default unmapped_intent message code will be used and including parameters with CSV data named as functionName, productType, functionCategory, functionDescription, functionCode, unifiedApiResponse, functionType. Can change the message code if required by clicking on the message which is shown on fulfilment if Message is Current drop down or changing DropDown to Message also we can do as shown

3. Templates : By default UnSupportedFulFillment template code will be used with payload contains parameters like functionName, productType, functionCategory, functionDescription, functionCode, unifiedApiResponse, functionType along with intent and feature and we can choose any existing templates to customise as shown

5. FAQ : By default utterance itself we hit to FAQ API (KBS_CLIENT) and also we can choose specific FAQ ID for particular use case as shown


Sync
Sync helps us to update the existing records with latest available csv in managed config resource
Import
Importing csv file will update the existing records, so that will be available at the time of managing functionalities sample import csv is as follows:
Function Code,Function Name,Function Category,Function Type,Product Type,Root Product,Action,Attributes,Conversation Type,intent,Supported,Template Code,FAQ Id,Function Description,Status,Auth User,Security Level,Audit Level,Supported Channels \ account_inquiry__savingsaccount,Account Enquiry,Balance Inquiry,Enquiry,Savings Account,account,,,M,qry-accountenquiry,false,,,Retrieving and showing balances for Savings Account is not supported,Y,0,0,0,
Note : csv managed in product (admin config) is different from what we need to import here
Export
Exporting will provide us data in csv format which has the details of what and how we are managing the functionalities.
Import Zip
Importing zip will help us to import functionality along with their available resources like messages, templates, hooks
Export Zip
Exporting zip will help us to export functionalities including resources like messages, templates, hooks we have export zip feature for individual functionality also
Fields
Name : Name of the function, should be unique
Description : Describe the function used for and its purpose
Category : This is a very important field which used to club all the other modules like messages, rules, template and data to bind together
Intents : Configure applicable intents for this function like txn-login etc
Functionality Type: Define whether this is inquiry or transaction type module
Channels : It will display all the configured channels for this workspace. Can enable or disable based on the requirement.
Security > Realm: It used to configure whether this function can be invoked before login or post login by configuring

Function comprises of following elements:
Definition
In the definition, there are four sections:

Description
Along with the basic details, you need to configure the intent for which you want this function to be triggered. Multiple functions can be configured with the same intent, but while defining the fulfillment, you need to make sure the rules or channels are configured in such a way that there is no ambiguity.
Channels
In the channels section, all the channels would be displayed which are configured for the bot. Select all the channels for which function is to be enabled.
Properties
Each function can either be transaction or enquiry. An Enquiry is mostly a single-step flow while a transaction is a multi-step flow. Other criteria to decide between transaction and enquiry, is whether a user is allowed to that flow within another flow or not. User is allowed to ask any enquiries within a transaction. But he can have only one transaction at a time.
Security
There are three options available to define the security for your function; One Factor Authentication (1FA), Two Factor Authentication (2FA) or Public. As the name suggests, for 1FA and 2FA user needs to be authenticated before it proceeds with the flow, like for balance enquiry. Public functions are accessible by all like enquiry for the foreign exchange rate. For 2FA, based on the policy configured either user would be asked to do 2FA at the starting of the flow itself, or the integration needs to send a flag to ask for 2FA in the middle of the flow.
Data
Data are all the utterances for which you have to the use case. It will show all the related utterances for the selected intent in the definition of the usecase. Eg; If you have added a use case for book_ticket then the data section will contain all the utterance related to book_ticket.
We categorized data into two sections
Base - Preloaded data which loaded by default when workspace created if any
Custom - User added utterances

Dialog
Based on the intent you have configured in definition, the dialog will show all the entities related to that intent. You can add more dialogs. Queries or transaction intent can have more than one dialog turn to complete the user's request. This type of intent can have multiple dialogs turns. One dialog turn involves providing the following three information:
To configure dialogs please refer Configure dialogs

Fulfillment
Fulfillment is the process of completing the user's request. There are five ways to define fulfillment.
Refer managing fulfillment.
Camel Routes
Integration Editor
Integration editor where the user can define the integration routes through a user interface that generates the Camel route XML DSL. In retail banking, the existing routes invoke integration routes and passing the domain-specific request objects in POJO (Plain Old Java Object). The request object generally would be our BizApp's (RB, Trading, etc.) canonical model. The user needs to get the required information form the request POJO and map to the client API POJO which intern converted to XML or JSON based on the API specification and get the response either JSON or XML. The output of the integration route is expected to return the domain response POJO with the required information populated. The object of API can be manually defined or can be dynamically introspected if the API supports open standards like OpenAPI 2.0 & 3.0 spec, SOAP or an HTTP schema.
If you want to add camel routes in your function then you can add by following these steps:

Templates
Templates are a combination of some components like images, text, buttons, etc. It will give a good look and feel to the user better than the only text response.
E.g., If you want to greet your user with a Greeting/Welcome message, then you can set the welcome message in a text-only as "Hey there! How may I assist you?" but If you add some Images/card, then it will give a good look & feel. That will help the user to spend more time on your bot.
To configure templates please refer Configure Templates

Messages
You can configure some error messages or some default messages, that will be shown if bot will not found any response.
Example: TRANSFER_ERROR_MESSAGE: Balance not available, please enter an amount less than the available balance.
You can configure a message code (TRANSFER_ERROR_MESSAGE) and the response that bot will send to the user (Balance not available, please enter an amount less than available balance.). So If the user will try to send amount more than their actual balance, then the bot will send the error message (Balance not available, please enter an amount less than available balance.).
To configure messages, please refer Configure messages

Managing Rules
Some rules can make your workspace more functional & user-friendly to interact with the users. You can manage the rules for your workspace as well as for our AI engine to make your bot respond better.
System Rules
These are the System rules that make our AI engine more effective & functional to work well with your bot as well as to analyze, process, filter & send the response to the user through your bot.
You can manage the following rules for your bot:
A. General Rules
1. AI Engines related rules
Rules |
Description |
|---|---|
| Ai Engine | It specifies the type of message processor. |
| Auto Suggest Corpus Variants | It specifies whether all or main variants to be added to the corpus. |
| Context Change Detector | It specifies the AI engine to be used to detect Context Change. |
| Elastic Search Index | You can set the Elastic Search Index for auto-complete. |
| Enable Confirmation Entities Handling | It specifies if the Confirmation Entities Handling is to be enabled. |
| Enable Elastic Search as Fallback | It specifies if the Elastic Search API call to be enabled. |
| Enable External FAQ Fallback | It specifies if the external FAQ fallback to be enabled. |
| Enable FAQ response local lookup | It specifies if to check FAQ response locally before hitting KBS. |
| Enable fuzzy search | It enables postback handling as text input. |
| Enable Local Lookup for Classification | It specifies if the local lookup of classification is enabled. |
| Enable logging for Fallback | It enables/disables logging for Fallback. |
| Enable message translation from other languages to English before processing | To support other languages, use the translator to translate the message to English and respond to other languages. To enable this also set Language Detector. |
| Enable Preprocessor | It specifies if the PrePreprocessor algorithm is to be enabled |
| Enable Query Parser | It specifies if the Query Parser algorithm is to be enabled |
| Enable response translation from English to other languages after processing | It translates response back to original language from English. Will require Message translation also to be enabled. |
| Enable Sentiment Analysis | It specifies if the Sentiment analysis is to be enabled. |
| Enable Split Query | It specifies if the Split Query algorithm is to be enabled to handle compound queries. |
| Enable Split Query For FAQs | It specifies if the Split Query algorithm is to be enabled to handle compound queries for FAQs. |
| Enable tagged FAQ lookup | It specifies if the Tagged FAQ lookup to be enabled. |
| Enable Triniti FAQ Web Search | It specifies if the Triniti FAQ web search API call to be enabled. |
| Enable Web Content Elastic Search as Fallback | It specifies if the Elastic Search API call to be enabled for the fallback based on web content. |
| Enable/Disable FAQ response lookup from Morfeus database | If enabled, FAQ response will be picked from the controller database, instead directly using AI Engine FAQ Answer. |
| Entity Extractor | It specifies the NLP engine to be used. |
| Fuzzy search for FAQ web search cutoff | It returns answer directly if web search question fuzzy matches user utterance. |
| If ES API calls should use system proxy | It specifies if ES API calls should use system proxy. |
| KBS MLT Cards Display Limit | It specifies the number of KBS MLT cards to be displayed when enabled. |
| KBS MLT Cards Fuzzy Search Score Minimum Threshold | It specifies the minimum threshold of Fuzzy Search Score for KBS MLT Cards. |
| Language Detector | It specifies the AI engine to be used to detect language. |
| Language Translator | It specifies the AI engine to be used to translate the message. |
| Message Converter | It specifies whether to translate or transliterate. |
| Mode to handle manual chat | It defines how to handle or reply manual chat |
| Number of suggestions to show in auto-complete | It will show the number of suggestions that are set here. |
| Primary Classifier | It specifies the Primary Classifier engine to be used. |
| Secondary Classifier | It specifies the Secondary Classifier engine to be used. |
| Show KBS MLT Cards | It shows cards in case of an ambiguous response from KBS. |
| Show Related FAQ Queries | It shows Related FAQ Queries if the FAQ answer is found. |
| Show Related FAQ Queries after Fallback | It shows Related FAQ Queries if the FAQ answer is found using any fallback. |
| Show Related FAQ Queries After FAQs with CTA | It shows related queries also for the FAQs which got click to action buttons. |
| Smalltalk/FAQ Handler | It specifies the AI engine to be used to handle Smalltalk and FAQs. |
| Smart FAQ ambiguity handling | It Uses a product from context to handle the ambiguity of KBS response. |
| Solution to use for suggestions | It specifies the solution to be used to suggest FAQs. |
| Web Search Elastic Search Index | Elastic Search Index for Web Search. |
2. Configuration related rules
Rules |
Description |
|---|---|
| Base Data Version | It specifies the version of the base data. |
| FAQ/Non-FAQ ES Index | It specifies the elastic search index for Faq/Non-Faq. |
| Handle Unmapped/Unsupported Intents as a FAQs | If enabled fulfill intent whose fulfillments are not configured as a FAQ. |
| Secondary Language Bot | Bot id of the Secondary Language Bot. |
| Smalltalk Paraphrasing Support | If enabled, Smalltalk paraphrasing support will be associated. |
| Synonyms support for AutoSuggest FAQ | If enabled, Keyphrases and Acronyms will be added as Synonyms for AutoSuggest Elasticsearch index. |
3. Elastic Search Index related rules
Rules |
Description |
|---|---|
| Enable Customer Segment to filter FAQs in ElasticSearch | If enabled, FAQs are filtered for a customer segment. |
4. Placeholders related rules
Rules |
Description |
|---|---|
| Break row placeholder | Placeholder for break row in FAQ response. |
5. Threshold related rules
Rules |
Description |
|---|---|
| Alternative Matches | It specifies the number of similar actions to be shown to the user in case his primary question was not confidently identified by the classifier. |
| Customer Support Fallback Threshold | It specifies the number of failed AI conversations before the system falls back to a customer support agent. |
| Customer Support Fallback Time Interval (in minutes) | It specifies the time interval in which the fallback threshold is measured e.g 2 failed attempts in 5 mins. |
| Enable Grain Type Verification | It enables verification of grain type for FAQs. The top candidate's grain type would be compared with the user query's grain type. |
| FAQ Core Labels | Core Labels included bouncing the request to intent. |
| Max Adversity Score For FAQ Web Search | It specifies the adversity score above which FAQ web search will not happen. |
| Max Adversity Score For Five And Above Word Message | It specifies the adversity score above which intent classified is invalid. |
| Max Adversity Score For Four Word Message | It specifies the adversity score above which intent classified is invalid. |
| Max Adversity Score For One Word Message | It specifies the adversity score above which intent classified is invalid. |
| Max Adversity Score For Three Word Message | It specifies the adversity score above which intent classified is invalid. |
| Max Adversity Score For TWO Word Message | It specifies the adversity score above which intent classified is invalid. |
| Max Confidence | It specifies the confidence percentage which defines an unambiguous (confident) intent detection of an input conversation |
| Min Confidence | It specifies the confidence percentage threshold which defines the lower boundary below which the classifier cant confidently predict the intent of a conversational input. For conversations with intent confidence levels between max and min levels are considered as ambiguous and the top 3 intents are displayed back to the user for selection. |
| Min FAQ Confidence | It specifies the confidence percentage threshold which defines the lower boundary below which the FAQ answer will be considered invalid. |
| Min Smalltalk Confidence | It specifies the confidence percentage threshold which defines the lower boundary below which the Smalltalk answer will be considered invalid. |
| Minimum Threshold to consider Elastic Search result | Minimum Threshold to consider Elastic Search result for FAQs. |
| Minimum Threshold to consider Elastic Search result for Web Search | Minimum Threshold to consider Elastic Search result for Web Search Fallback. |
| Minimum Threshold to consider Triniti FAQ Web Search result | Minimum Threshold to consider Triniti FAQ Web Search result for FAQs. |
| Minimum Threshold to Show Suggestion | Minimum threshold to include the question in suggestion. |
| Negative sentiment threshold | Score above this threshold will consider the message as negative. |
| Postback fuzzy search cutoff | Adjusting the score for postback search as text input. |
| Retry FAQ | It Retries answering FAQ if confidence is low. |
| Retry Smalltalk | It Retries answering Smalltalk if confidence is low. |
| Stop Words | It Stops words to exclude counting number of tokens in the message. |
| Web search for FAQ | Fallback to web search if FAQ is not able to answer. |
| Web search for unclassified utterances | Web search for unclassified utterances if the product exists. |

B. Triniti Rules
1. Configuration related rules
Rules |
Description |
|---|---|
| API Key | It specifies the API key for Triniti. |
| Domains | It specifies the domains of the Triniti AI Engines (specified in a comma-separated format for clustered deployments). |
| Enable Cache | It specifies if Triniti API calls are to be cached. |
| If Triniti API calls should use system proxy | It specifies if Triniti API calls should use system proxy. |
| NER API Key | It specifies the API key for Triniti NER. |
| NER Domain | It specifies the domain of the Triniti NER. |
| Relative URL Context Path | It specifies the relative context path. |
| Triniti Paraphrase URL | It specifies the URL for paraphrasing. |
| Triniti Translate API Key | It specifies the API key for Triniti Translate. |
| Triniti Translate API URL | It specifies the domain of the Triniti Translate API. |
| Triniti Transliterate API Key | It specifies the API key for Triniti Transliterate. |
| Triniti Transliterate API URL | It specifies the domain of the Triniti Transliterate API. |
| Triniti worker process used only when loading after successful data training |
2. Deployment related rules
Rules |
Description |
|---|---|
| Deployment Mode | It specifies the deployment mode of Triniti. |
| Deployment Type | It specifies if Triniti API calls are to be cached. |
| Elastic Search Index used for loading Primary Classifier configuration for Quick Training | It Quick Train Elastic Search index used for Intent classification. |
| Trainer URL | It specifies the Triniti instance URL which is used for training in a cluster deployment. |
| Training Data Format | It specifies the data format used to train the instance for Triniti version greater than 1.x |
| Triniti API Key | It specifies the X-API-KEY value to be embedded in all cloud Triniti calls. |
| Triniti Manager URL | It Specifies the URL of the Triniti manager for cloud deployment. |

C. Translation Rules
1. AI Engine related rules
Rules |
Description |
|---|---|
| Enable message translation for NER from other languages to English before processing | To support other languages, use translator to translate the message to English and respond to other languages. To enable this also set Language Detector. |
| Enable message translation for Primary Classifier from other languages to English before processing | To support other languages, use translator to translate the message to English and respond to other languages. To enable this also set Language Detector. |
2. Configuration related rules
Rules |
Description |
|---|---|
| Enable message translation from other language to English before processing | To support other language, use translator to translate message to English and response back to other language. To enable this also set Language Detector. |
| Enable response translation from English to other language after processing | It translates the response back to original language from English. Will require Message translation also to be enabled. |
| Google Service Account Credentials | It specifies the Service Account JSON Credentials of Google Cloud API for translation. |
| Language Detector | It specifies the AI engine to be used to detect language. |
| Language Translator | It specifies the AI engine to be used to translate message. |
| Message Converter | It specifies whether to translate or transliterate. |
| Secondary Language Bot | Bot id of the Secondary Language Bot |
| Translate API Max utterances | It specifies the Max Number of utterances to be translated by configured Translate API. |
| Yandex API Key | It specifies the API key for Yandex |
3. Triniti related rules
Rules |
Description |
|---|---|
| Triniti Translate API Key | It specifies the API key for Triniti Translate |
| Triniti Translate API URL | http:// |
| Triniti Transliterate API Key | It specifies the API key for Triniti Transliterate |
| Triniti Transliterate API URL | It specifies the domain of the Triniti Transliterate API |

D. Git Rules
1. Configuration related rules
Rules |
Description |
|---|---|
| AI Data Sync source (Git or Zip) | It pecifies the Sync source for AI data |
2. Data related rules
Rules |
Description |
|---|---|
| Branch | It specifies the branch for triniti data parser. |
| Password | It specifies the password for triniti data parser. |
| URL | It specifies the URL for triniti data parser. |
| Username | It specifies the username for triniti data parser. |
| Workspace | It specifies the workspace for triniti data parser. |
3. ZIP related rules
Rules |
Description |
|---|---|
| Zip Password | It specifies the password for triniti data parser zip file. |
| Zip URL for Triniti Data import | It specifies the Zip URL for Triniti Data import. |
| Zip Username | It specifies the username for triniti data parser zip file. |

E. Knowledge Graph Rules
1. Configuration related rules
Rules |
Description |
|---|---|
| Elastic Search Index for Knowledge Graph | It shows Elastic Search Index for Knowledge Graph. |
| Enable Knowledge Graph | It specifies whether the Knowledge Graph lookup is enabled. |
| Enable Knowledge Graph Lookup for FAQ Fallback | It specifies if the Knowledge Graph lookup to be used as FAQ fallback. |
| Enable Query Parser using Knowledge Graph | It specifies if the Query Parser using Knowledge Graph is to be enabled. |
| Knowledge Graph Beautification phrases | You can add the knowledge graph beautification phrases in this field. |
| Knowledge Graph Beautification phrases for Attributes | You can add the knowledge graph beautification phrases for the attribute in this field. |
| Knowledge Graph Response Beautification | If enabled, Knowledge Graph suggestions will be phrased as near meaningful Questions. |
| Maximum Knowledge Graph suggestions | It specifies the maximum number of Knowledge Graph suggestions in the display. |
| Maximum number of words for Knowledge Graph | Maximum number of words for Knowledge Graph |
| Strict Search Knowledge Graph Threshold | Specifies threshold for matching irrelevant results. Higher the value stricter the search. 0 to switch off this check. |
| Time in seconds to keep Suggestion and Offset in cache | Time in seconds to keep Suggestion and Offset in the cache, This is for Show More functionality. |

F. Self Learning Rules
1. Self Learning Configuration related rules
Rules |
Description |
|---|---|
| Enable Self Learning 2.0 | It will enable/disable the advance self-learning |
| Number of rows to be created per XLSX workbook | It specifies the number of rows to be created per XLSX workbook based on heap size, maximum being 1048576. |
| Scroll search page size | It will specify the scroll search page size. |

G. Spotter Rules
1. Spotter Configuration related rules
Rules |
Description |
|---|---|
| API Key | It specifies the API key for Spotter. |
| Enable masking of numeric values | The Spotter will mask the numbers in the responses if you enable this rule. |
| Enable Spotter derived KeyPhrases | If enabled, Spotter derived KeyPhrases will be updated. |
| Spotter Context Path | It specifies the relative context path for the spotter. |
| Spotter URL | It specifies the endpoint of Spotter. |
| Spotter worker process used only when loading after successful data training | |
| Use Spotter Bounce-To Response as Intent | If enabled, Spotter Bounce-To intent will be used as the main Intent. |
| User ID | It specifies the USER ID for Spotter. |

H. Triniti Unified API v2 rules
1. Unified API related rules
Rules |
Description |
|---|---|
| API Key | It specifies the API key to access Unified API. |
| API Secret | It specifies the secret key to access Unified API. |
| Context Path | It specifies the Context Path of Unified API. |
| Enable Context Handling For Products | Prerequisite Context handling is enabled. Only for specified products context handling will work. Set value to ALL to enable for all products |
| Enable/Disable Compression | It specifies if compression is enabled. |
| Enable/Disable Context Handling | It specifies if Context handling is enabled. Previous inputs will be passed to Triniti to provide context information |
| Enable/Disable Debug | It specifies if debug is enabled. |
| Enable/Disable Discourse | It specifies if the discourse is enabled. |
| Enable/Disable Fragments | It specifies if fragments are enabled. |
| Enable/Disable Pragmatics | It specifies if pragmatics are enabled. |
| Enable/Disable Semantic Rules | It specifies if semantic rules are enabled. |
| Enable/Disable Similar Queries | It specifies if similar queries are enabled. |
| Endpoint URL | It specifies the Unified API endpoint URL. |
| Triniti Cloud Backend Domain URL | --- |
| Triniti Cloud Basic Auth Encoded Credential | --- |
| Unified API v2 process used only when loading after successful data training | --- |
| Unified API Version | It specifies the version of Unified API. |
| X-SESSION-ID | It specifies X-SESSION-ID for Triniti. |
| X-USER-ID | It specifies X-USER-ID for Triniti. |

Import AI Rules
You can even import the AI rules as per your requirement by following these steps:

Importing System Rules
You can even import the AI rules as per your requirement by following these steps:

Exporting System Rules
You can also export the AI rules by going through these steps:
A JSON file will be downloaded for AI rules

Workspace Rules
Even you can also configure your workspace properly by managing the workspace rules. It will help you to manage your workspace more effectively. You can manage your workspace’s functionality by configuring the business rules.
A. General Rules

B. Security Rules

C. Manual Chat Rules

D. Alexa Rules

E. Camel Route Rules

F. Campaign Rules

G. Push Notification Rules

I. Login Rules

J. Triniti.Ai

Importing Workspace Rules
You can import your workspace rules by following these steps:
Note: The rules file should be in JSON format where all the rules are configured in JSON.
Exporting Workspace Rules
You can also export your workspace rules by following these steps:
It will download a JSON file containing all the configured rules.

Managing Messages
Overview
You can configure a message code (TRANSFER_ERROR_MESSAGE) and the response that bot will send to the user (Balance not available, please enter an amount less than available balance.). So If the user will try to send amount more than their actual balance then the bot will send the error message (Balance not available, please enter an amount less than available balance.). You can configure messages or some error messages, that will be shown if bot will not found any response.
Eg; TRANSFER_ERROR_MESSAGE: Balance not available, please enter an amount less than the available balance.
Adding Messages
You can configure the messages by following these steps:

Importing Messages
You can also import the set of messages from your system by following these steps:
Note:

Exporting Messages
You can also export the set of messages by following these steps:
If you click on Export it will download a JSON file containing all the configured messages.
Or if you click on Export CSV it will download a CSV file containing Message Code, Message Category Message Value, Message Description, Customer Segment, Code, Language, etc columns

Managing Templates
Overview
Templates are a combination of some components like images, text, buttons, etc. It will give a good look and feel to the user better than the only text response.
Eg; If you want to greet your user with a Greeting/Welcome message then you can set the welcome message in a text-only as "Hey there! How may I assist you?" but If you add some Images/card then it will give a good look & feel. That will help the user to spend more time on your bot.

Adding Templates
You can either configure templates manually by selecting the required template & entering all the required details or import the templates. The file that will be imported should be a JSON file, where all the templates are configured in JSON format.
Add Templates Manually
To add the templates manually follow these steps:
You can configure the following templates:
Export / Import
If you have configured some templates & wants to use the same templates in another environment or want to keep that configuration then you can simply export those templates & If you want to use the same configuration in another environment/workspace then you can import the same JSON file rather than configuring again.
Importing Templates
Even you can import the list of templates from your system by following these steps:
Exporting Templates
You can also export the templates by following these steps:
It will download a JSON file containing all the configured templates.

Managing Channels
We have the channels for the communication between your user & the bot. These channels can help you to expand your services on the various channel platform as every user might be using the various channels. So we have provided some configuration to make your bot channel specific to interact with the user. Users can either interact with the bot by typing or can interact with the voice command, the bot will perform any kind of transaction or inquiry that the user has asked.
Currently, we are supporting the following channels:
You can manage your channels from the 'Manage Channels' section under 'Configure Workspace'.
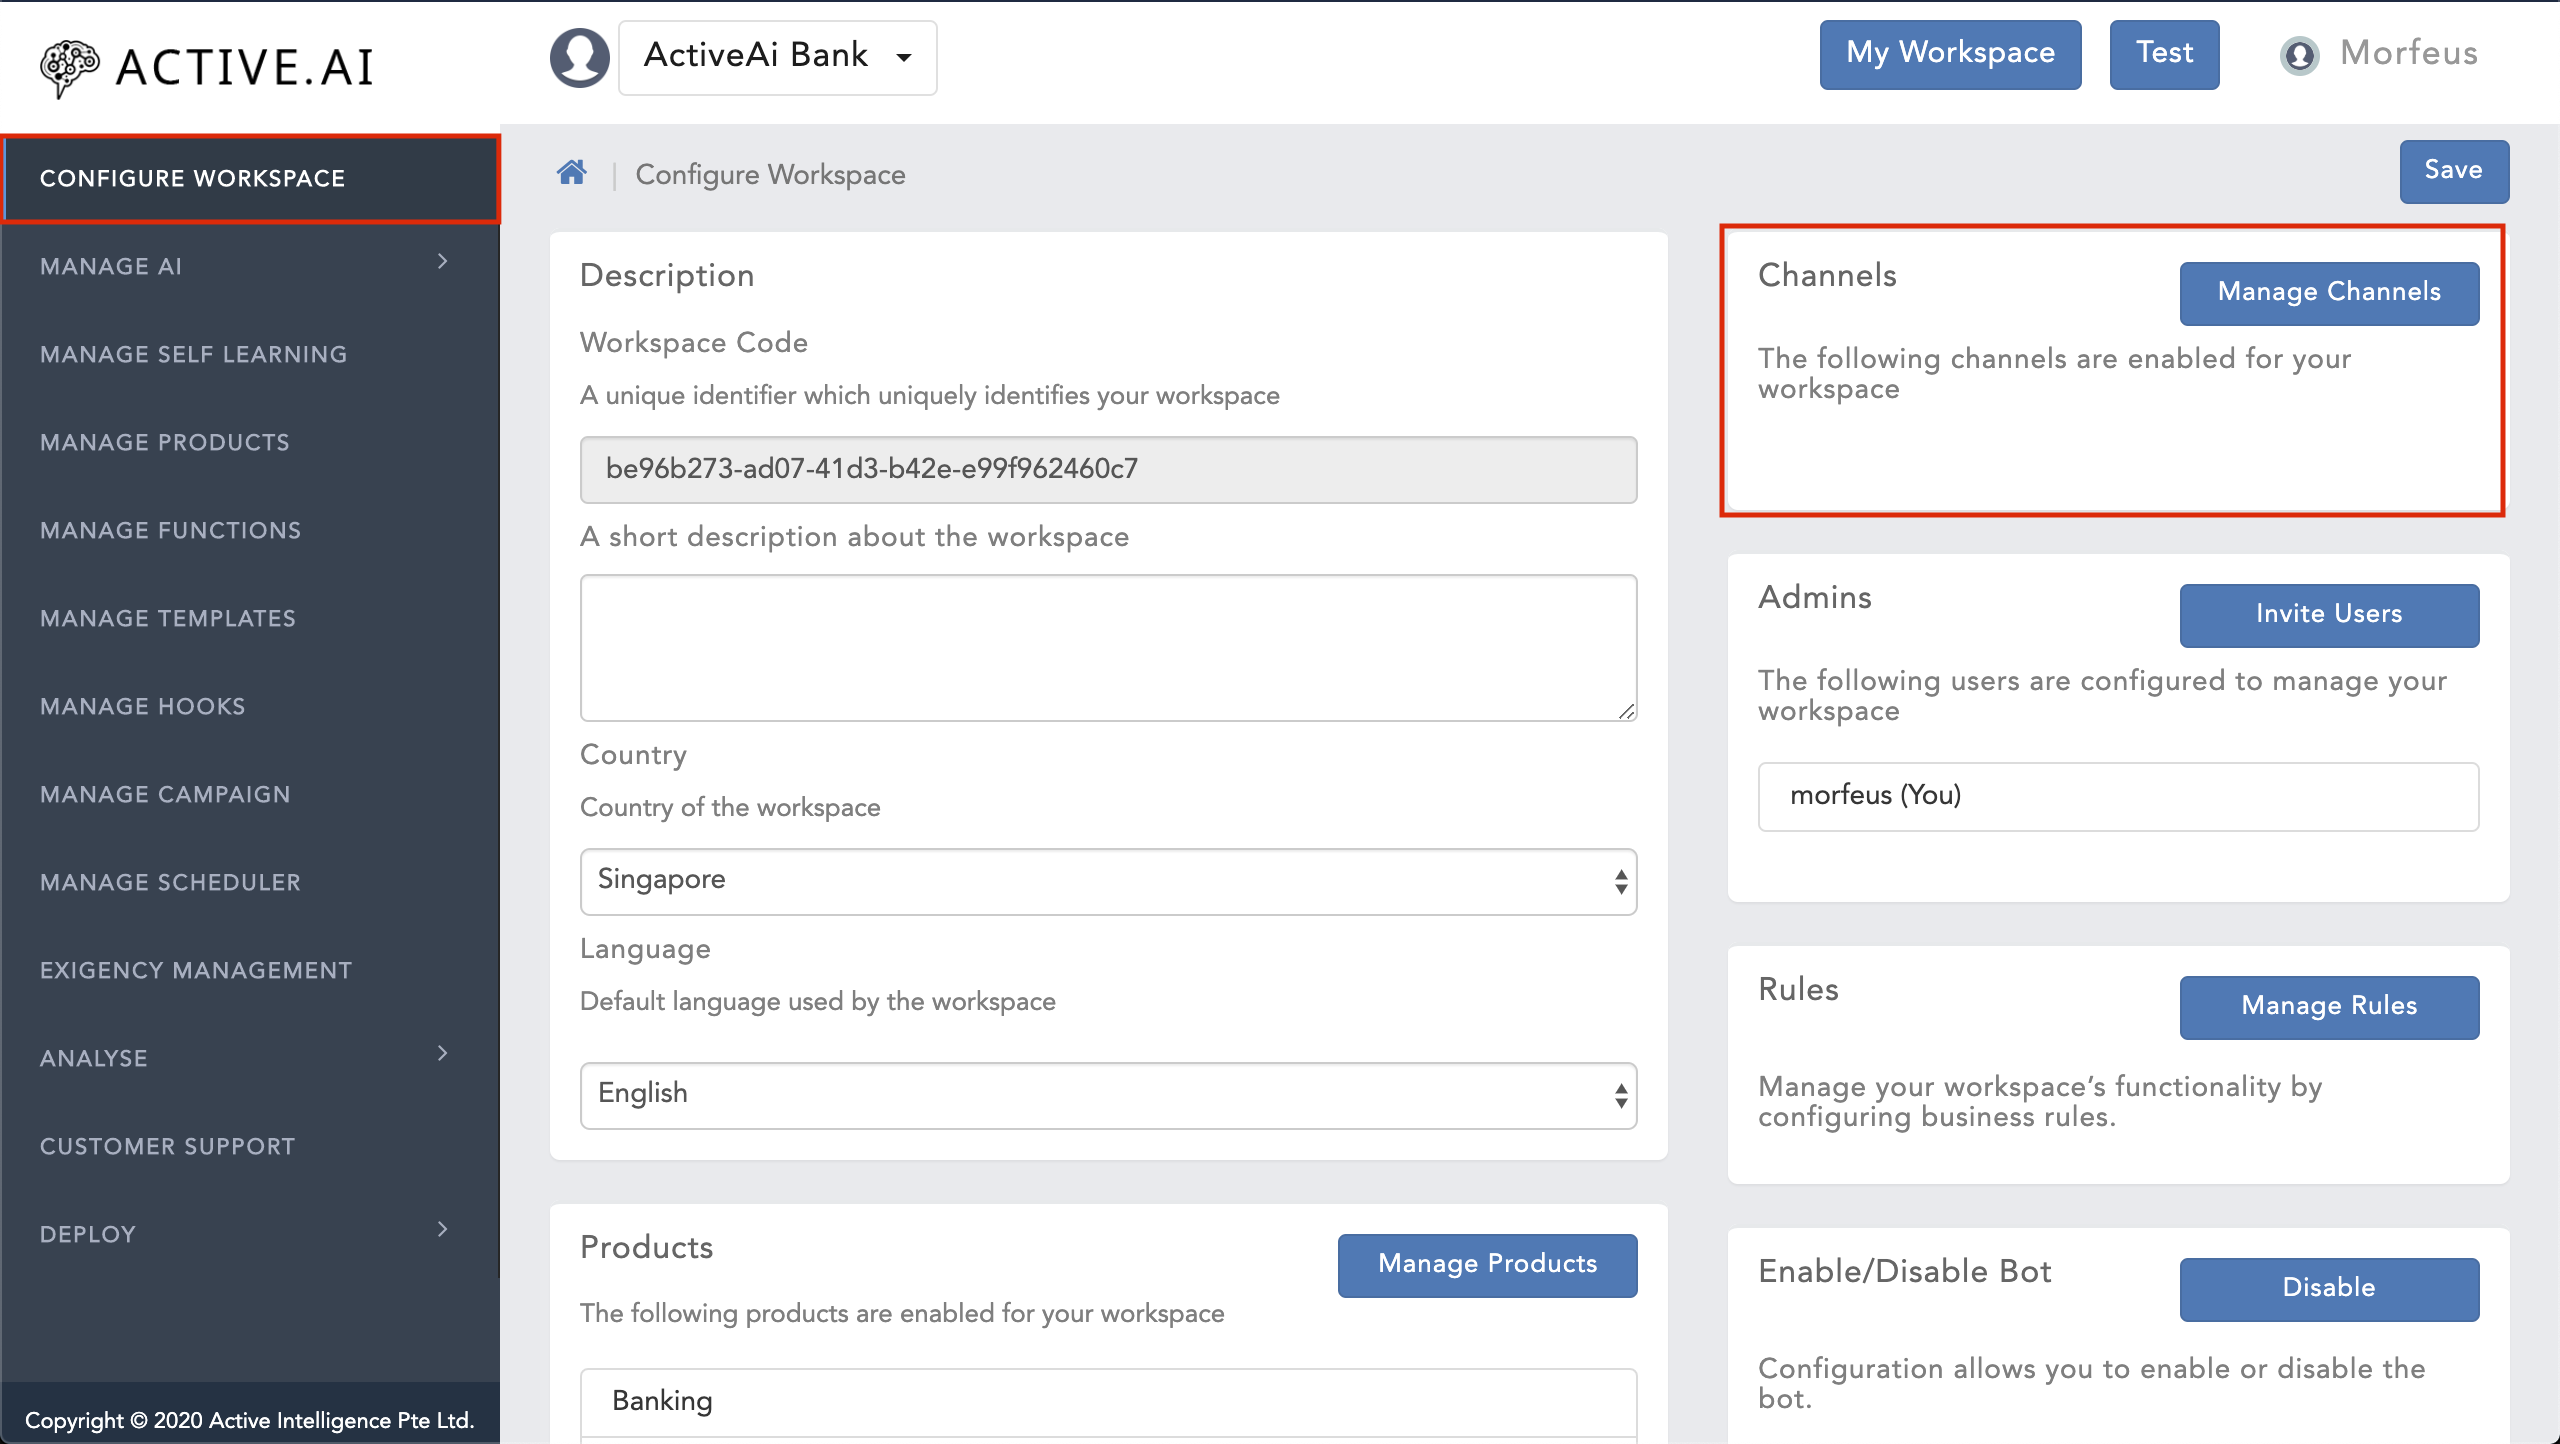
Common Configutaion Parameters
You can configure the channels by following these steps:
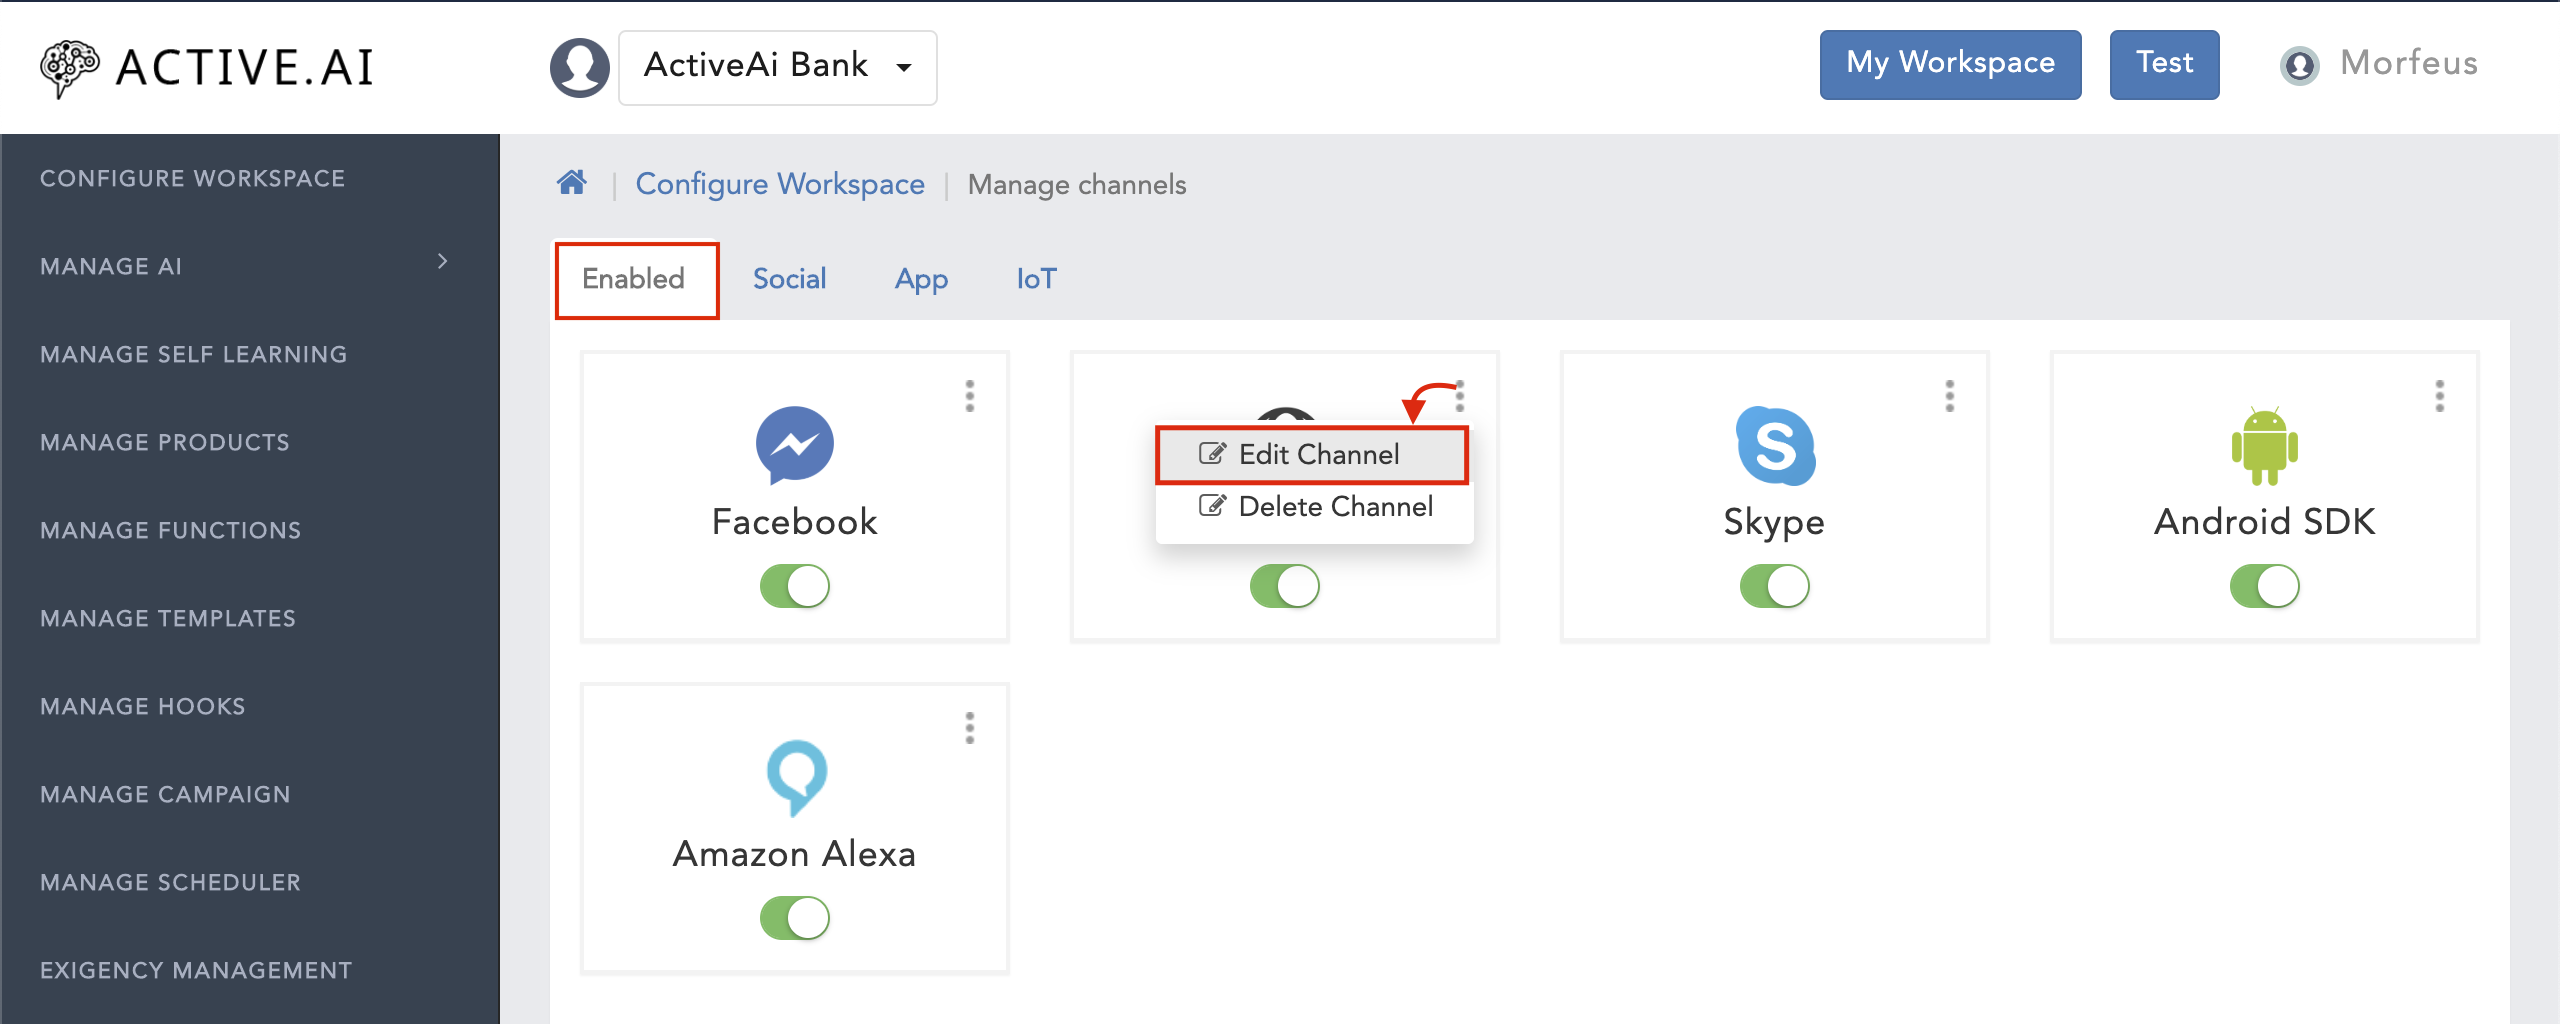
After clicking on the 'Edit Channel' you will see the following tabs, so what are these tabs & how to configure these tabs you will see in this section.
To know more about configuration or confgure these parameters, please refer to Configure Channels
You can configure the token based or authentication related configurations in this section for the channel. This section consists following parameter that can be configured to enable the channel for the bot.
Parameters |
Description |
|---|---|
| Welcome Message | You can enter a welcome message for the bot that will be shown on the bot launch to the user. |
| Verify Token | You can enter the verification token that will be needed to authenticate the bot with the particular channel platform. |
| Auth Token | It will be needed for the authentication of the webhhok request from your bot with the channel. |
| Refresh Token | You can enter the refresh token that will be needed for the authentication with some of the channel |
| Token Expiry (Secs) | You can set the token expiry time, after that time the token will be expired |
| Secret Key | The channel secret key will be reauired for the authentication. |
| Input Message URL Endpoint | It specifies the Morfeus endpoint URL to which messages from customers are sent to |
| Base URL | --- |
| Signature Key | --- |
| Reponse strategy | --- |
| Social Authentication policy | --- |
| Environment | You can select the environment for the bot to work. |
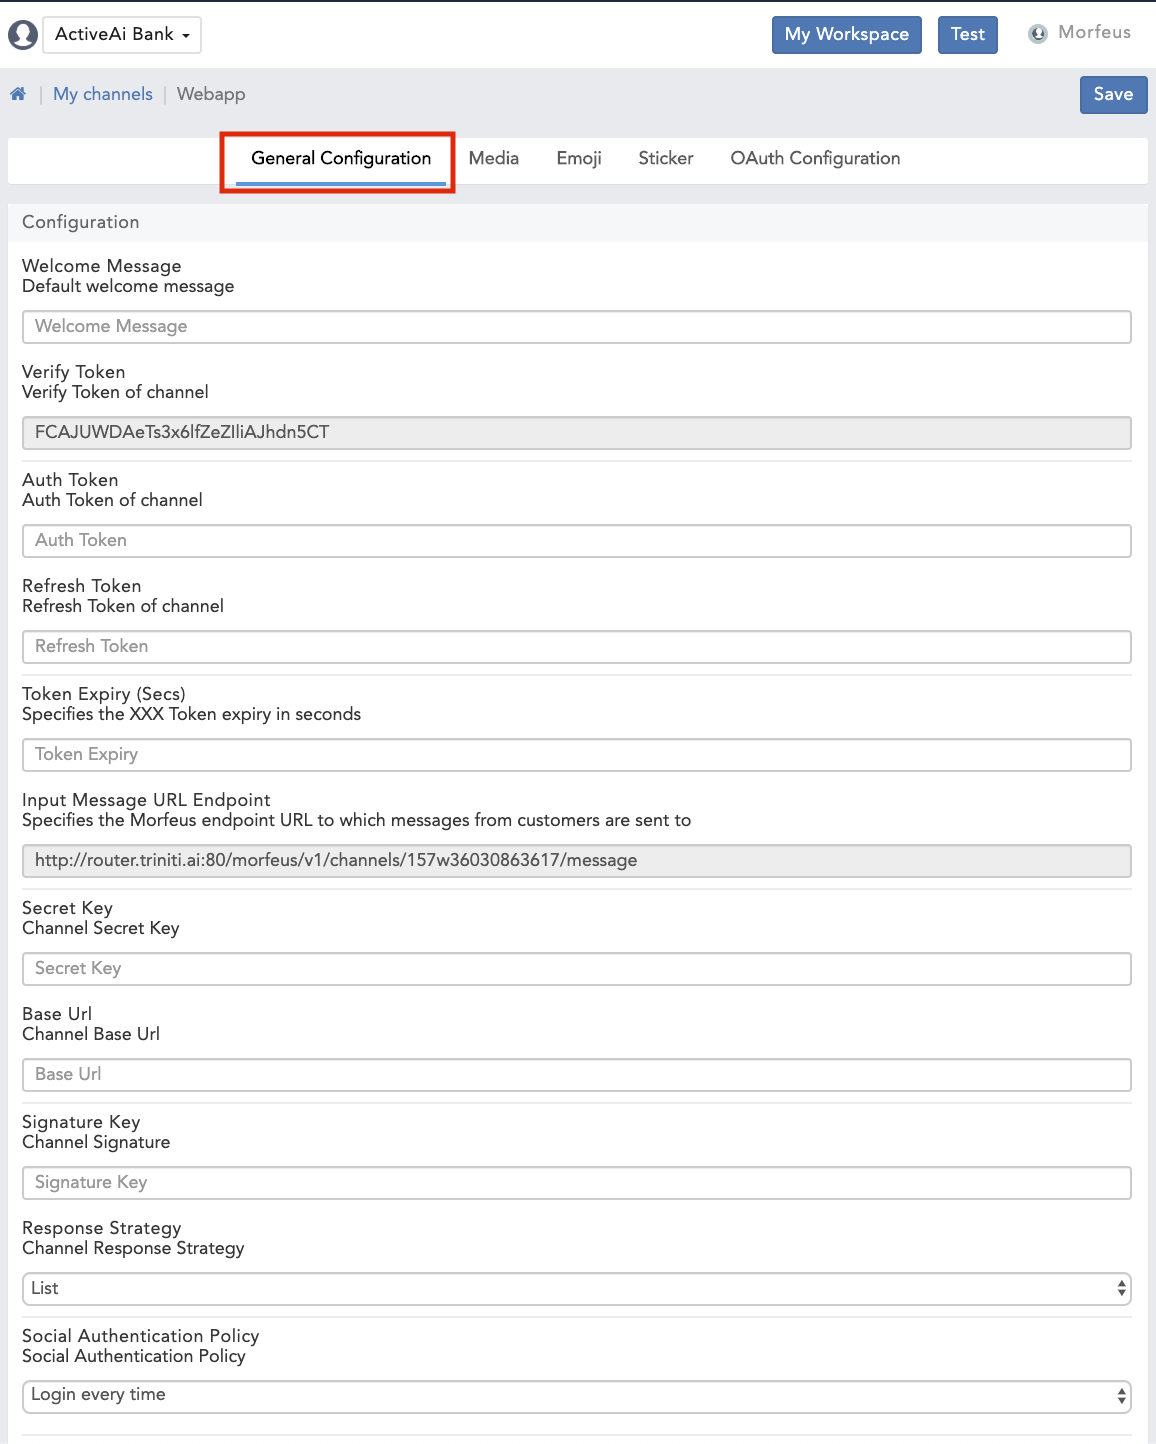
You can enable or disable the various media option for your bot. We are supporting following media option:
Parameters |
Description |
|---|---|
| Voice | You can enable this media if you want to support audio input on the bot. |
| Video | You can enable this media if you want to support video responses on the bot. |
| Stickers | If enabled, you will allow stickers on the bot as input. |
| Location | If you want to check for location, you can enable this feature. |
| Images | You can also allow the images response by enabling this feature. |
| Emojis | Some users might be using emojis more than text to express their feelings, by enabling this feature you can allow that kind of input. |
| Documents | You can also share the the documents by enabling this feature. |
| Gifs | If you want o show some GIFs on your bot then you can enable this feature. |
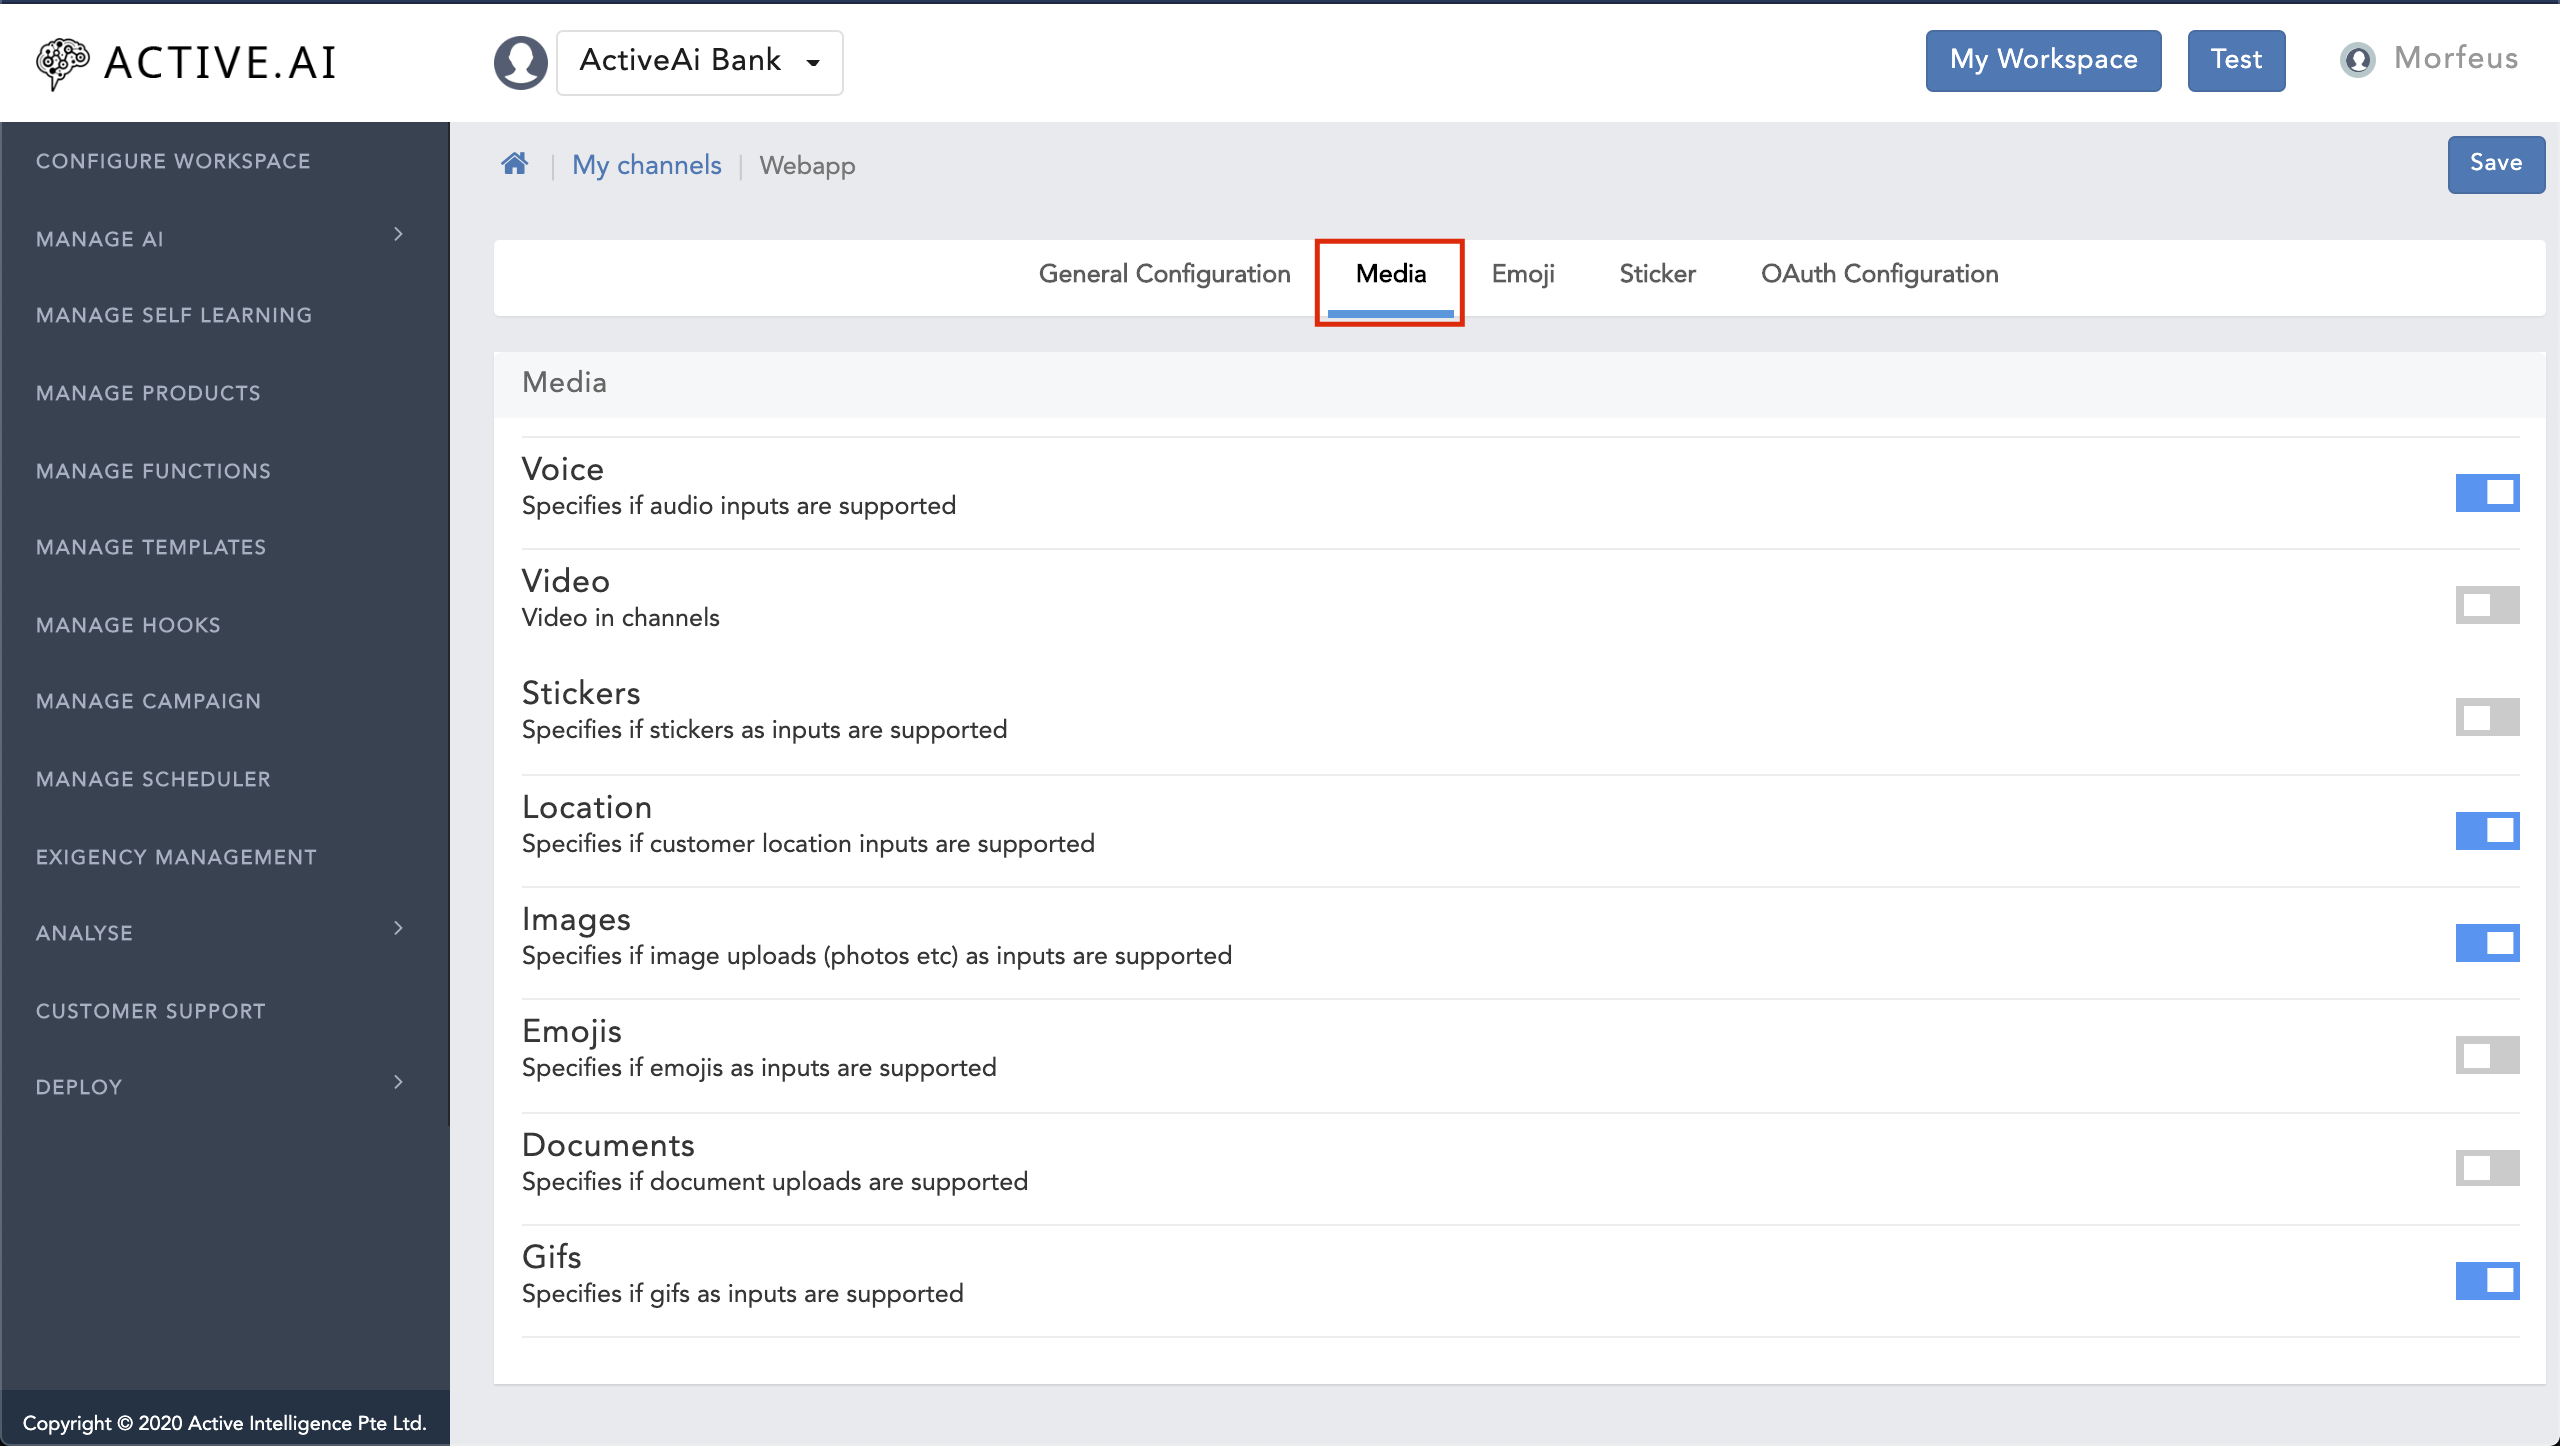
Some users might use emojis to show their feelings instead of expressing their feelings in text. So you can configure your bot to handle these types of inputs from the user. like if a user enters any emoji then how you bot should react or reply to that kind of emojis.
Eg; If a user has entered any sad, angry, not satisfied with the response kind of emojis then you can configure these type of emojis to show courtesy to the user by entering the courtesy intent in those emojis by following these steps:
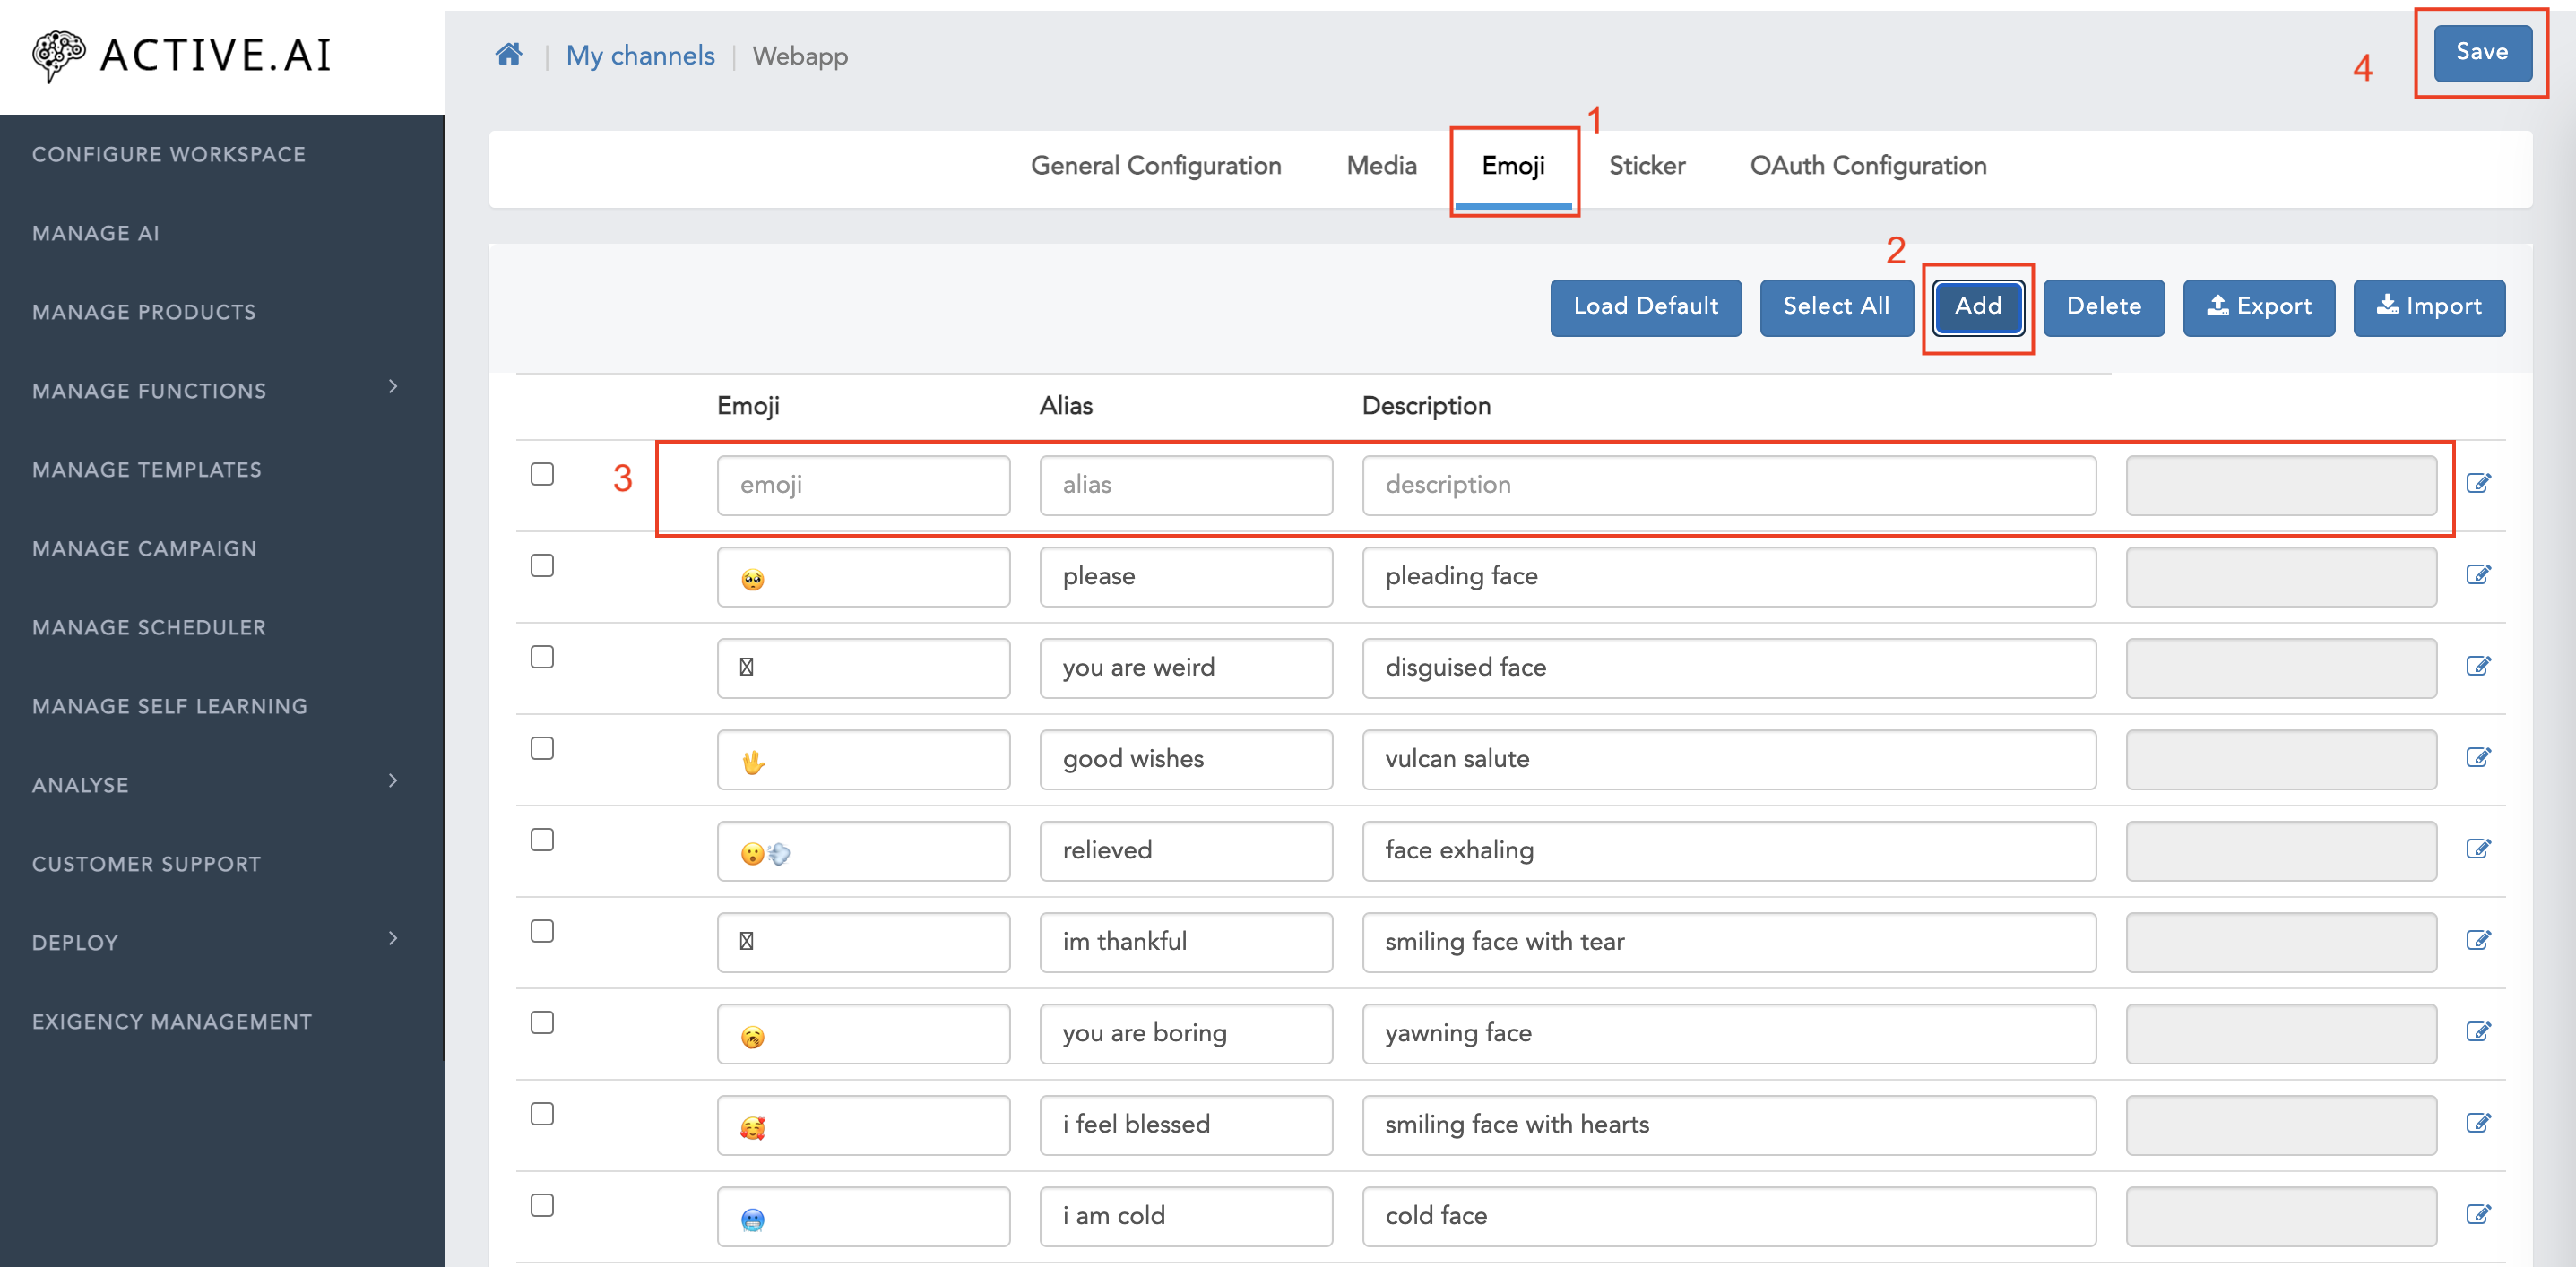
1. Load Default Emojis:
You can load the default emojis which is already configured and added to the bot by default by following these steps:
(It will load all the default emojis)
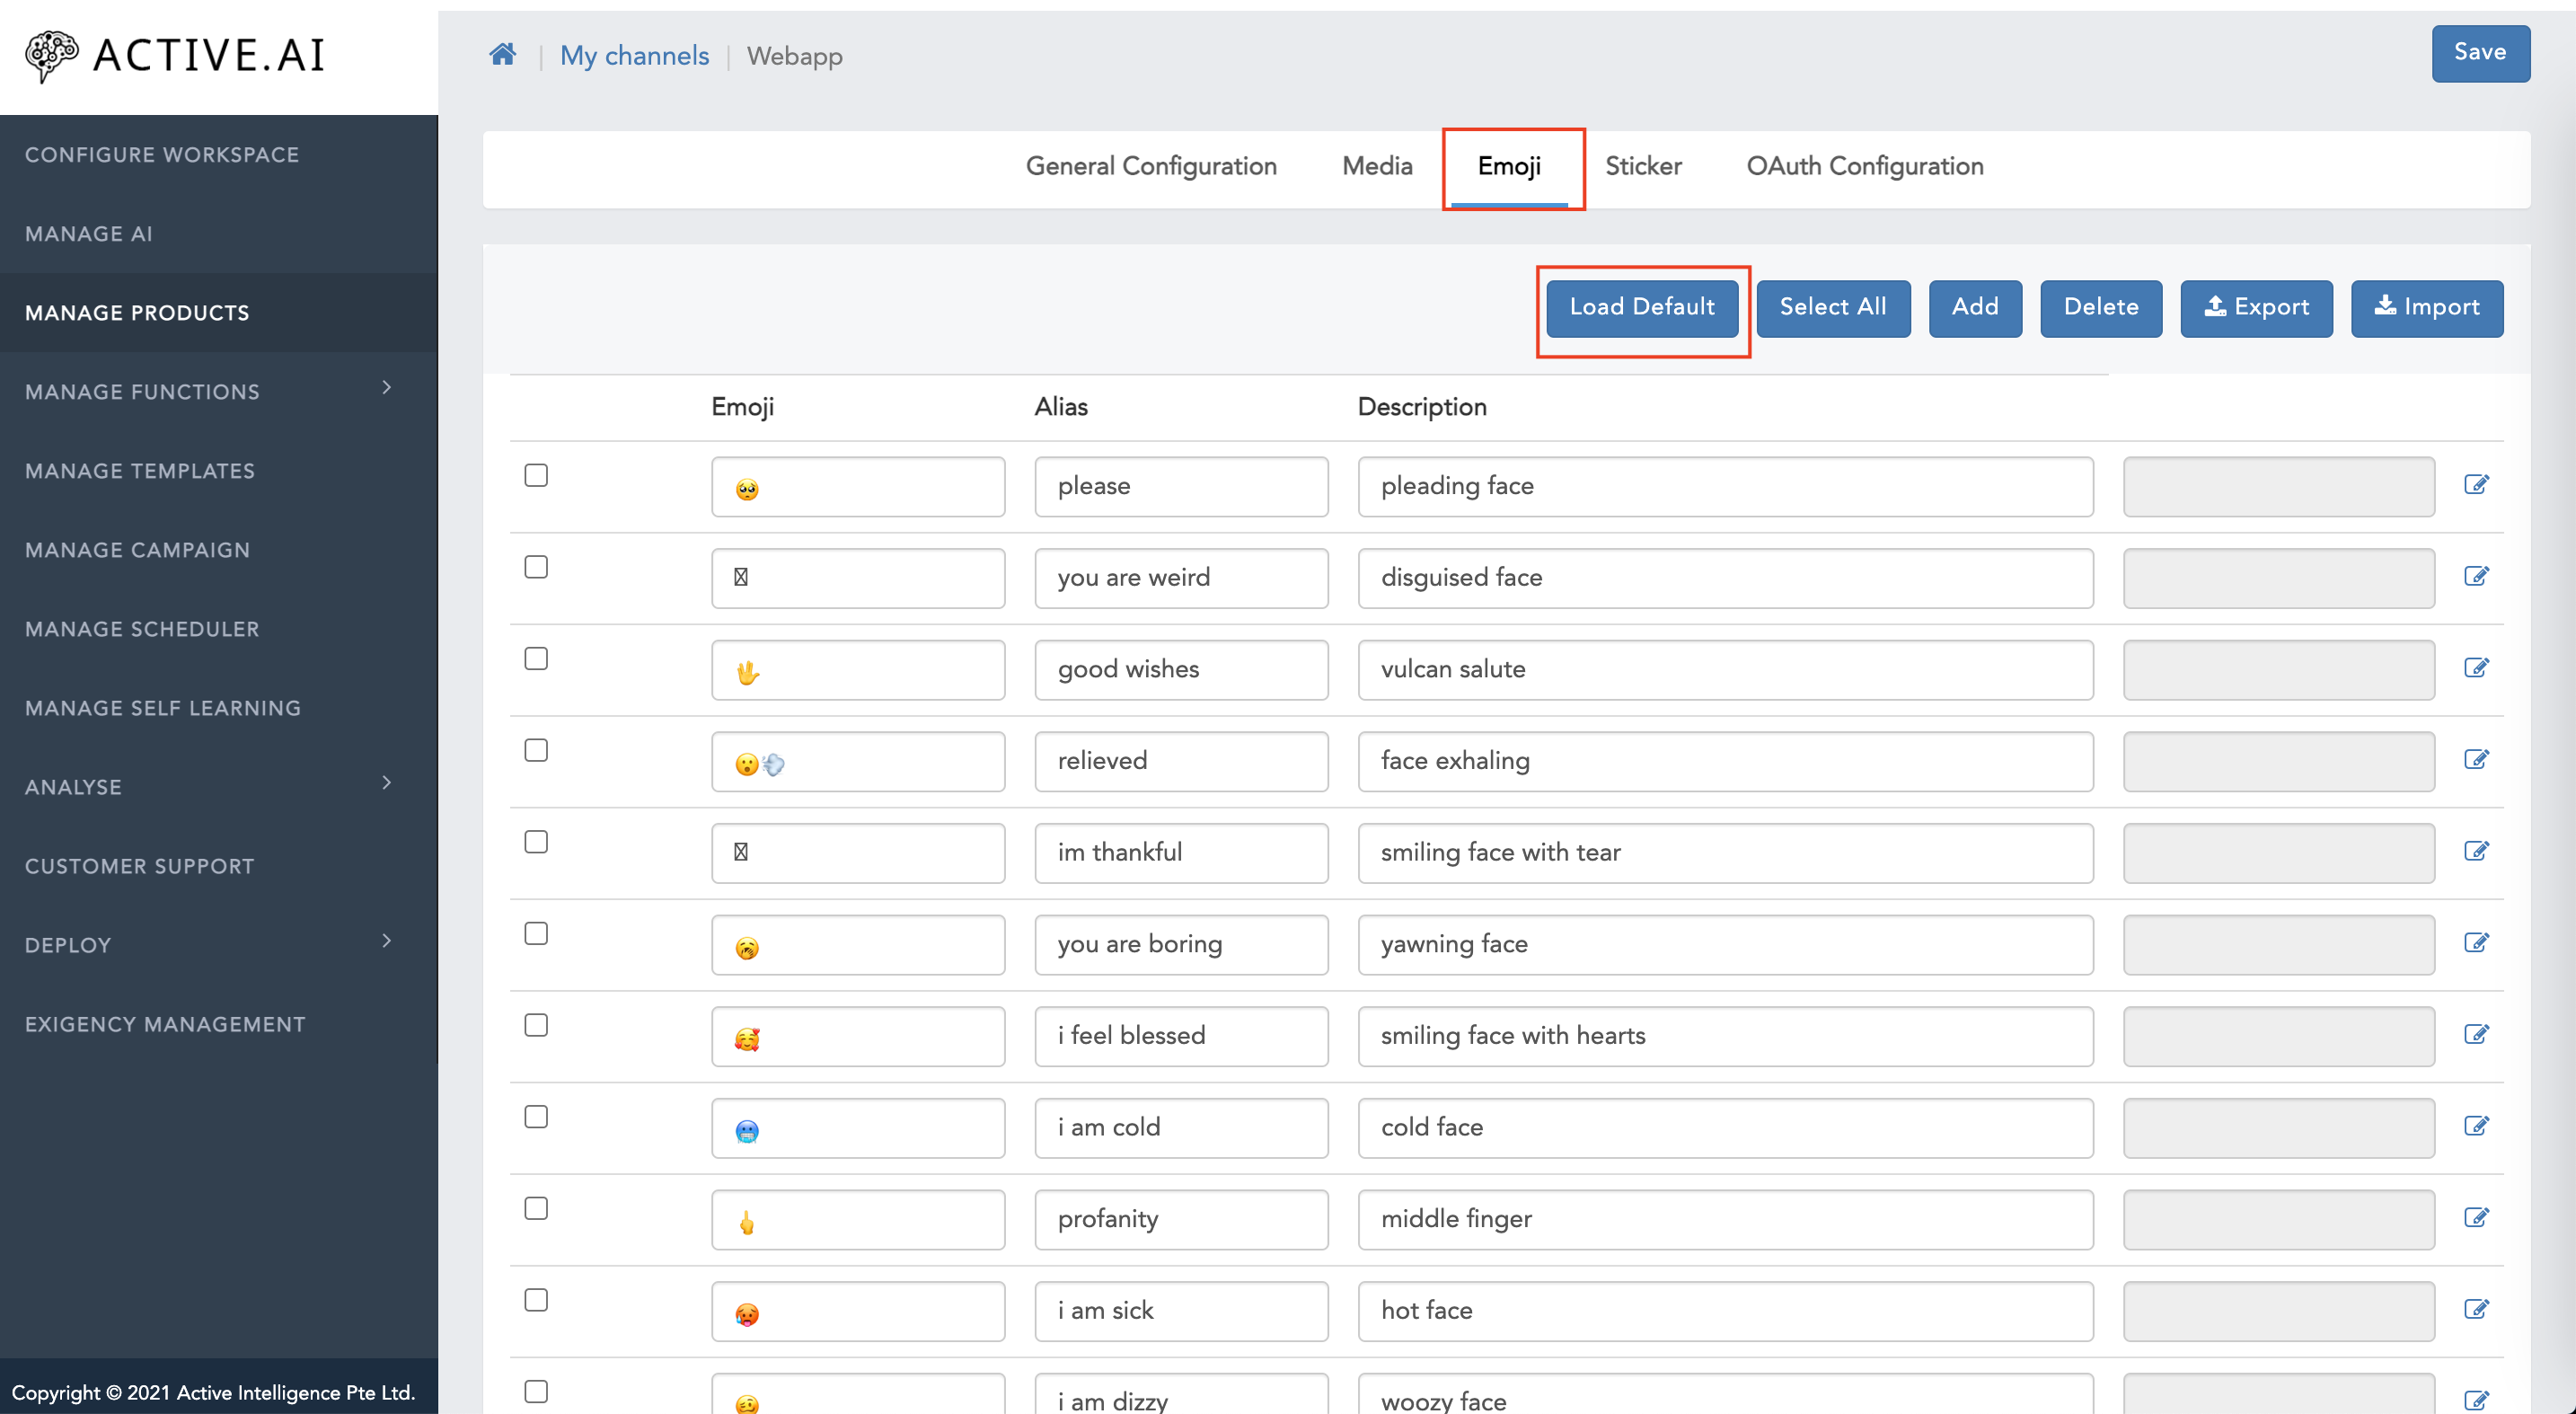
2. Link Emojis to FAQs/Intents/Smalltalk
The emojis can be linked to any FAQ, smalltalk or intent to get the expressive response by emojis, that could make a good impression of the bot response to the user To link FAQs/Intents/Smalltalks please follow these steps:
(It will show all the emojis which are added)
Link Emojis to the FAQ:
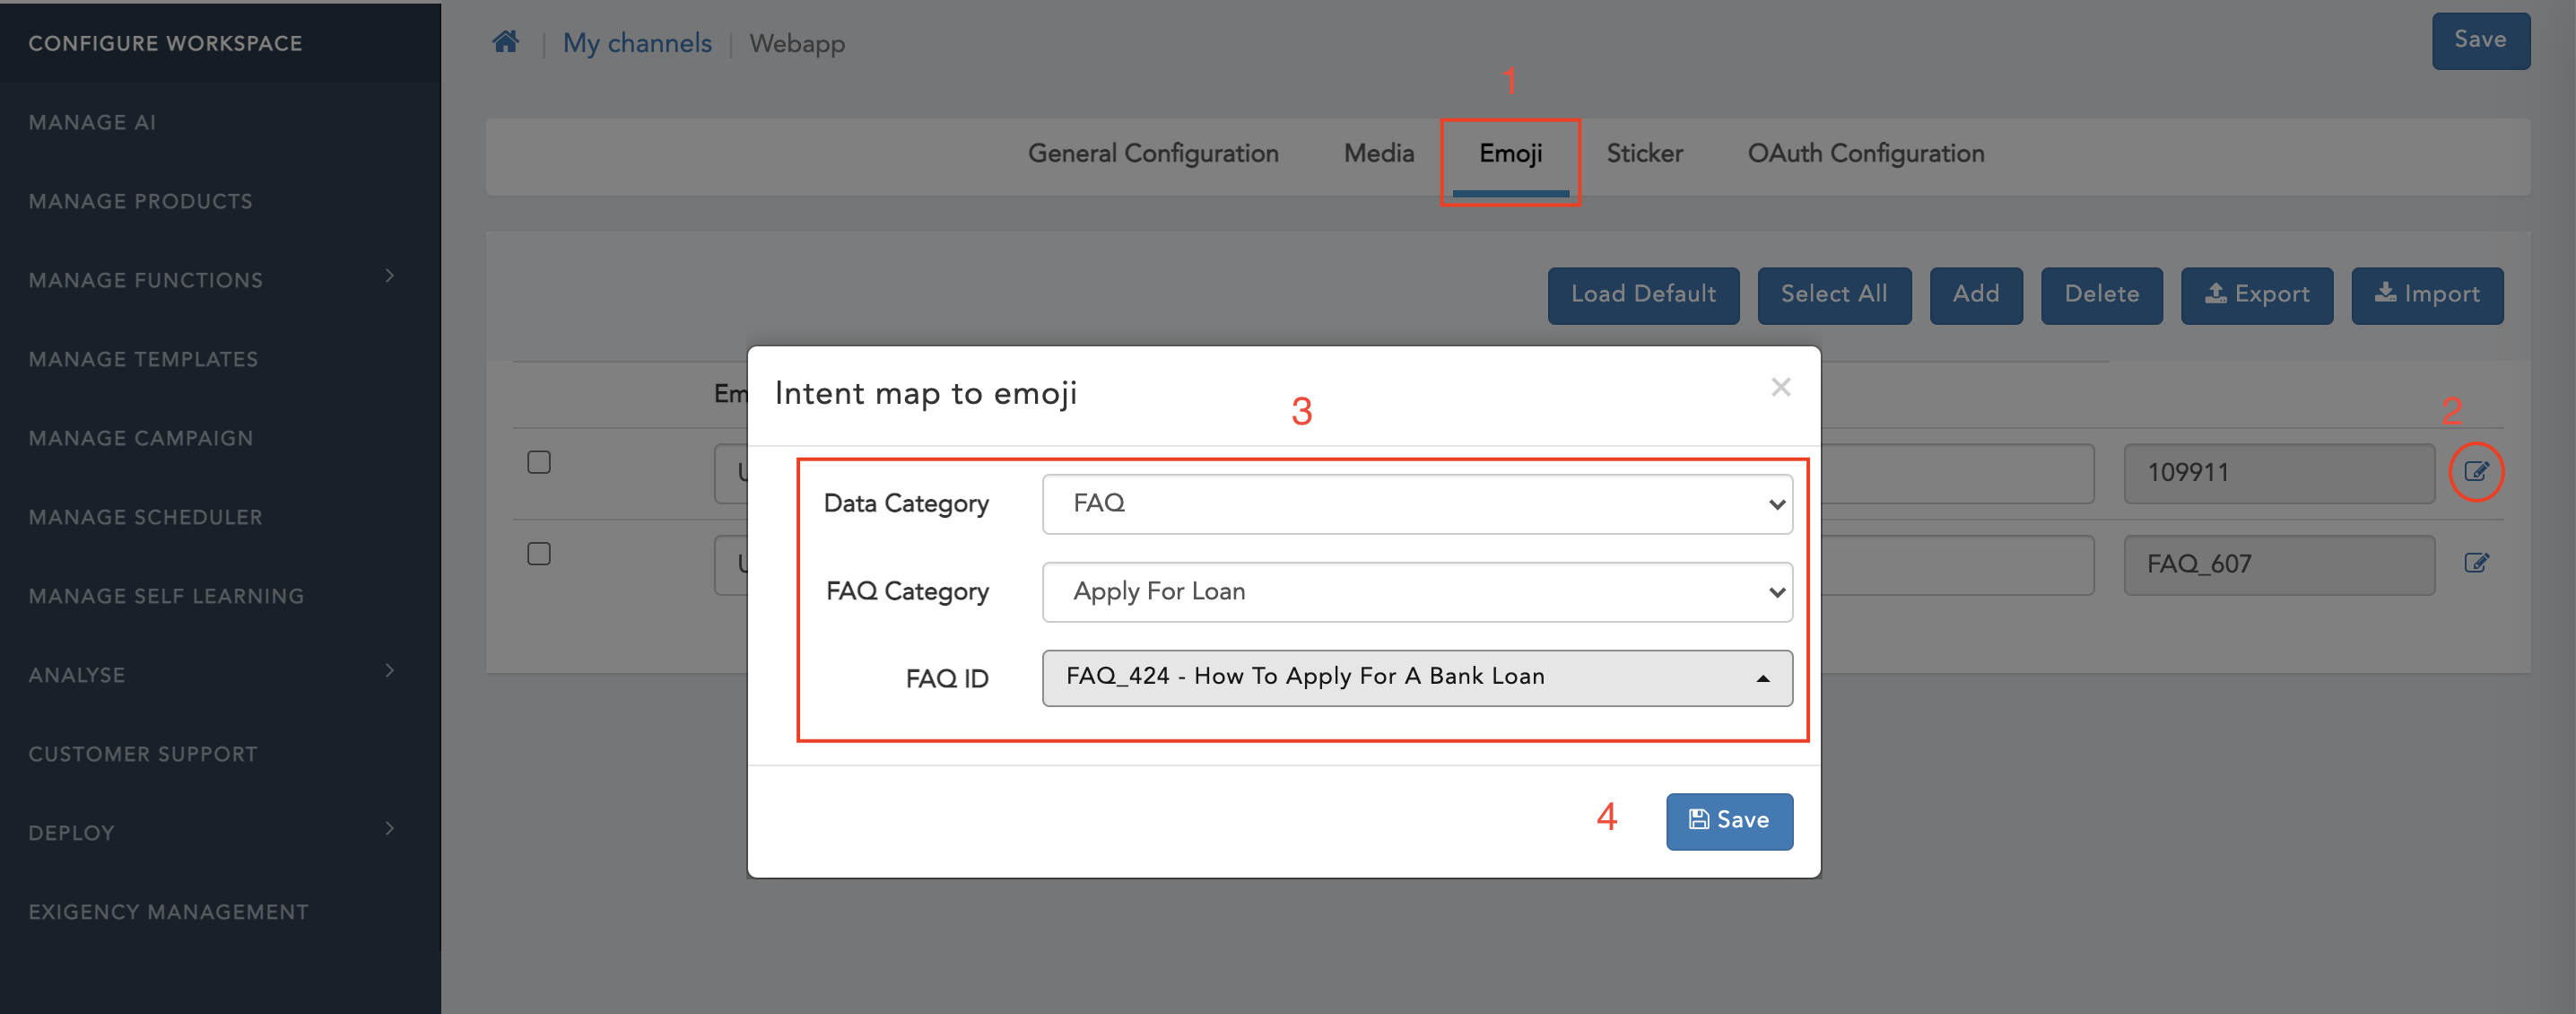
Link Emojis to the FAQ:
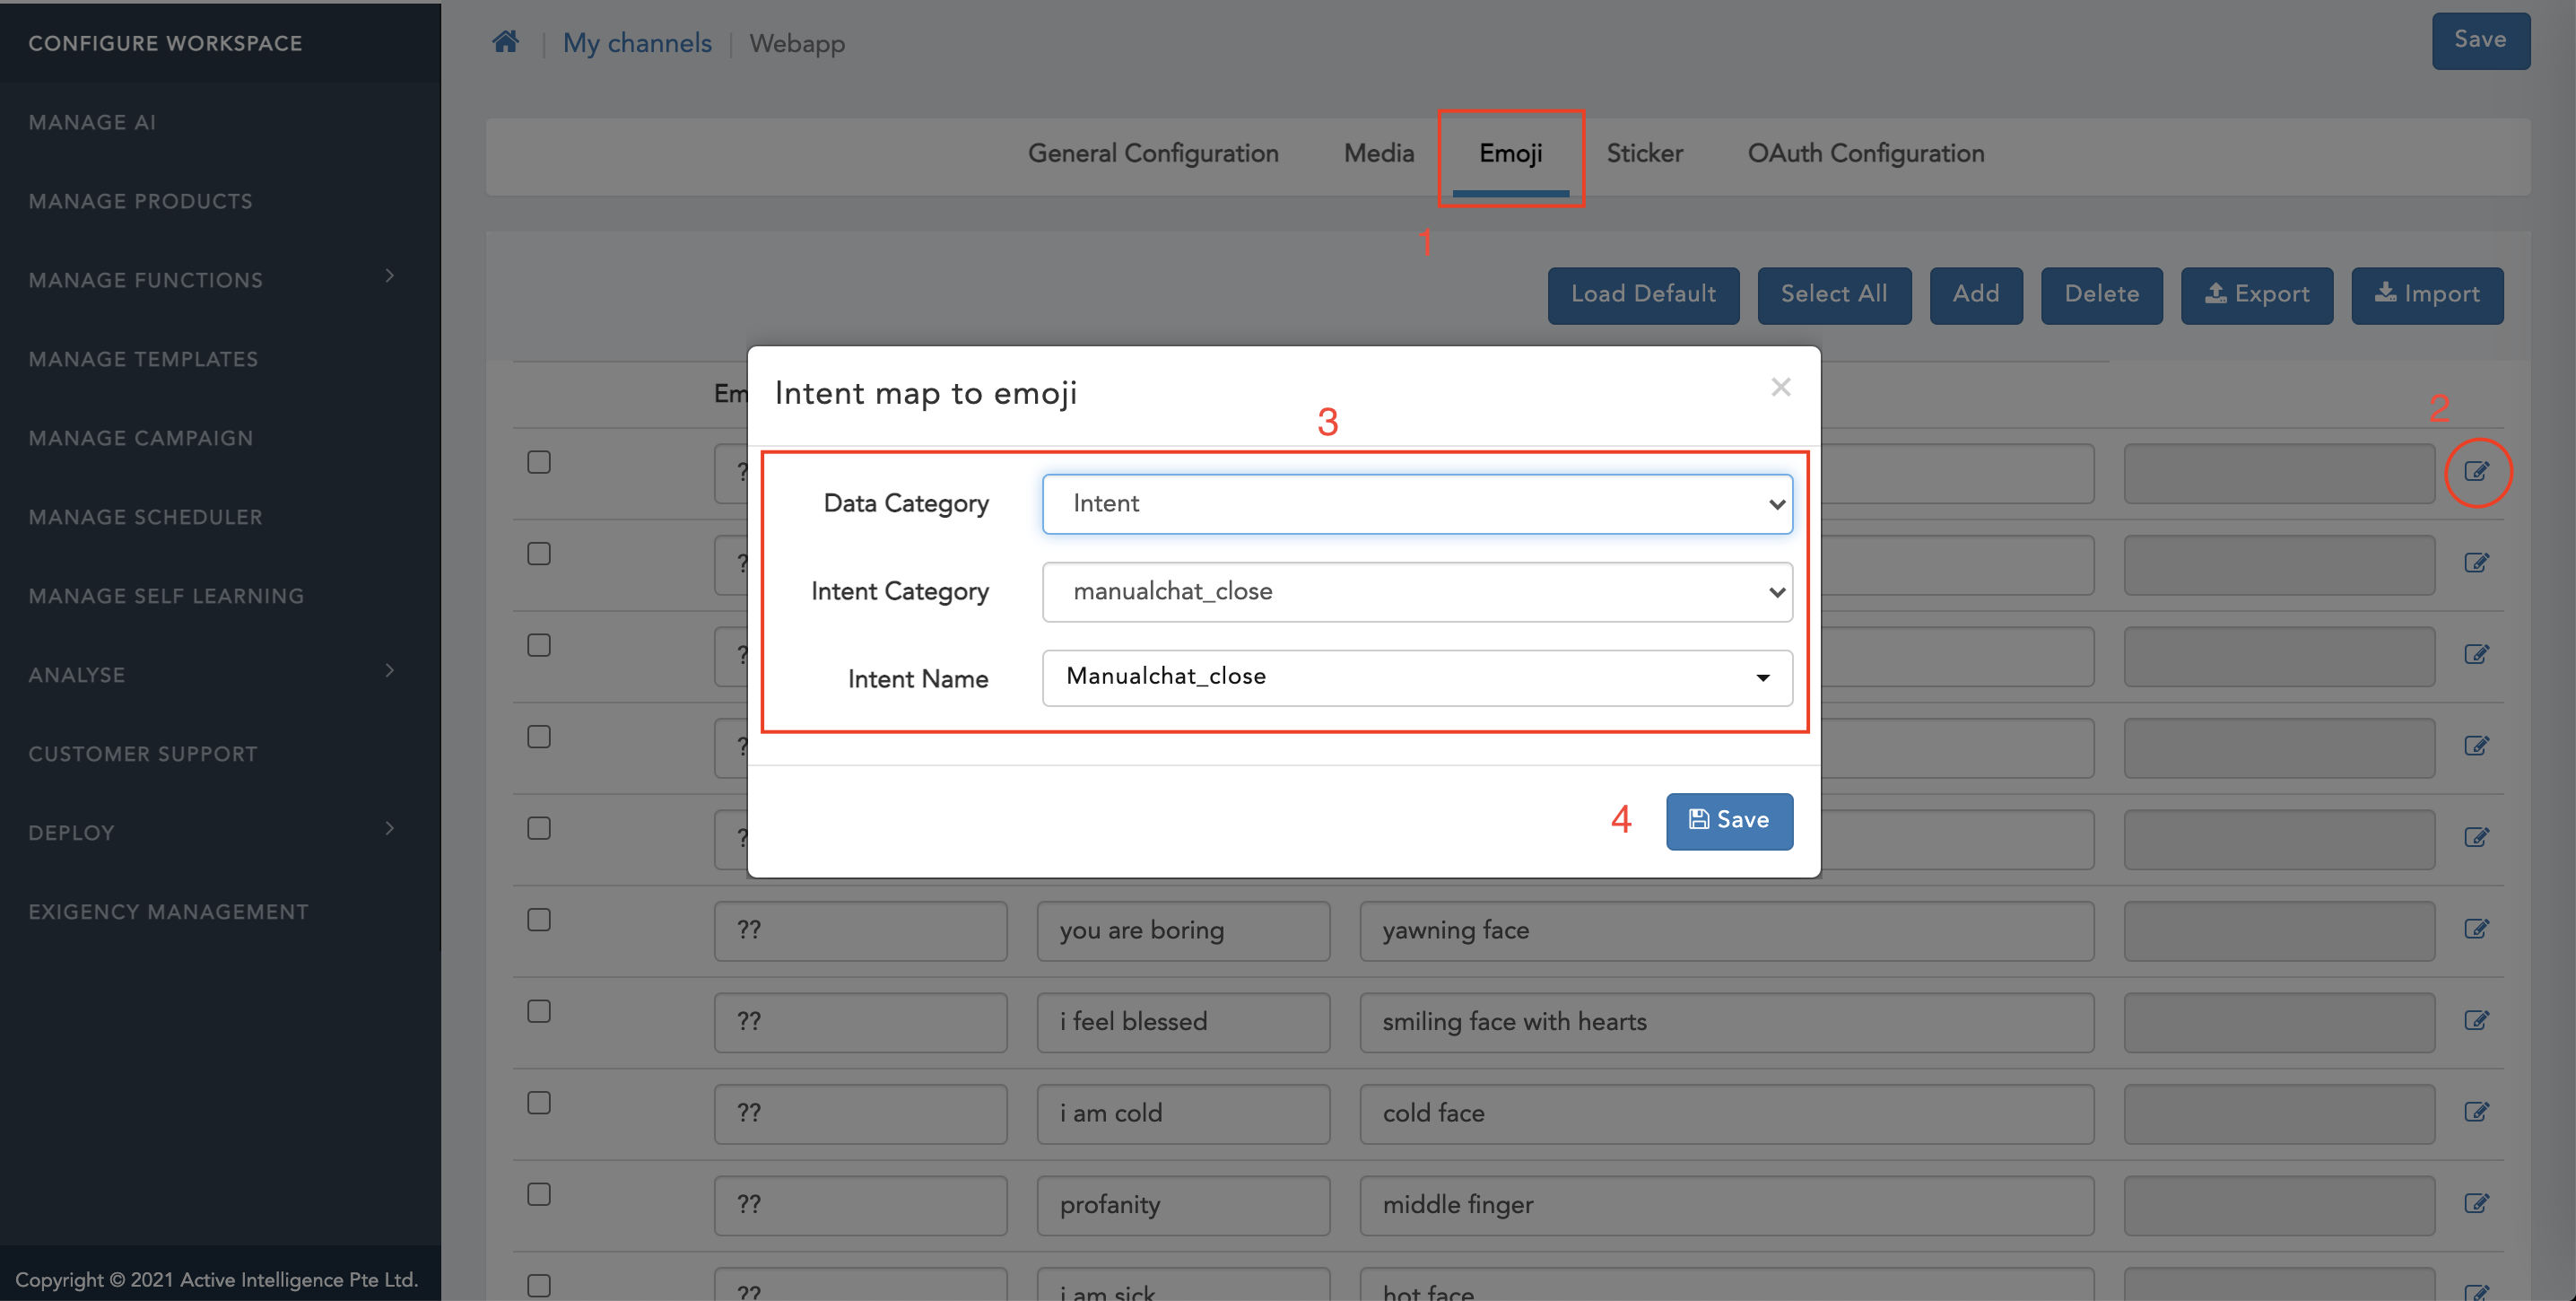
3. Import Emojis
You can import or export the emojis also by following these steps:
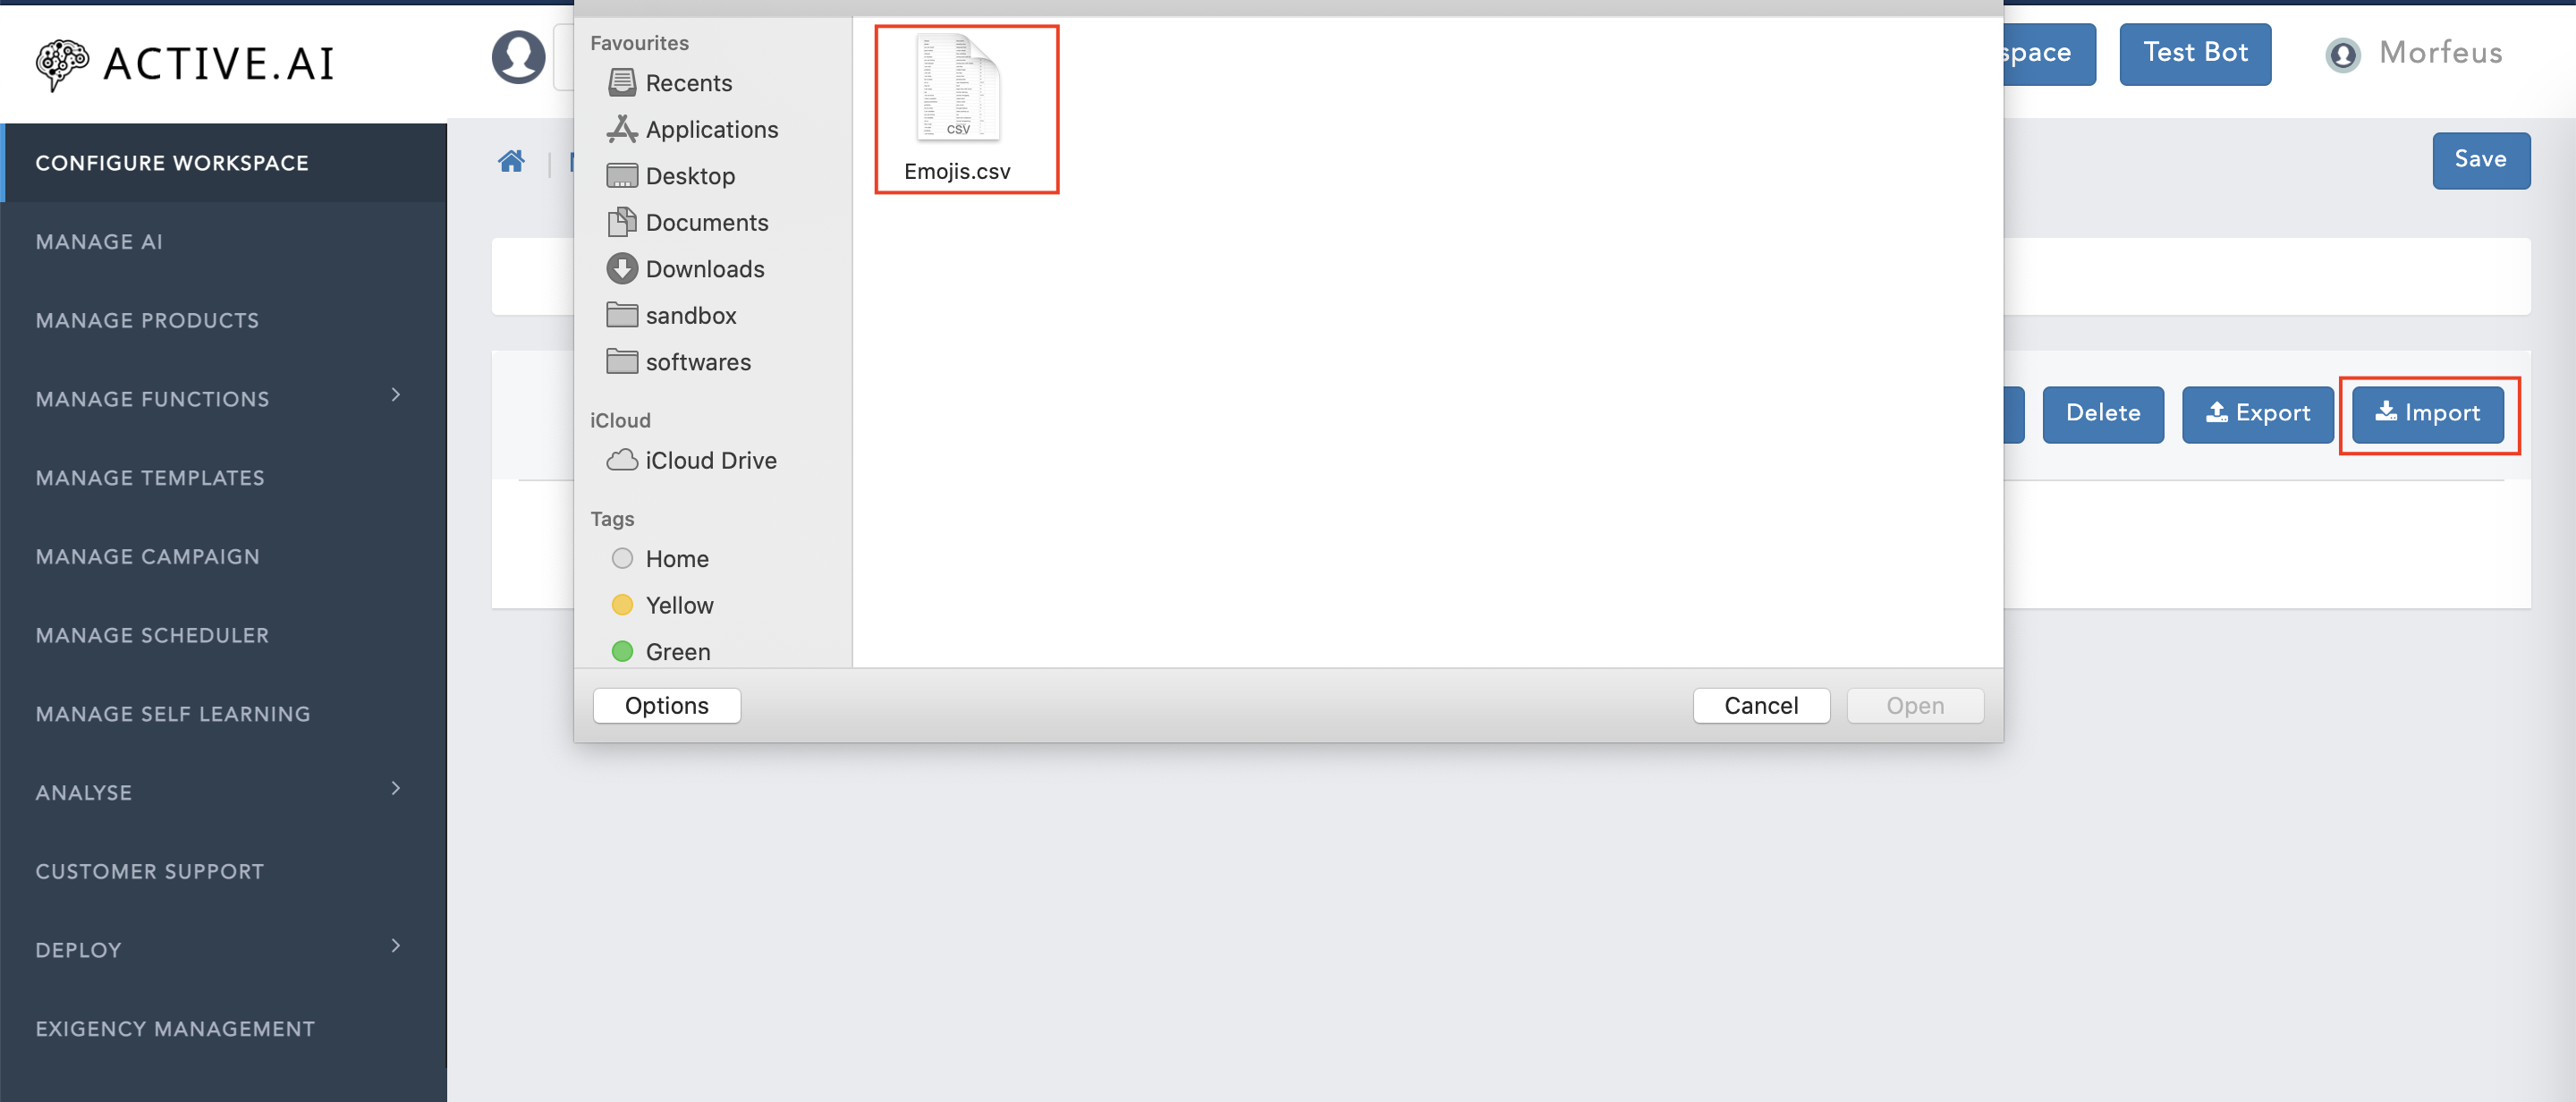
4. Export Emojis
You can import or export the emojis also by following these steps:
If you want to allow stickers on your bot so that user can interact with stickers as well and how you bot should react on those stickers then you can configure these kind of input as well by following these steps:

OAuth Configuration will be needed to enable the IoT based channels like Amazon Alexa etc. You can configure following parameters.
Parameters |
Description |
|---|---|
| Client ID | It specifies the Client ID of the authorization server. |
| Client Secret | It specifies the Client Secret of the authorization server. |
| Scope | It specifies the scope permissible by the authorization server. |
| Authorization URI | It specifies the Authorization URI. |
| Access Token URI | It specifies the Access Token URI. |
| Profile URI | It specifies the Profile URI. |
| Morfeus Client ID | It specifies the Morfeus Client ID for Alexa & Google Assistant. |
| Morfeus Secret | It specifies the Morfeus Secret for Alexa & Google Assistant. |
| IOT Authorization URI | It specifies the Authorization URI for Alexa & Google Assitant. |
| IOT Token URI | It specifies the Token URI for Alexa & Google Assistant. |
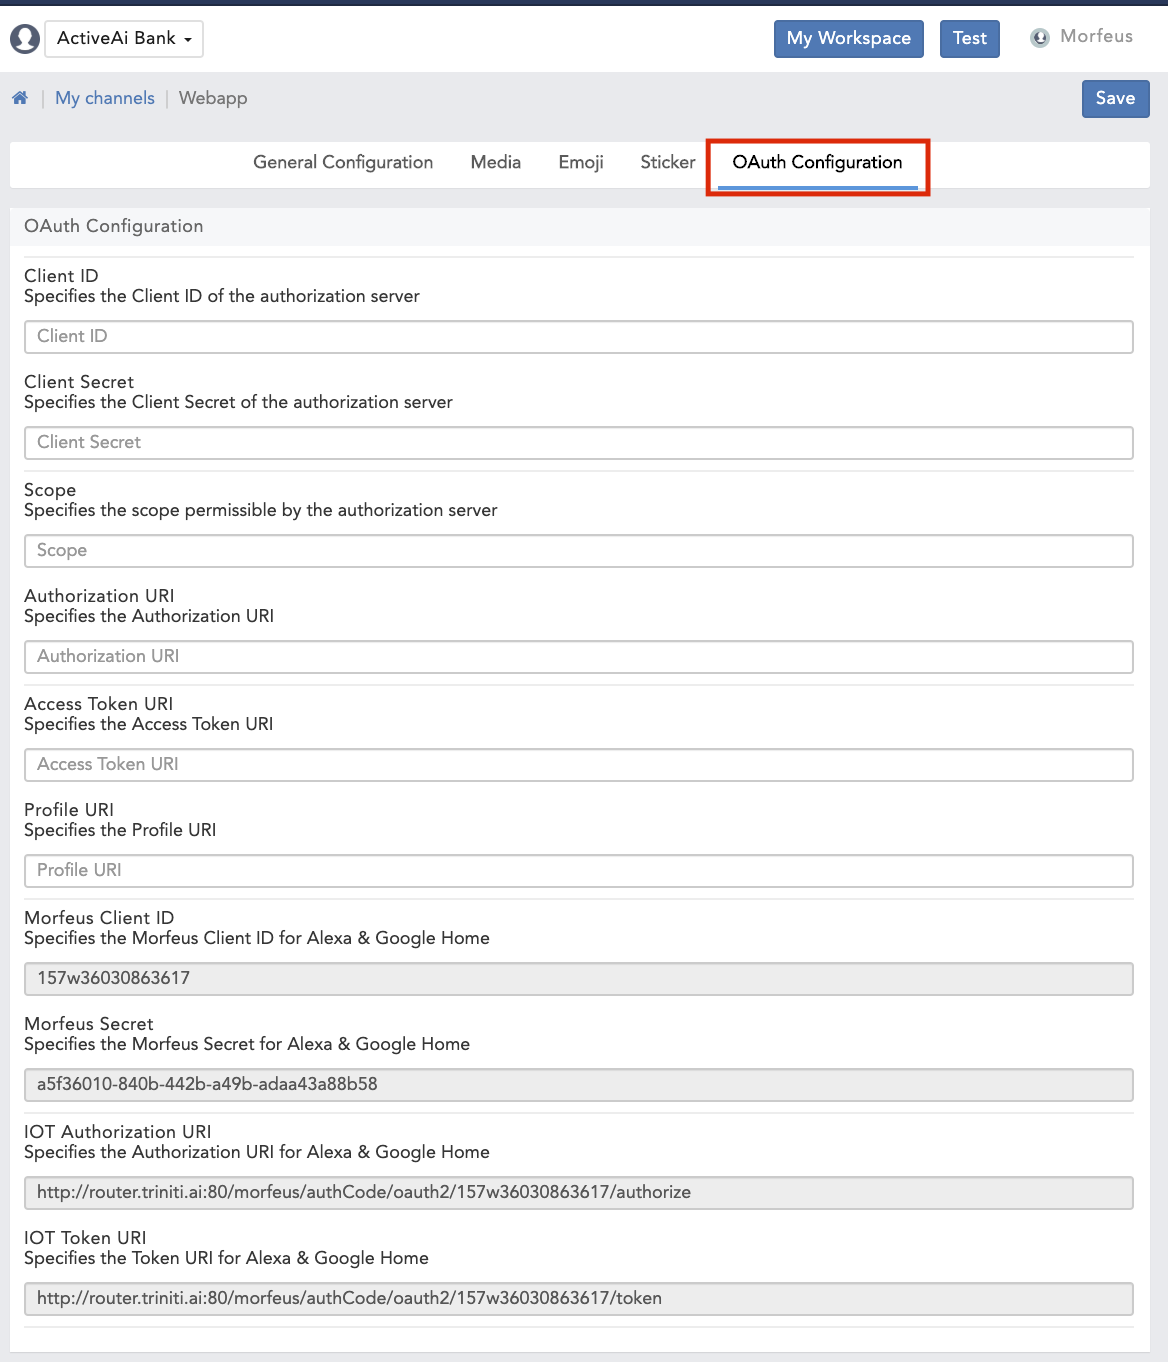
Social Channels
Social channels give you many opportunities and benefits regarding expand your services and reach to the user. Nowadays almost every user is using social channels. So we have segregated the social channels to make your bot more interactive.
We are supporting the following Social Channels:
1. Facebook Channel
You can configure your bot to interact with the user through Facebook messenger, where user can ask their query to the bot on the Facebook messenger itself.
To add Facebook to your bot follow these steps:
To configure your Facebook channel, please refer to Configure Facebook Channel

2. Skype Channel
We also do support skype channels to configure your bot & interact with the user on the skype. You can enable the skype channels for your bot by following these steps:
To configure your skype channel, please refer to Configure Skype Channel

3. Slack Channel
Slack is also in our channels bucket list, your bot can also interact on slack with the users. To add the slack in your bot follow these steps:
To configure your slack channel, please refer to Configure Slack Channel

4. Line Channel
The bot can answer the user's query on the line channel as well. You can enable & configure the line channel for your bot by following these steps:
To configure your line channel, please refer to Configure Line Channel

5. Viber Channel
Even you can configure your bot to respond to the user's query on the Viber as well by following these steps:
To configure your Viber channel, please refer to Configure Viber Channel
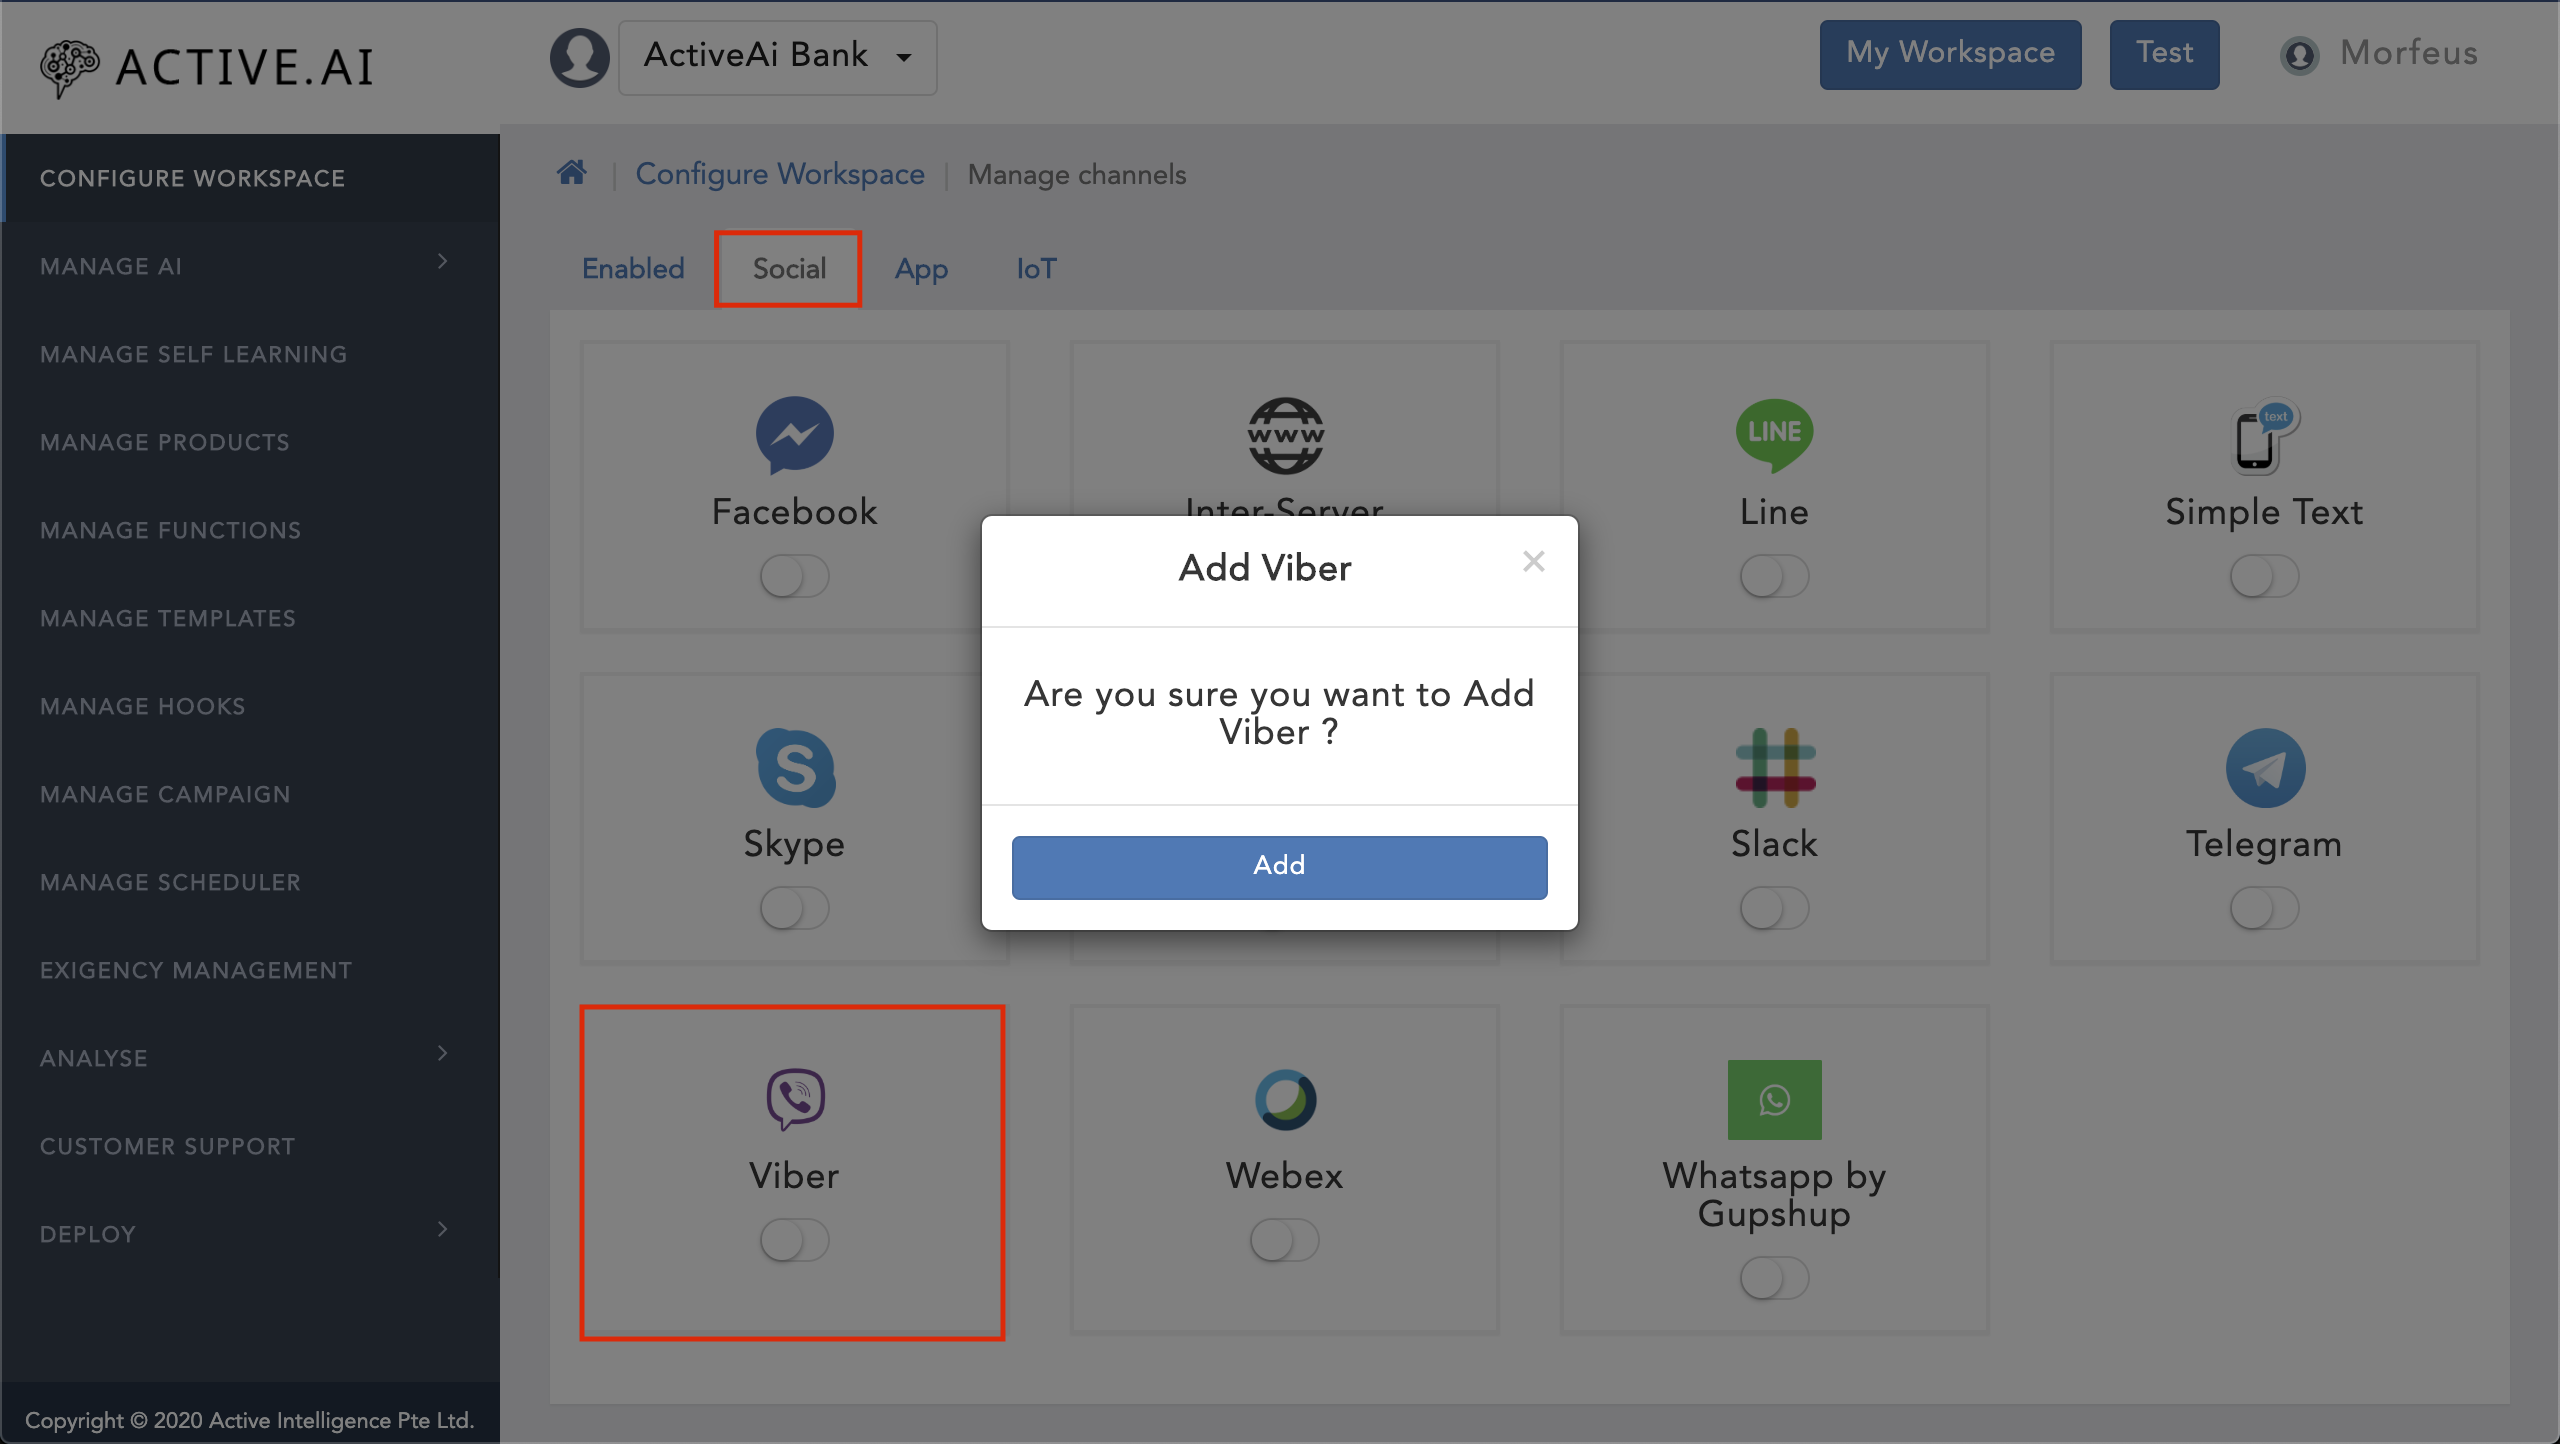
6. Webex Channel
We are also supporting the Webex channel for the bot. You can enable & configure the WebEx channel for your bot by following these steps:
To configure your webex channel, please refer to Configure Webex Channel
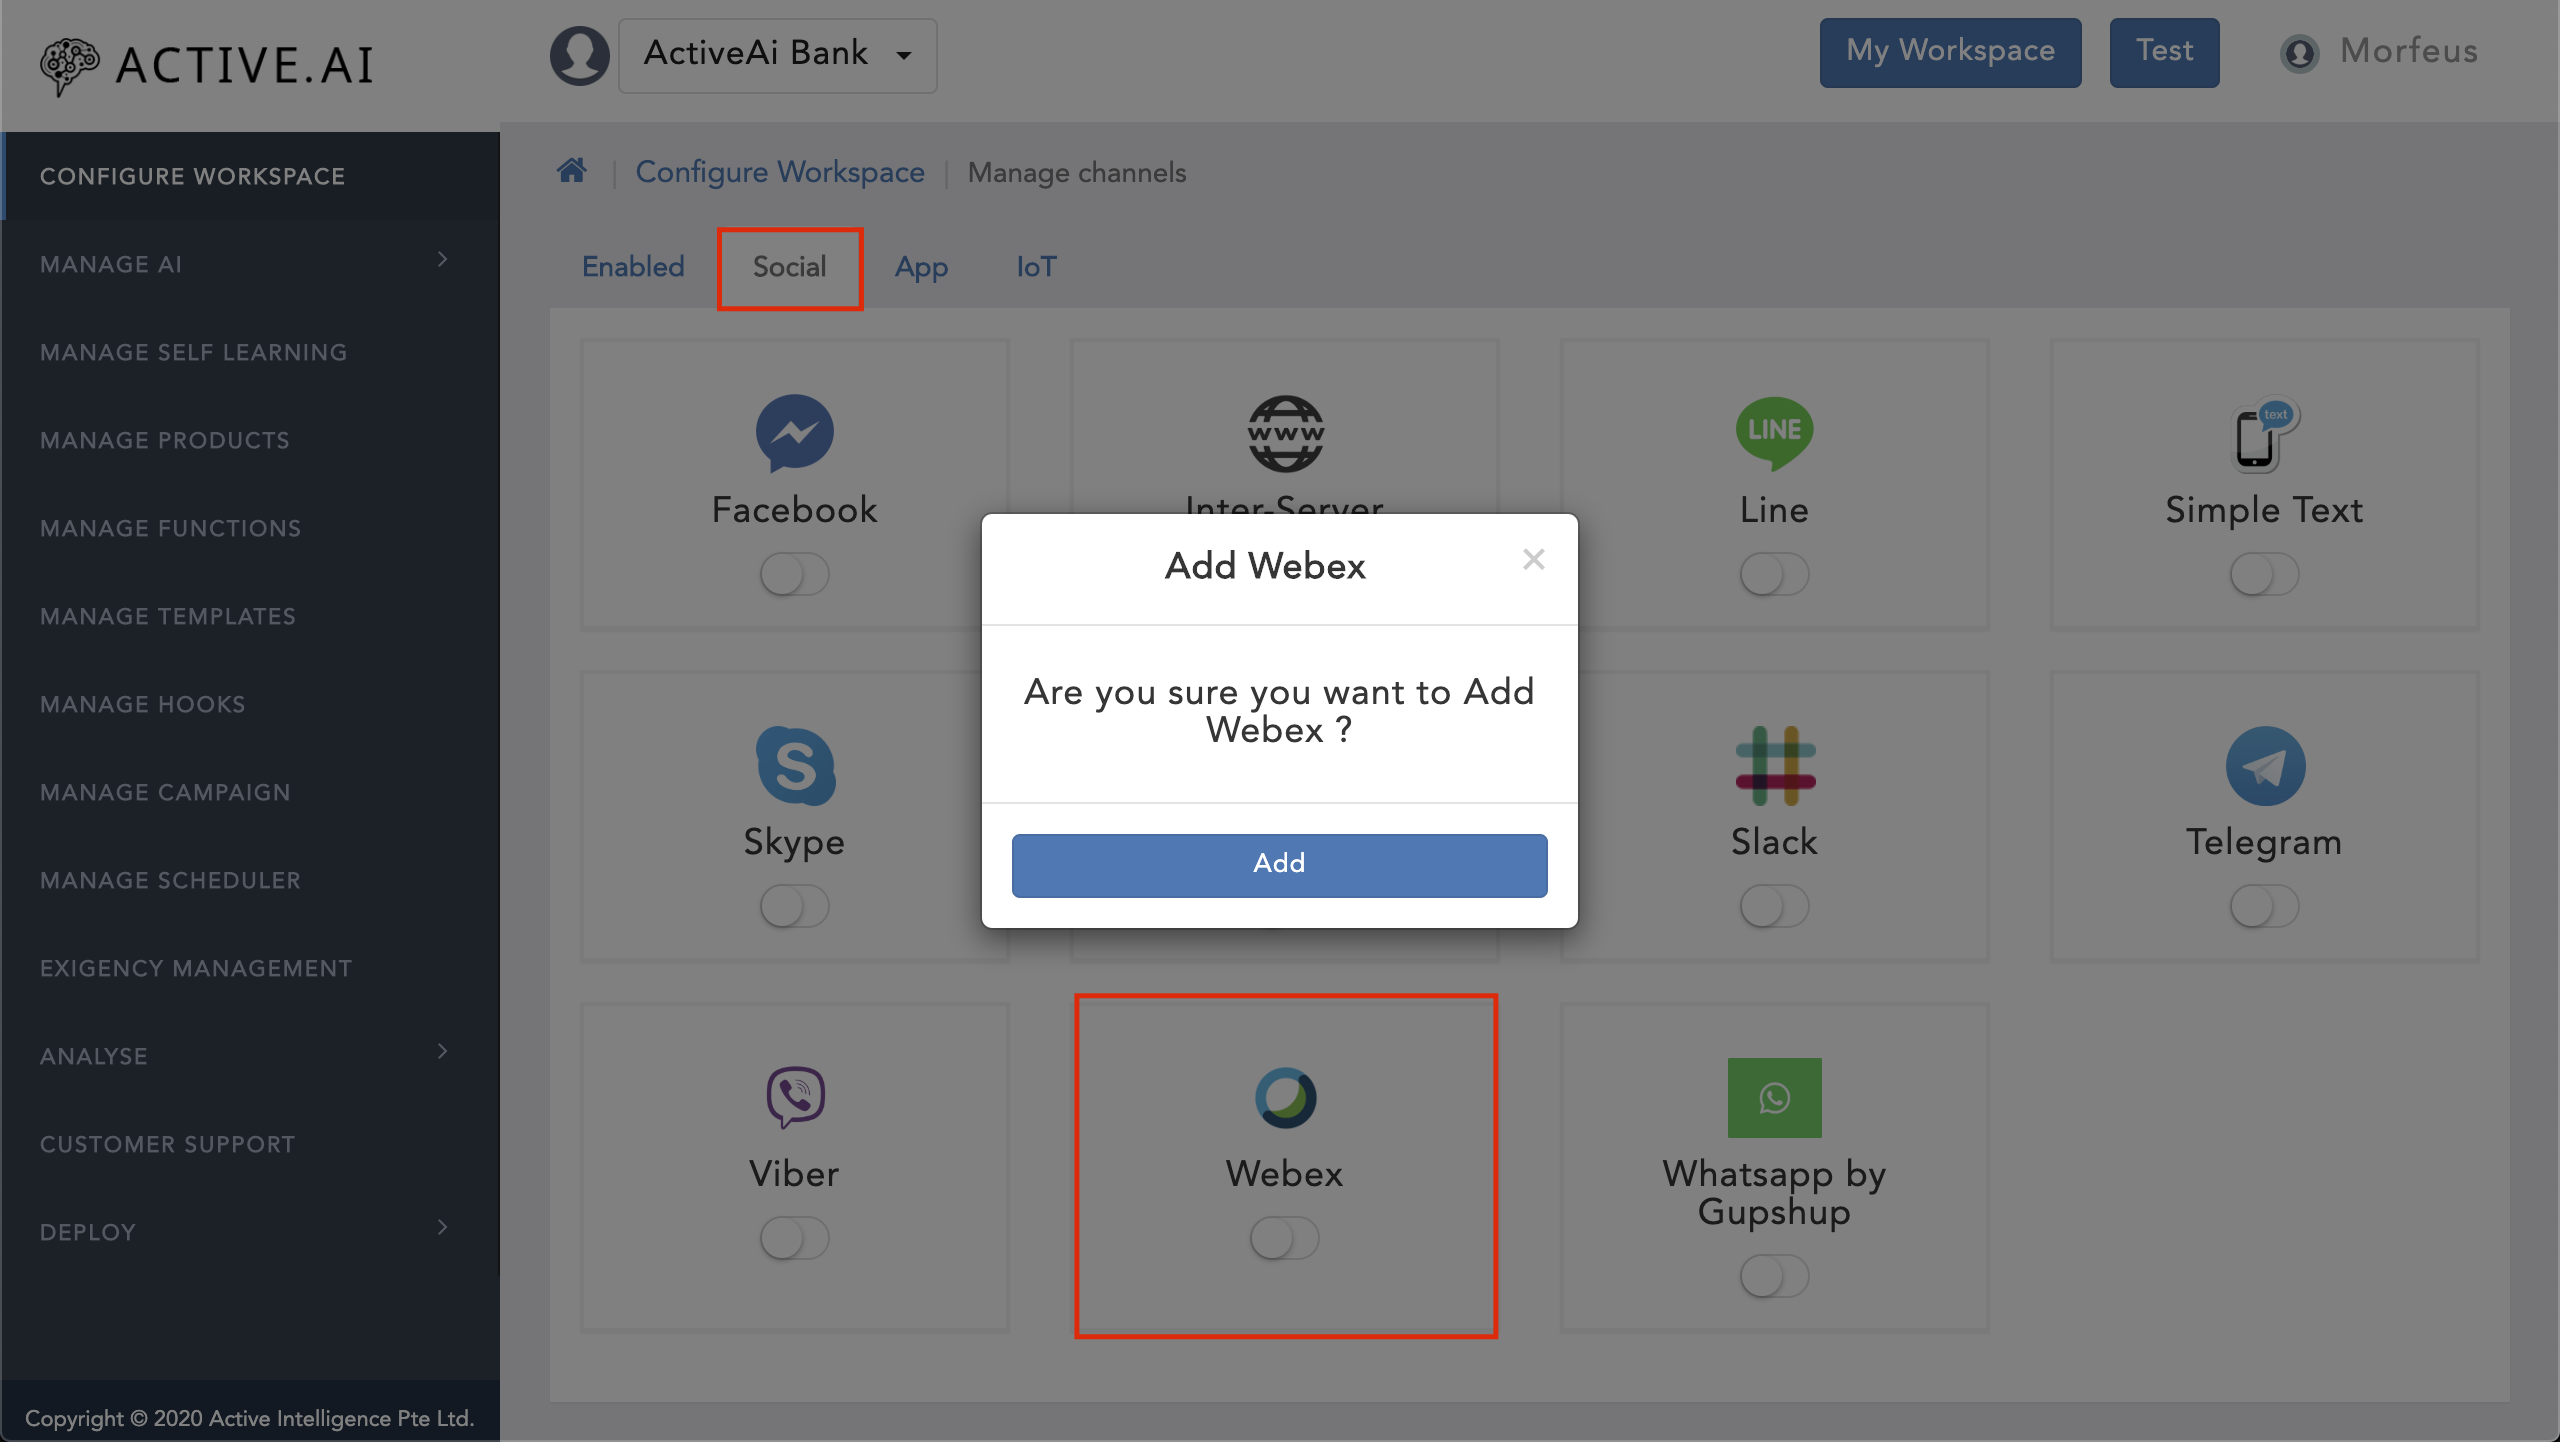
8. Whatsapp by Gupshup Channel
We have also enabled the What by gupshup channel for the bot as Whatsapp is the most popular social media channel across the world, so it will be more easy to reach the user and interact with them. You can enable Whatsapp by gupshup channel for your bot by following these steps:
To configure your Whatsapp by Gupshup channel, please refer to Configure Whatsapp by Gupshup Channel

9. Telegram Channel
We also do support telegram channel, you can enable telegram channel for your bot by following these steps:
To configure your telegram channel, please refer to Configure Telegram Channel

Application Based Channels
We enable you to craft your conversations to be embedded in an existing Web App or Mobile App. You can configure your bot for a mobile app or a web app to interact with the user and get their query resolved by enabling these application-based channels.
Currently, we are supporting the following application-based channels:
1. Web App Channel
Web App is a lightweight messaging SDK which can be embedded easily in web sites and hybrid mobile apps with minimal integration effort. Once integrated it allows end-users to converse with the Conversational AI/bot on the Active AI platform on both text and voice. WebSDK has out the box support for multiple UX templates such as List and Carousel and supports extensive customization for both UX and functionality.
You can enable the Web App channel by following these steps:
To configure your WebApp channel, please refer to Configure WebApp Channel
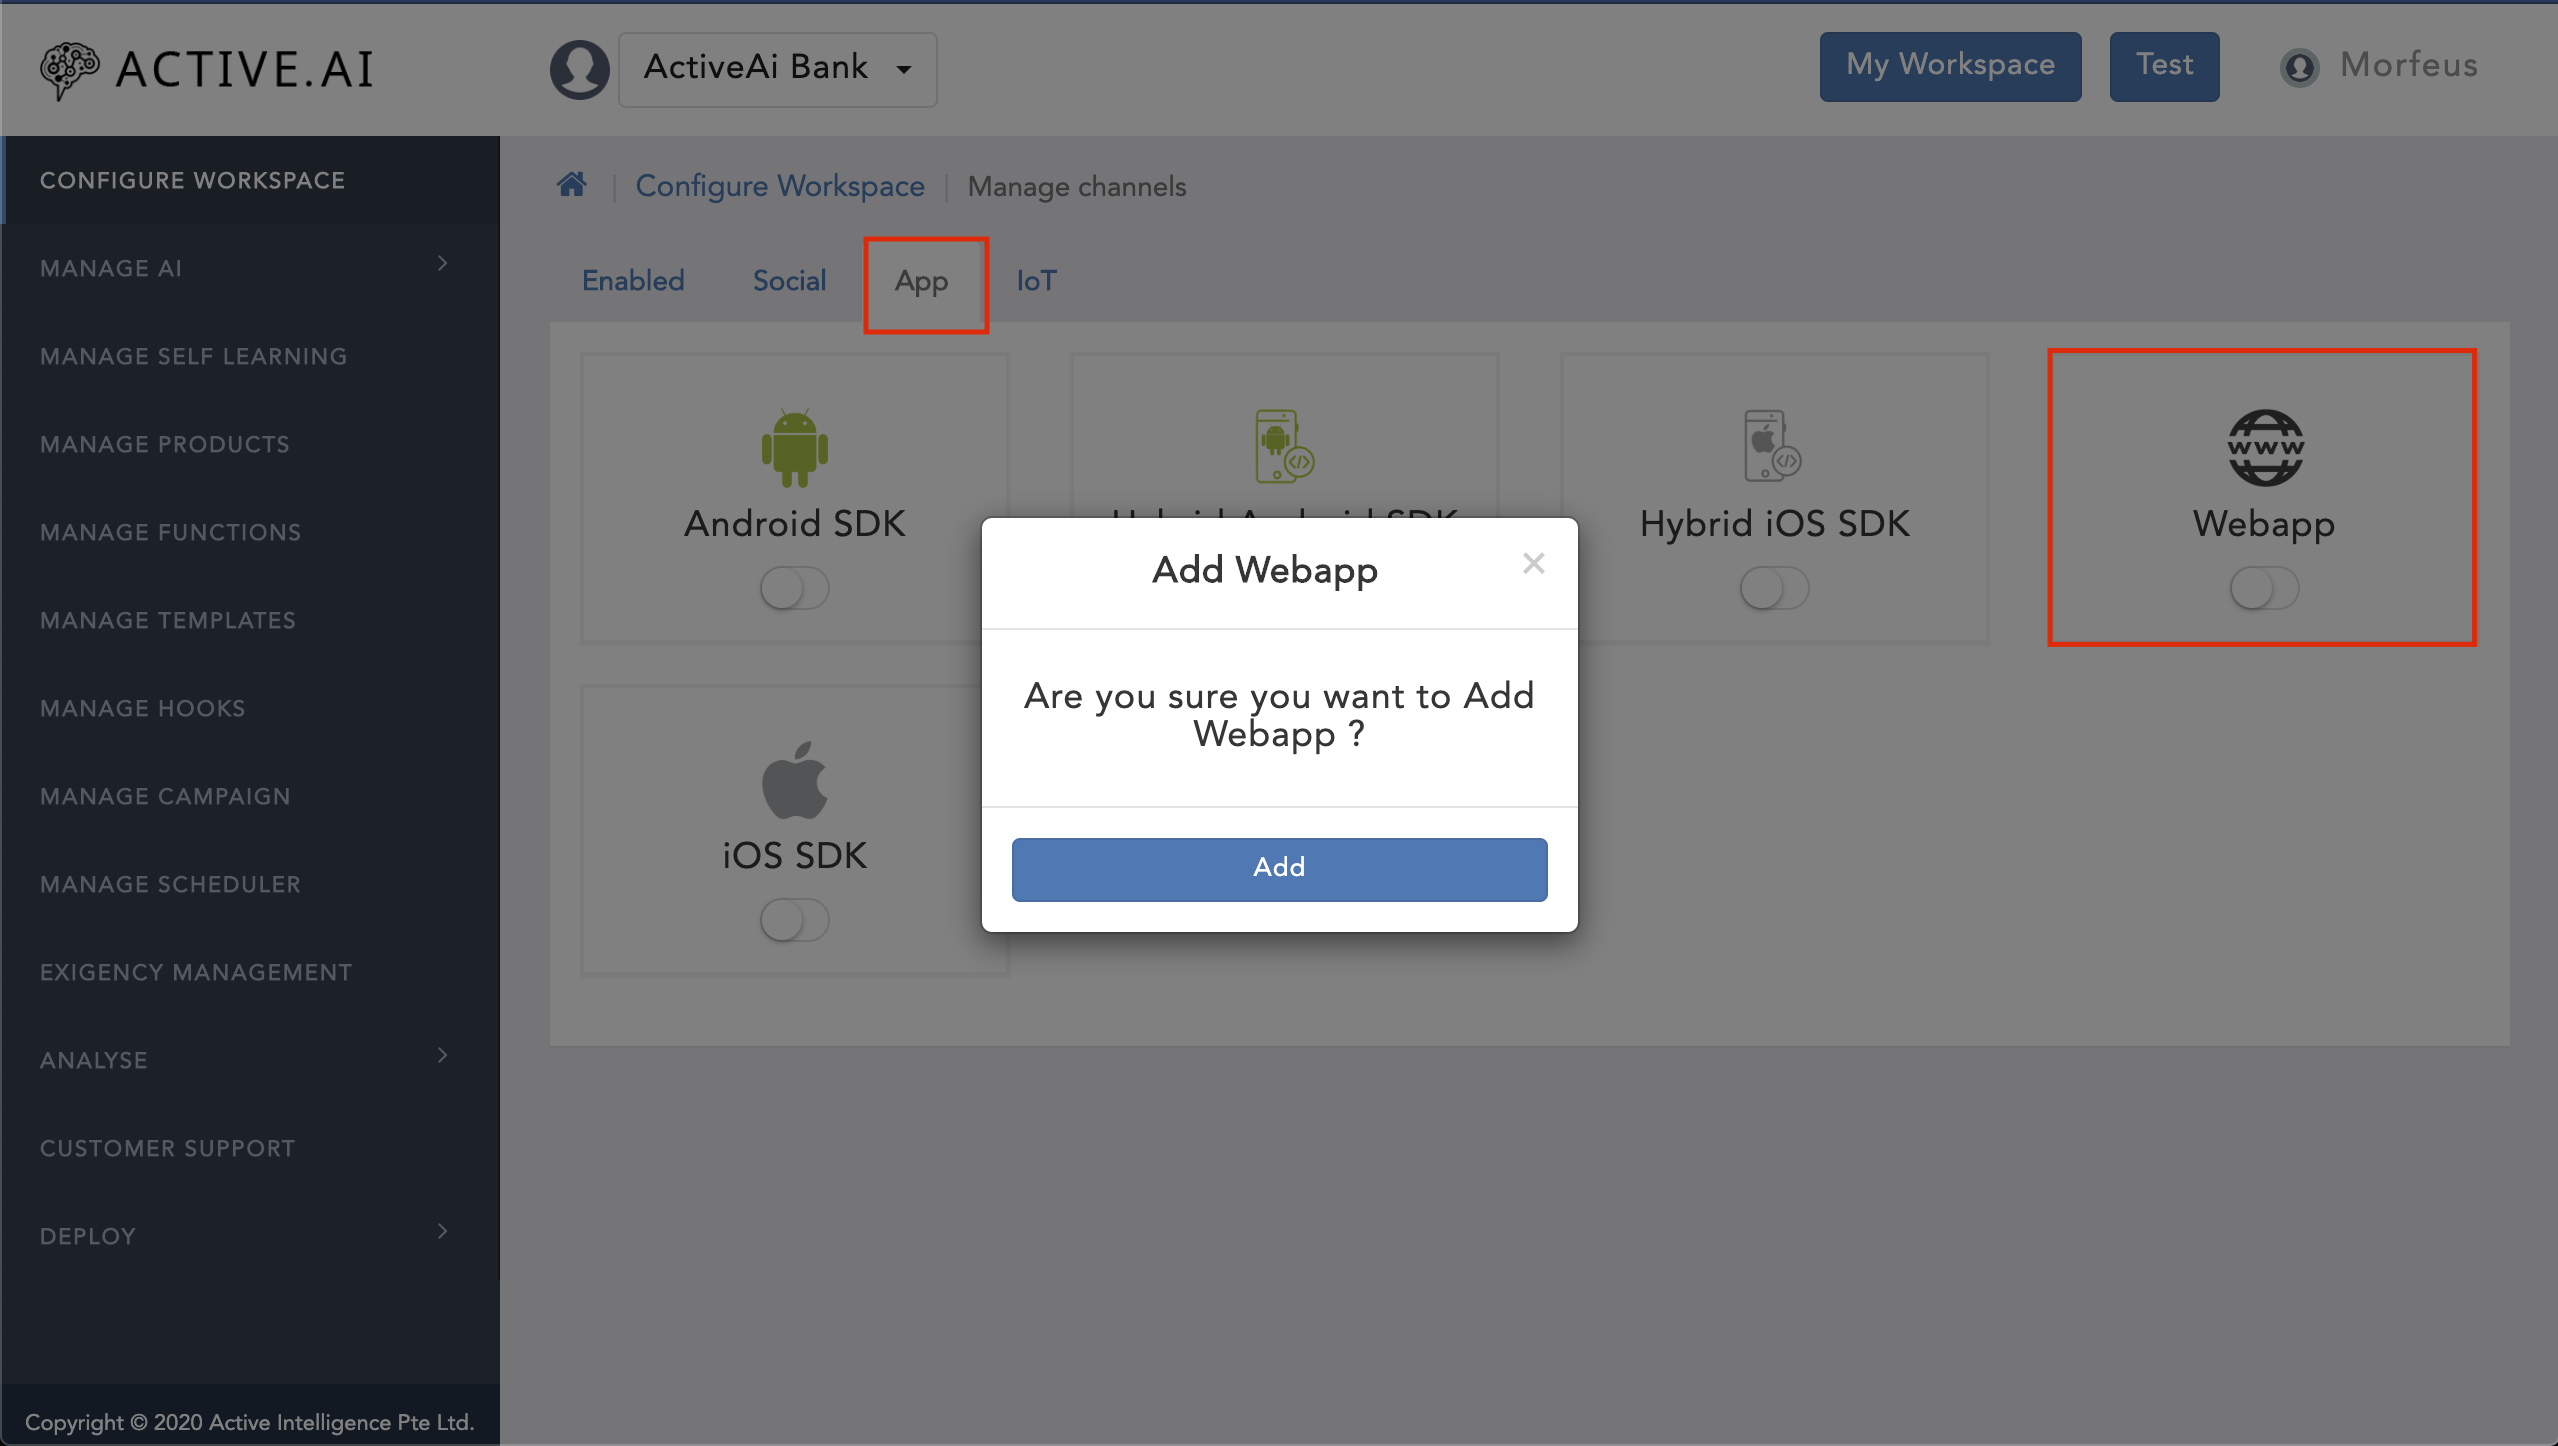
2. Android SDK
Android Native SDK is a lightweight messaging SDK which can be embedded easily in native mobile apps with minimal integration effort. Once integrated it allows end-users to converse with the Conversational AI /bot on the Active AI platform on both text and voice. The SDK has out the box support for multiple UX templates such as List and Carousel and supports extensive customization for both UX and functionality. The SDK has inbuilt support for banking grade security features.
You can configure an android SDK channel for your bot by following these steps:
To configure your Android SDK channel, please refer to Configure Android SDK Channel
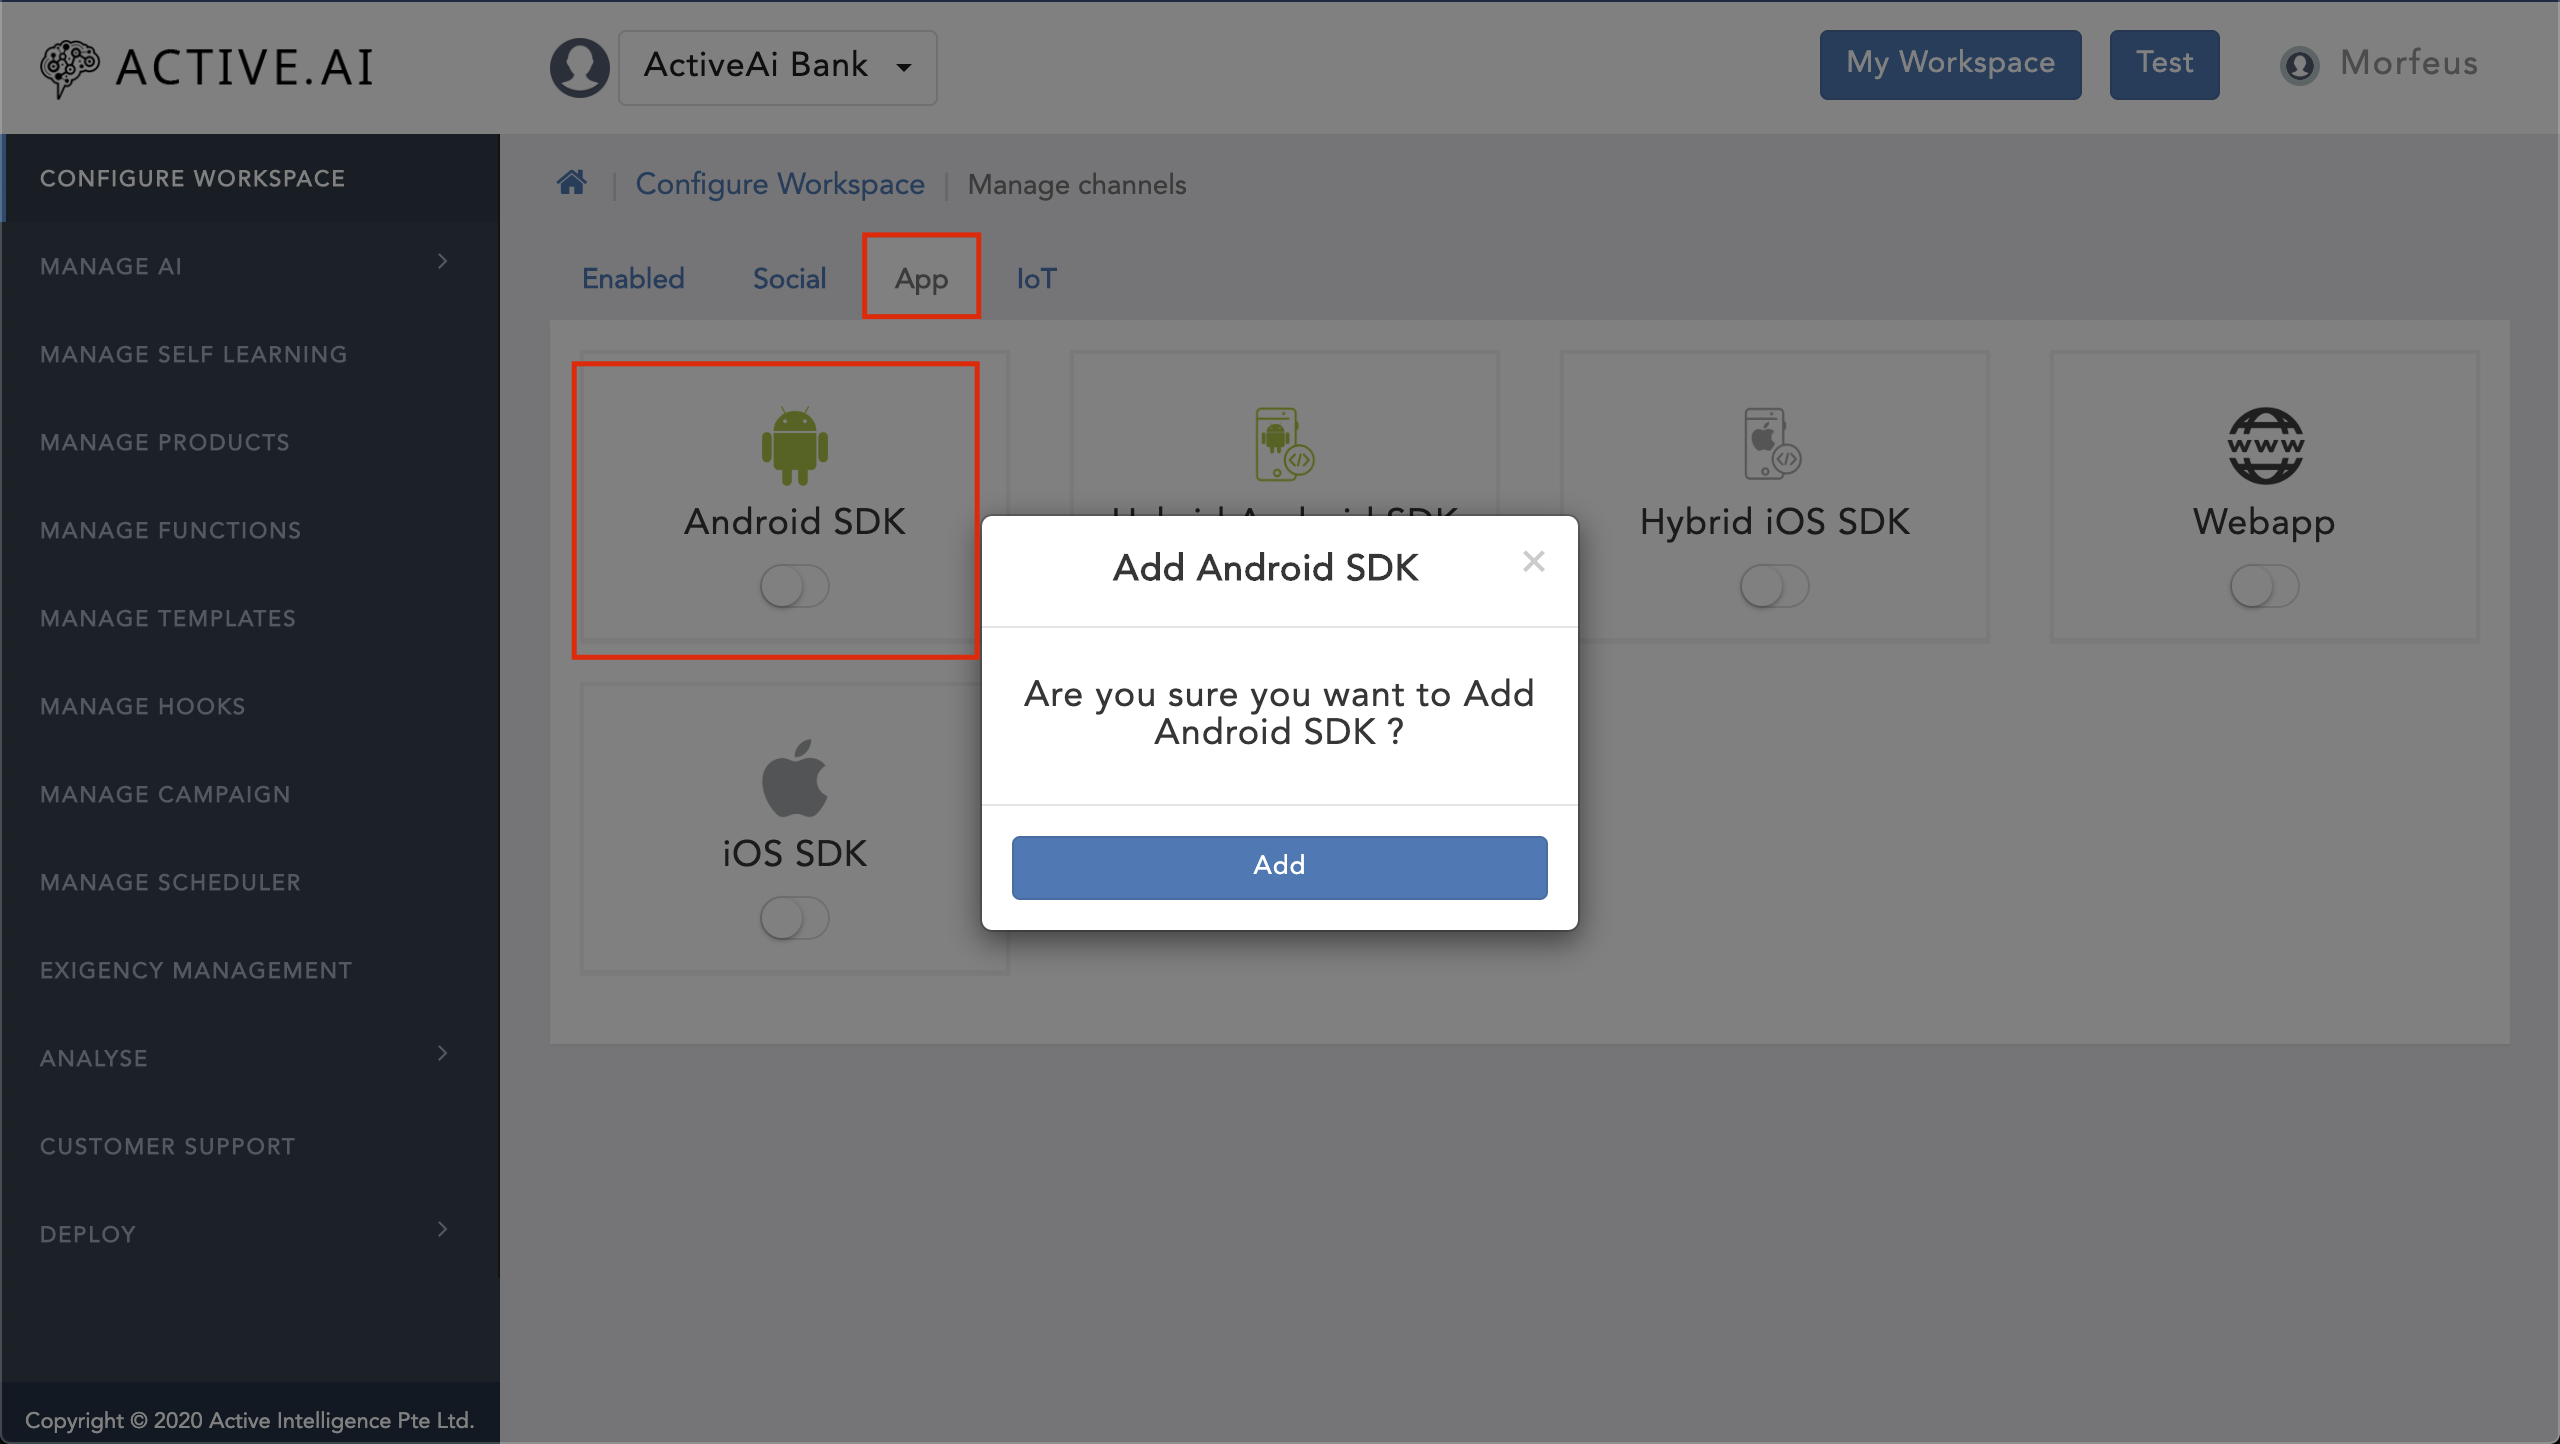
3. Hybrid Android SDK Channel
Hybrid Android SDK is a lightweight messaging SDK which can be embedded easily in web sites and hybrid mobile apps with minimal integration effort. Once integrated it allows end-users to converse with the Conversational AI /bot on the Active AI platform on both text and voice. WebSDK has out the box support for multiple UX templates such as List and Carousel and supports extensive customization for both UX and functionality.
You can configure a hybrid android SDK channel for your bot by following these steps:
To configure your Hybrid Andoroid SDK channel, please refer to Configure Hybrid Android SDK Channel

4. iOS SDK Channel
iOS Native SDK is a lightweight messaging SDK which can be embedded easily in native mobile apps with minimal integration effort. Once integrated it allows end-users to converse with the Conversational AI /bot on the Active AI platform on both text and voice. The SDK has out the box support for multiple UX templates such as List and Carousel and supports extensive customization for both UX and functionality. The SDK has inbuilt support for banking grade security features.
You can configure an iOS SDK channel for your bot by following these steps:
To configure your iOS SDK channel, please refer to Configure iOS SDK Channel
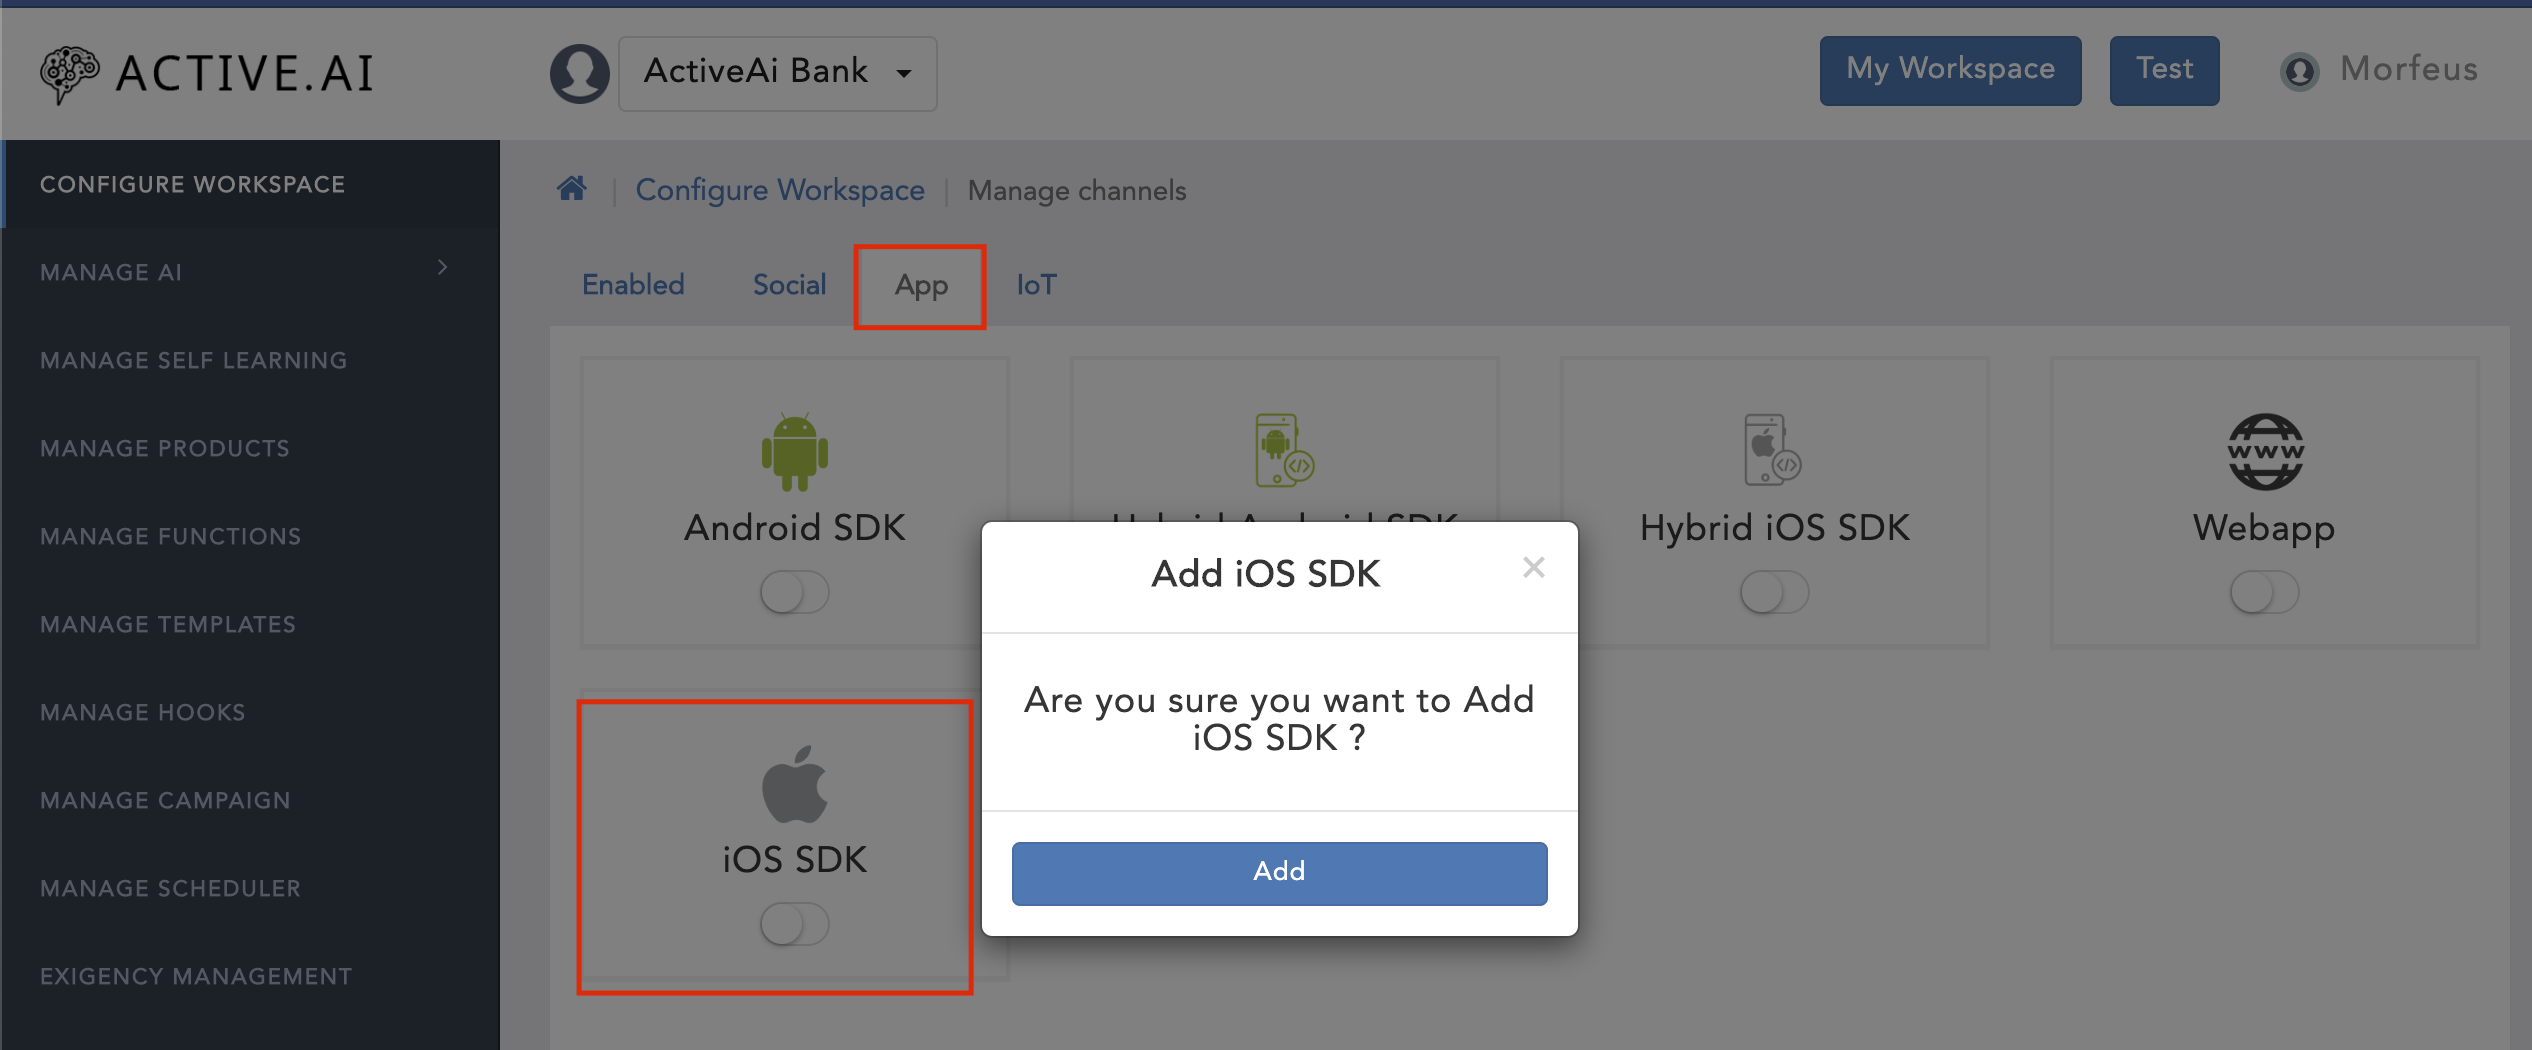
5. Hybrid iOS SDK Channel
iOS Hybrid SDK is a lightweight messaging SDK which can be embedded easily in web sites and hybrid mobile apps with minimal integration effort. Once integrated it allows end-users to converse with the Conversational AI /bot on the Active AI platform on both text and voice. WebSDK has out the box support for multiple UX templates such as List and Carousel and supports extensive customization for both UX and functionality.
You can configure a hybrid iOS SDK channel for your bot by following these steps:
To configure your hybrid iOS SDK channel, please refer to Configure Hybrid iOS SDK Channel
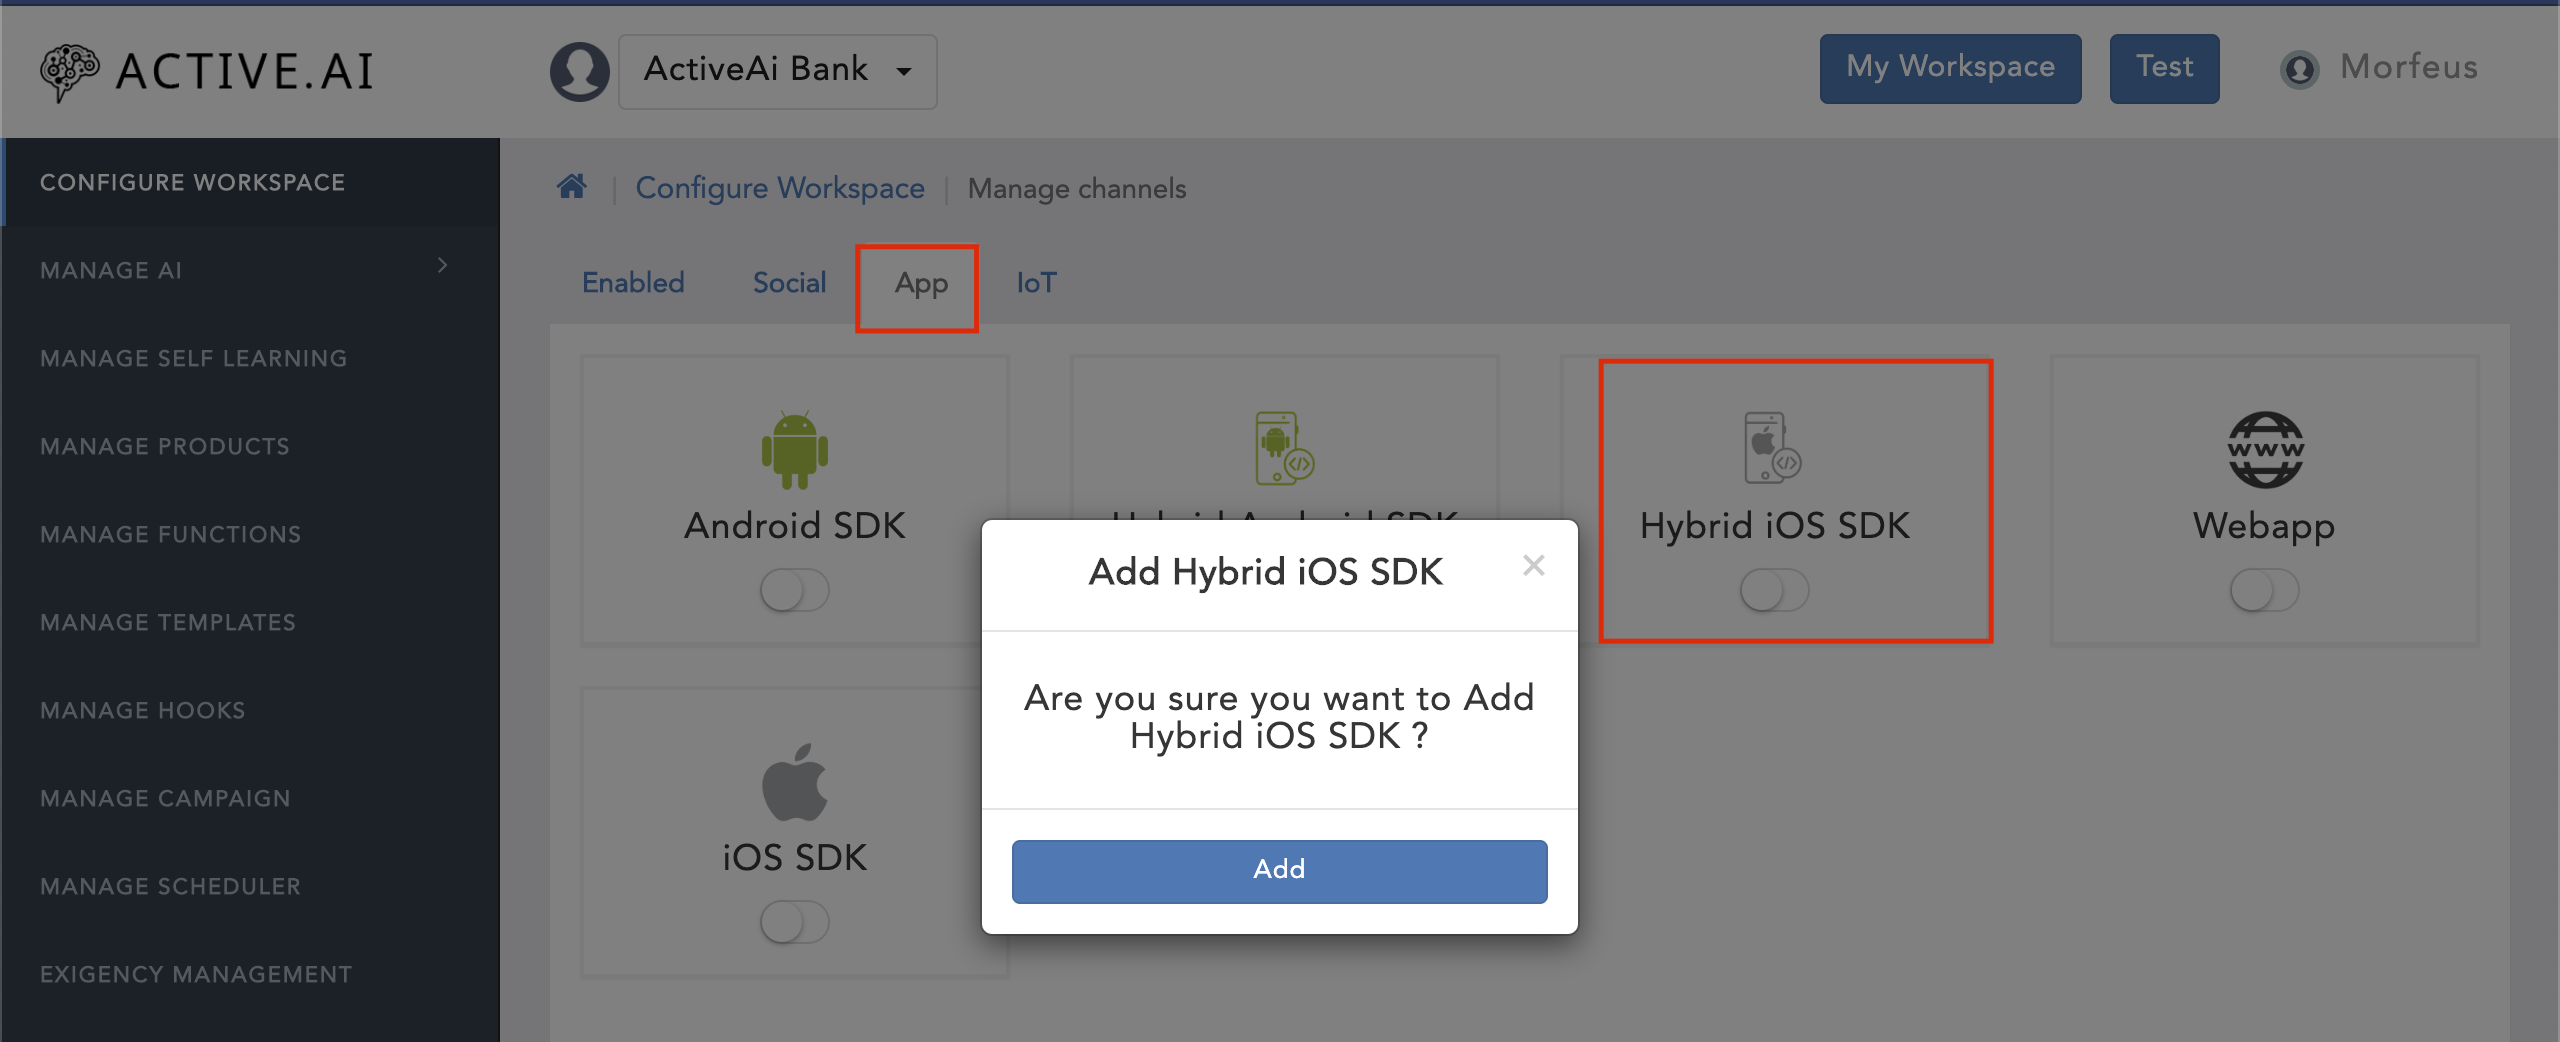
IoT Based Channels
As artificial intelligence is broadening the users are also being more adaptable to artificial intelligence. We have enabled some of the channels that support speech responses to make the user more interactive with the bot. It will reduce more effort from the user to perform any transaction or ask any query by voice command rather than typing on the bot. It will allow the user to perform any action by speeches, the bot will also respond to the user in speeches as well. It will fill the maximum gap between the user & the bot that comes during interaction with the bot in typing, time-consuming, & more importantly thinking to interact with the bot.
We are currently supporting these IoT based channels:
1. Amazon Alexa Channel
As the Amazon Alexa is getting more popular among the user, we have made the amazon Alexa configure with your bot and interact with the user for any kind of transaction or inquiry. Users can directly interact with the bot through amazon Alexa and get their things done or get their response concerned with their queries.
You can enable the amazon Alexa channel for your bot by following these steps:
To configure your amazon Alexa channel, please refer to Configure Amazon Alexa Channel

2. Google Assistant Channel
As the most common IoT device is Google Assistant that enables the user to interact by asking or voice command to the google assistant. We have enabled the google assistant to make your conversational bot more interactive so that the user can interact with your bot by providing any voice command, the bot will send the response in speeches as well. You can enable the Google Assistant channel for your bot to interact with the user in speeches by following these steps:
To configure your google assistant channel, please refer to Configure Google Assistant Channel
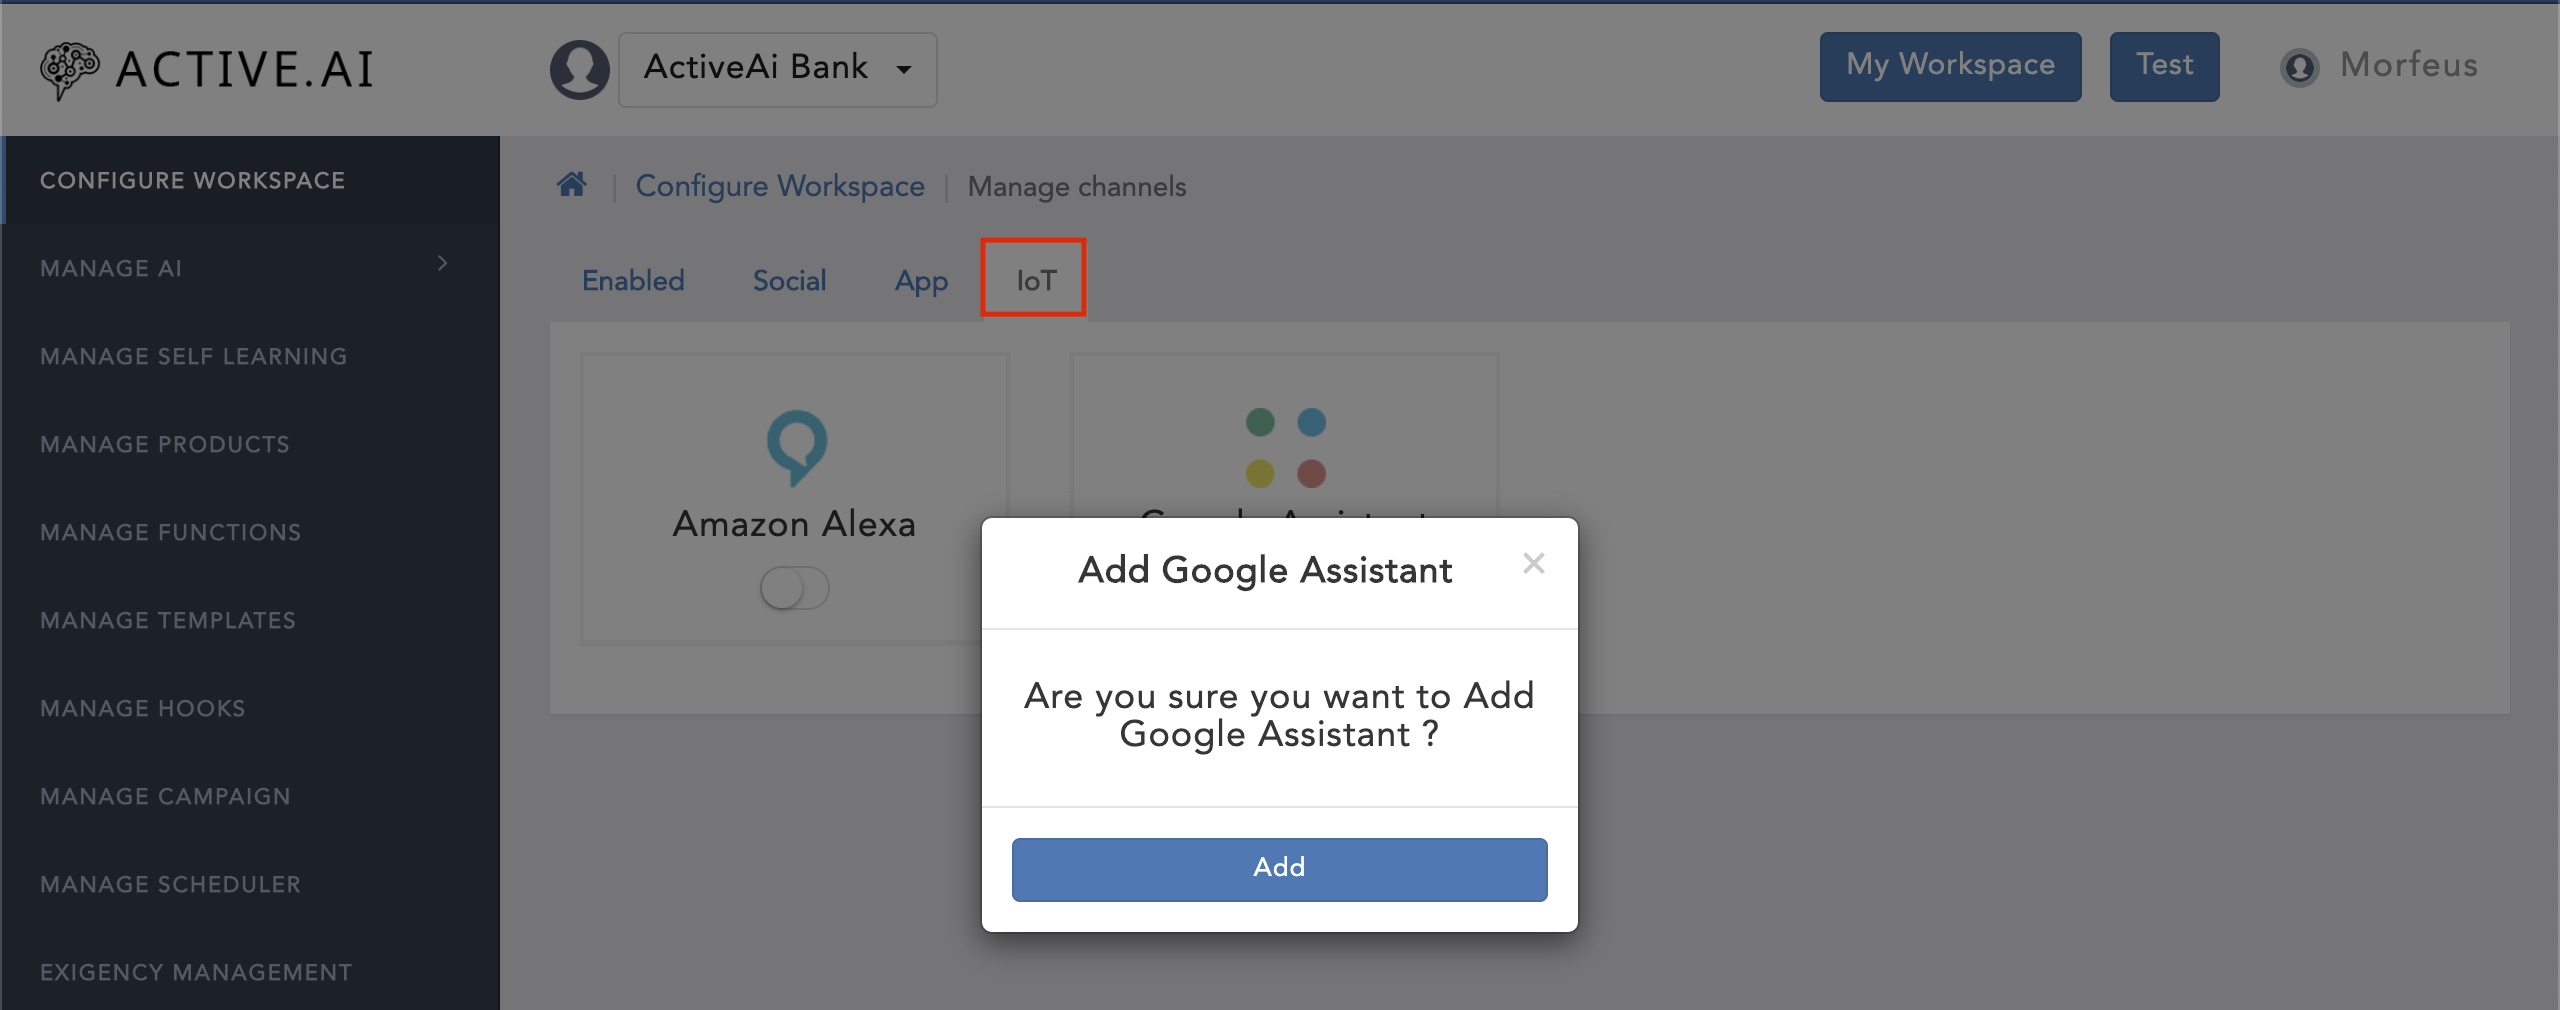
Managing Hooks
The end goal of determining a message intends to do some action based on that. For that purpose for each intent/feature, we have to configure a hook. A hook is the final action bot will perform based on the intent. A hook can be of transaction or inquiry type. Transaction type hook means its a multi-step fulfillment like fund transfer. Inquiry type hook is any fulfillment which can be fulfilled in a single step like "what is my balance?". We can have multiple hooks for an intent to have different fulfillment for different channels.
Adding Hooks
You can add the hooks by following these steps:
Name : Name of the Hook to be created
Service ID : Unique Id to identify the Hook
Category : This is a very important field which used to club all the other modules like messages, rules, template and data to bind together
Intents : Configure applicable intents for this function like txn-login etc
Feature : If we need sub-intent functionality, need to configure feature Id and rule JSON
Functionality Type: Define whether this is inquiry or transaction type module
Channels : It will display all the configured channels for this workspace. Can enable or disable based on the requirement.
Security > Realm: It used to configure whether this function can be invoked before login or post login by configuring
Fulfillment: To define how this hooks if fulfilled. Options are Camel routes, Workflow, Template, SpringBean and Webhook

Deleting Hooks
If you don't want any hook then you can delete those hooks by following these steps:
Import/Export
If you want to use the hooks of any other workspace in your workspace or if you have configured hooks then you can import that JSON file in your workspace, And If you want to keep the existing configured hooks or use in another environment then you can export those hooks.
You can also import the hooks from your system by following these steps:
You can also export the hooks from your system by following these steps:
It will download a JSON file containing Hooks configuration in JSON format.

Managing Campaigns
Overview
A campaign is a process to push any executable information from the server to the client through batch or in the transaction. You can configure a campaign for your workspace by following these steps:

Rules & Parameters
Definition
Internal campaign is a campaign which will be fulfilled by a Fulfillment service such as Template or Hook. Hook can be workflow, camel route or javabean etc.
External Campaign is a campaign which can be fulfulled by calling a external service.
Rules
Context Rules - These rules apply when the user is between any process.It will specify the context rule by selecting operand & operator. This will be applied by checking the context of the user. For eg. You select context rules as Billing Date and operator as Between and then specify a date. When the user is performing bill payment and the date falls between the range of specified date then the campaingn will be rendered.
Historical Rules - It will be used to store the previous transactions by selecting the 'super Aggregation', 'Aggregation', 'Operator', etc. For eg. - select super aggregration as Count ,Aggregation as Average and Transaction amount, operator as between and specified Conversation amount. Then when the transaction amount of the user lies in the specified range of the mentioned amount in rule then the campaign will rendered.
Derived Rule - Derived rule is aaplied on historical rule if configured otherwise is optional. for eg. You could specify the payee name, if user performs transcation to specified user then rule will get exectuted.
Reports - The reports will show the graphical representation of the statistics of the campaigns done on the bot.

Managing Schedulers
You can manage the scheduler to auto-trigger the job or job classes on the configured interval (Hour(s), Day(s), week(s), month(s), etc)
Eg; If you want to keep your workspace up to date with the latest version, then you can set a schedule for your configuration class where it can update all the latest version changes that will be added.
Adding a Scheduler
You can add a scheduler for any job by following these steps:
It will schedule a job that you want to be triggered based on the configured interval.
Note:

Editing Scheduler
If you want to change the job or interval then you can edit the schedule by following these steps:
Stopping Scheduler
If you want to stop the scheduler then you can stop by following these steps:

Deleting Scheduler
If you want to remove a scheduler then you can delete the scheduler by following these steps:
It will delete the configured scheduler.
Managing Products
We support some products that can be more effective & essential to your bot for handling banking related queries. These are all the basic banking needs related products, that you can configure to make your banking communication more effective.
Functions
You can add some functions to your workspace so that bot can react on that function to give the proper response to the user. Eg; You have configured a function for balance_enquiry where you have configured
For a function, a default hook will be created with the service category as function category and service id as function code. Data for each function will be retrieved based on the function category. If the function category is separated by ',' like Fund Transfer, Common, balance inquiry then While displaying we display data for all the categories. i.e; Data associated with both the category (Fund Transfer, Common, balance inquiry)
You can add the function by following these steps:
Rules
You can also configure your products rules by following these steps:

You can configure the following rules:
A. General Rules
1. Configuration rules
2. General rules
3. Security Rules
B. Bill Payment Rules
1. Biller Payment Rules
2. Configuration Rules
3. Consumer Number Rules
4. Credit Card Rules
5. One Time Credit Card Rules
C. Recharge Rules
1. DTH Recharge Rules
2. Data Card Recharge Rules
3. Mobile Recharge Rules
D. Fund Transfer Rules
1. Fund Transfer Rules
2. Inter Bank Rules
3. Intra Bank Rules
4. MMID Rules
5. Quick Pay Rules
6. Self Rules
7. Transaction Timing Rules
8. UPI Rules
E. Alexa Rules
1. Notification Rules
Default Messages
You can add some default messages for your bot to send a response for a particular scenario if the user asks from one of those messages or some default error message so that bot will send the response that is set in that message code if don't find any proper response.
To configure the messages please refer Manage messages
Banking Products
You can add your banking products like checkbook allowed, FD Open allowed, etc. by following these steps:
Billers
You can also set the billers for your bot by following these steps:
Recharge Billers
If you want to save the operator for recharges then you can configure the Recharge biller by following these steps:
IFSC Codes
You can set IFSC codes for the various regions/areas as per your banking needs.
Holiday Calendar
You can configure bank holidays also by following these steps:
Customer Segment
You can add a Customer Segment by following these steps:
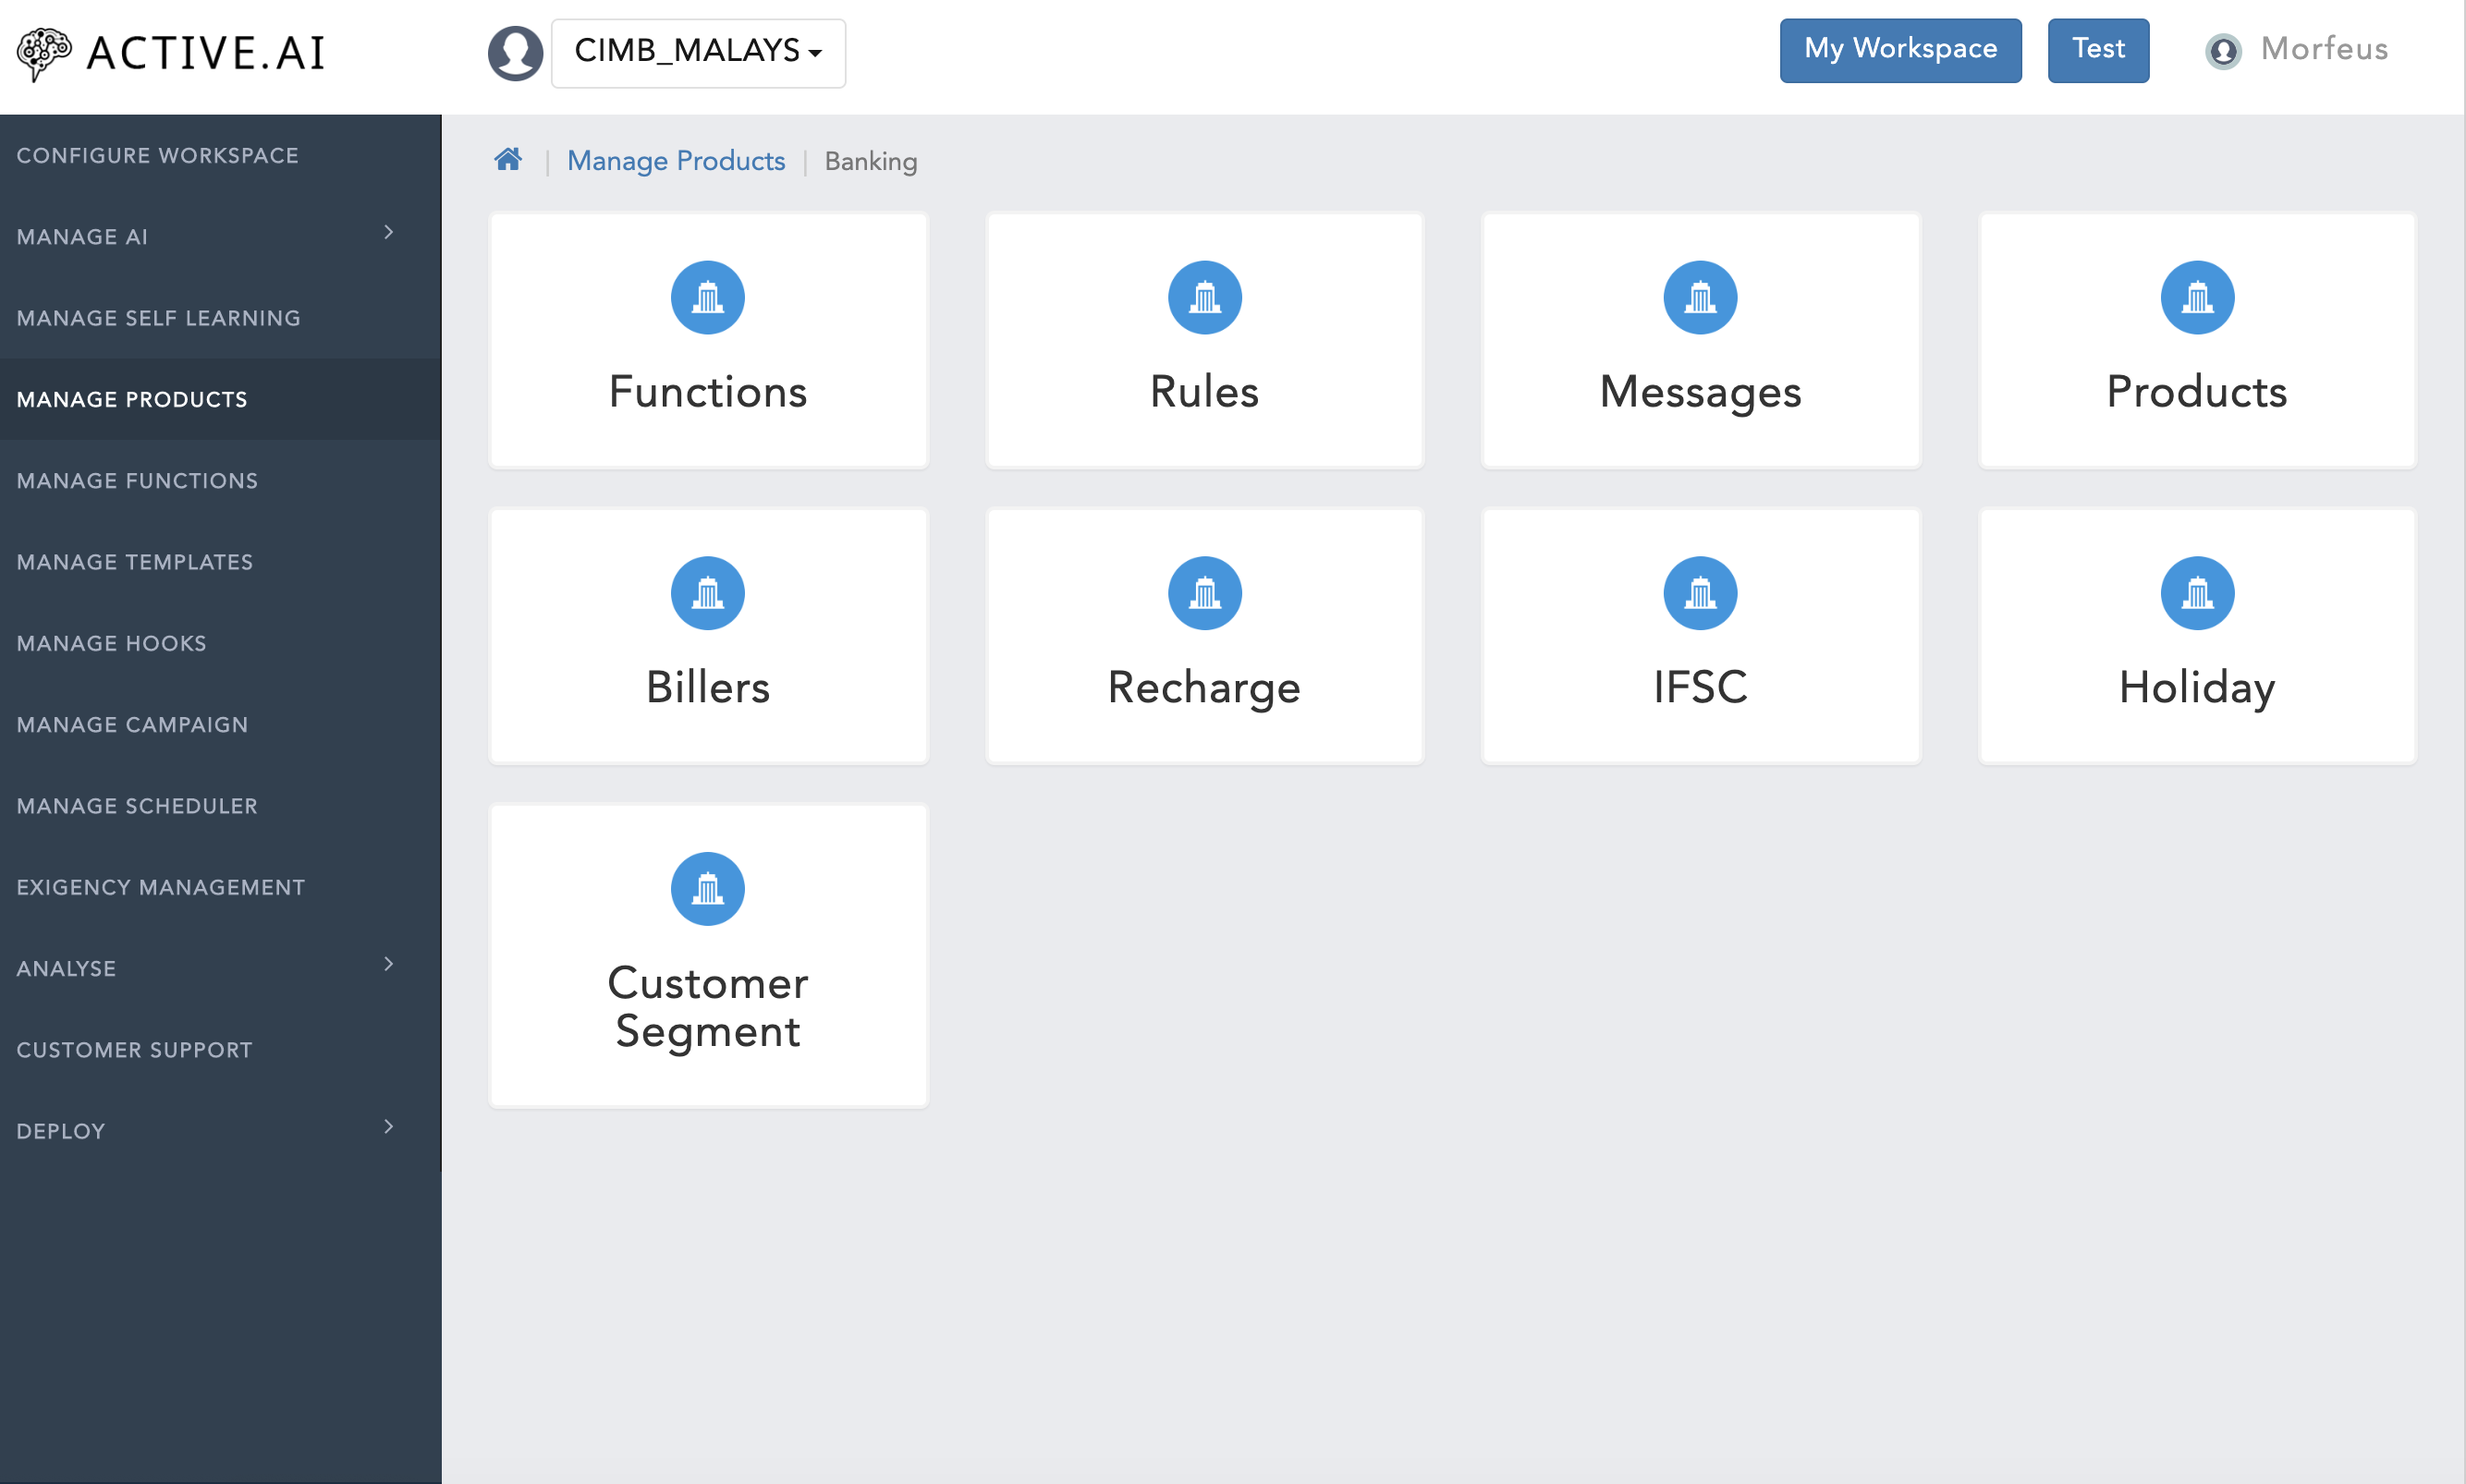
Managing Exigency Management
Exigency Management provides admin to mark the bot as down for maintenance. The exigency management uses push notification to send notifications to the users, so all the essential changes to be done for push notification are mandatory here. You can configure any one of these two exigency management Scheduled exigency management and another one is Immediate Exigency Management.
Scheduled Exigency Management
Scheduled Exigency Management allows you to add a schedule for a future time when the bot will be down, also this gives you an option to send advance notifications to the users about this downtime. Suppose if you have any planned date for the maintenance then you can simply configure Scheduled Exigency Management.
Essentially this requires parameters like downtime start time and Down time end time. In case notification has to be set up, add the time by when a notification is to be sent and also the message to be sent, also select the channels for which the notifications to be sent.
You can configure Scheduled Exigency Management by following these steps:
It will save all the entered data and send the notification to the user at the configured date & time.

Immediate Exigency Management
Immediate Exigency Management allows you to mark the bot as down immediately or to enable a bot that is down already, this does not provide any notification set up, rather its effect is immediate. Suppose if there was some issue that came suddenly that can cause the performance of the services then you can immediately disable the bot without sending any notifications.
You can configure Immediate Exigency Management by following these steps:
It will disable the bot immediately without sending any notification, similarly you can enable the bot from here also.
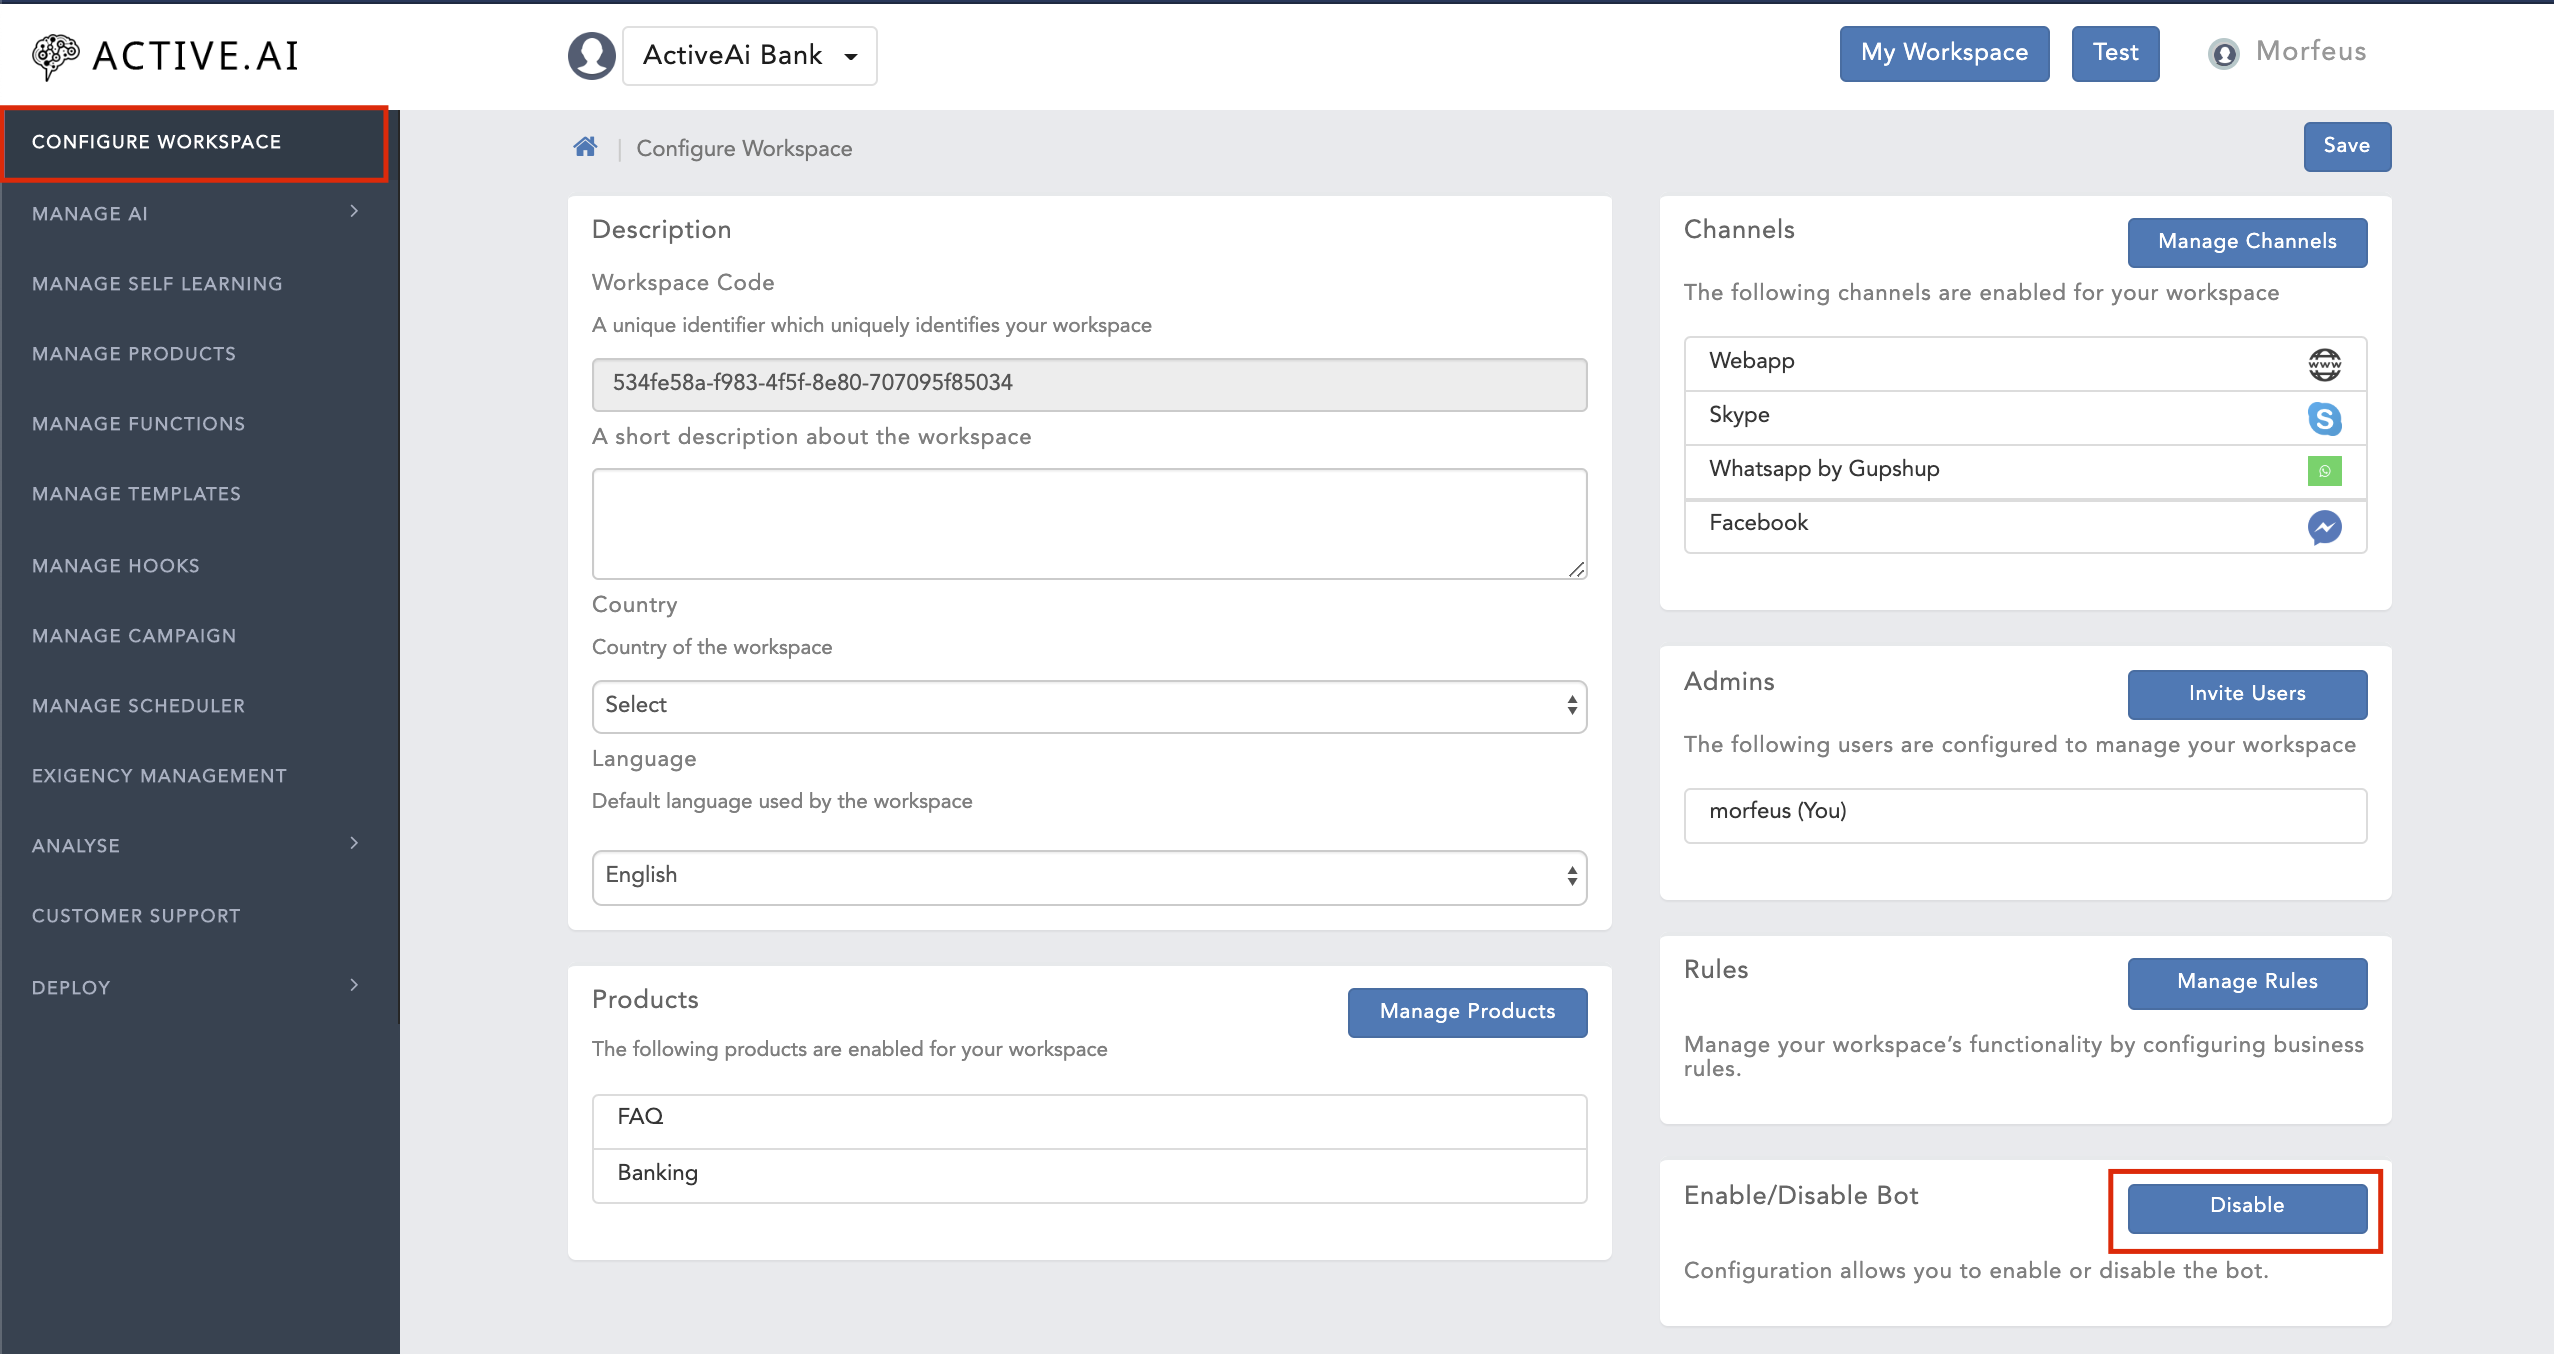
Managing Analytics
Analytics will help to know the overall statistics of bot & AI Engine, which gives many details in terms of Users, Accuracy, Channels, Domain, etc. You can monitor the requests and responses of the bot to improve the services and serve the user better. You can check the number of users & new users registering on the bot, number of hits receiving on the bot, the accuracy of the knowledge base on a daily, weekly, monthly basis and for a particular date basis as well.

You can filter the report based on Date (Daily, weekly, Monthly, Yearly) with Domains (FAQ, SmallTalk, etc) & Channel(Web App).
Using this report, we can do detailed analysis on Accuracy obtaining, No of Logged-in Users, NewUsers, Total Session in range, Live Chat Redirections, Feedback percentage and many more.
Customer Support has complete details of user based on customer id, phone number, & from Channel have interacted. Using this we can easily find Registered Users or Anonymous. The search option is also available to filter by entering Customer id also.
No. of logins - Total records/user who logged in for a given date range.
AI Accuracy - AI accuracy represents the percentage of messages whose confidence is above the minimum threshold
Users Till Date
Registered Users
Unique Users - Registered
Unique Users - Anonymous
Messages - Total number of message sent via user in chat bot.
Sessions - Total number of session in the system with the filtered date range
Avg Session - Total average of session in the system with the filtered date range
Live chat redirection
Transactions, Service Requests & Enquiry - Statistics for the selected date range.
Conversations categorised - Unclassified - Unsupported - FAQ - Clicks - Intent - Smalltalk
Sentiments - Statistics for positive, negative and neutral utterances.
You can also analyze:
You can check:
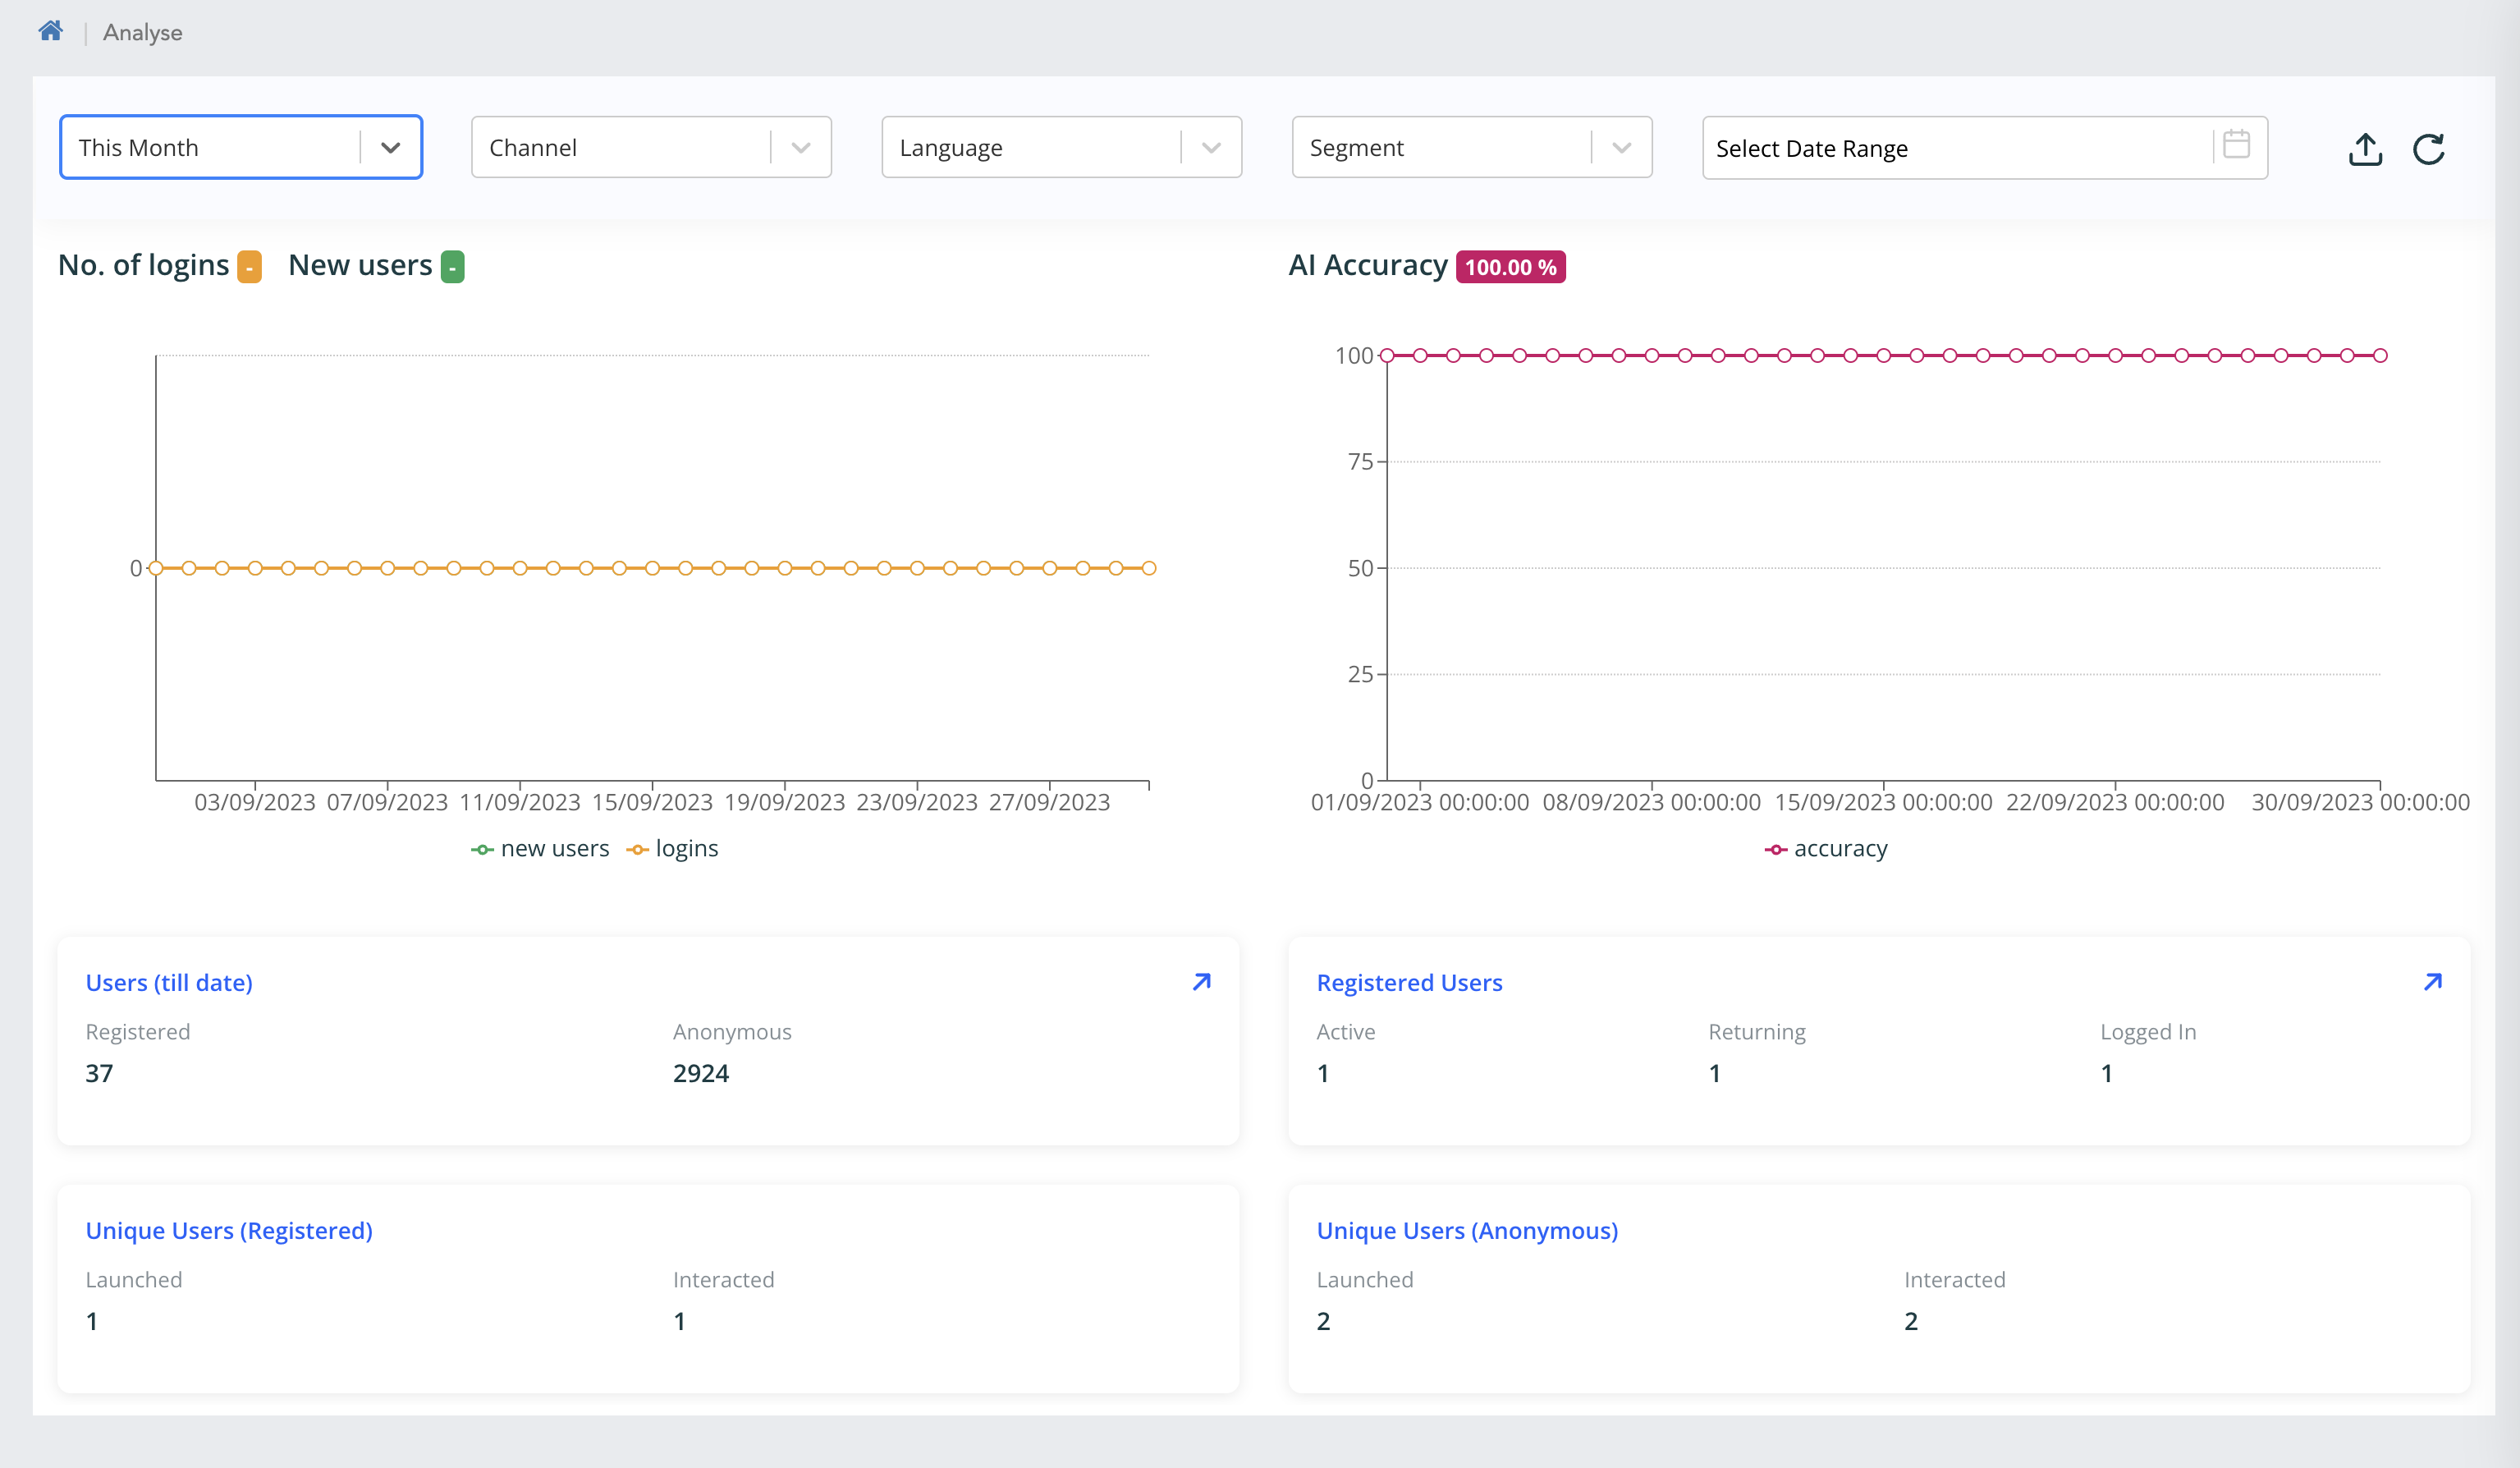
You can check:
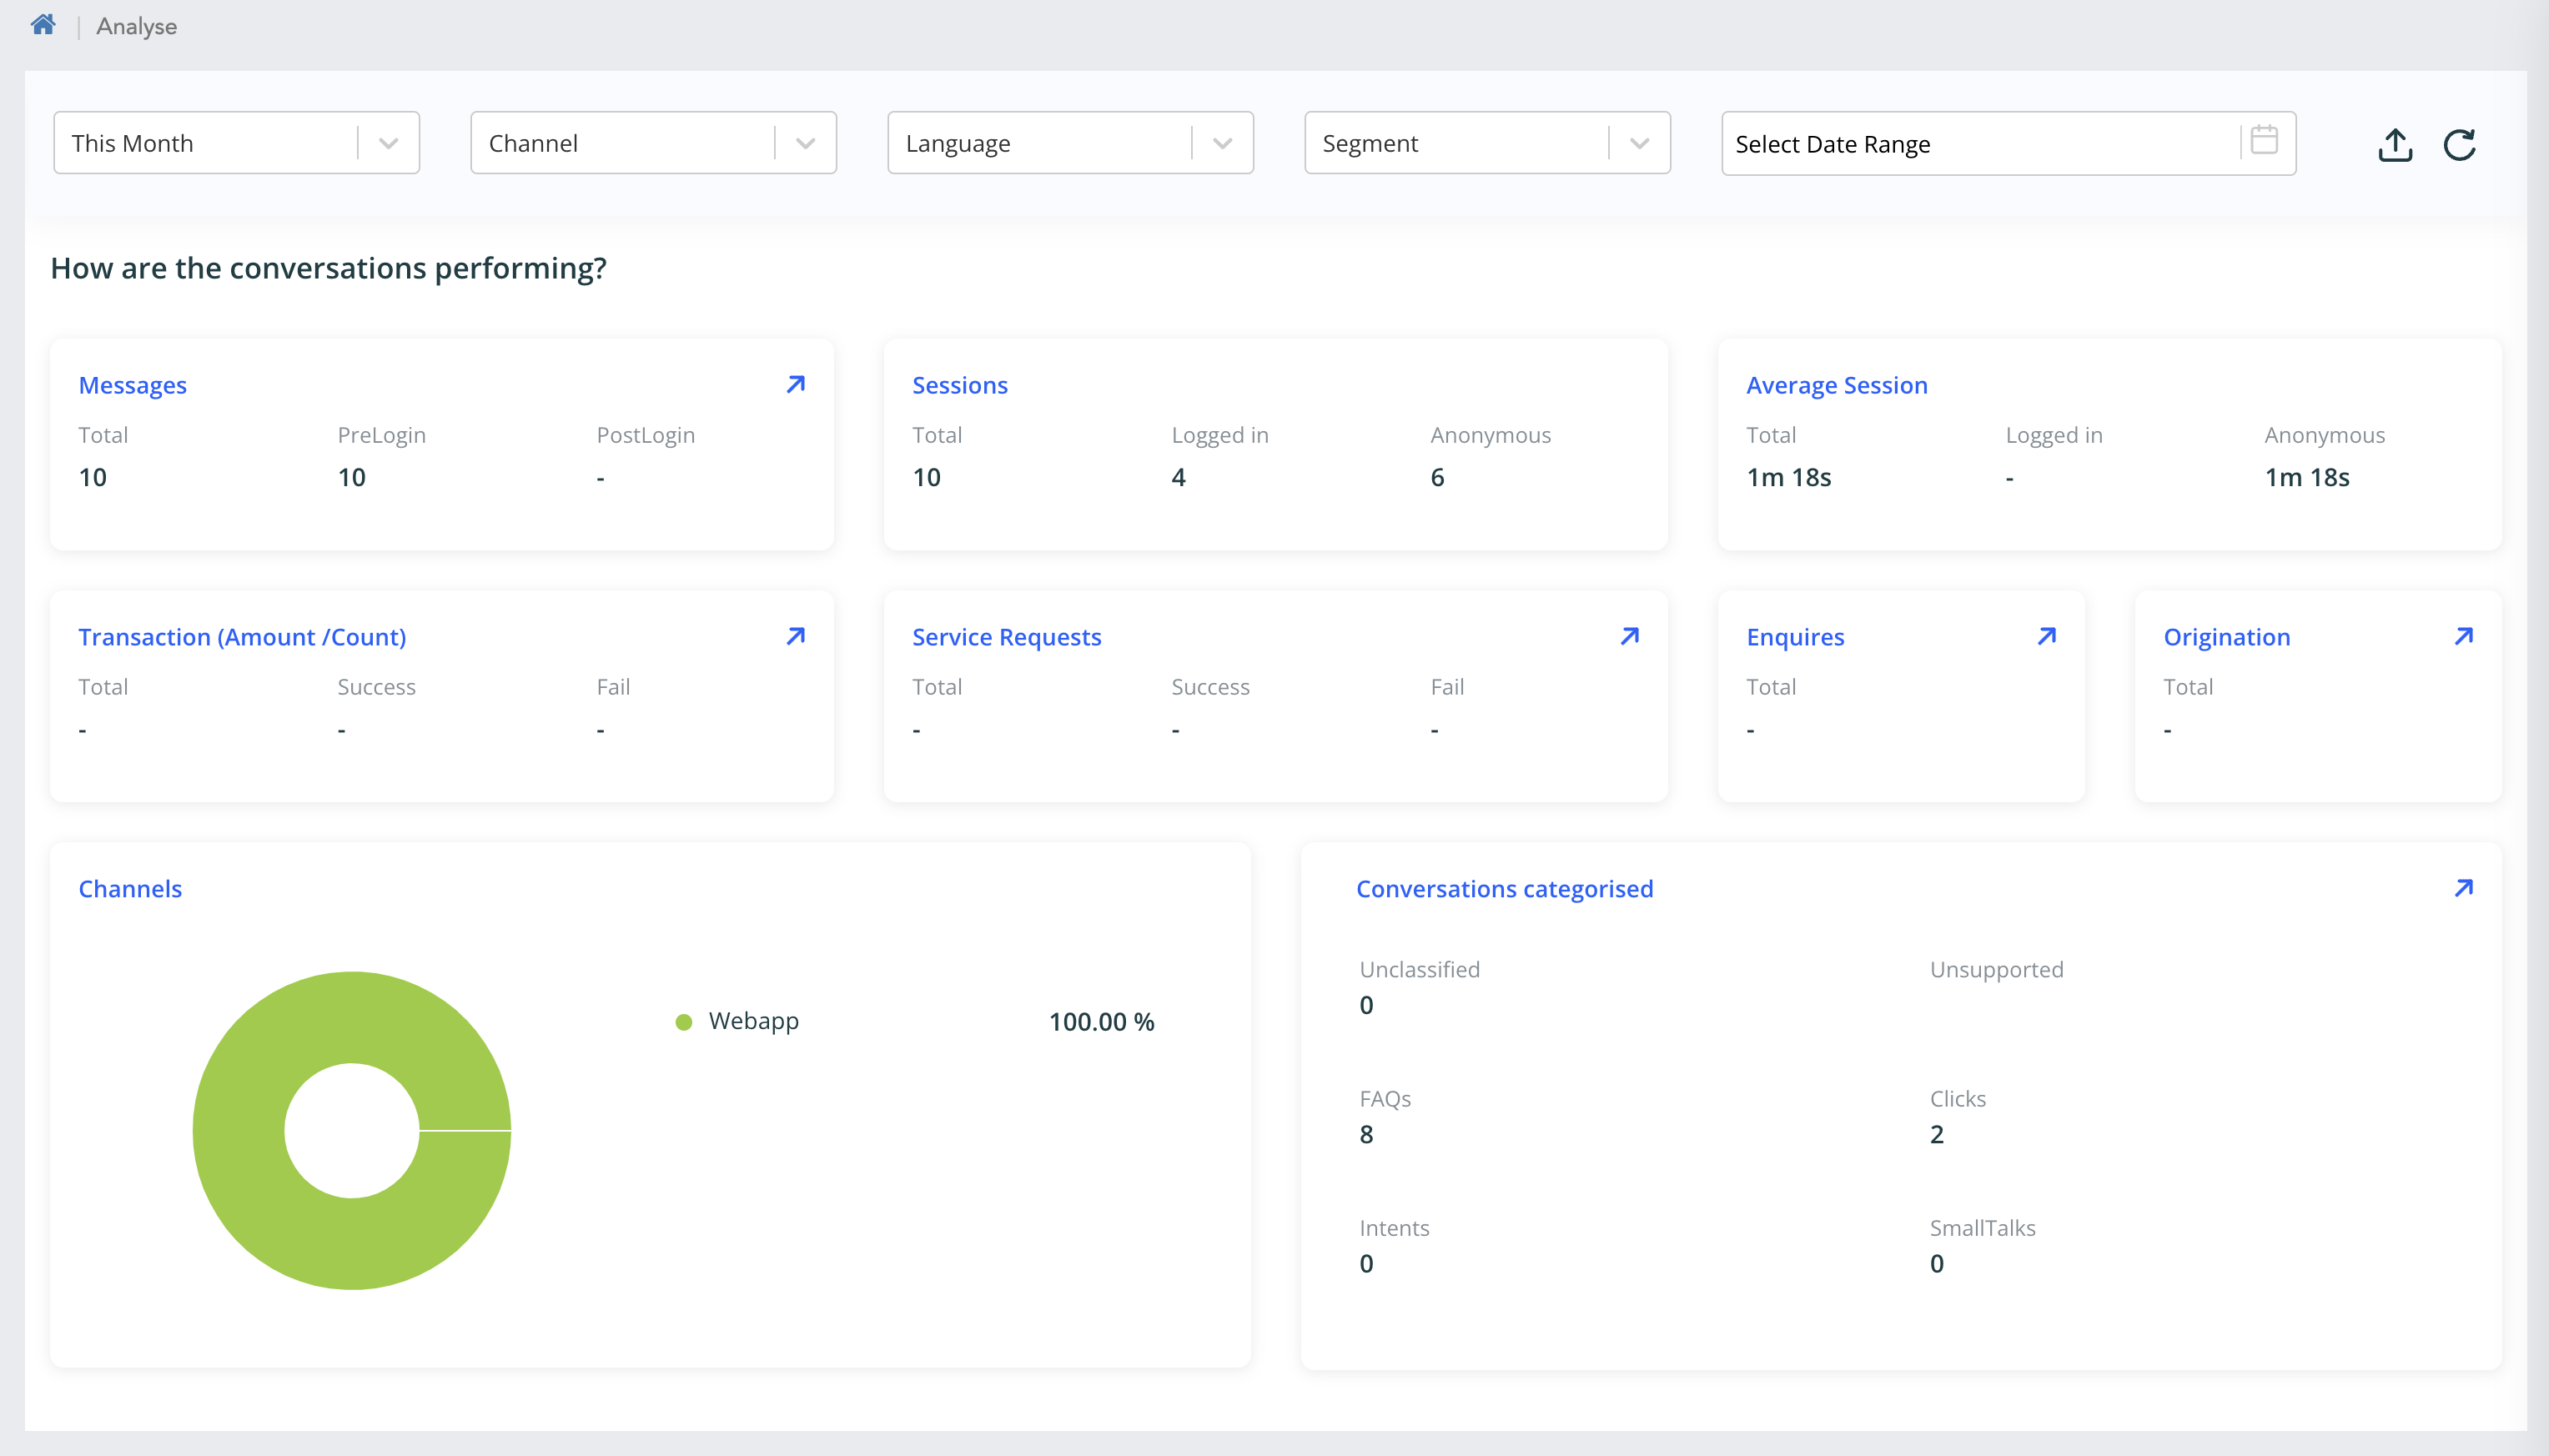
You can check:

Conversational Analytics:
The Conversational Analytics shows overall statistics of the AI Engine and what is happening on the bot in a graphical manner, which includes all the answered & unanswered utterances including Ontology, FAQs, Smalltalks, Clicks, Intents, etc. This will contain all the unique counts of the messages based on the category of the utterances (Eg; FAQs, Smalltalks, Intents, etc.), you can expand the total messages to see the category of utterances and their respective unique counts.
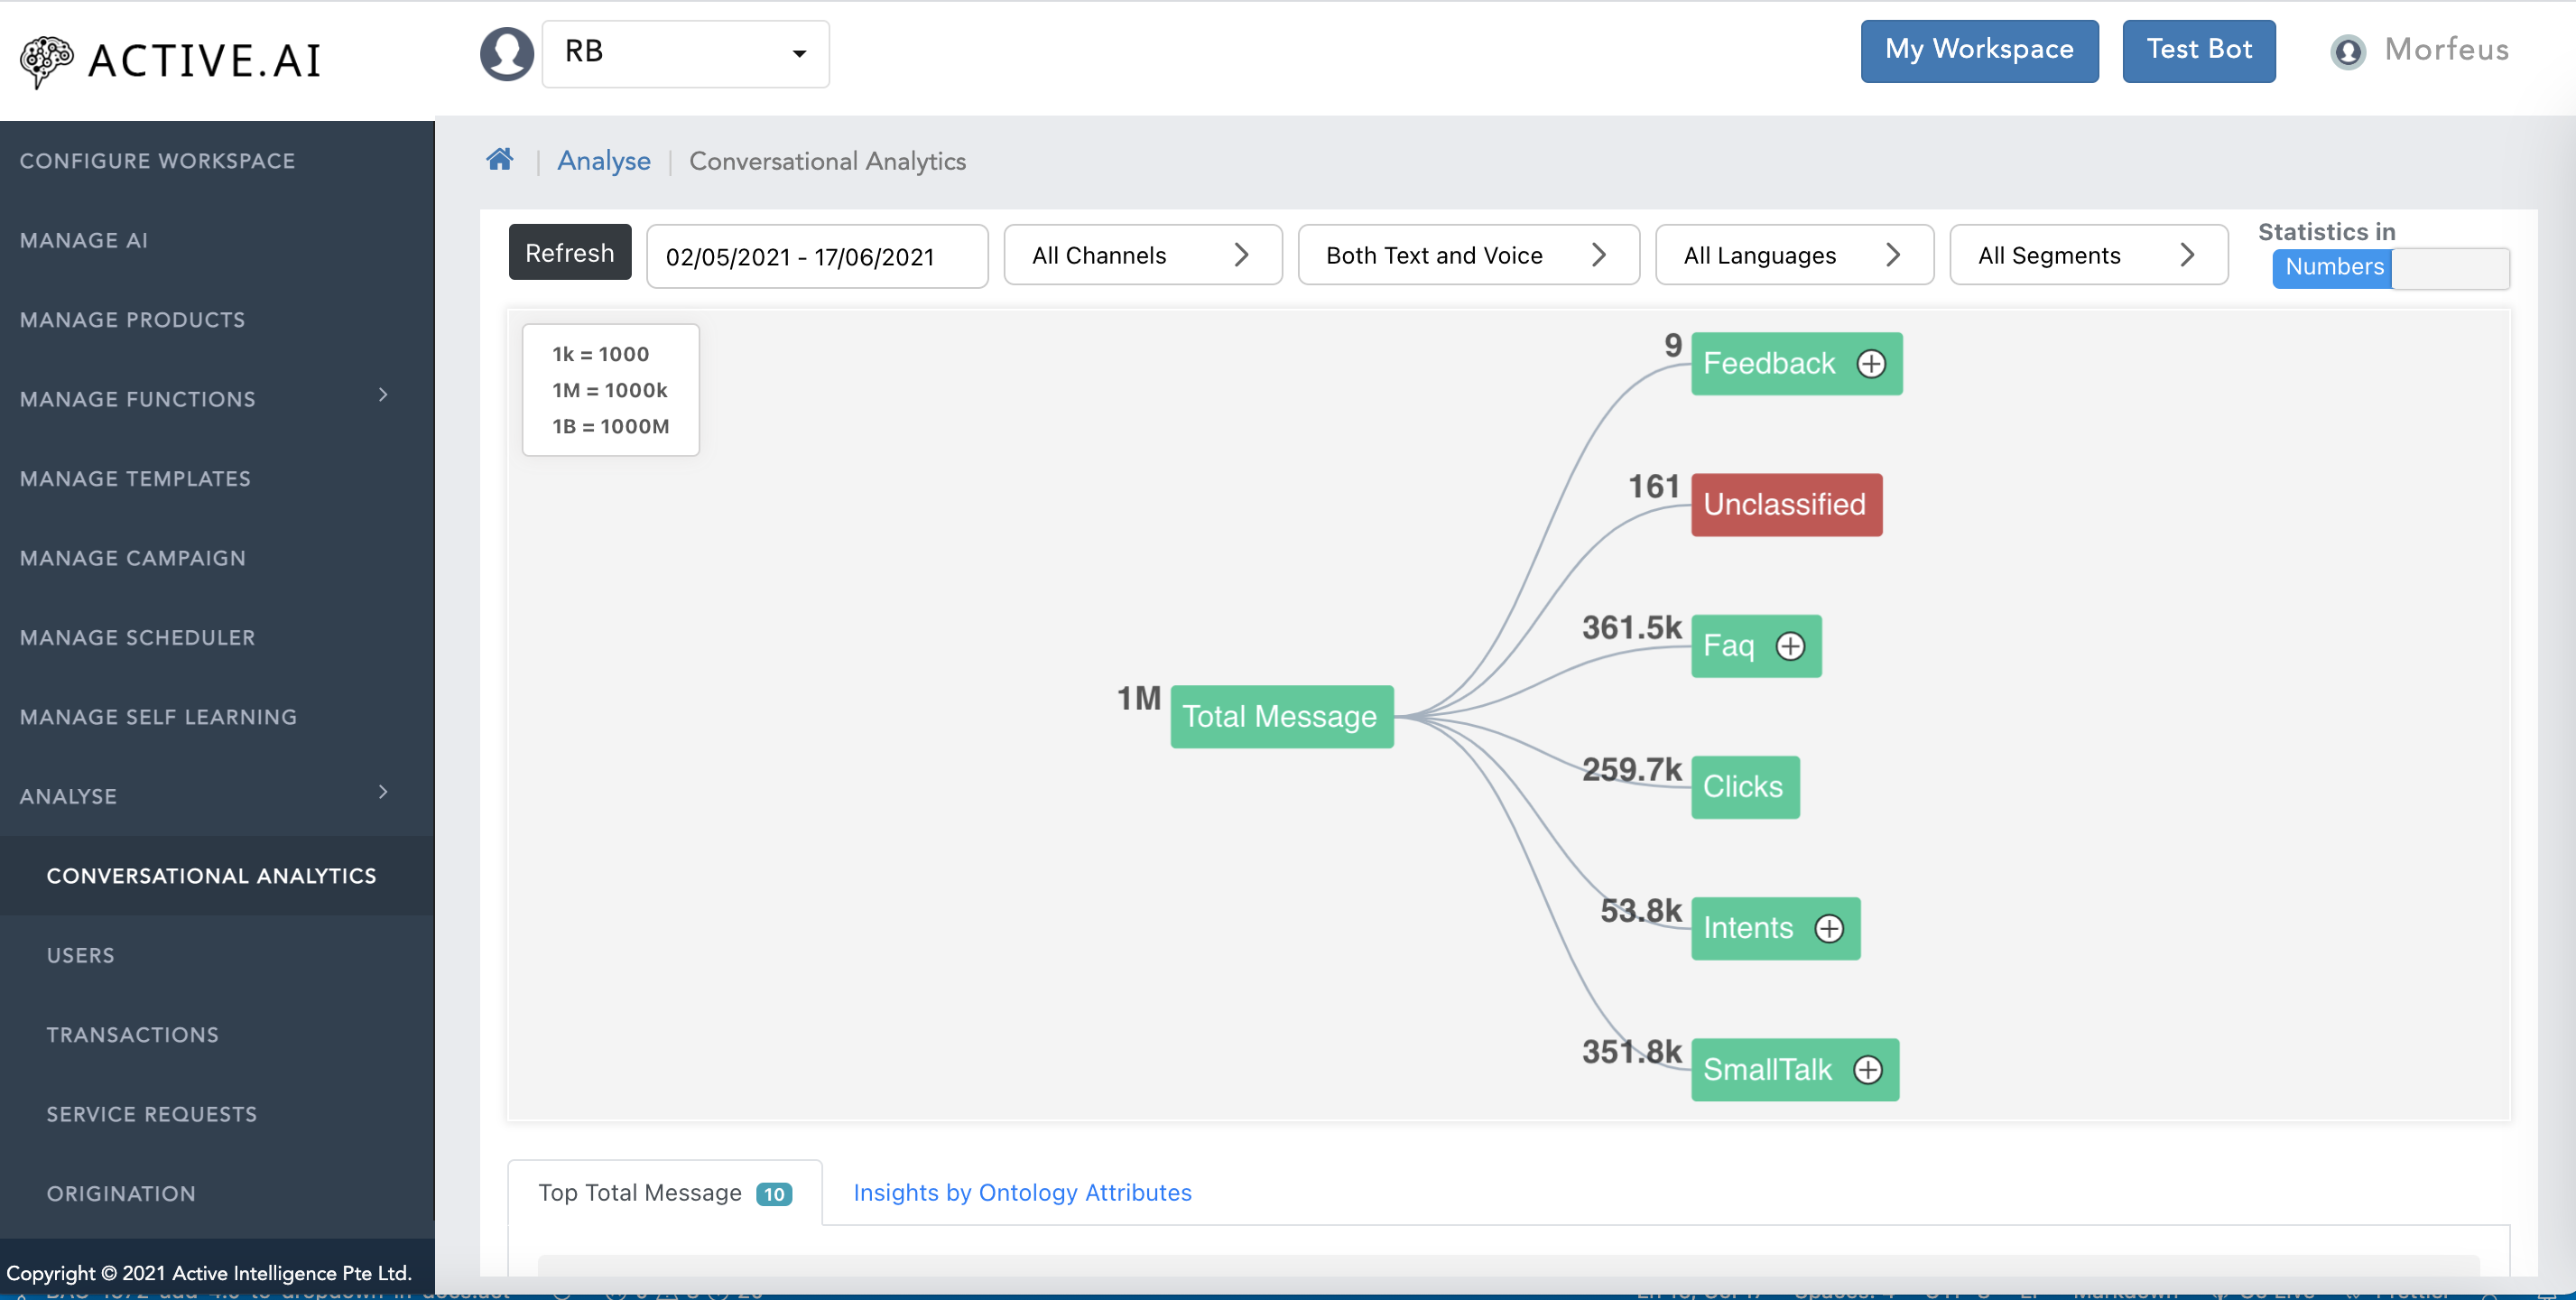
From the graph, you can goto self-learning page to check what are all the utterances there in the respective category. Eg; If you want to check what are all the utterances there in the unanswered category so you can just right click on unanswered (It will show all the attributes) click on any product, select 'Redirect' from the popup and you will be redirected to the self-learning page and can check the unanswered utterances.
In the conversation analytics, you can filter based on the date, channel, response type, and language. It will also show the top total messages and Insights by Ontology attributes.

Managing Reports
The reports play a vital role to improve any services, based on reports you can analyse what improvements are required & how can it be improved to attract more users. You can analyze the reports based on Users, Transactions, Service Requests, Origination & AI. So that you can improve the functionality and accuracy of the bot.
On each module we provide the functionality to export the data either in CSV/Excel depending on the module. Export also works with filters.
Users
We can filter the report based on
Date (Daily, weekly, Monthly, Yearly) Domains (FAQ, SmallTalk,etc.) Channels
Users are categorized in Anonymous Users (those who haven't loggedIn) and Registered Users (those users logged In).
Using this report, we can do detailed analysis on Accuracy obtaining for a particular user and No of Logged-in Users, NewUsers, Total Sessions.

The users who has interacted with the bot without any login or authentication like Small talk and FAQ's.
It will show all the anonymous users.

The users who has interacted with the bot with some authentication or login.
It will show all the registered users.

Below are the filters available .

User Profile
In this module we are showing user specific data like, user name, Registered Date, Last Access Date, Cust Id along with Channel Details.
Also we are showing Overview, Chat, Transaction, Service Request, Origination, Interaction, Operations.
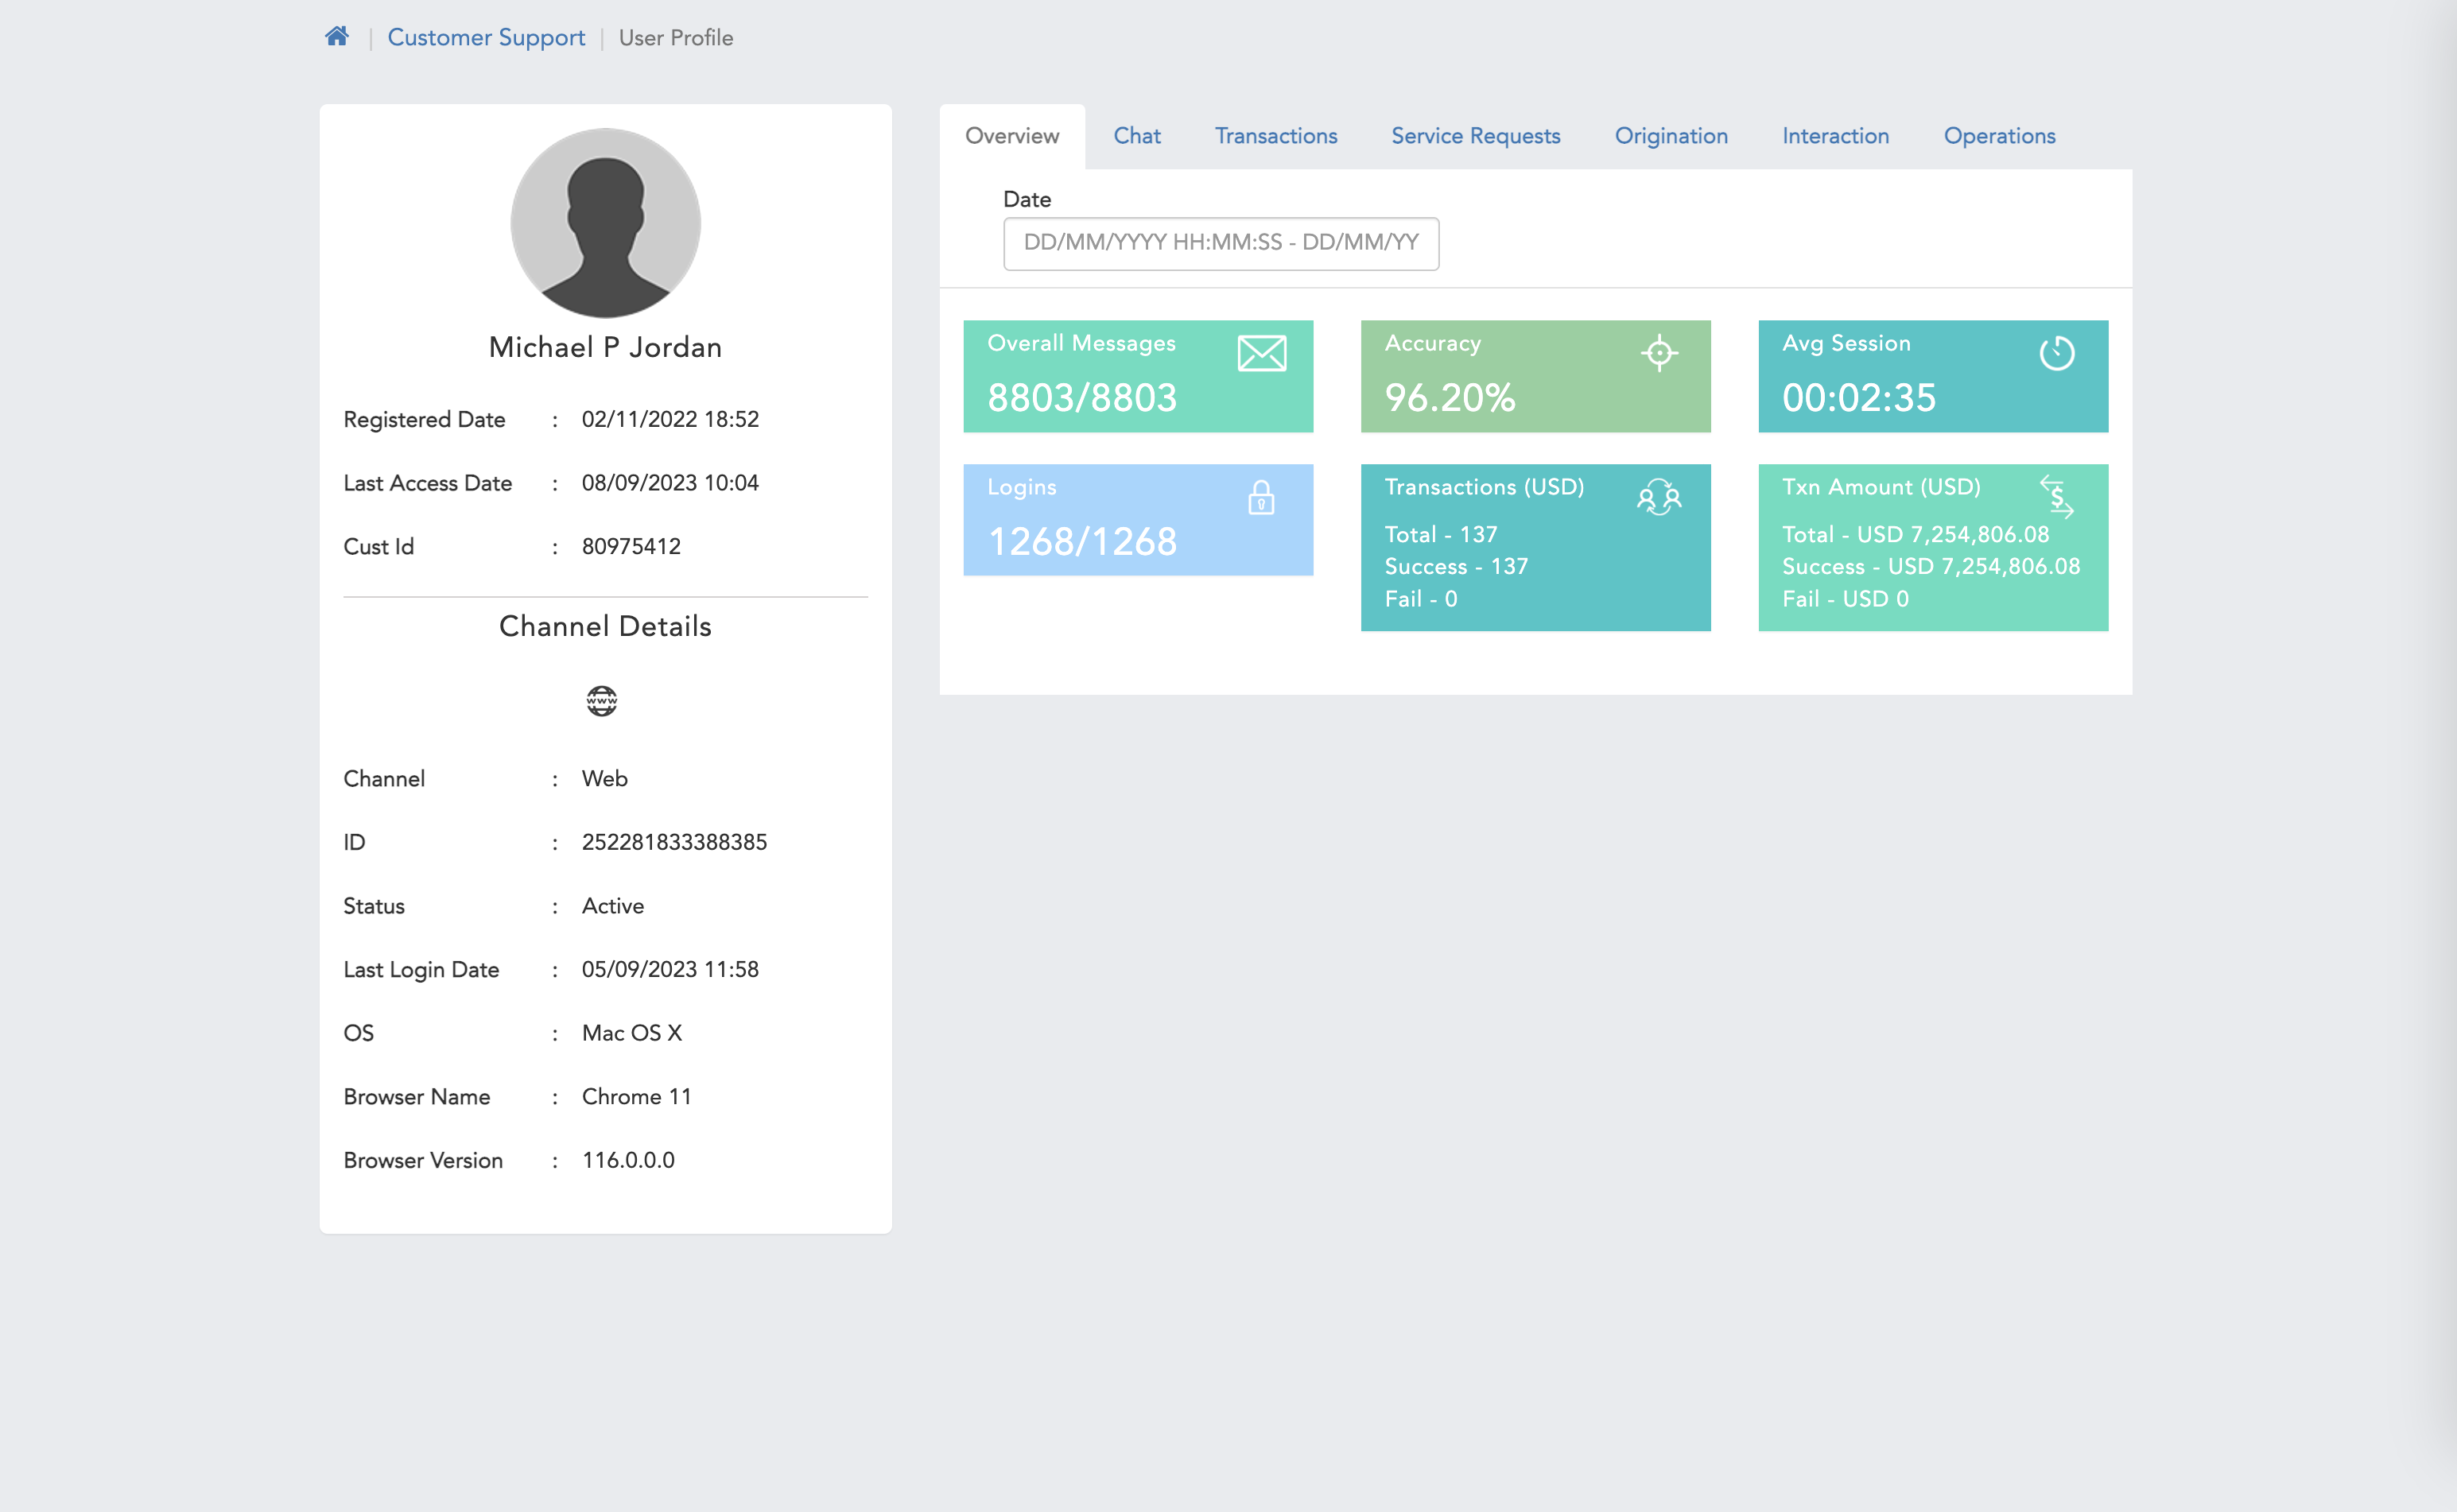
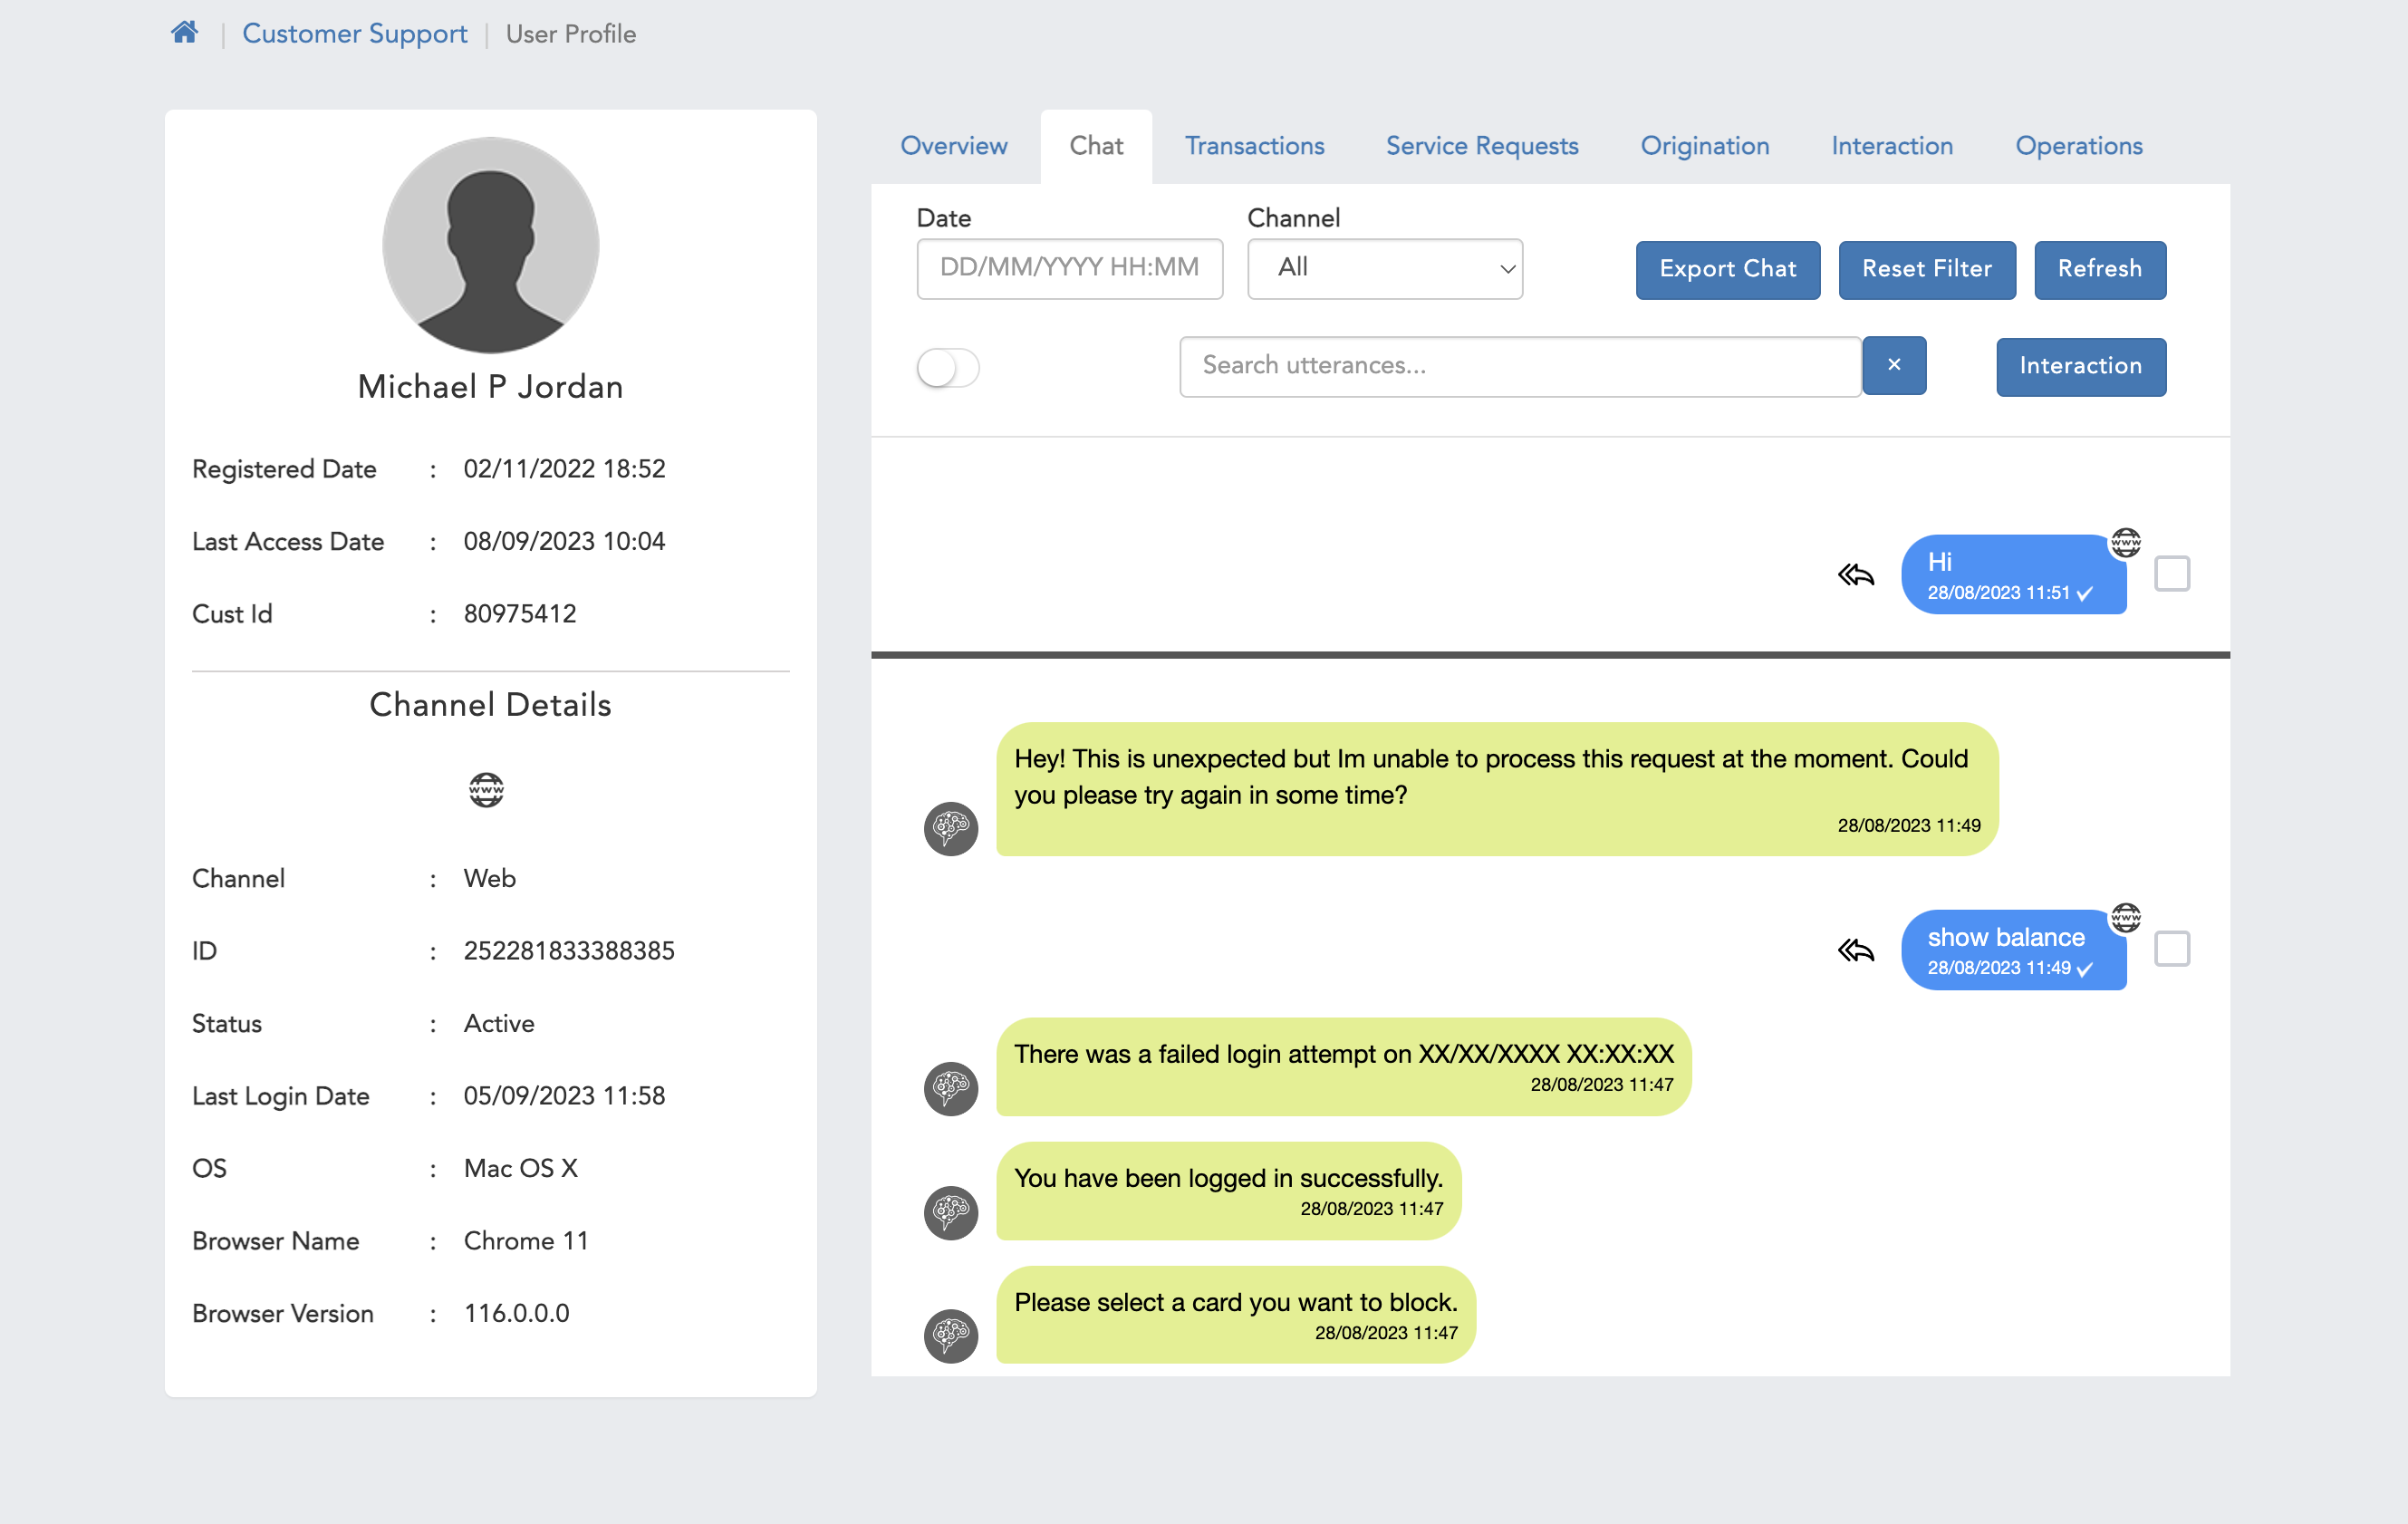
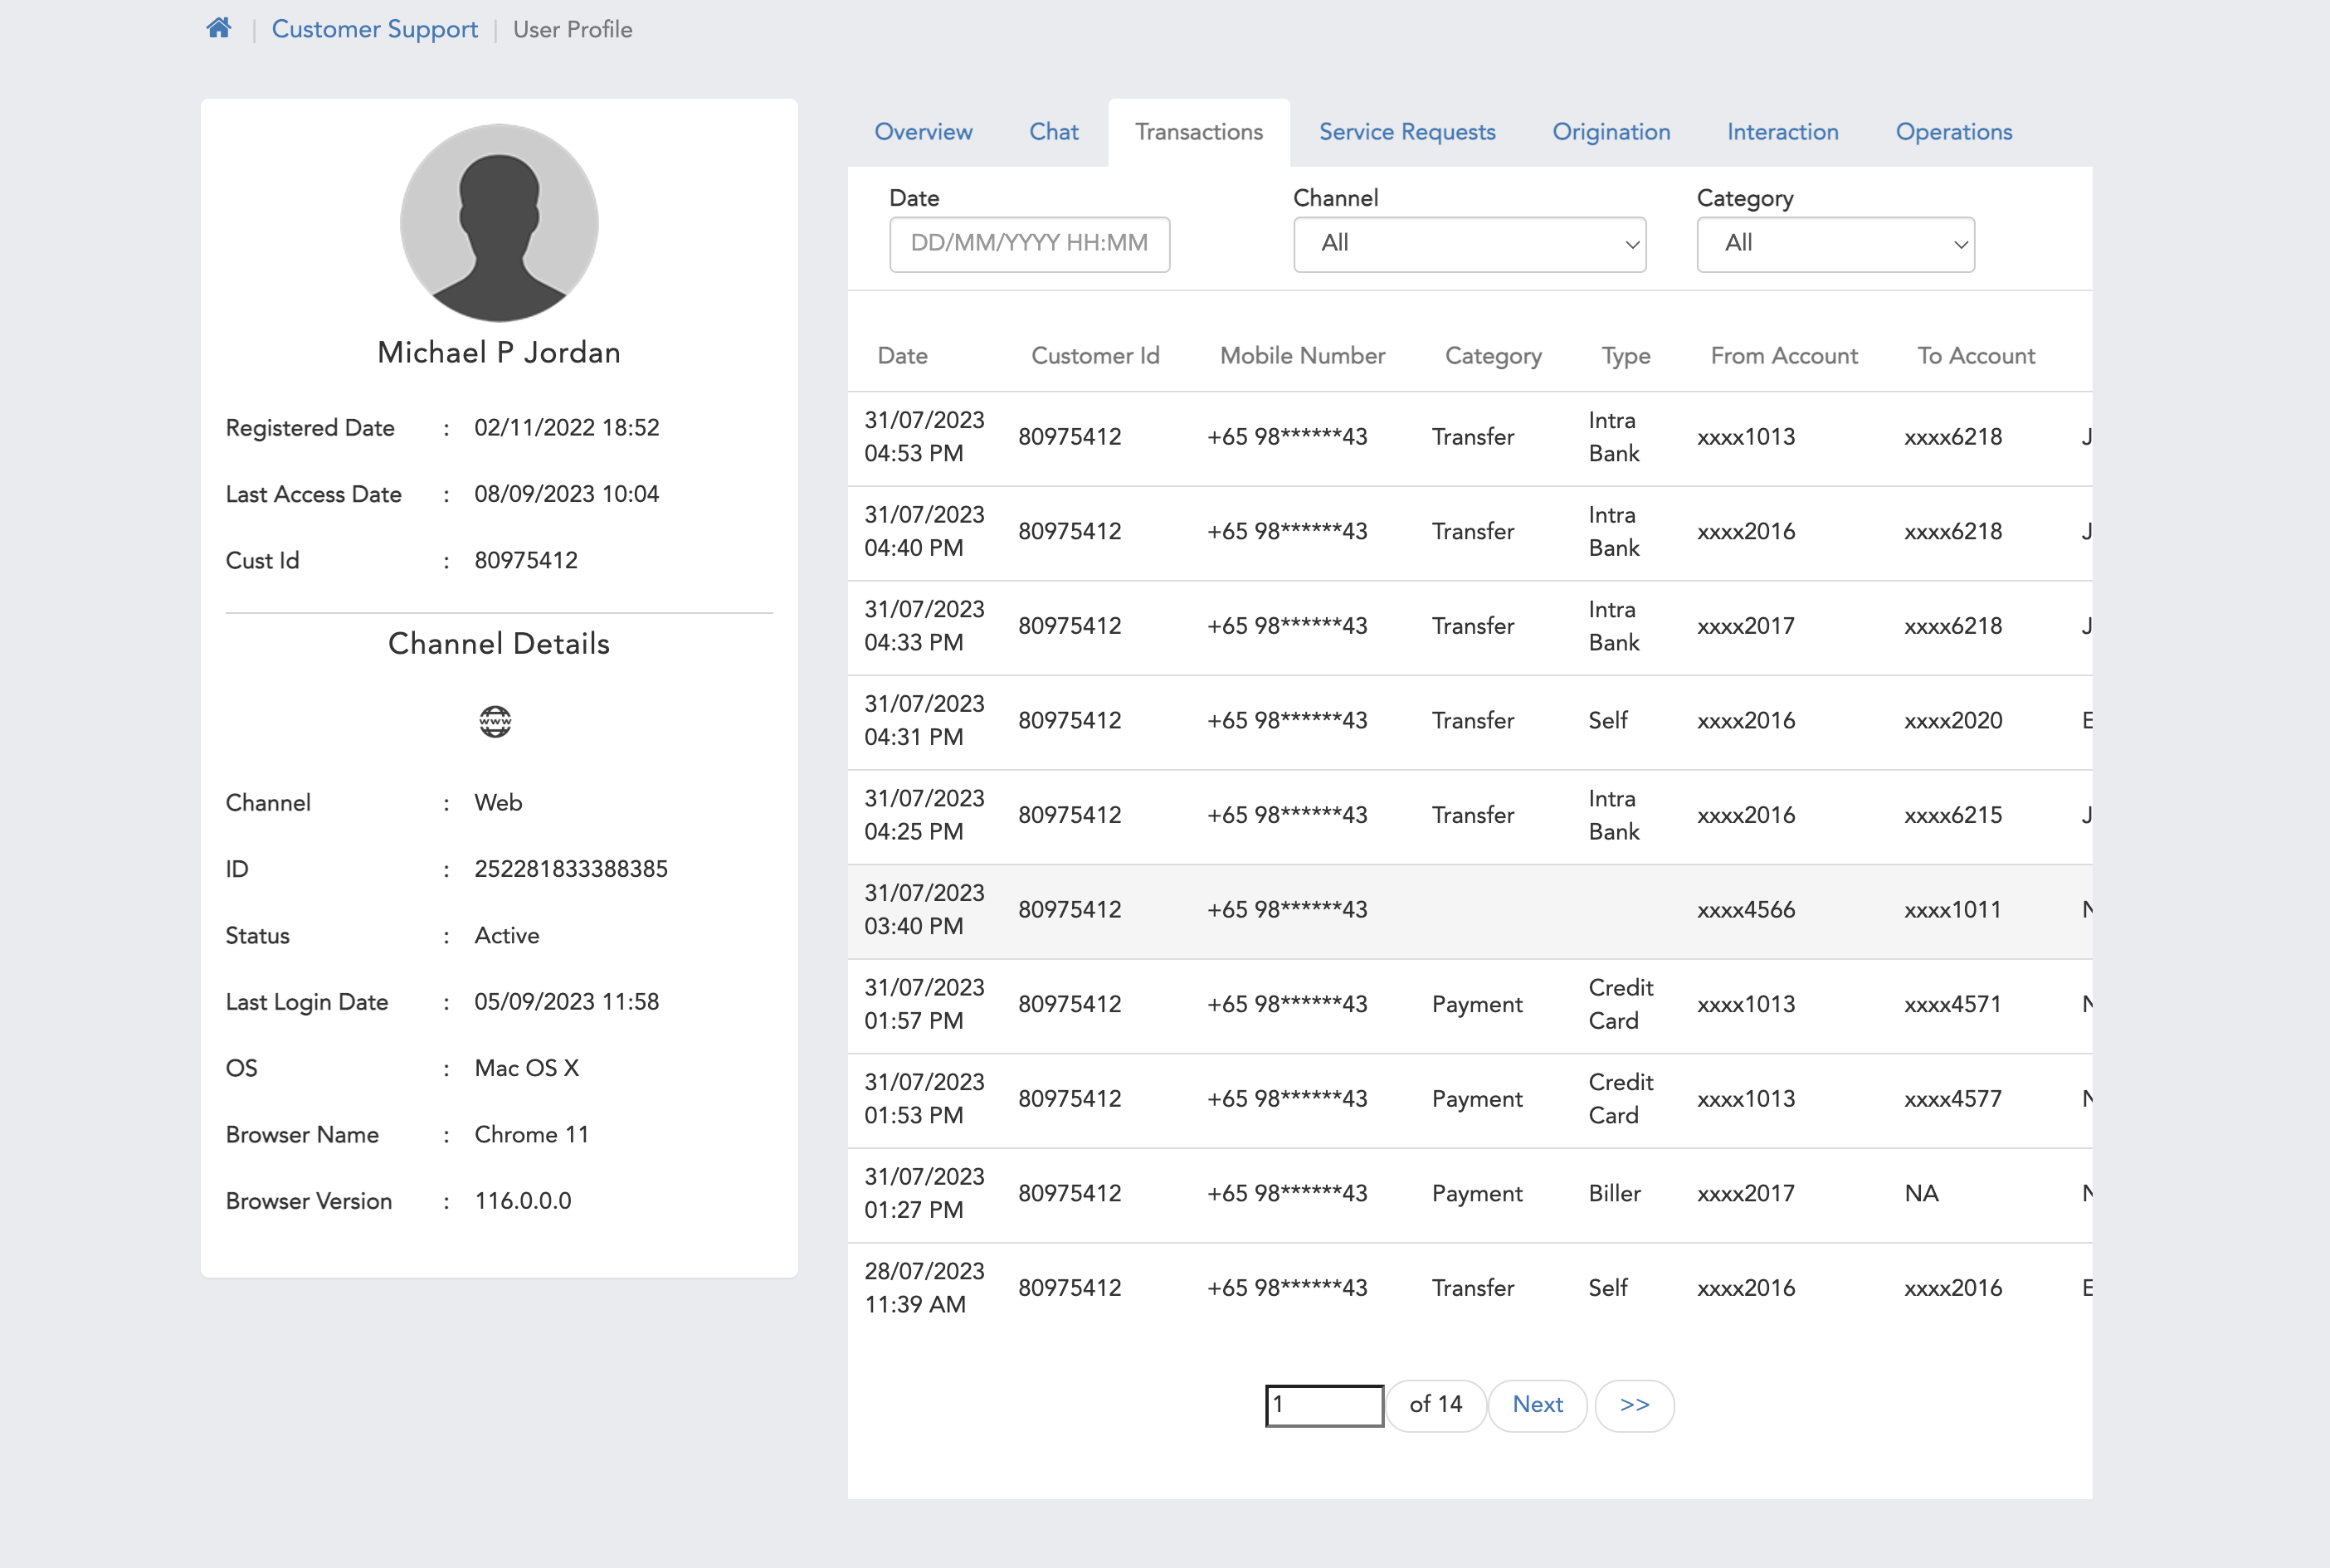
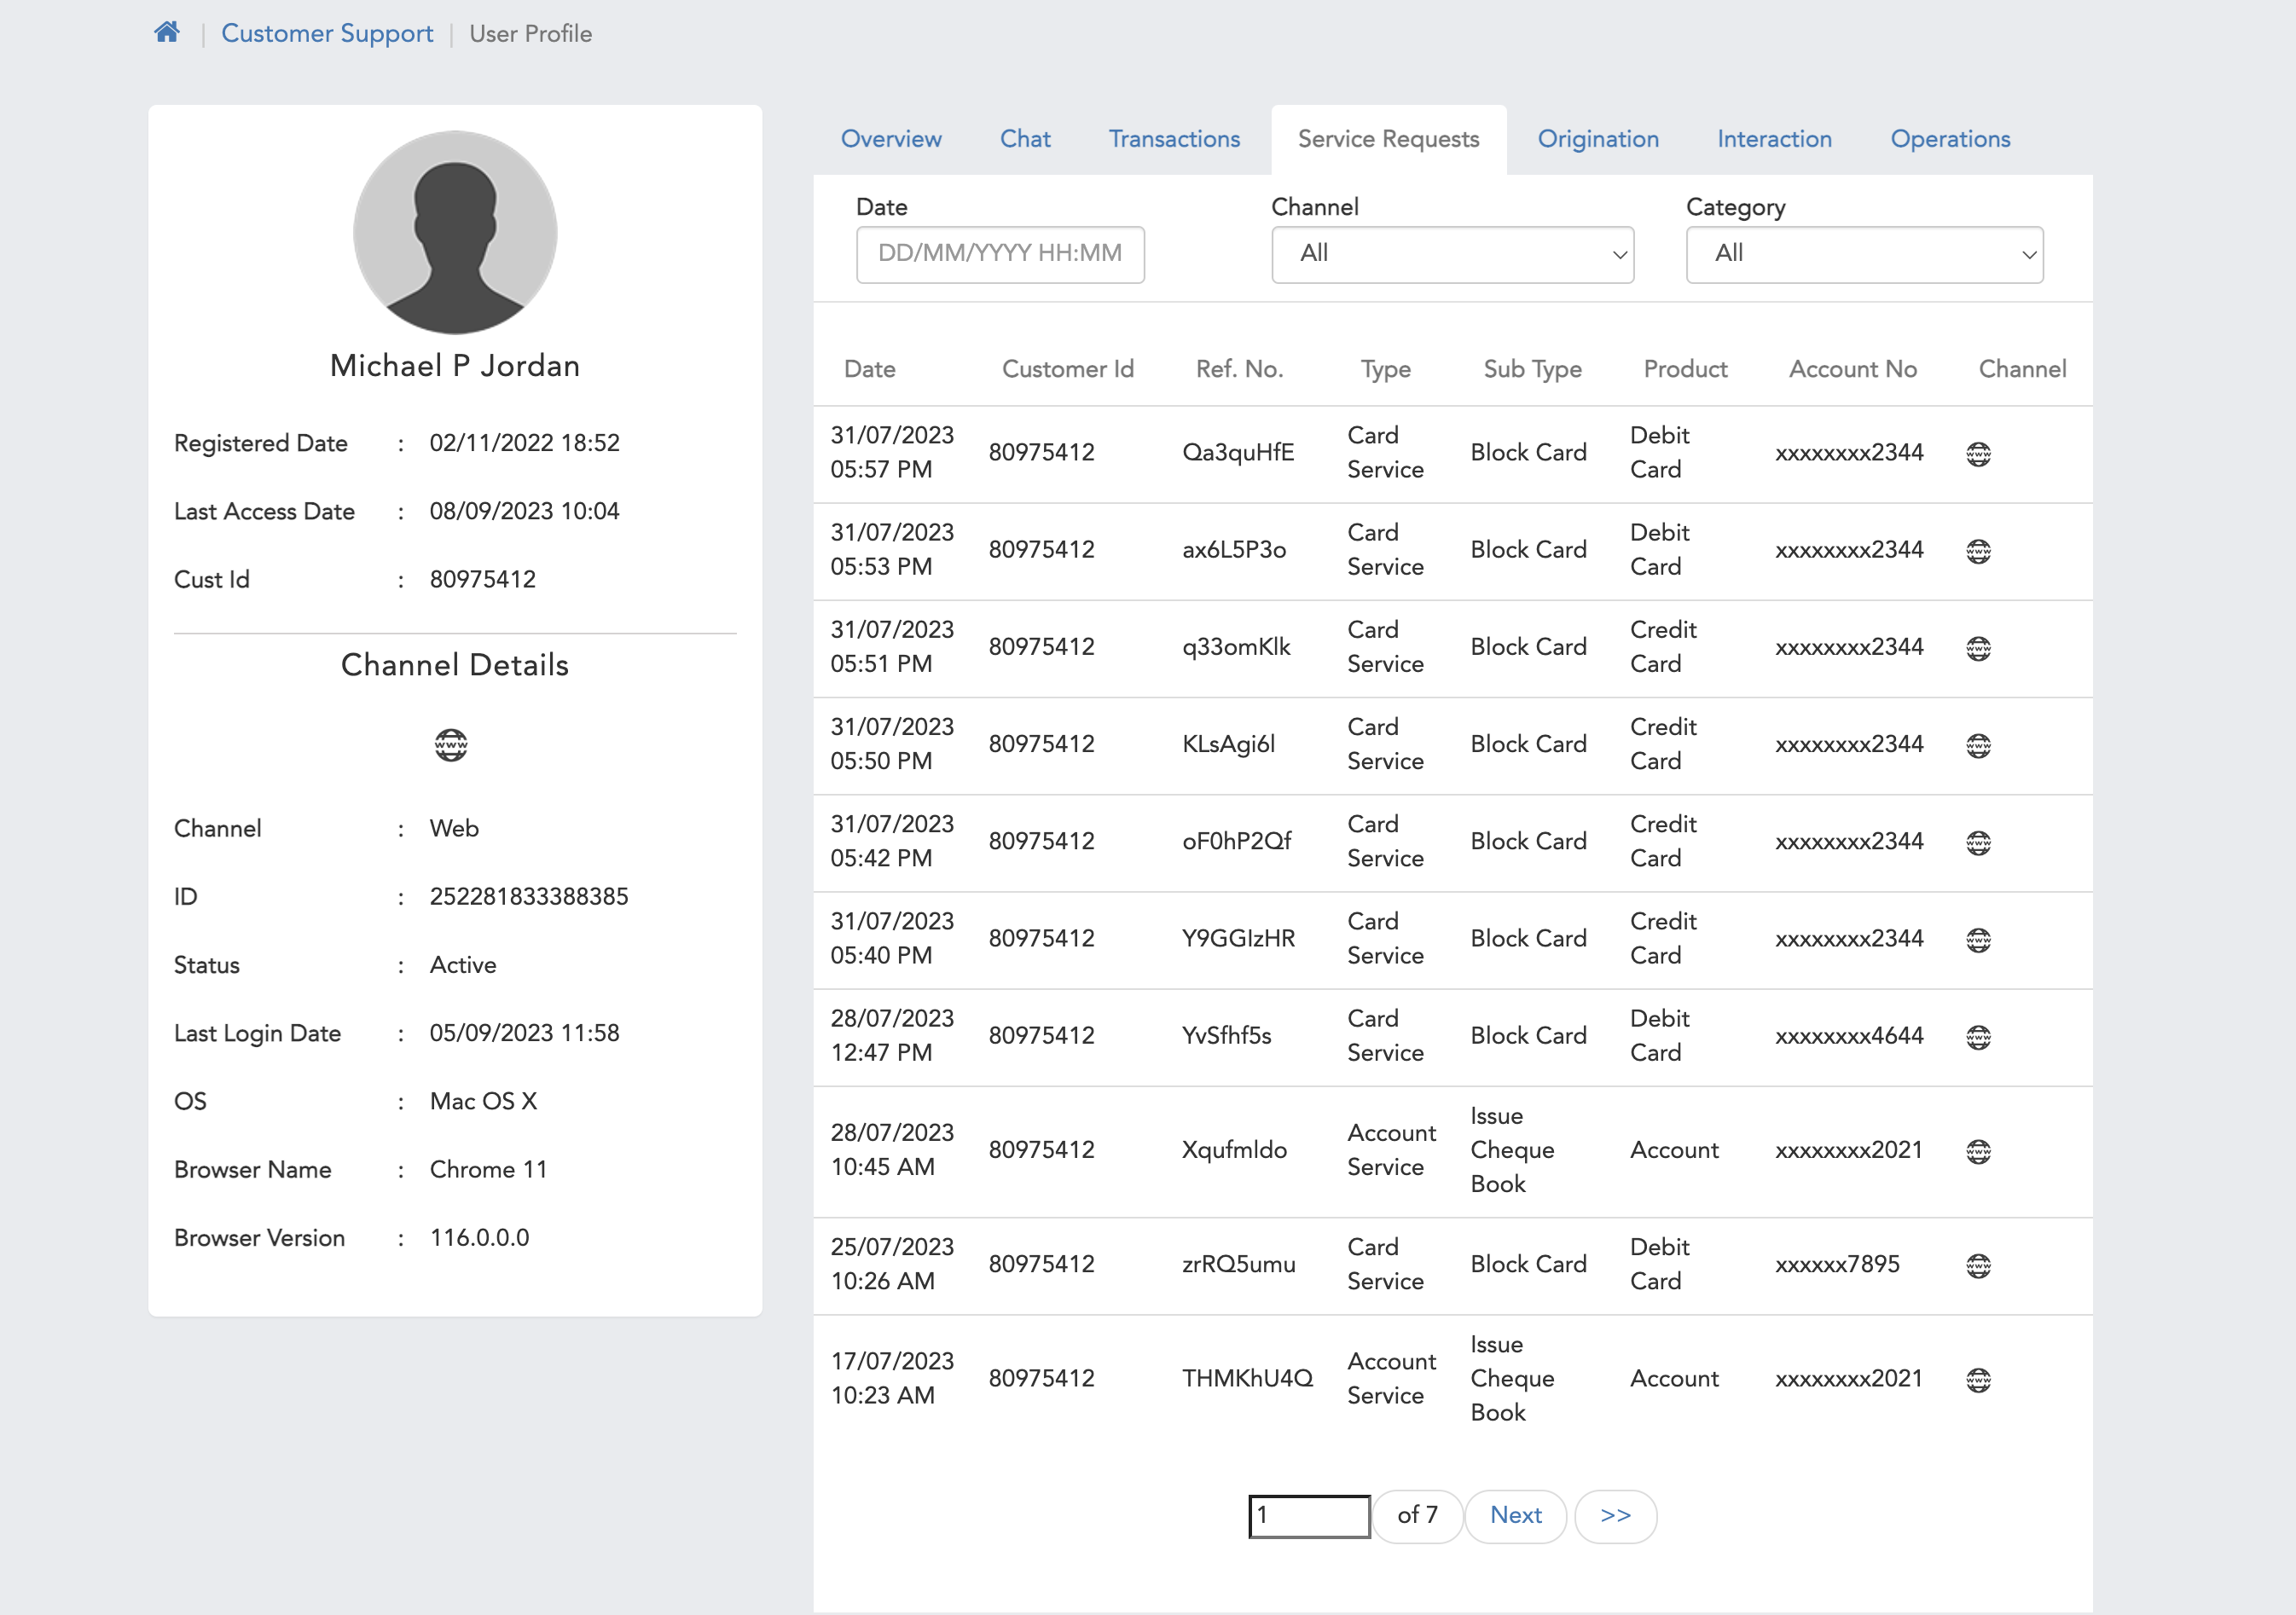
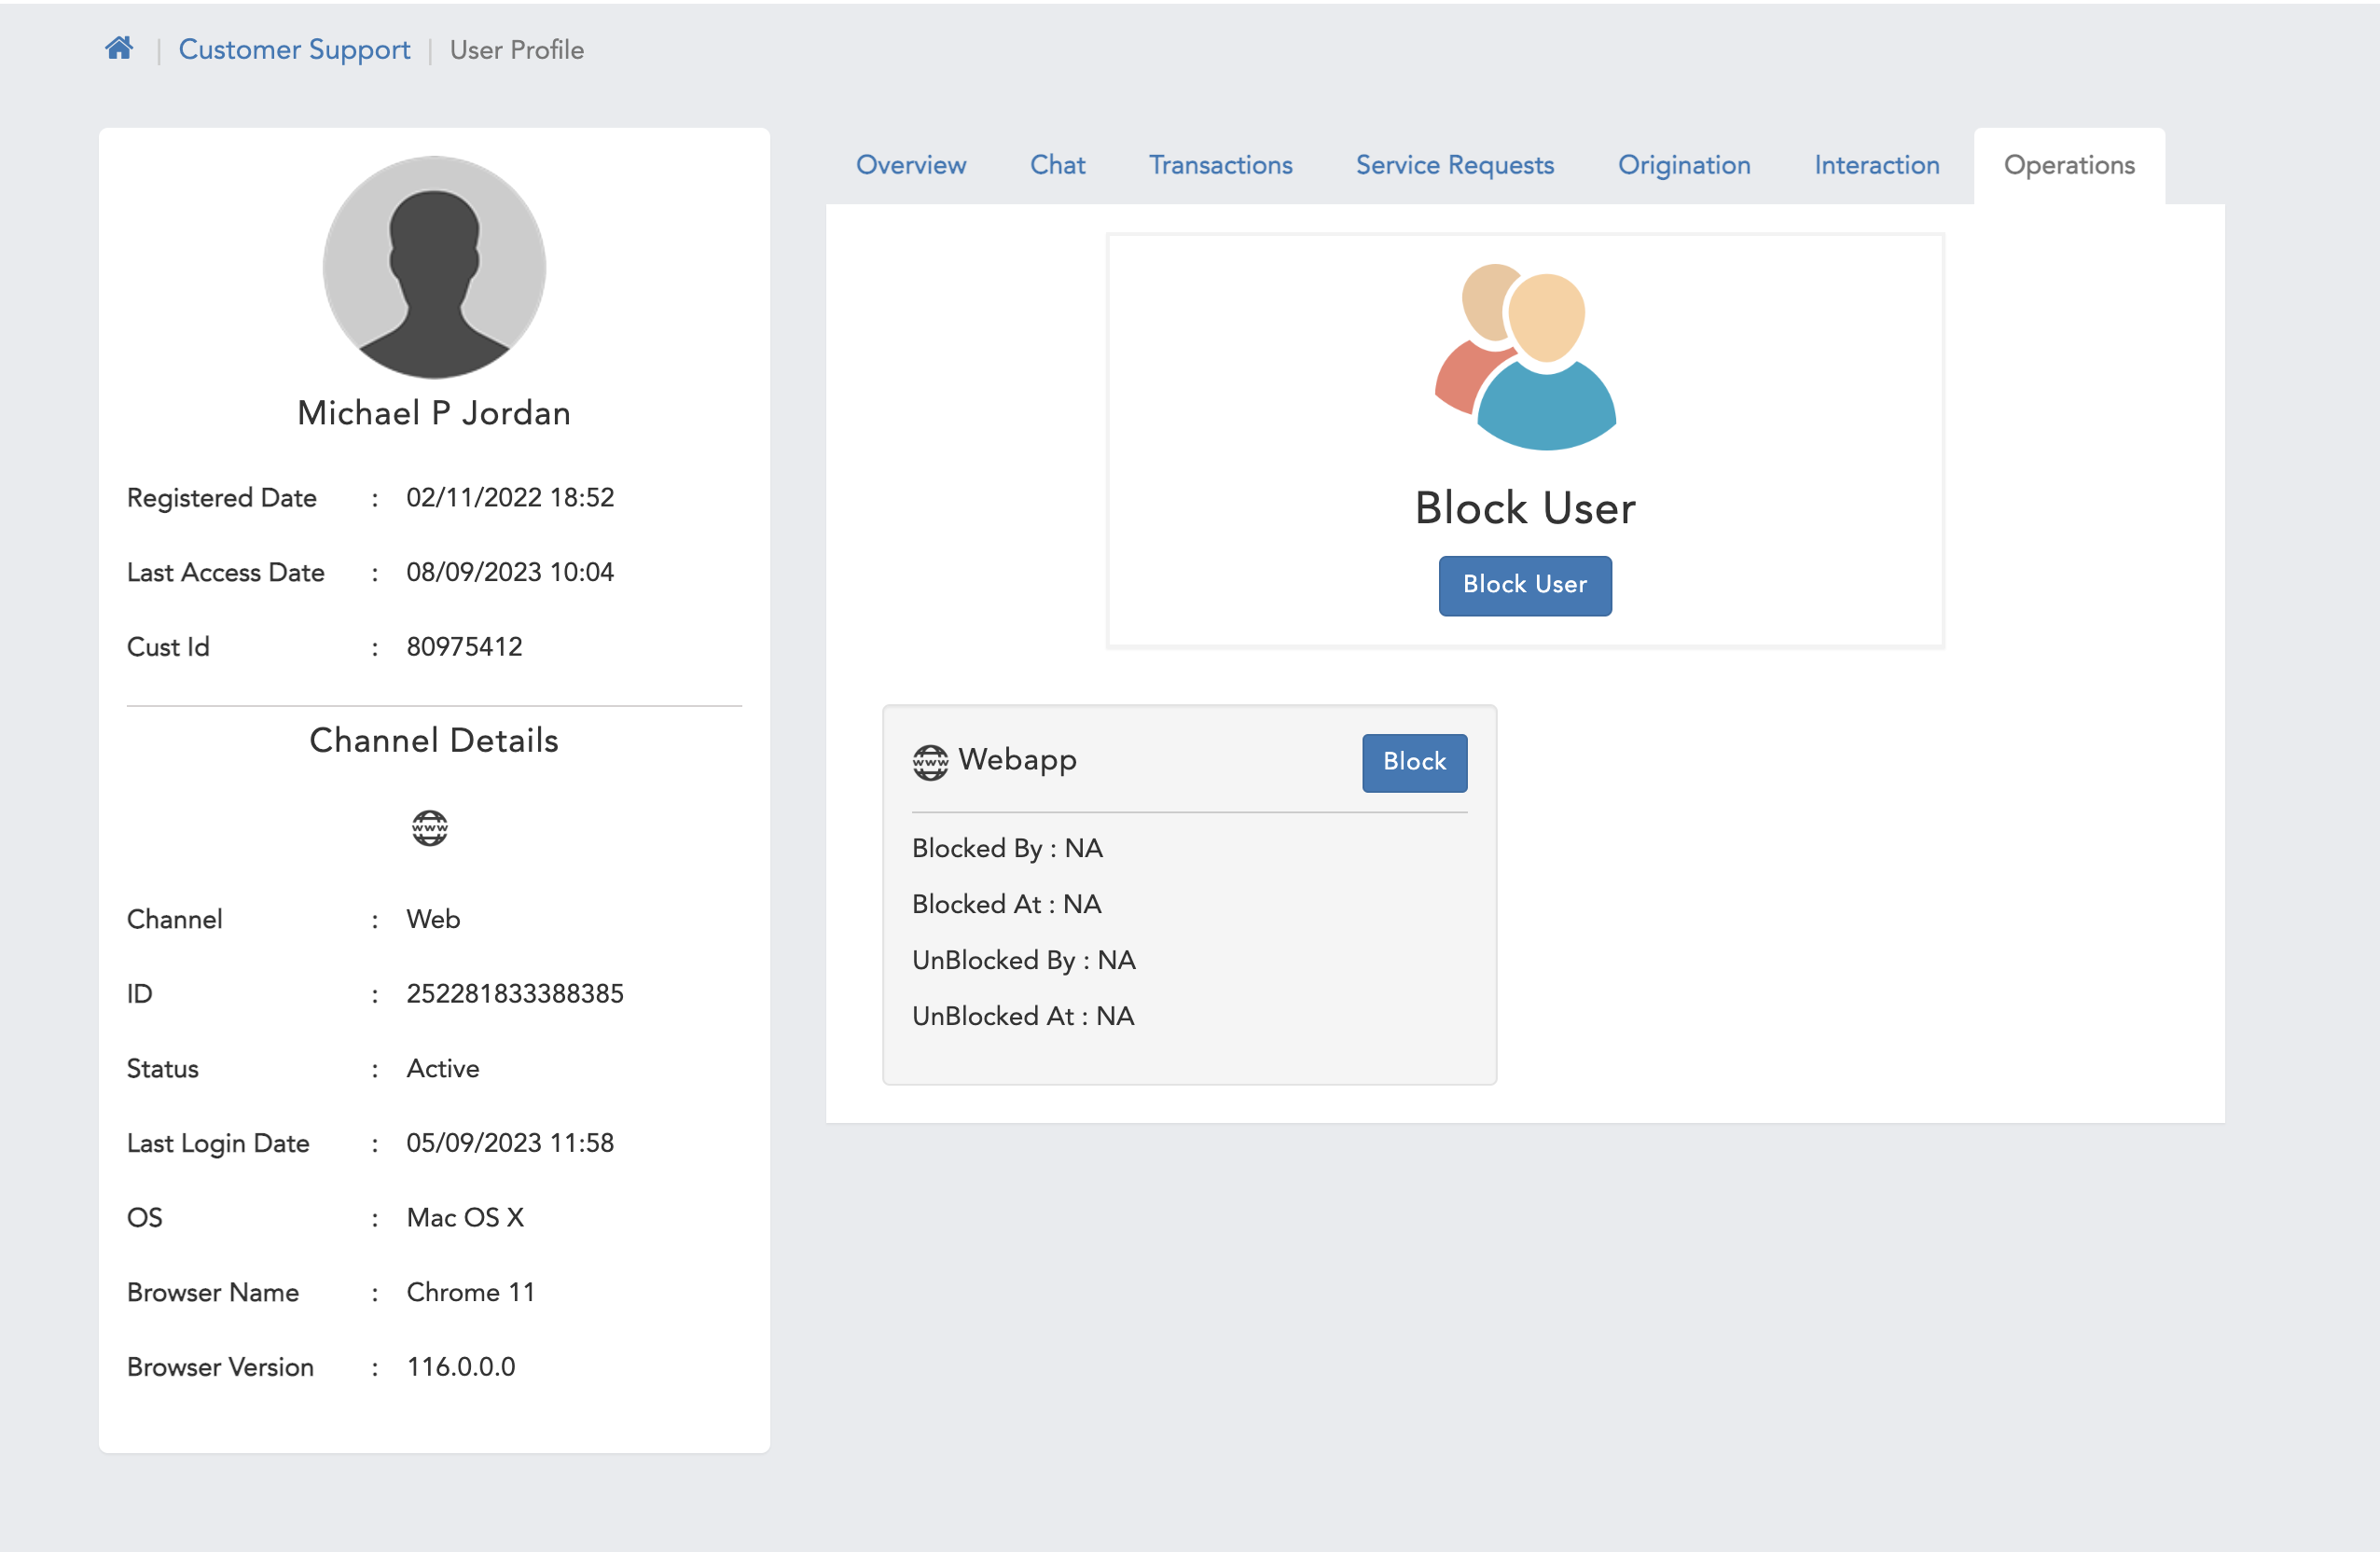
Transactions
If you want to analyse how much transactions happened with your bot on a daily, monthly basis then you can analyse that also by following these steps:

Below are the filters available.
Service Requests
If you want to analyse how many service requests like ''Issue Cheque Book'' raised on your bot on a daily, monthly, yearly and custom date range basis then you can analyse that also by following these steps:
It will show all the service requests that have been raised on your bot.

Below are the filters available for service request.

For faster downloads for transaction and service request reports. In this, we will be excluding the reports.json file while processing the records.
We can still use the reports.json to do that just make change the following rule, goto Manage AI rules -> Reports and look for 'Enable Handlebars engine for reports’.
Origination
You can analyse origination also on a daily, monthly basis then you can analyse that also by following these steps:
It will show on boarding process of the user.


AI
In the AI reports, you can analyse the performance & accuracy of the bot responses, you can also analyse the bot response average time. so that you can improve the bot accuracy & performance to serve better to the user.
It will show the AI accuracy & performance.

Functionality Journey
Steps To Add Functionality
Once we added functionality either in Transaction or Service Request, Whatever user is started conversation with bot, can be analysed in Functionality Journey, which can be view under ANALYSE > Functionality Journey
 Home Page
Filters
We have Filters to get report based on our requirement as shown in Functionality journey image
Apart from this filter we can also do refresh to get updated data on journey
If we Add Functionality using workflow editor no need to worry about report when we use proper links inside editor without use of java or camel to decide on what should be the next node, in worst case if we go with camel or java then we needs to maintain reports.json and reportstep.json **in admin config path($ADMIN_CONFIG_PATHconfig/global**), inside this we have already pre-populated data to render reports on rb supported use cases which uses camel route to decide what should be the next node
Reports
A JSON file contains Categorisation including visibility of reports
A Sample content is as follows
{
  "transactions" : {
    "category" : [
      {
        "name" : "All",
        "key" : "ALL",
        "headers" : ["Date", "Customer Id", "Mobile Number", "Category", "Type", "From Account", "To Account", "Biller/Payee Name", "Amount", "Txn Id", "Payment Ref No", "Response Code", "Response Message", "Channel","User Journey","Status"],
        "exportHeaders" : ["Date", "Customer Id", "Mobile Number", "Category", "Type", "From Account", "To Account", "Biller/Payee Name", "Amount", "Txn Id", "Payment Ref No", "Response Code", "Response Message", "Channel","Status"],
        "values" : ["{{#if txnDateStr}}{{txnDateStr}}{{else}}NA{{/if}}","{{#if userReport}}{{custId}}{{else}}<a data-custId='{{custId}}' data-userIntId='{{userIntId}}' style='cursor:pointer'>{{#if custId}}{{custId}}{{else}}NA{{/if}}</a>{{/if}}","{{#if userMobileNumber}}{{userMobileNumber}}{{else}}NA{{/if}}","{{#ReportsConfig}}{{#category}}{{#is key trxnCateg}}{{#if trxnCateg}}{{name}}{{else}}NA{{/if}}{{/is}}{{/category}}{{/ReportsConfig}}","{{#ReportsConfig}}{{#category}}{{#types}}{{#is key trxnType}}{{#if trxnType}}{{name}}{{else}}NA{{/if}}{{/is}}{{/types}}{{/category}}{{/ReportsConfig}}","{{#if trxnSrcAccountNum}}{{trxnSrcAccountNum}}{{else}}NA{{/if}}","{{#if payeeAccountNum}}{{payeeAccountNum}}{{else if phoneNo}}{{phoneNo}}{{else}}NA{{/if}}","{{#if billerName}}{{billerName}}{{else if payeeName}}{{payeeName}}{{else}}NA{{/if}}","{{#if trxnAmtDis}}{{trxnCurr}}{{trxnAmtDis}}{{else}}NA{{/if}}","{{#if trxnId}}{{trxnId}}{{else}}NA{{/if}}","{{#if paymentRefNo}}{{paymentRefNo}}{{else}}NA{{/if}}","{{#if trxnCode}}{{trxnCode}}{{else}}NA{{/if}}","{{#if trxnFailureText}}{{{trxnFailureText}}}{{else}}NA{{/if}}","{{#Channels}}{{#is (lowercase channelCode) (lowercase channelType)}}{{#if channelType}}<img src='imgs/{{channelLogo}}.png' style='width: 15px !important; height: 15px !important;'>{{else}}NA{{/if}}{{/is}}{{/Channels}}","<a data-transactionIntId='{{instTrxnId}}' data-transactionCategory='{{trxnCateg}}' data-transactionType='{{trxnType}}' data-transactionName='{{trxnType}}' style='cursor:pointer'>View</a>","{{#if trxnStatus}}{{trxnStatus}}{{else}}NA{{/if}}"],
        "exportValues" : ["{{#if txnDateStr}}{{txnDateStr}}{{else}}NA{{/if}}","{{#if custId}}{{custId}}{{else}}NA{{/if}}","{{#if userMobileNumber}}{{userMobileNumber}}{{else}}NA{{/if}}","{{#ReportsConfig}}{{#category}}{{#is key trxnCateg}}{{#if trxnCateg}}{{name}}{{else}}NA{{/if}}{{/is}}{{/category}}{{/ReportsConfig}}","{{#ReportsConfig}}{{#category}}{{#types}}{{#is key trxnType}}{{#if trxnType}}{{name}}{{else}}NA{{/if}}{{/is}}{{/types}}{{/category}}{{/ReportsConfig}}","{{#if trxnSrcAccountNum}}{{trxnSrcAccountNum}}{{else}}NA{{/if}}","{{#if payeeAccountNum}}{{payeeAccountNum}}{{else if phoneNo}}{{phoneNo}}{{else}}NA{{/if}}","{{#if billerName}}{{billerName}}{{else if payeeName}}{{payeeName}}{{else}}NA{{/if}}","{{#if trxnAmtDis}}{{trxnCurr}}{{trxnAmtDis}}{{else}}NA{{/if}}","{{#if trxnId}}{{trxnId}}{{else}}NA{{/if}}","{{#if paymentRefNo}}{{paymentRefNo}}{{else}}NA{{/if}}","{{#if trxnCode}}{{trxnCode}}{{else}}NA{{/if}}","{{#if trxnFailureText}}{{{trxnFailureText}}}{{else}}NA{{/if}}","{{#Channels}}{{#is (lowercase channelCode) (lowercase channelType)}}{{#if channelType}}{{channelName}}{{else}}NA{{/if}}{{/is}}{{/Channels}}","{{#if trxnStatus}}{{trxnStatus}}{{else}}NA{{/if}}"],
        "display": false
      },
      {
        "name" : "Transfer",
        "key" : "TRANSFER",
        "headers" : ["Date", "Customer Id", "Mobile Number", "Category", "Type", "From Account", "To Account", "Amount", "Payee Name", "Txn Id", "Response Code", "Response Message", "Channel","User Journey","Status"],
        "exportHeaders" : ["Date", "Customer Id", "Mobile Number", "Category", "Type", "From Account", "To Account", "Amount", "Payee Name", "Txn Id", "Response Code", "Response Message", "Channel","Status"],
        "values" : ["{{#if txnDateStr}}{{txnDateStr}}{{else}}NA{{/if}}","{{#if userReport}}{{custId}}{{else}}<a data-custId='{{custId}}' data-userIntId='{{userIntId}}' style='cursor:pointer'>{{#if custId}}{{custId}}{{else}}NA{{/if}}</a>{{/if}}", "{{#if userMobileNumber}}{{userMobileNumber}}{{else}}NA{{/if}}","{{#ReportsConfig}}{{#category}}{{#is key trxnCateg}}{{#if trxnCateg}}{{name}}{{else}}NA{{/if}}{{/is}}{{/category}}{{/ReportsConfig}}","{{#ReportsConfig}}{{#category}}{{#types}}{{#is key trxnType}}{{#if trxnType}}{{name}}{{else}}NA{{/if}}{{/is}}{{/types}}{{/category}}{{/ReportsConfig}}","{{#if trxnSrcAccountNum}}{{trxnSrcAccountNum}}{{else}}NA{{/if}}","{{#if payeeAccountNum}}{{payeeAccountNum}}{{else}}NA{{/if}}","{{#if trxnAmtDis}}{{trxnCurr}}{{trxnAmtDis}}{{else}}NA{{/if}}","{{#if payeeName}}{{payeeName}}{{else}}NA{{/if}}","{{#if trxnId}}{{trxnId}}{{else}}NA{{/if}}","{{#if trxnCode}}{{trxnCode}}{{else}}NA{{/if}}","{{#if trxnFailureText}}{{{trxnFailureText}}}{{else}}NA{{/if}}","{{#Channels}}{{#is (lowercase channelCode) (lowercase channelType)}}{{#if channelType}}<img src='imgs/{{channelLogo}}.png' style='width: 15px !important; height: 15px !important;'>{{else}}NA{{/if}}{{/is}}{{/Channels}}","<a data-transactionIntId='{{instTrxnId}}' data-transactionCategory='{{trxnCateg}}' data-transactionType='{{trxnType}}' data-transactionName='{{trxnType}}' style='cursor:pointer'>View</a>","{{#if trxnStatus}}{{trxnStatus}}{{else}}NA{{/if}}"],
        "exportValues" : ["{{#if txnDateStr}}{{txnDateStr}}{{else}}NA{{/if}}","{{#if custId}}{{custId}}{{else}}NA{{/if}}", "{{#if userMobileNumber}}{{userMobileNumber}}{{else}}NA{{/if}}","{{#ReportsConfig}}{{#category}}{{#is key trxnCateg}}{{#if trxnCateg}}{{name}}{{else}}NA{{/if}}{{/is}}{{/category}}{{/ReportsConfig}}","{{#ReportsConfig}}{{#category}}{{#types}}{{#is key trxnType}}{{#if trxnType}}{{name}}{{else}}NA{{/if}}{{/is}}{{/types}}{{/category}}{{/ReportsConfig}}","{{#if trxnSrcAccountNum}}{{trxnSrcAccountNum}}{{else}}NA{{/if}}","{{#if payeeAccountNum}}{{payeeAccountNum}}{{else}}NA{{/if}}","{{#if trxnAmtDis}}{{trxnCurr}}{{trxnAmtDis}}{{else}}NA{{/if}}","{{#if payeeName}}{{payeeName}}{{else}}NA{{/if}}","{{#if trxnId}}{{trxnId}}{{else}}NA{{/if}}","{{#if trxnCode}}{{trxnCode}}{{else}}NA{{/if}}","{{#if trxnFailureText}}{{{trxnFailureText}}}{{else}}NA{{/if}}","{{#Channels}}{{#is (lowercase channelCode) (lowercase channelType)}}{{#if channelType}}{{channelName}}{{else}}NA{{/if}}{{/is}}{{/Channels}}","{{#if trxnStatus}}{{trxnStatus}}{{else}}NA{{/if}}"],
        "intentname" : "txn-moneymovement",
        "subIntentName" : "transfer",
        "types" : [{
          "key" : "EXTERNAL_DOMESTIC",
          "name" : "Inter Bank"      }, {
          "key" : "INTERNAL_DOMESTIC",
          "name" : "Intra Bank"      }, {
          "key" : "SELF",
          "name" : "Self"      }, {
          "key" : "MMID",
          "name" : "MMID"      }, {
          "key" : "QUICK_PAY",
          "name" : "Quick Pay"      }, {
          "key" : "UPI",
          "name" : "UPI"      }
        ],
        "display": true
      }
    ]
  },
  "serviceRequests": {
    "category": [
      {
        "name": "All",
        "key": "ALL",
        "headers": [
          "Date",
          "Customer Id",
          "Ref. No.",
          "Type",
          "Sub Type",
          "Product",
          "Account No",
          "Channel",
          "User Journey",
          "Status",
          "Comments"
        ],
        "exportHeaders": [
          "Date",
          "Customer Id",
          "Ref. No.",
          "Type",
          "Sub Type",
          "Product",
          "Account No",
          "Channel",
          "Status",
          "Comments"
        ],
        "values": [
          "{{#if serviceReqDateStr}}{{serviceReqDateStr}}{{else}}NA{{/if}}",
          "{{#if userReport}}{{userCustomerId}}{{else}}{{#if userCustomerId}}<a data-custId='{{userCustomerId}}' data-userIntId='{{userIntId}}'>{{userCustomerId}}</a>{{else}}NA{{/if}}{{/if}}",
          "{{#if srvcereqRefNum}}{{srvcereqRefNum}}{{else}}NA{{/if}}",
          "{{#ReportsConfig}}{{#category}}{{#is key srvcereqCateg}}{{#if srvcereqCateg}}{{name}}{{else}}NA{{/if}}{{/is}}{{/category}}{{/ReportsConfig}}",
          "{{#ReportsConfig}}{{#category}}{{#types}}{{#is key srvcereqType}}{{#if srvcereqType}}{{name}}{{else}}NA{{/if}}{{/is}}{{/types}}{{/category}}{{/ReportsConfig}}",
          "{{#if auditField3}}{{auditField3}}{{else}}NA{{/if}}",
          "{{#if accountId}}{{maskAccNum accountId}}{{else}}NA{{/if}}",
          "{{#Channels}}{{#is (lowercase channelCode) (lowercase channelType)}}{{#if channelType}}<img src='imgs/{{channelLogo}}.png' style='width: 15px !important; height: 15px !important;'>{{else}}NA{{/if}}{{/is}}{{/Channels}}",
          "<a data-transactionIntId='{{srvcereqId}}' data-transactionCategory='{{srvcereqCateg}}' data-transactionType='{{srvcereqType}}' data-transactionName='{{srvcereqType}}'>View</a>",
          "{{srvcereqStatus}}",
          "{{#if comments}}{{comments}}{{else}} {{/if}}"
        ],
        "exportValues": [
          "{{#if serviceReqDateStr}}{{serviceReqDateStr}}{{else}}NA{{/if}}",
          "{{#if userCustomerId}}{{userCustomerId}}{{else}}NA{{/if}}",
          "{{#if srvcereqRefNum}}{{srvcereqRefNum}}{{else}}NA{{/if}}",
          "{{#ReportsConfig}}{{#category}}{{#is key srvcereqCateg}}{{#if srvcereqCateg}}{{name}}{{else}}NA{{/if}}{{/is}}{{/category}}{{/ReportsConfig}}",
          "{{#ReportsConfig}}{{#category}}{{#types}}{{#is key srvcereqType}}{{#if srvcereqType}}{{name}}{{else}}NA{{/if}}{{/is}}{{/types}}{{/category}}{{/ReportsConfig}}",
          "{{#if auditField3}}{{auditField3}}{{else}}NA{{/if}}",
          "{{#if accountId}}{{maskAccNum accountId}}{{else}}NA{{/if}}",
          "{{#Channels}}{{#is (lowercase channelCode) (lowercase channelType)}}{{#if channelType}}{{channelName}}{{else}}NA{{/if}}{{/is}}{{/Channels}}",
          "{{srvcereqStatus}}",
          "{{#if comments}}{{comments}}{{else}} {{/if}}"
        ],
        "display": false
      },
      {
        "key": "CARD_SERVICE",
        "name": "Card Service",
        "headers": [
          "Date",
          "Customer Id",
          "Ref. No.",
          "Type",
          "Sub Type",
          "Product",
          "Account No",
          "Channel",
          "User Journey",
          "Status",
          "Comments"
        ],
        "exportHeaders": [
          "Date",
          "Customer Id",
          "Ref. No.",
          "Type",
          "Sub Type",
          "Product",
          "Account No",
          "Channel",
          "Status",
          "Comments"
        ],
        "values": [
          "{{#if serviceReqDateStr}}{{serviceReqDateStr}}{{else}}NA{{/if}}",
          "{{#if userReport}}{{userCustomerId}}{{else}}{{#if userCustomerId}}<a data-custId='{{userCustomerId}}' data-userIntId='{{userIntId}}'>{{userCustomerId}}</a>{{else}}NA{{/if}}{{/if}}",
          "{{#if srvcereqRefNum}}{{srvcereqRefNum}}{{else}}NA{{/if}}",
          "{{#ReportsConfig}}{{#category}}{{#is key srvcereqCateg}}{{#if srvcereqCateg}}{{name}}{{else}}NA{{/if}}{{/is}}{{/category}}{{/ReportsConfig}}",
          "{{#ReportsConfig}}{{#category}}{{#types}}{{#is key srvcereqType}}{{#if srvcereqType}}{{name}}{{else}}NA{{/if}}{{/is}}{{/types}}{{/category}}{{/ReportsConfig}}",
          "{{#if auditField3}}{{auditField3}}{{else}}NA{{/if}}",
          "{{#if accountId}}{{maskAccNum accountId}}{{else}}NA{{/if}}",
          "{{#Channels}}{{#is (lowercase channelCode) (lowercase channelType)}}{{#if channelType}}<img src='imgs/{{channelLogo}}.png' style='width: 15px !important; height: 15px !important;'>{{else}}NA{{/if}}{{/is}}{{/Channels}}",
          "<a data-transactionIntId='{{srvcereqId}}' data-transactionCategory='{{srvcereqCateg}}' data-transactionType='{{srvcereqType}}' data-transactionName='{{srvcereqType}}'>View</a>",
          "{{srvcereqStatus}}",
          "{{#if comments}}{{comments}}{{else}} {{/if}}"
        ],
        "exportValues": [
          "{{#if serviceReqDateStr}}{{serviceReqDateStr}}{{else}}NA{{/if}}",
          "{{#if userCustomerId}}{{userCustomerId}}{{else}}NA{{/if}}",
          "{{#if srvcereqRefNum}}{{srvcereqRefNum}}{{else}}NA{{/if}}",
          "{{#ReportsConfig}}{{#category}}{{#is key srvcereqCateg}}{{#if srvcereqCateg}}{{name}}{{else}}NA{{/if}}{{/is}}{{/category}}{{/ReportsConfig}}",
          "{{#ReportsConfig}}{{#category}}{{#types}}{{#is key srvcereqType}}{{#if srvcereqType}}{{name}}{{else}}NA{{/if}}{{/is}}{{/types}}{{/category}}{{/ReportsConfig}}",
          "{{#if auditField3}}{{auditField3}}{{else}}NA{{/if}}",
          "{{#if accountId}}{{maskAccNum accountId}}{{else}}NA{{/if}}",
          "{{#Channels}}{{#is (lowercase channelCode) (lowercase channelType)}}{{#if channelType}}{{channelName}}{{else}}NA{{/if}}{{/is}}{{/Channels}}",
          "{{srvcereqStatus}}",
          "{{#if comments}}{{comments}}{{else}} {{/if}}"
        ],
        "types": [
          {
            "name": "Block Card",
            "key": "BLOCK_CARD"
          },
          {
            "name": "Reset Pin",
            "key": "RESET_PIN"
          },
          {
            "name": "Card Activation",
            "key": "CARD_ACTIVATION"
          },
          {
            "name": "International Usage",
            "key": "INTERNATIONAL_USAGE"
          },
          {
            "name": "Replace Card",
            "key": "REPLACE_CARD"
          },
          {
            "name": "Convert EMI",
            "key": "CONVERT_EMI"
          },
          {
            "name": "Update Limit",
            "key": "UPDATE_LIMIT"
          }
        ],
        "display": true
      }
    ]
  }
}
Report Step
A JSON file contains details on each step linked with others
{
  "name": Name of the Step as same as step code provided, ex:- "Step_3"
  "shape": Shape of the step visibilty on jopurney, possible shapes "circle", "rectangle"
  "color": Colour of the step, recomended colours   BLACK("#78909C"), GREEN("#9CCC65"), RED("#EF9A9A");
  "text": Colour in text for readble pupose, as above in smallcases ex: "black"
  "detail": Step name to visible on journey, always keep simple as possible, ex:- "Amount"
  "from": Step from which this step may called, for start node from will be blank value and rest can be based on workflow
  ex:- "Step_1,Step_2" means Step 3 called from either Step_1 or Step_2
  "isView": A Step needs to be visble in report or it is added for some enhancemment as of now we can keep this with disbaling this flag, possible values true,false
  "orderNo": Order number of step in journey,ex:- 3, this step will be visible on 3rd place
}
Collection of these kind of objects in an array forms a complete journey
{
  "CARD_SERVICE":{
    "CARD_ACTIVATION": [
      {
        "name": "START",
        "shape": "circle",
        "color": "#9CCC65",
        "text": "black",
        "detail": "Start",
        "from": "",
        "isView": true,
        "orderNo": 1  },
      {
        "name": "sr_account_list",
        "shape": "rectangle",
        "color": "#78909C",
        "text": "black",
        "detail": "Card Selection",
        "from": "START",
        "isView": true,
        "orderNo": 2  },
      {
        "name": "sr_card_activation_confirm",
        "shape": "rectangle",
        "color": "#78909C",
        "text": "black",
        "detail": "Activation Confirm",
        "from": "START,sr_account_list",
        "isView": true,
        "orderNo": 3  },
      {
        "name": "sr_otp",
        "shape": "rectangle",
        "color": "#78909C",
        "text": "black",
        "detail": "OTP Step",
        "from": "sr_card_activation_confirm",
        "isView": true,
        "orderNo": 4  },
      {
        "name": "OTP_03",
        "shape": "rectangle",
        "color": "#78909C",
        "text": "black",
        "detail": "Re-Enter OTP",
        "from": "sr_otp,OTP_03",
        "isView": true,
        "orderNo": 5  },
      {
        "name": "Cancellation",
        "shape": "circle",
        "color": "#EF9A9A",
        "text": "red",
        "detail": "Cancellation",
        "from": "sr_account_list,sr_card_activation_confirm,sr_otp,OTP_03",
        "isView": true,
        "orderNo": 6  },
      {
        "name": "OTP_02",
        "shape": "circle",
        "color": "#EF9A9A",
        "text": "red",
        "detail": "OTP Attempts Exceeds",
        "from": "OTP_03",
        "isView": true,
        "orderNo": 6  },
      {
        "name": "sr_card_activation_txn_status",
        "shape": "circle",
        "color": "#9CCC65",
        "text": "green",
        "detail": "END",
        "from": "sr_otp,OTP_03",
        "isView": true,
        "orderNo": 7  }
    ]
  }
}
Let’s discuss above with one example like Card Activation use case
Requirement
Show Journey of Card activation inside Functionality journey as well as completed service requests use case to view their journey on service request of analyse page
 Functionality Journey Landing Page
 Category Landing Page
As Show above on click of functionality journey we should show category called Card Service and this can be achievable with reports.json In reports.json file create an object with any value(Indicates main category) here we named it as Service Requests but inside of it create an object and name it as category and that is an array of objects which contains many category like Card Service, Deposit Service etc,. and create an another object which we needs to show in Functionality journey landing page
contains parameters as shown below
"name" : "Card Service", :- Name to be show in FUnctionality Journey landing page
 "key" : "CARD_SERVICE", :-Id to hold object which we refer inside reportstep.json
 "headers" : ["Date", "Customer Id", "Mobile Number", "Category", "Type", "From Account", "To Account", "Biller/Payee Name", "Amount", "Txn Id", "Payment Ref No", "Response Code", "Response Message", "Channel","User Journey","Status"],
 "exportHeaders" : ["Date", "Customer Id", "Mobile Number", "Category", "Type", "From Account", "To Account", "Biller/Payee Name", "Amount", "Txn Id", "Payment Ref No", "Response Code", "Response Message", "Channel","Status"],
 "values" : ["{{#if txnDateStr}}{{txnDateStr}}{{else}}NA{{/if}}","{{#if userReport}}{{custId}}{{else}}<a data-custId='{{custId}}' data-userIntId='{{userIntId}}' style='cursor:pointer'>{{#if custId}}{{custId}}{{else}}NA{{/if}}</a>{{/if}}","{{#if userMobileNumber}}{{userMobileNumber}}{{else}}NA{{/if}}","{{#ReportsConfig}}{{#category}}{{#is key trxnCateg}}{{#if trxnCateg}}{{name}}{{else}}NA{{/if}}{{/is}}{{/category}}{{/ReportsConfig}}","{{#ReportsConfig}}{{#category}}{{#types}}{{#is key trxnType}}{{#if trxnType}}{{name}}{{else}}NA{{/if}}{{/is}}{{/types}}{{/category}}{{/ReportsConfig}}","{{#if trxnSrcAccountNum}}{{trxnSrcAccountNum}}{{else}}NA{{/if}}","{{#if payeeAccountNum}}{{payeeAccountNum}}{{else if phoneNo}}{{phoneNo}}{{else}}NA{{/if}}","{{#if billerName}}{{billerName}}{{else if payeeName}}{{payeeName}}{{else}}NA{{/if}}","{{#if trxnAmtDis}}{{trxnCurr}}{{trxnAmtDis}}{{else}}NA{{/if}}","{{#if trxnId}}{{trxnId}}{{else}}NA{{/if}}","{{#if paymentRefNo}}{{paymentRefNo}}{{else}}NA{{/if}}","{{#if trxnCode}}{{trxnCode}}{{else}}NA{{/if}}","{{#if trxnFailureText}}{{{trxnFailureText}}}{{else}}NA{{/if}}","{{#Channels}}{{#is (lowercase channelCode) (lowercase channelType)}}{{#if channelType}}<img src='imgs/{{channelLogo}}.png' style='width: 15px !important; height: 15px !important;'>{{else}}NA{{/if}}{{/is}}{{/Channels}}","<a data-transactionIntId='{{instTrxnId}}' data-transactionCategory='{{trxnCateg}}' data-transactionType='{{trxnType}}' data-transactionName='{{trxnType}}' style='cursor:pointer'>View</a>","{{#if trxnStatus}}{{trxnStatus}}{{else}}NA{{/if}}"],
 "exportValues" : ["{{#if txnDateStr}}{{txnDateStr}}{{else}}NA{{/if}}","{{#if custId}}{{custId}}{{else}}NA{{/if}}","{{#if userMobileNumber}}{{userMobileNumber}}{{else}}NA{{/if}}","{{#ReportsConfig}}{{#category}}{{#is key trxnCateg}}{{#if trxnCateg}}{{name}}{{else}}NA{{/if}}{{/is}}{{/category}}{{/ReportsConfig}}","{{#ReportsConfig}}{{#category}}{{#types}}{{#is key trxnType}}{{#if trxnType}}{{name}}{{else}}NA{{/if}}{{/is}}{{/types}}{{/category}}{{/ReportsConfig}}","{{#if trxnSrcAccountNum}}{{trxnSrcAccountNum}}{{else}}NA{{/if}}","{{#if payeeAccountNum}}{{payeeAccountNum}}{{else if phoneNo}}{{phoneNo}}{{else}}NA{{/if}}","{{#if billerName}}{{billerName}}{{else if payeeName}}{{payeeName}}{{else}}NA{{/if}}","{{#if trxnAmtDis}}{{trxnCurr}}{{trxnAmtDis}}{{else}}NA{{/if}}","{{#if trxnId}}{{trxnId}}{{else}}NA{{/if}}","{{#if paymentRefNo}}{{paymentRefNo}}{{else}}NA{{/if}}","{{#if trxnCode}}{{trxnCode}}{{else}}NA{{/if}}","{{#if trxnFailureText}}{{{trxnFailureText}}}{{else}}NA{{/if}}","{{#Channels}}{{#is (lowercase channelCode) (lowercase channelType)}}{{#if channelType}}{{channelName}}{{else}}NA{{/if}}{{/is}}{{/Channels}}","{{#if trxnStatus}}{{trxnStatus}}{{else}}NA{{/if}}"],
 "display": false,
 "types": [
      {
        "name": "Block Card",
        "key": "BLOCK_CARD"
      },
      {
        "name": "Card Activation",
        "key": "CARD_ACTIVATION"
      }
    ] -> This contains sub category or we can say functionality name under this catgory
    where name to be show on functionality journey and key will be used in reportstep.json
So we done with showing clicks to view journey in admin but to populate journey we need to frame a json objects which should have each and every steps we come across the journey of use case let’s say :- - Card activation → account Selection → Confirmation → otp → status - Card activation with account number → Confirmation → otp → status - Card activation with account number → Confirmation → wrong otp → otp → status - Card activation with account number → Confirmation → cancel
these are the possible scenario’s and other scenarios were u may cancel use case in any step and u may ask faq’s smalltalk and enquiries in between the steps
[
      {
        "name": "START",
        "shape": "circle",
        "color": "#9CCC65",
        "text": "black",
        "detail": "Start",
        "from": "",
        "isView": true,
        "orderNo": 1  },
      {
        "name": "sr_account_list",
        "shape": "rectangle",
        "color": "#78909C",
        "text": "black",
        "detail": "Card Selection",
        "from": "START",
        "isView": true,
        "orderNo": 2  },
      {
        "name": "sr_card_activation_confirm",
        "shape": "rectangle",
        "color": "#78909C",
        "text": "black",
        "detail": "Activation Confirm",
        "from": "START,sr_account_list",
        "isView": true,
        "orderNo": 3  },
      {
        "name": "sr_otp",
        "shape": "rectangle",
        "color": "#78909C",
        "text": "black",
        "detail": "OTP Step",
        "from": "sr_card_activation_confirm",
        "isView": true,
        "orderNo": 4  },
      {
        "name": "OTP_03",
        "shape": "rectangle",
        "color": "#78909C",
        "text": "black",
        "detail": "Re-Enter OTP",
        "from": "sr_otp,OTP_03",
        "isView": true,
        "orderNo": 5  },
      {
        "name": "Cancellation",
        "shape": "circle",
        "color": "#EF9A9A",
        "text": "red",
        "detail": "Cancellation",
        "from": "sr_account_list,sr_card_activation_confirm,sr_otp,OTP_03",
        "isView": true,
        "orderNo": 6  },
      {
        "name": "OTP_02",
        "shape": "circle",
        "color": "#EF9A9A",
        "text": "red",
        "detail": "OTP Attempts Exceeds",
        "from": "OTP_03",
        "isView": true,
        "orderNo": 6  },
      {
        "name": "sr_card_activation_txn_status",
        "shape": "circle",
        "color": "#9CCC65",
        "text": "green",
        "detail": "END",
        "from": "sr_otp,OTP_03",
        "isView": true,
        "orderNo": 7  }
    ]
These are the steps which includes all the above scenario’s With this we are sufficient knowledge to frame any kind of reports in admin with Customized workflows and reports will be shown in admin as shown below
 Functionality Journey view
 Functionality completion view
Manage Deployments
Overview
Deployment helps to manage the Morfeus Middleware, AI data training lifecycle. Currently we support 2 kinds of deployment workloads.
This feature also keeps track of AI data trained & deployed previously. These trained data models can be restored at a later time. Every AI data training is identified by data Id (GUID - 32 byte Alphanumeric string)
Local deployments
For Morfeus deployment, please follow the below link. ~Coming Soon~
On-prem trainer and worker setups should follow the local documentation setup. AI trainers and AI worker processes should be configured as below.
Components
| Table 12 AI trainers and AI worker processes' Configurations | |
|
Rules
|
Description
|
|---|---|
| Triniti Trainer | AI engine performing base classification, natural language understanding, Named Entity recognition, spell checking and generates AI models specific to AI data domains & AI data provided. |
| Triniti Worker | AI process which will be loaded with the AI models and answers the user utterances from the chatbot. |
| Spotter Trainer | Deep learning AI engine generating supervised and unsupervised FAQ models. |
| Spotter Trainer | AI process loads the deep learnt model for serving the user queries related to FAQs. |
| Manager | Process helps to manage, interface and maintain all the trainers & workers with middleware through APIs. |

Rules for local deployments
| Table 13 Rules for local deployments | ||||
|
Configuration Type
|
Rule Name
|
Rule Location
|
Description
|
Example
|
|---|---|---|---|---|
| Deployment Type | Deployment Type |
|
Decides local/cloud deployment | local should be choosen |
| Manager Process | Triniti Manager URL | Manage AI → Manage Rules → Triniti | Manager URL (Contains config information related to Triniti / Spotter Masters) | http://10.2.3.12:8090/v/1 |
| Triniti Master |
|
|
Configured in Manager |
|
| Spotter Master |
|
|
Configured in Manager |
|
| Triniti Worker processes 1..N | Unified API v2 process used only when loading after successful data training | Manage AI → Manage Rules → Triniti Unified Api V2 | Comma separated URLs. Format: scheme1://host1:port1,schemeN://hostN:portN | http://10.2.1.24:8003,http://10.2.1.24:8004 |
| Triniti Worker Nginx URL | Endpoint URL | Manage AI → Manage Rules → Triniti Unified Api V2 | Serves the request from the bot, either can be configured as the process itself, if we have only 1 worker. If multiple workers available, then a web server is needed for load balancing requests. | http://10.2.1.24:8008 |
| Spotter Multi Tenant Worker Processes 1..N | Spotter worker process used only when loading after successful data training | Manage AI → Manage Rules → Spotter | Comma separated URLs. Format: scheme1://host1:port1,schemeN://hostN:portN |
|
| Spotter Worker Nginx URL | Spotter URL | Manage AI → Manage Rules → Spotter |
|
http://10.2.1.24:8006 |
Workspace Type : Conversational Bot - Both (Triniti + Spotter)
Triniti worker forwards requests to Spotter worker in case of FAQs/Smalltalk
Workspace Type : FAQ Bot
Spotter Only FAQ bots will use spotter workers for serving the response
Worker loading process

Worker load processes states

| Table 14 Worker load processes states | ||
| State | Description | Action |
|---|---|---|
| SUCCESS | Successfully loaded the model with the specified data ID |
|
| FAILURE | Load failed for the specific worker | Check the worker logs for the reason of Failure and retry loading |
| LOADING | In-progress of loading | |
| PENDING | Already a loading of another process is on-going. Once done the next process loading will start automatically |
|
Troubleshooting steps
Cloud Deployments
Cloud deployments are facilitated by a mandatory component Manager. Morfeus, Triniti Trainers & Workers, Spotter Trainers & Workers can be launched using cloud deployments.
Set Manage AI Rules
For enabling cloud deployments, please set the below rules, to proceed with using and launching the deployment workloads.
Navigate to Workspace → Manage AI
| Table 15 Manage Ai Rule configurations | ||
| Category | Rule | Value |
|---|---|---|
| General | AI Engine | UnifiedApiV2 |
| General | Primary Classifier | UnifiedApiV2 |
| General | Entity Extractor | UnifiedApiV2 |
| General | Smalltalk/FAQ Handler | UnifiedApiV2 |
| General | Context Change Detector | UnifiedApiV2 |
| Triniti | Deployment Type | Cloud |
| UnifiedApiV2 | Triniti | Triniti Manager URL |
| UnifiedApiV2 | Endpoint URL | https://router.triniti.ai |
| UnifiedApiV2 | Unified API Version | 2 |
| UnifiedApiV2 | Context Path | /v2 |
Set Workspace Rules
Create Instances
Start Morfeus Instance
Start Triniti/CongnitiveQnA/Both instance
Users can create Conversational AI (Triniti) Instances, CognitiveQnA (Spotter/Faqs) Instances or Both

Update Instances
Delete Instances
After Time-To-Live (in Mins), the Instance will be shut down automatically. Users can delete the instance before this Time-To-Live period.
Restart Instances

Use case: Refreshing Jar Artifactory Path for Morfeus Instances. This operation will restart the Server Container.
Guidelines
Train
For AI data training follow these steps:
Stop Train
If you have started the train and wanted to interupt the train to modify AI data and start a fresh train, then follow the below steps:
Import Zip
You can also import the deployed data by following these steps:

Export Zip
If you want to reuse the generated or deployed data, so you can export those data. And can use as per your need. You can export either Deployed data or Generated data.
Exporting Generated Data
It will download a ZIP file containing dialogs, NER, FAQs, parseQuery, primaryClassifier, smalltalk, spellcheck, etc*
Modular Train Button
Train button is added at five modules
Notes
All the generation and Training steps are in sync once we trigger the training from any of the above modules. The current status will be updated in each modules respectively. If it is in progress, the status will be present everywhere and no new training will be triggered until the one going on is finished.
Generic Validations
Following are the error scenarios for which validation added which is applicable for all the workspace type :-
Data Generation Validation (FAQ workspace type)
Following are the error scenarios for which validation added which is applicable for FAQ only the workspace type :-
If spellchecker data is not present in the workspace, then generation will fail with error message
Data Generation Validation [RB+FAQ workspace type]
Quick Train - generic validation
When Elastic search url is not configured for the workspace, then on click of quick train, validation message is shown to update the url.
Quick Train related changes
FAQ only workspace
On click of train, Load data to ES only.
RB FAQ workspace
On click of train, load data to ES and Train only Sniper
Recent Module Update on Modular Training
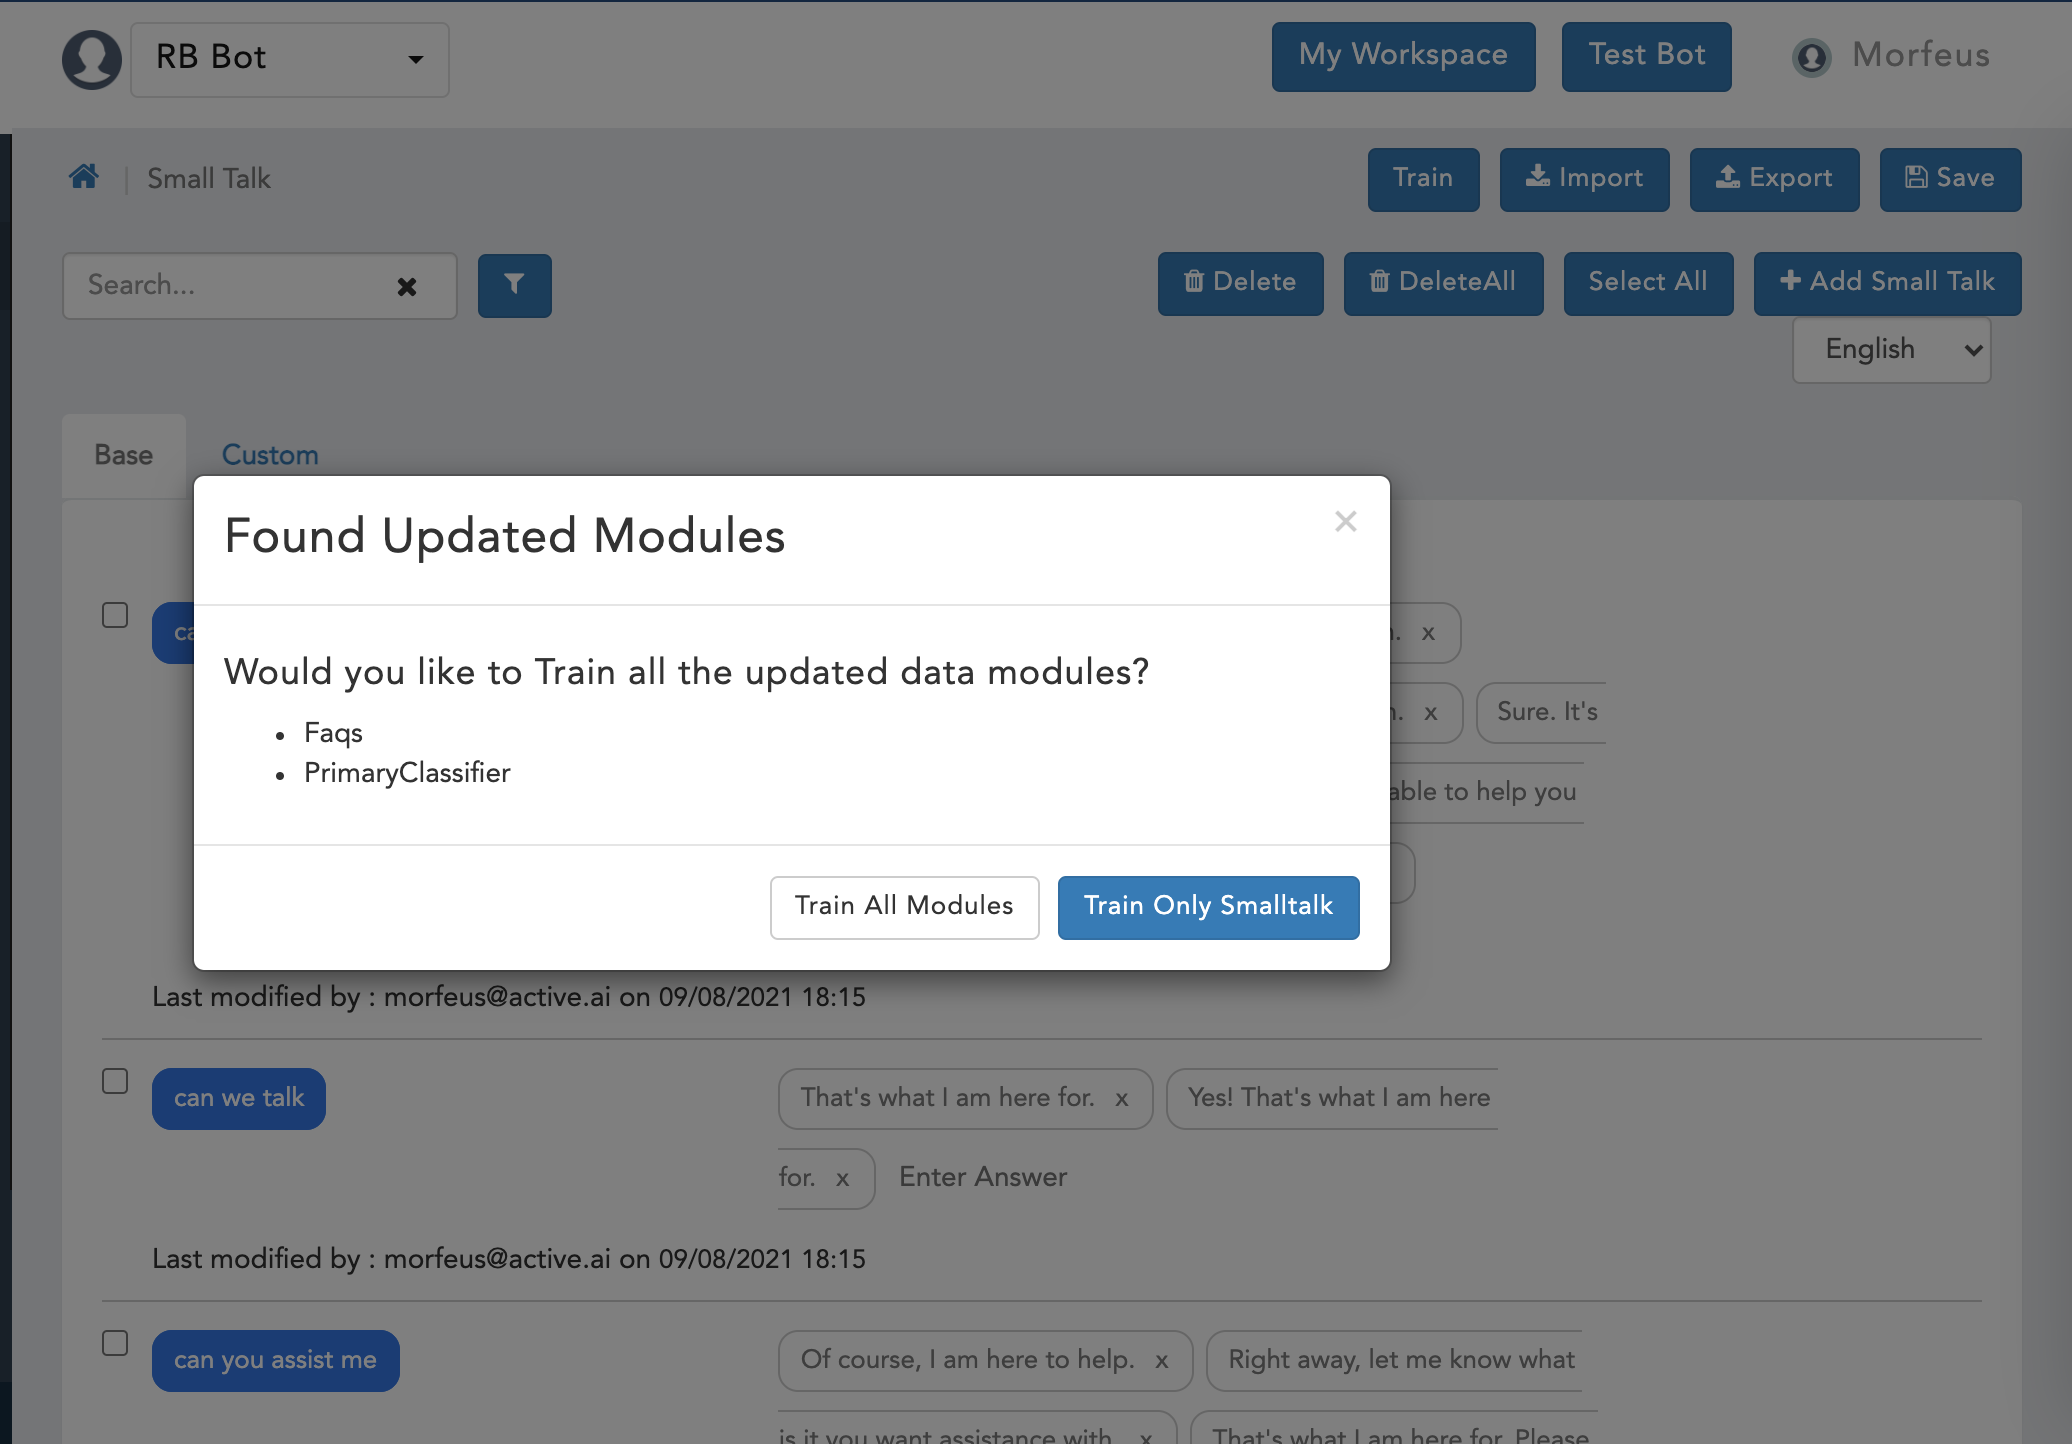
If user clicks on Train All modules, then from abive faqs and primary classifier will be changed and if Train only smallTalk is selected then only smalltalk will be trained. Once proceeded the complete data generation will start and post that training will be proceeded. Respective updates will be shown for the generation and training steps.
New screens changes is shown below.
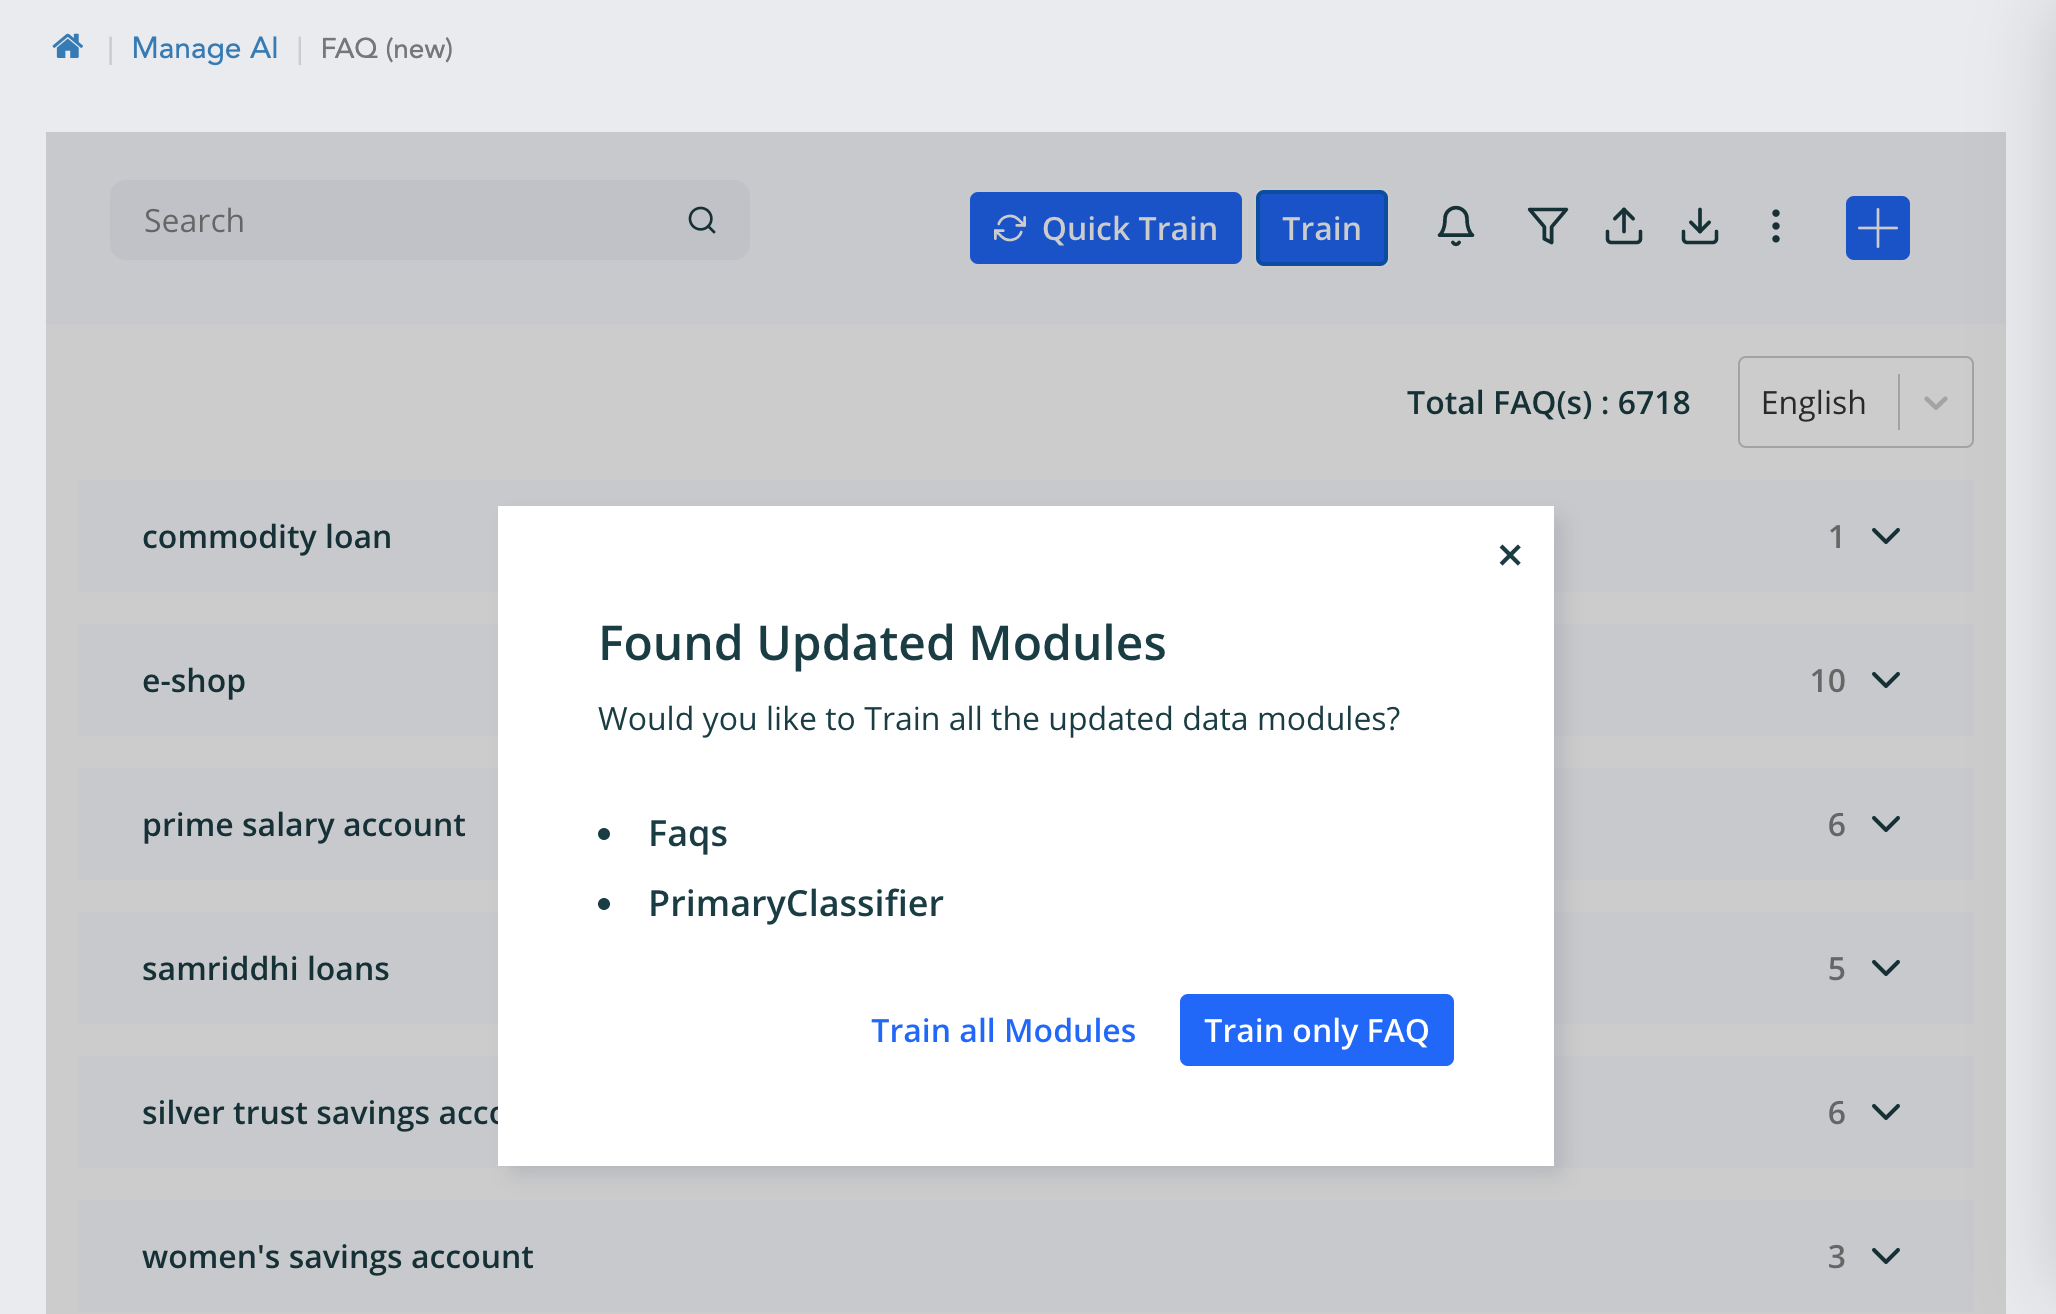
Note :-
Training triggered from any one of the five module, the training and generation status will shown on the remaining four modules.
This change is present on five modules and the Ai Ops Train button.
Sniper Base Model Selection
Definition
Base models are single models which are trained on curated on model training datasets guided from the large set of existing customer trained FAQs and variants. It is incorparated to incerease the expectation of accuracy of customer and reduce the false positive scenarios. All the models have been kept genetric in nature.Instead of having a signle model for a language, Sniper is now changed to work with multiple models for a language. This allows use to use base model sets for different situations. For example Tata Capital can have a different model from Axis Bank.
Configurations
Rules to configure are ->
Go to Manage AI -> Manage rules -> Cognitive QnA tab -> select any of the listed model inside the rule "Override Models for Sniper Config"
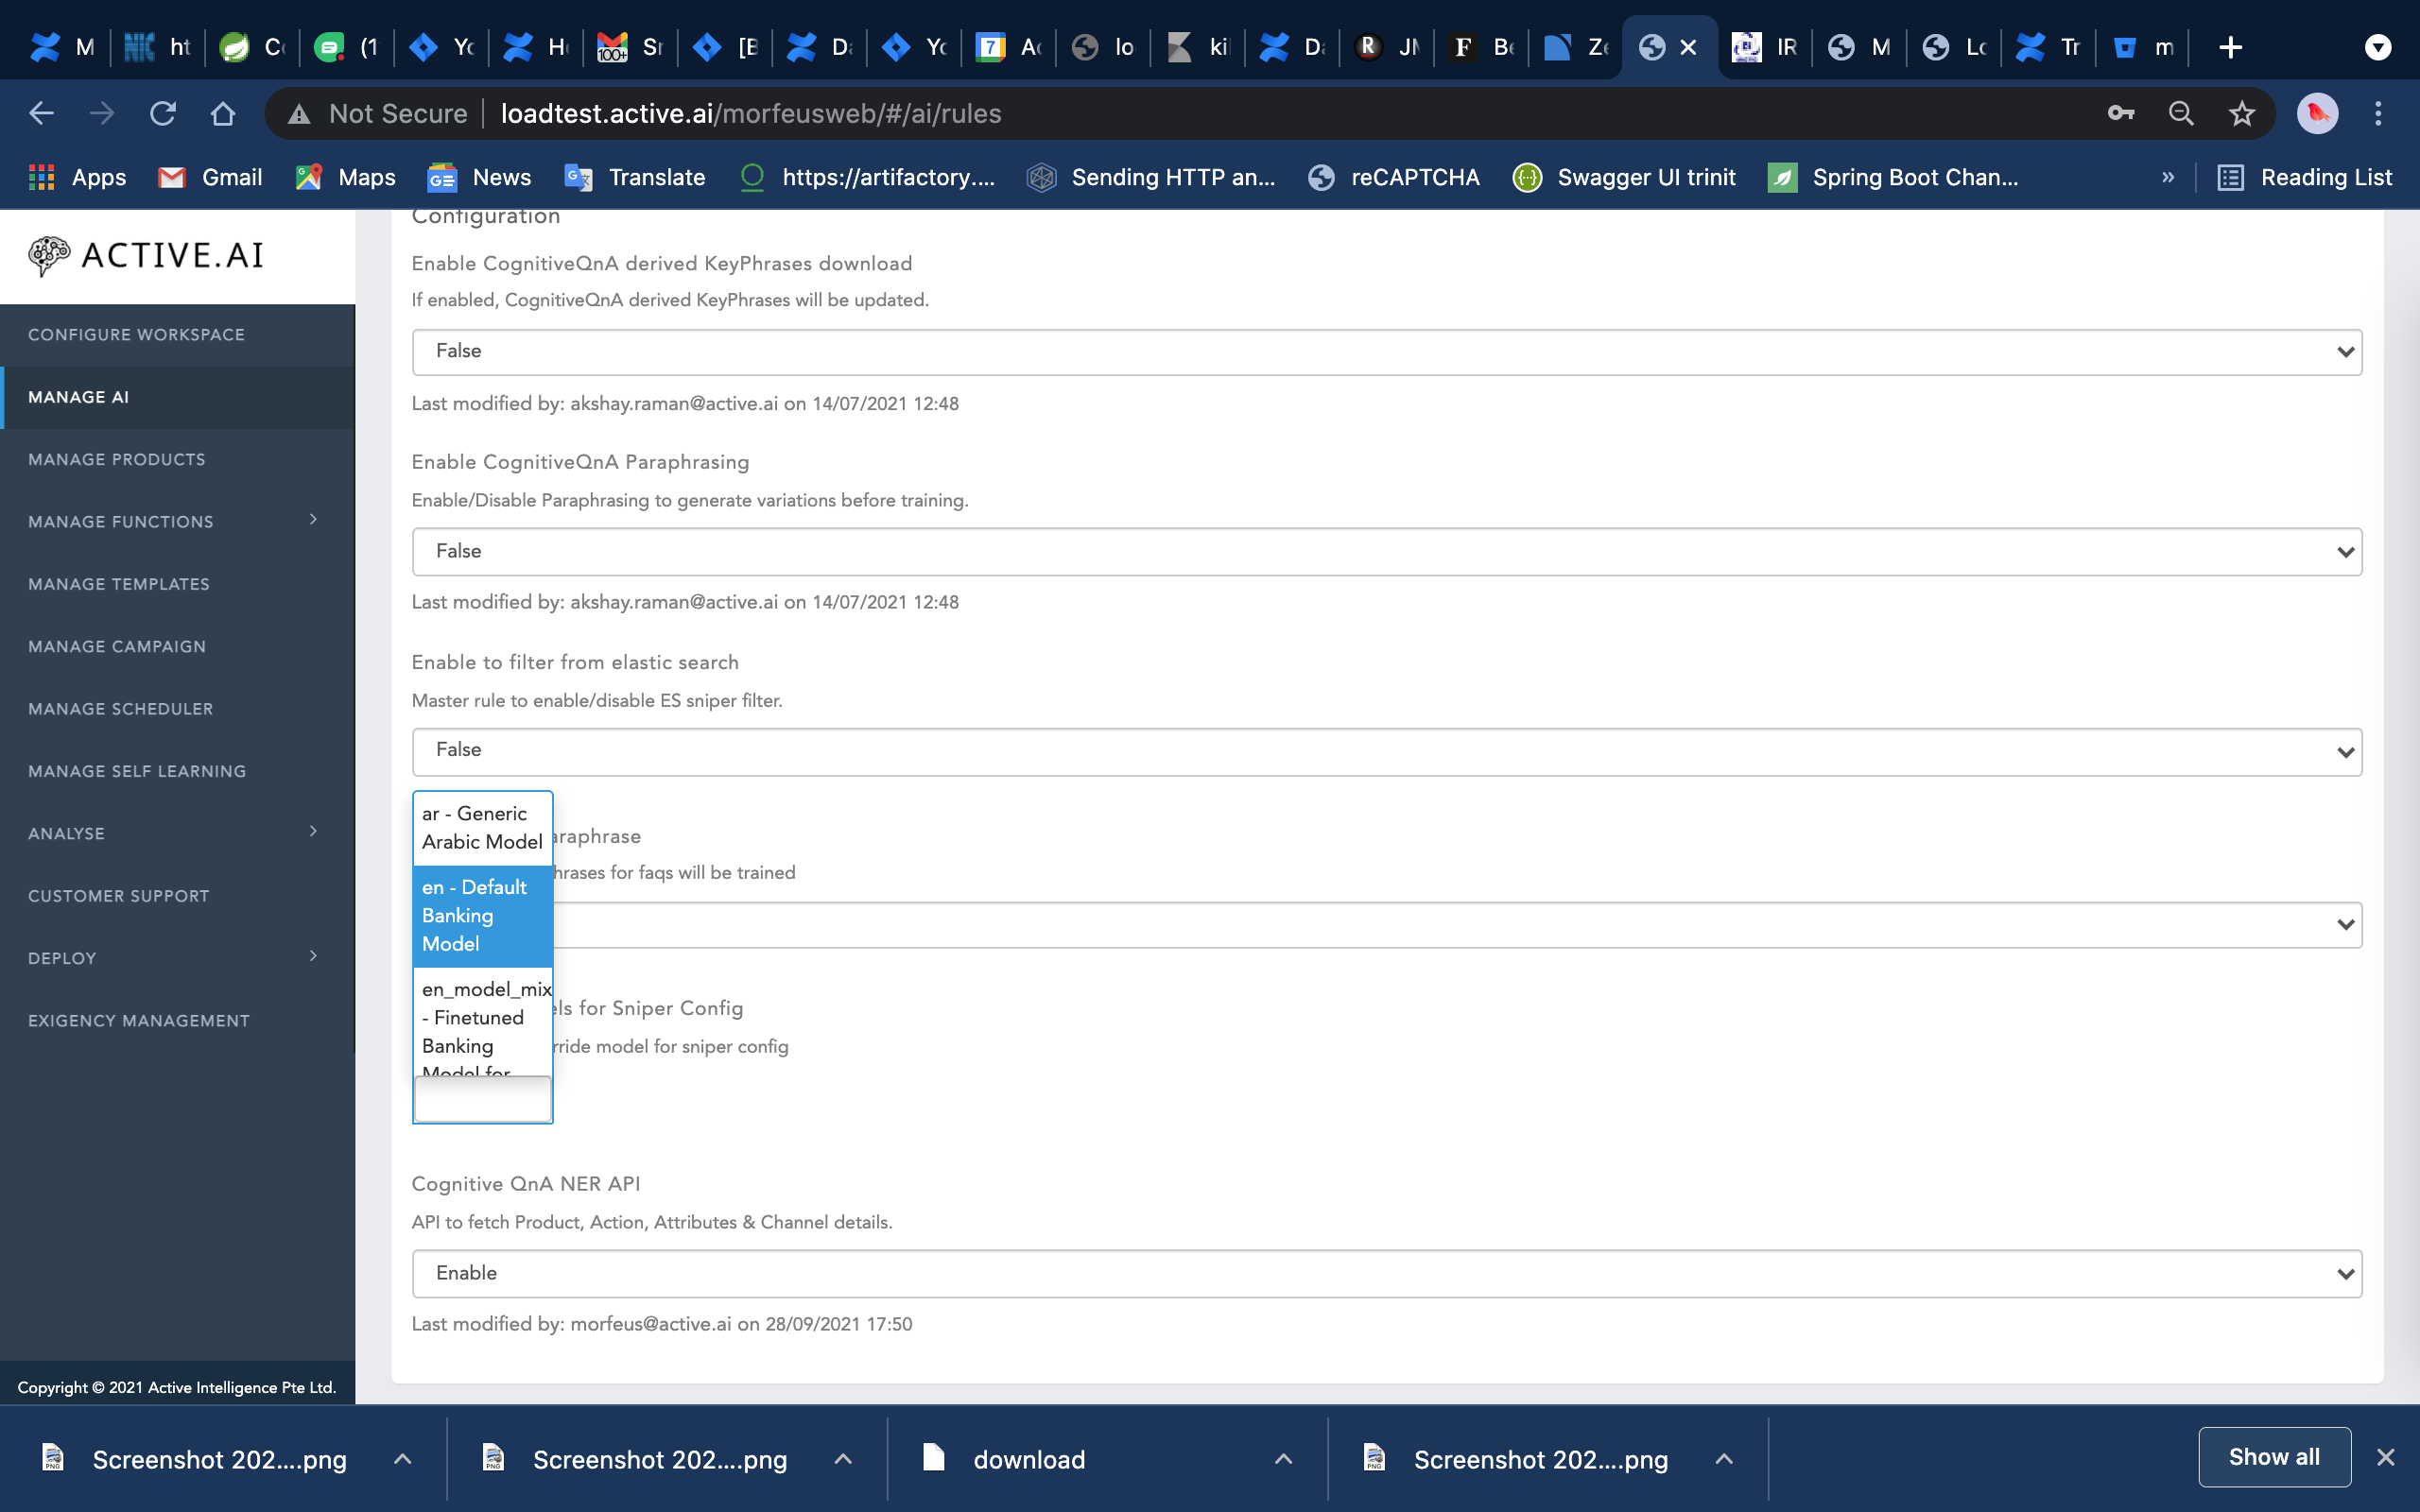
On data generation, the config.yml file is generated inside Cognitive QnA module which contains the Elastic search details having the username and password if configured in the workpsace rules. Having the elastic search rules enables, the sniper could connect direclty connect to ES.
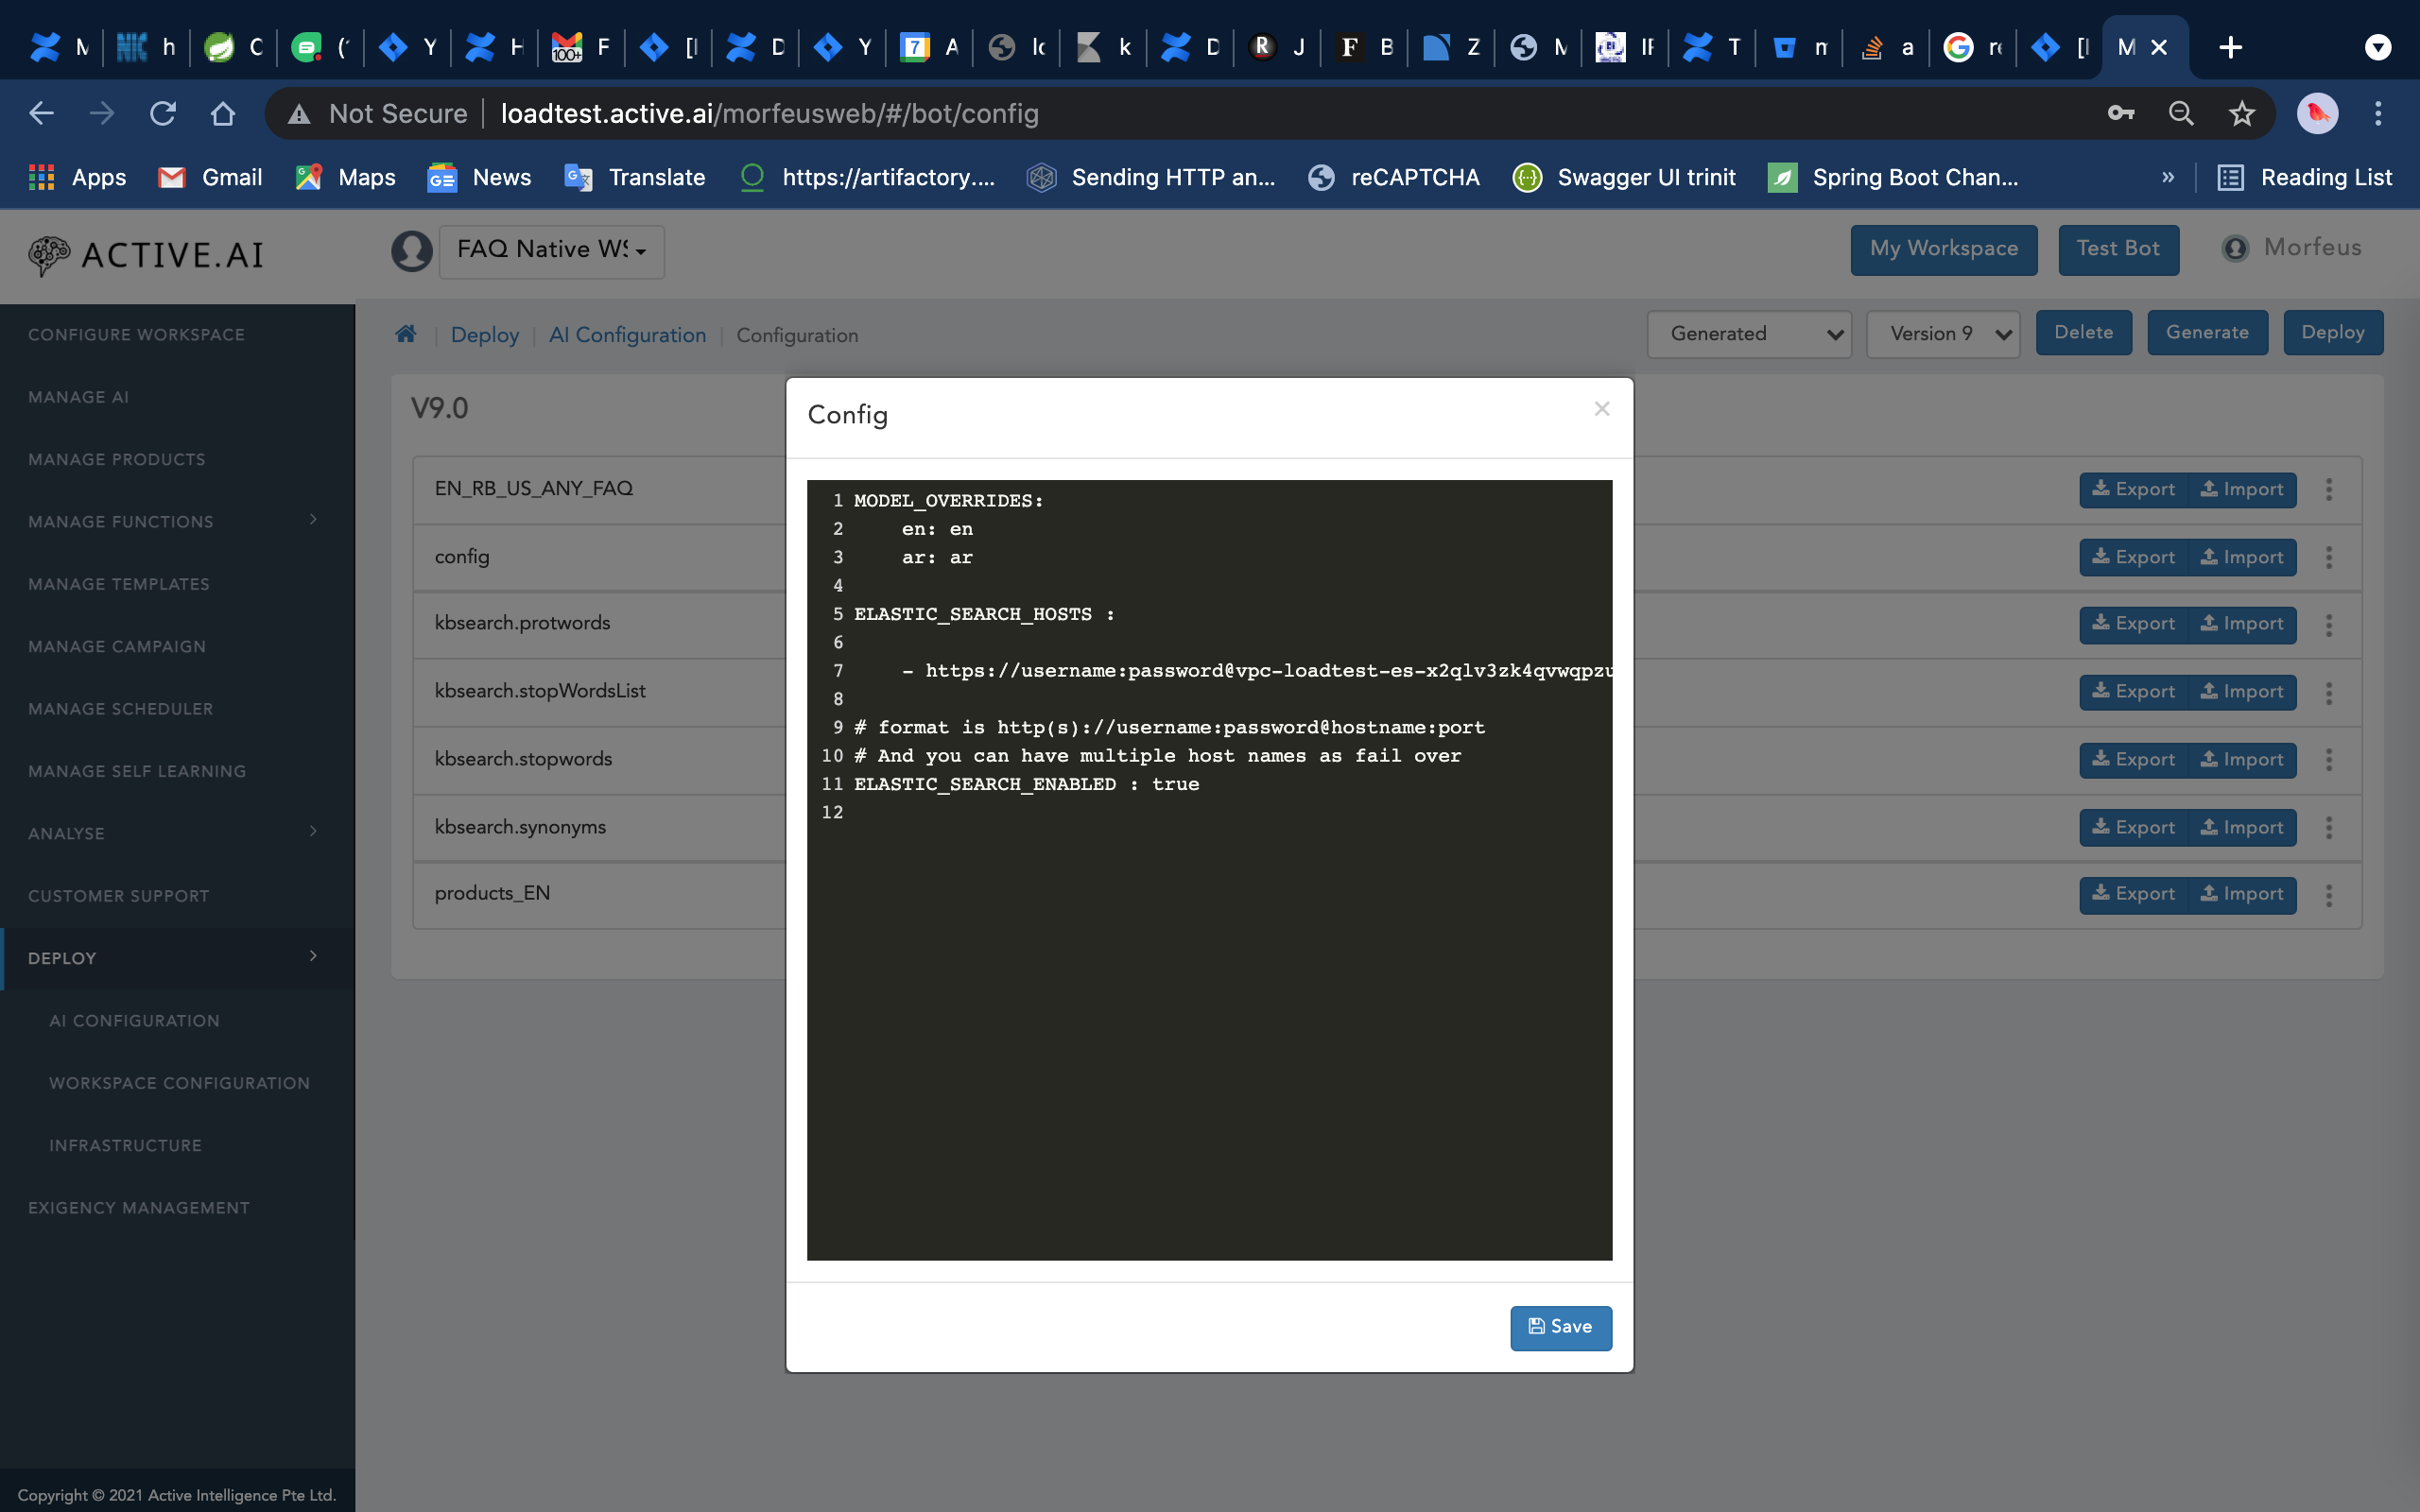
TRINITI Version - 4.5
| Table 13 Rules for local deployments | ||||
|
Configuration Type
|
Rule Name
|
Rule Location
|
Description
|
Example
|
|---|---|---|---|---|
| Deployment Type | Deployment Type |
|
Decides local/cloud deployment | local should be choosen |
| Manager Process | Triniti Manager URL | Manage AI → Manage Rules → Triniti | Manager URL (Contains config information related to Triniti) | https://triniti45.active.ai/manager/v/1 |
| Classification Process | Triniti endpoint URL | Manage AI → Manage Rules → Triniti | Triniti URL (Contains config information related to Triniti) | https://triniti45.active.ai |
| Classification Process | Triniti context path | Manage AI → Manage Rules → Triniti | Triniti context path (Contains config information related to Triniti) | /v45/triniti |
| Triniti |
|
|
Configured in Manager |
|
Configuration
With Triniti 4.5 if you wish to make 2 separate calls for Triniti and Sniper. Configure the respective URL and context path for sniper and set the rule value KBS_CLIENT = spotter and TRAIN_VERSION = 4.5.
Manage AI Operations
The below mentioned features help in aiding the day-to-day administrative and maintenance operations of the ChatBots based on Workspaces.

Import
Imports the provided Zip file and loads the content to Manage AI modules.
Export
Exports the content to Manage AI modules to Zip file.
Generate
This feature helps to create the content of AI Data which has to be given as input for training for generating respective models which will serve the users queries/utterances through bots.
Generate creates the below modules as per the AI trainer format.
Enabling and training native language (Currently supported for Arabic FAQ only)
Steps to enable and train
The generated content will be shown in the Configure Workspace -> Deploy -> Triniti Tab.
Train
This feature allows us to train single or multiple modules based on user selection and triggers training. The result of training is the models generated out of training input from the "Generate" module.

Data Sync
AI data can be synced in the admin by 2 methods. (Git/Zip)
Git Sync
| Rule | Description |
|---|---|
| AI Data Sync source (Git or Zip) | Git |
| URL | URL of Git |
| Workspace | Sub folder path for the AI Data content |
| Branch | Git Branch |
| Username | Git auth username |
| Password | Git auth password |
Zip Sync
| Rule | Description |
|---|---|
| AI Data Sync source (Git or Zip) | Zip |
| Zip URL | Provide the Zip URL |
| Zip Username | Zip auth username |
| Zip Password | Zip auth password |

Clear Cache
Clears the cached AI worker calls from the cache. This feature is useful when all the Triniti AI engine call caches need to be cleared.
Reload Cache
Loads the AI data for local classifier operations in the cache.
Quick Train (CognitiveQnA)
Loads the CognitiveQnA details to Elasticsearch for aiding discovery of relative FAQs feature. This information is used for suggesting questions in the bot as well.
In-Memory Classifier
Loads the AI Data details to Elasticsearch for aiding classification.
Managing Bot Operations
Overview
This feature allows you to perform some basic operation that will be needed mostly to configure your bot. You can perform these operations from this section also rather than going to the section of a particular module. It allows you to perform the following operations.
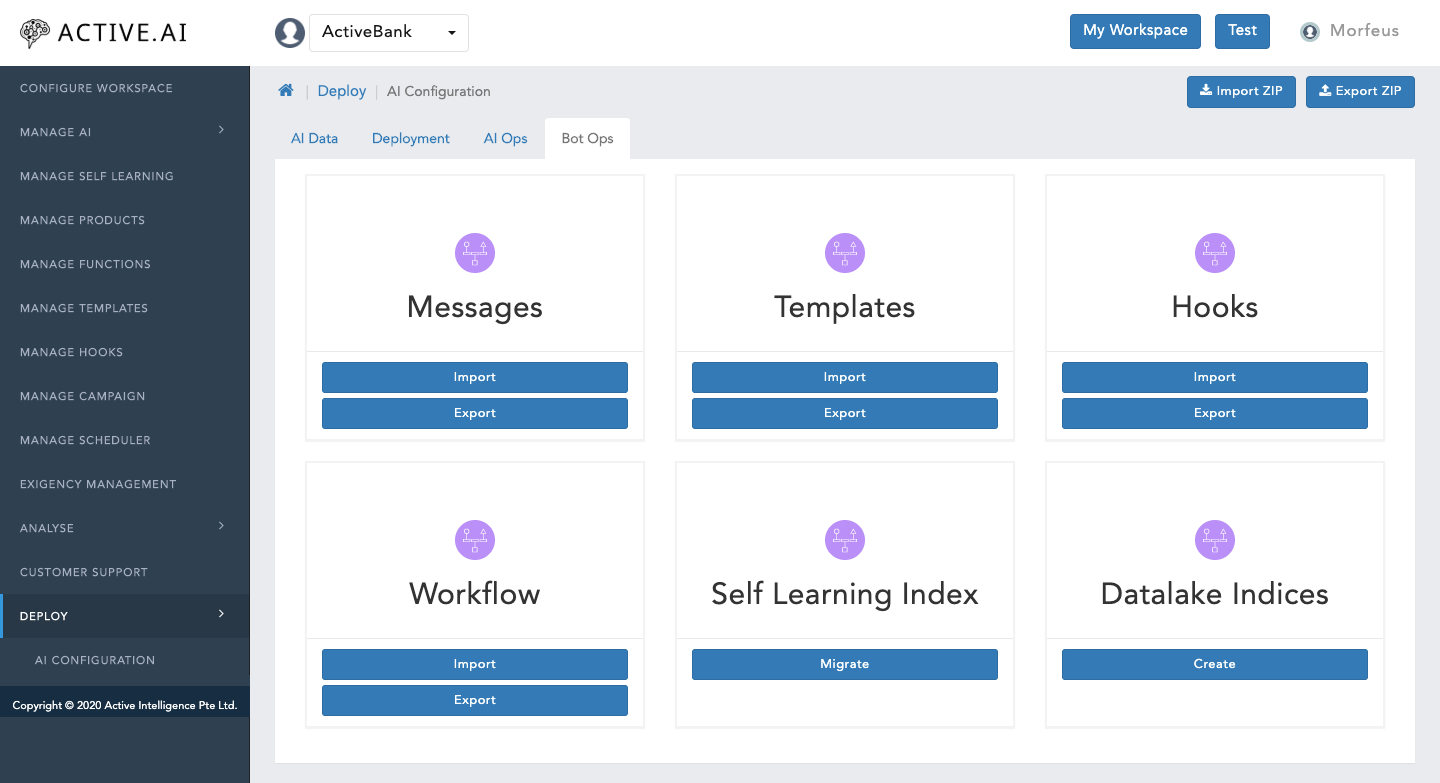
Messages
You can configure some messages to show on bot like if you don't support any feature for your service or some error message.
Eg; If a user is trying to transfer the amount more than their balance then you can show some message like You have insufficient balance, please enter an amount less than your balance, etc.
Importing Messages
You can import the list of the message also by following these steps:
Note:
Exporting Messages
You can also export the set of messages by following these steps:
It will download a JSON file containing all the configured messages.
Templates
Templates are a combination of some components like images, text, buttons, etc. If you have configured some templates & wants to use the same templates in another environment or want to keep that configuration then you can simply export those templates & If you want to use the same configuration in another environment/Workflow then you can import the same JSON file rather than configuring again.
Importing Templates
Even you can import the list of templates from your system by following these steps:
Exporting Templates
You can also export the templates by following these steps:
It will download a JSON file containing all the configured templates.
Hooks
The end goal of determining a message intends to do some action based on that. For that purpose for each intent/feature, we have to configure a hook. A hook is the final action bot will perform based on the intent. A hook can be of transaction or inquiry type. Transaction type hook means its a multi-step fulfillment like fund transfer. Inquiry type hook is any fulfillment which can be fulfilled in a single step like "what is my balance?".
Importing Hooks
You can also import the hooks from your system by following these steps:
Exporting Hooks
You can also export the hooks from your system by following these steps:
It will download a JSON file containing Hooks configuration in JSON format.
Workflow
Workflow helps to define conversation journeys. The intent and entity might be enough information to identify the correct response, or the workflow might ask the user for more input that is needed to respond correctly.
Eg; If a user asks, "How to apply for a debit card?", the defined workflow can ask for the various card selection like Rupay Card, Master Card, Visa Card, etc.
Importing workflow
You can also import the workflows from your system by following these steps:
Exporting workflow
You can also export the configured workflows by following these steps:
It will download a JSON file containing workflow configuration in JSON format.
Selflearning Index
Migrate
You can migrate the Selflearning index by following these steps:
Data Lake Indicies
Create You can create the Data lake Indices by following these steps:


